BeeSecure LoRa R311A User manual


PA G E |1
B e e S ec u r e |LORA “R311A”GE T T I N G ST A R T E D
Contents
Part A: Account Activation..................................................................... 2
Part B: Pair Your Door Sensor with an Asset ....................................... 2
Part C: Set Location of Device in App................................................... 3
Part D: Connect your “R311A” ............................................................. 4
Step 1: Power on the R311A............................................................................................. 4
Step 2: First Time Connecting........................................................................................... 5
Step 3: Replacing the Batteries ........................................................................................ 5
Help..................................................................................................................................... 5
Part E: Install the Sensor on a Door ..................................................... 6
Part F: Device Operation....................................................................... 7
Part G: Monitor Your Assets.................................................................. 7
Monitor your BeeSecure-Guarded Assets ........................................................................ 7
PA G E |2
B e e S ec u r e |LORA “R311A”GE T T I N G ST A R T E D
Part A: Account Activation
Please see the BeeSecure Setup Guide at beesecure.ca/getting-started to setup your
account on app.beesecure.ca.
Part B: Pair Your Door Sensor with an Asset
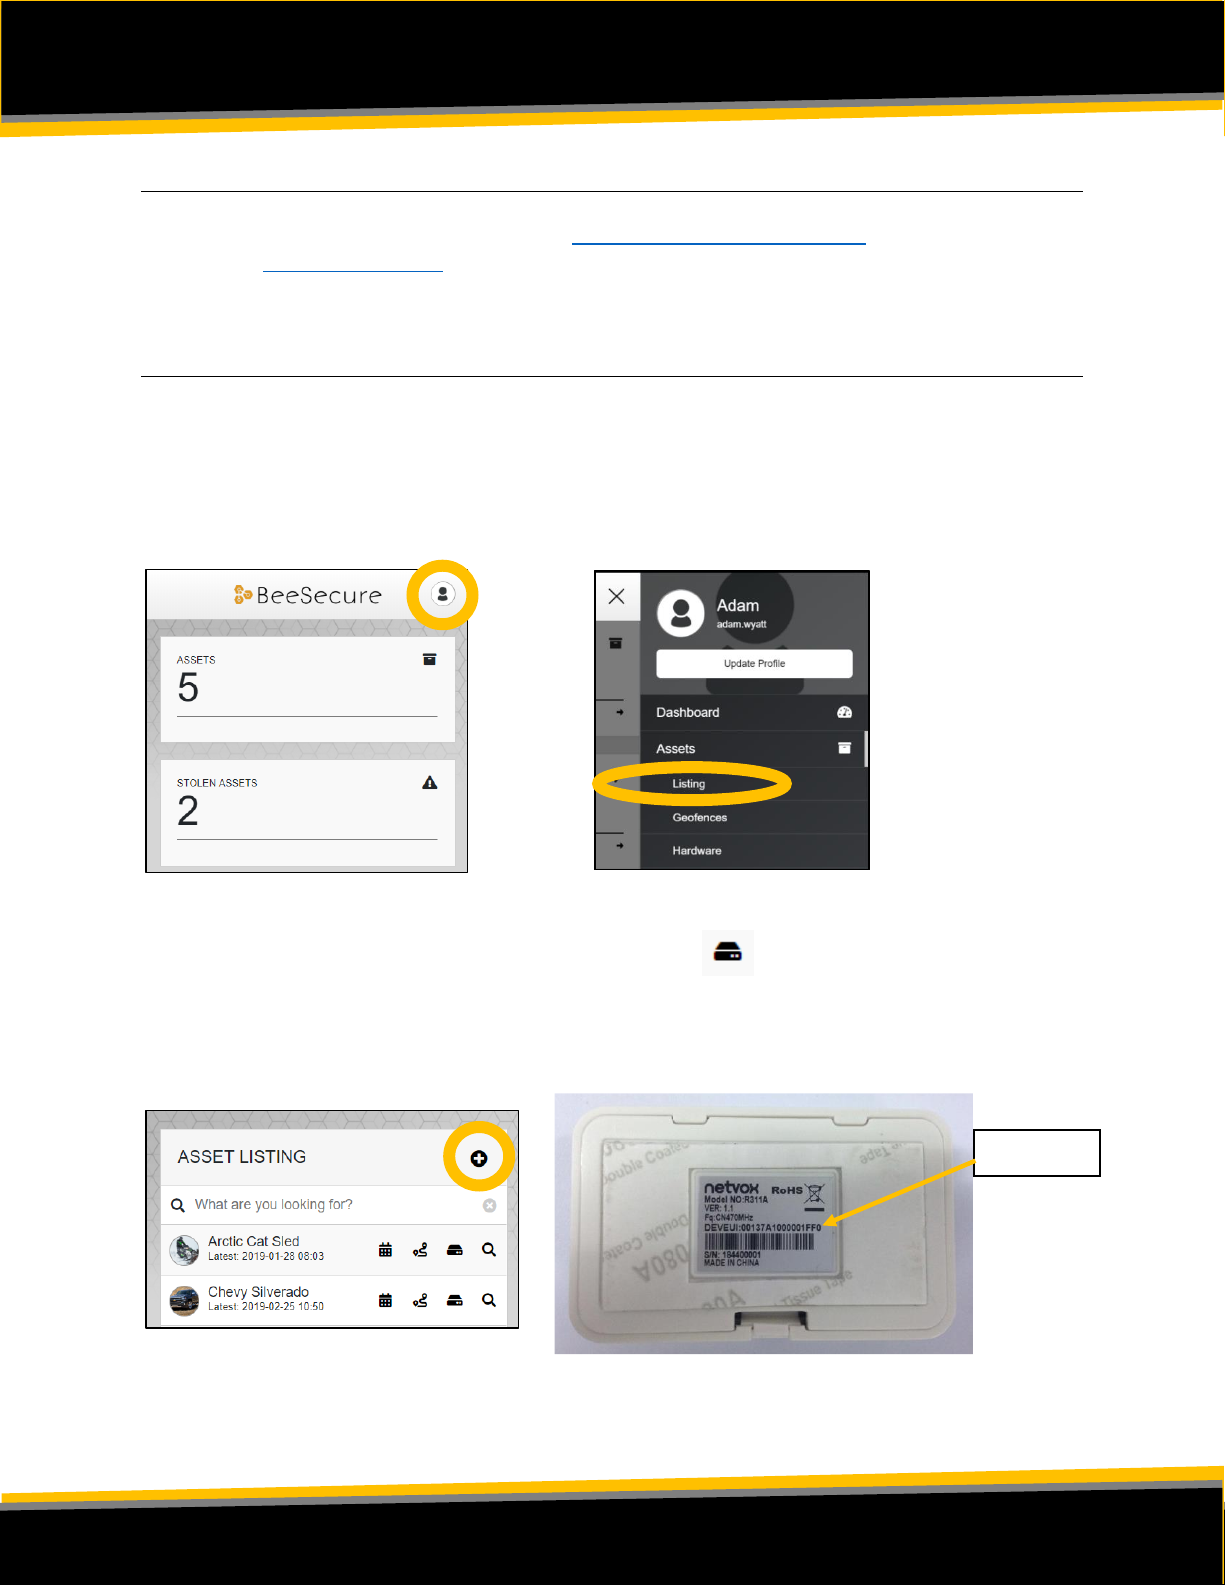
First, create a new asset in the BeeSecure app. This asset will be the door that you want to
monitor.
To create an asset, go to the “Listing”menu in the app by opening the menu on the right
and clicking on “Assets” →“Listing”:
Next, add an asset by clicking the (+) icon on the top right of the screen.
After you created a new asset, click the hardware icon ( ) for your new asset and type in
the ID for your door sensor. The ID is located on the box your sensor came in and is also
found on the back of the sensor, labeled with DevEUI.
Asset ID
PA G E |3
B e e S ec u r e |LORA “R311A”GE T T I N G ST A R T E D
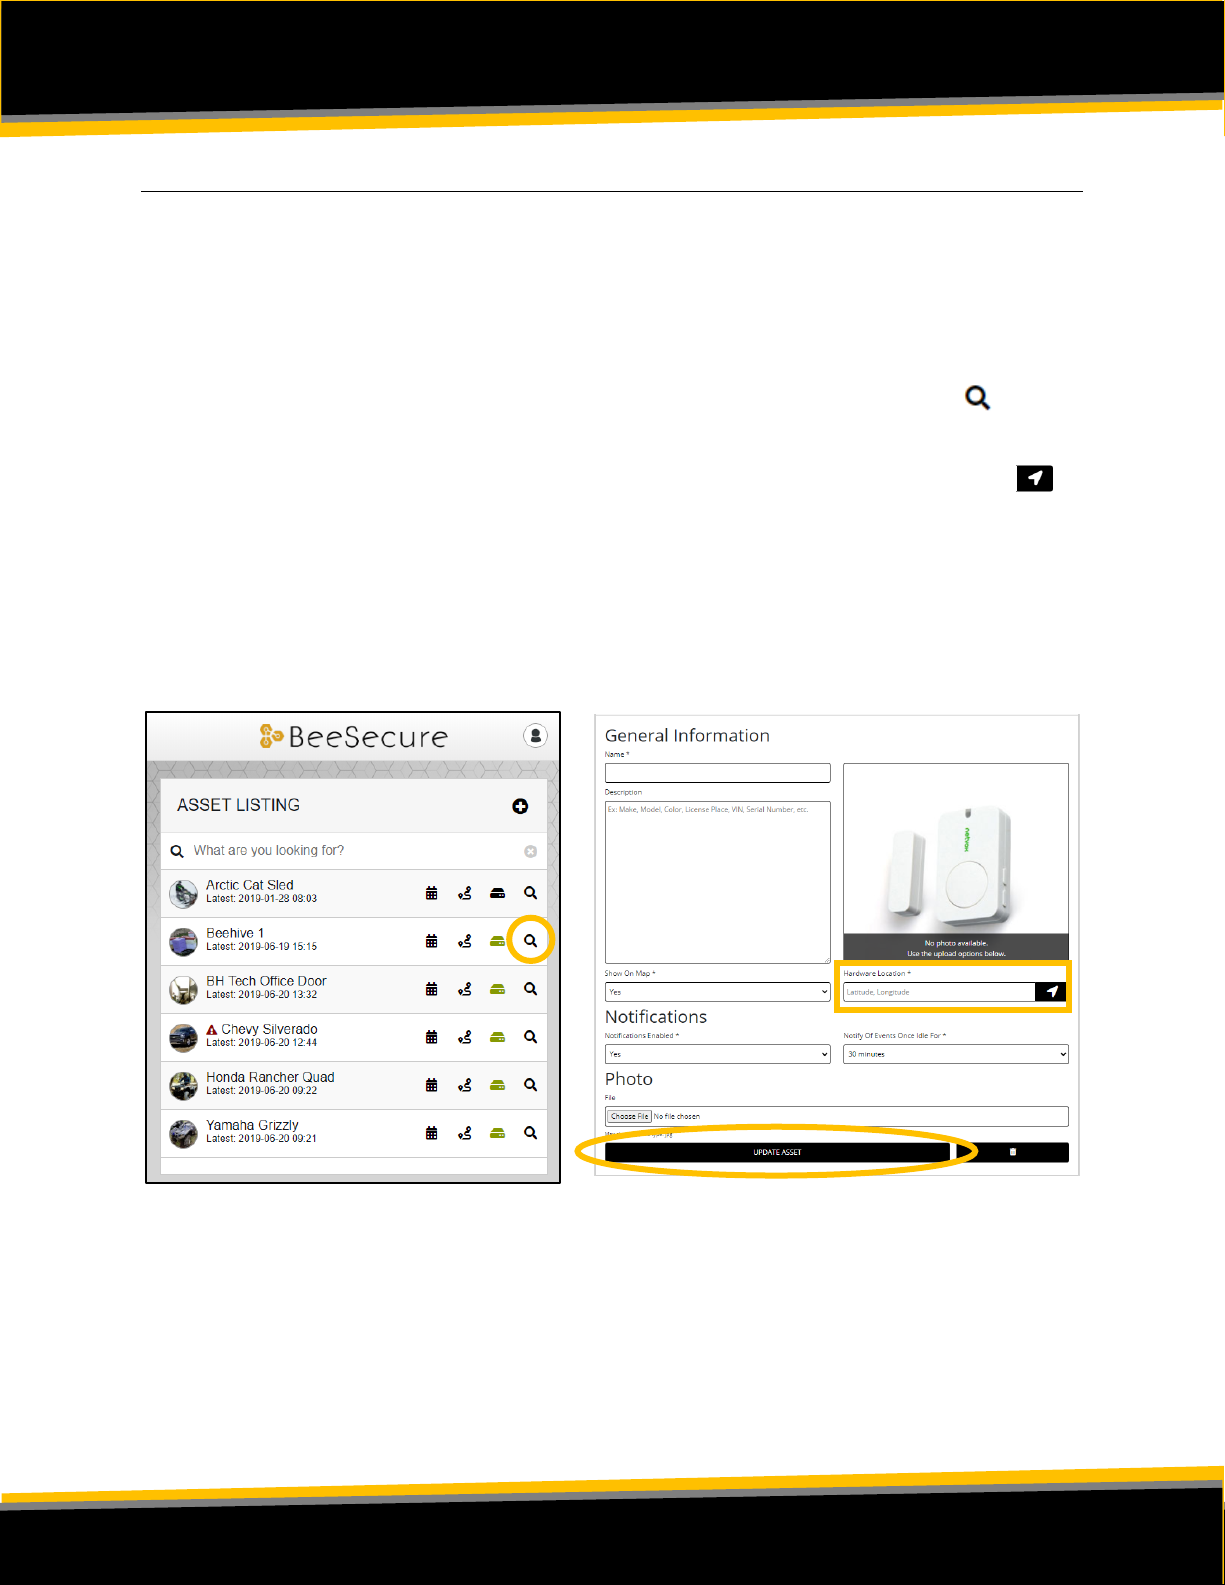
Part C: Set Location of Device in App
The “R311A” does not have a GPS to find its own location, so in the BeeSecure app you will
have to manually set its location so it will show up properly on the map.
After pairing your device to an asset in the BeeSecure app in Part B, set the location of this
asset by manually entering it:
i) Go to the ‘ASSETS’ →‘LISTING’ page in the BeeSecure app, and click the icon
ii) Type in the GPS location (latitude, longitude) into the “Hardware Location *” box. If
you are standing at the location with your phone or computer, you can click the
icon to get your current location, then copy and paste it into the “Hardware Location
*” box.
iii) Click the “Update Asset”button at the bottom of the page. Now you should see the
location of this device on the Asset Map.
i
)
ii
iii
PA G E |4
B e e S ec u r e |LORA “R311A”GE T T I N G ST A R T E D
Part D: Connect your “R311A”
Step 1: Power on the R311A
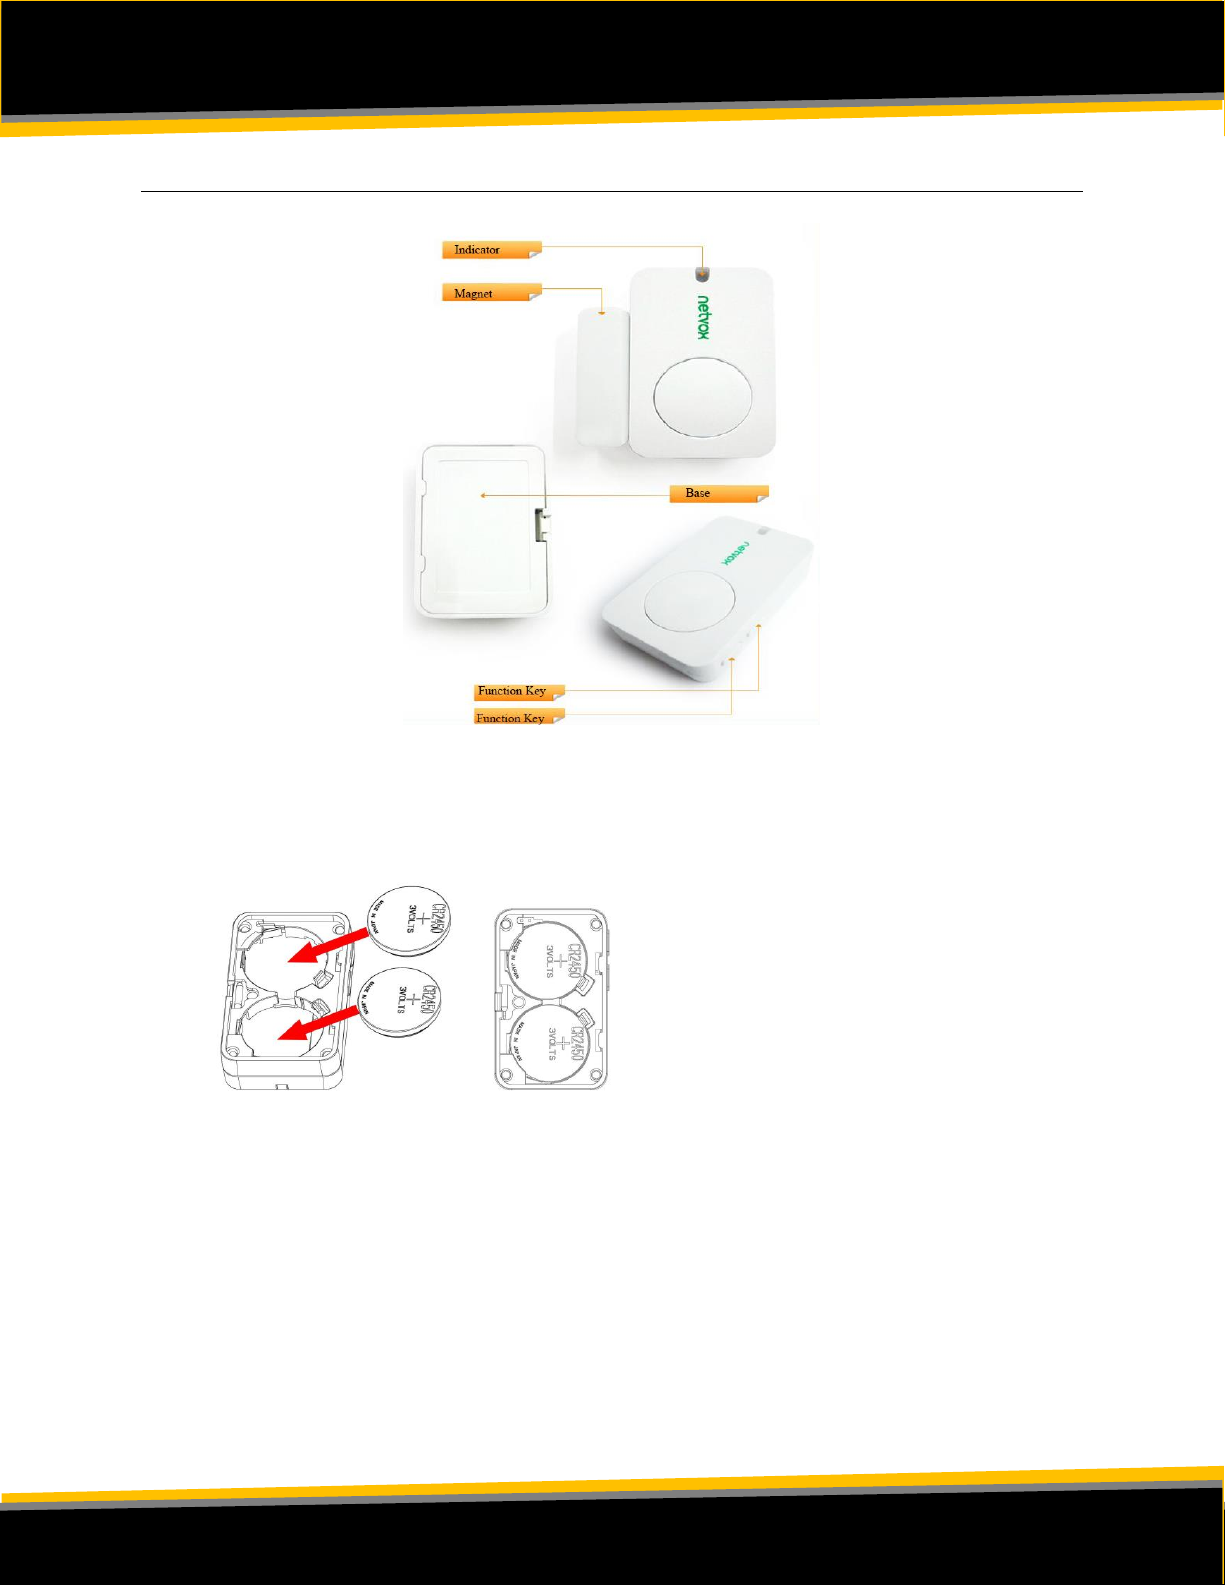
i) Insert the batteries into the sensor by opening the back of the sensor and inserting
the two batteries face up. You might need a flat head screwdriver to push the tab to
open the back of the sensor.
ii) Turn on the sensor by pressing and holding one of the Function Keys (doesn’t matter
which one) until the green indicator light flashes. This should take a few seconds
iii) You can power off the sensor by pressing down both function keys at once for about
10 seconds until the green light starts flashing rapidly.
Other manuals for LoRa R311A
1
Table of contents
Other BeeSecure Accessories manuals


