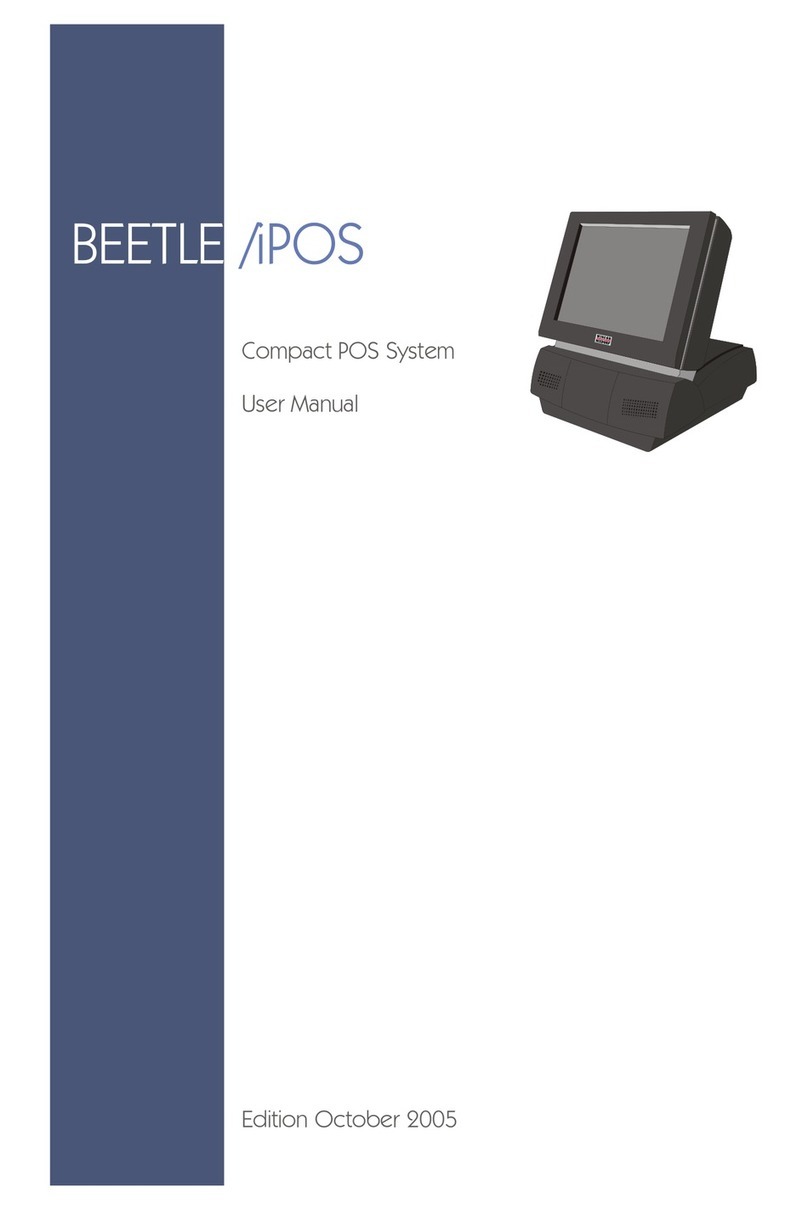
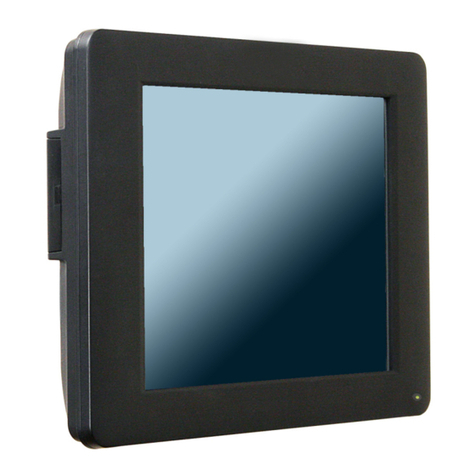
BEETLE iPOS User manual

BEETLE /iPOS
Entry
Compact POS System
User Manual
Edition April 2010

All brand and product names mentioned in this document are trademarks of their respec-
tive owners.
The reproduction, transmission or use of this document or its contents is not permitted
without express authority. Offenders will be liable for damages. All rights, including rights
created by patent grant or registration of a utility model or design, are reserved.
Delivery subject to availability; technical modifications possible.
Copyright ©Wincor Nixdorf International GmbH, 2010

Contents
Manufacturers Certification................................................1
Tested Safety..............................................................................................1
Note on the laser ........................................................................................1
FCC-Class A Declaration............................................................................1
Important notes ...........................................................................................2
Introduction..........................................................................4
About this manual .......................................................................................4
Care of the BEETLE /iPOS .........................................................................5
Recycling the BEETLE /iPOS .....................................................................5
Warranty .....................................................................................................6
BEETLE /iPOS .....................................................................7
Advantages at a Glance..............................................................................7
BEETLE /iPOS Peripherals ....................................................................8
BEETLE /iPOS in a Network ..................................................................9
Before switching on the System................................................................10
Unpacking and checking the System....................................................10
Setting up the device ............................................................................10
Adjustment of the Footed Stand ...........................................................11
Cabling of the BEETLE /iPOS ..............................................................12
Disconnecting cables............................................................................16
Basic settings .......................................................................................17
Connecting to the mains power supply.................................................17
Adjusting the System’s Loudspeaker....................................................18
Light emitting diode (LED) ....................................................................18
Connecting peripherals .............................................................................18
Keyboard (KYBD).................................................................................19
COM1* and COM2*..............................................................................19
COM3* and COM4* (optional) ..............................................................20
Monitor (optional) .................................................................................20
TFT - LCD Display (optional)................................................................20
Network ................................................................................................21
Cash Drawer ........................................................................................21
USB (Universal Serial Bus) ..................................................................21

BEETLE /iPOS - the components.....................................23
Overview...................................................................................................23
Capacative Touch Screen (Option)...........................................................26
General ................................................................................................26
Touch Screen and Sleep Mode ............................................................27
How to Operate ....................................................................................27
Cleaning Instructions ............................................................................28
Resistive Touch Screen (Option) ..............................................................29
General ................................................................................................29
How to Operate ....................................................................................30
Cleaning Instructions ............................................................................30
Infrared Touch Screen (Option) ................................................................31
General ................................................................................................31
How to operate .....................................................................................31
Cleaning Instructions ............................................................................32
Swipe Card Reader (optional)...................................................................33
How to Operate ....................................................................................33
Cleaning Instructions ............................................................................33
Waiter Lock (optional) ...............................................................................34
Barcode Scanner (optional) ......................................................................35
Note on the laser ..................................................................................35
Configuration variants ......................................................36
Availability of Interfaces ............................................................................36
Submodules for the CPU ..........................................................................37
POS Board (COM 3*, COM 4*, Cash Drawer)......................................37
CRT- Bridge or TFT- Controller ............................................................37
Installing the Submodules .........................................................................38
Inserting a POS Board .........................................................................41
Inserting a CRT Bridge.........................................................................44
Inserting a TFT Controller ....................................................................45
Change of the Hard Disk Drive .................................................................47
Start and runup behaviour................................................49
Retail Software...................................................................51
Platforms and products .............................................................................51
Microsoft-based solution: TP.net ..............................................................52
Linux-based solution: TPLinux ..................................................................52
Technology evaluation ..............................................................................52

Appendix ............................................................................53
Technical data for the BEETLE /iPOS ......................................................53
Dimensions ...............................................................................................56
BEETLE /iPOS with a 12.1” screen ......................................................56
BEETLE /iPOS with a 15” screen .........................................................57
BEETLE /iPOS with a 15” screen and a customer display ...................58
Connections..............................................................................................59
Standard...............................................................................................59
Versions ...............................................................................................59
Glossary....................................................................................................61
Abbreviations ............................................................................................63

Manufacturers Certification
The device complies with the requirements of the EEC
directive 2004/108/EC with regard to ‘Electromagnetic
compatibility" and 2006/95/EC “Low Voltage Directive”.
Therefore, you will find the CE mark on the device or packaging.
Tested Safety
The POS system has been provided with the symbol
for “Tested Safety”.
In addition, the BEETLE has received the UL symbol
and cUL symbol.
Note on the laser
FCC-Class A Declaration
This equipment has been tested and found to comply with the limits for a
Class A digital device, pursuant to part 15 of the FCC Rules. These limits
are designed to provide reasonable protection against harmful interference
when the equipment is operated in a commercial environment. This equip-
ment generates, uses, and can radiate radio frequency energy and, if not in-
stalled and used in accordance with the instruction manual, may cause
harmful interference to radio communications.
Operation of this equipment in a residential area is likely to cause harmful
interference in which case the user will be required to correct the interferen-
ce at his own expense.
1
TESTED SAFETY

Modifications not authorized by the manufacturer may void users authority
to operate this device.
This class A digital apparatus complies with Canadian ICES-003.
Cet appareil numérique de la classe A est conforme à la norme NMB-003
du Canada.
Important notes
The compact POS system BEETLE /iPOS conforms to the current safety
standards for data processing equipment.
nIf this device is taken from a cold environment into the operating room,
moisture condensation may form. The device must be absolutely dry
before being put into service; an acclimatization period of at least two
hours must therefore be observed.
nThis device is equipped with a safety-tested power cable and may be
connected only to a prescribed grounded-contact power socket.
nWhen setting up the device, ensure that the power socket on the device
and the grounded-contact power socket are easily accessible.
nTo disconnect the device from the supply voltage completely, switch off
the device and disconnect the power plug.
nWhenever work of any kind is done on the device, as well as when data
cables are plugged and unplugged, the device must be completely
disconnected from the line voltage. To do so, turn the device off and
unplug the power cord.
nEnsure that no foreign objects (c.g. office clips) find their way into the
device, as this may lead to electric shocks or short-circuits.
nNever plug in or unplug data communication lines during thunderstorms.
nProtect devices from vibrations, dust, moisture and heat.
nIf liquids were spilled over your BEETLE /iPOS switch off the system and
disconnect the power plug. Dry the device with a cloth and leave it
switched off for a while.
2
IMPORTANT NOTES

nAlways dispose of used parts in an environmentally safe manner.
nThe lithium battery must be disposed of in accordance with local
regulations for special waste.
nIn emergencies (e.g. damaged housing or damaged power cable,
penetration by liquids or foreign bodies), the device must be switched off
immediately, the power plug disconnected and the Customer Service of
Wincor Nixdorf (WN) or your dealer must be notified.
nThe device may only be repaired by authorized qualified personnel.
Unauthorized opening of the device and inexpertly carried-out repairs may
not only seriously jeopardize the safety of the user, but also cancel all
warranty and liability agreements.
nIf the display element is damaged and the liquid crystal solution leaks out
onto your hands or clothing, please wash your hands or clothing
immediately under running water for at least 15 minutes, using soap or
alcohol.
If the liquid comes into contact with your eyes, consult a medical doctor
immediately.
nYou should connect your BEETLE or other IT-devices only to power
supply systems with separately guided protective earth conductor (PE).
This kind of electricity system is known as TN-S network. Do not use PEN
conductors!
Please also observe the recommendations of the norm DIN VDE 0100,
Part 540, Appendix C2 as well as EN50174-2, §5.4.3. Thus, you can help
to avoid possible malfunctions.
3
IMPORTANT NOTES

Introduction
With the BEETLE /iPOS Wincor Nixdorf meets the growing demands of the
retail market for sophisticated Point-of-Service and Kiosk system solutions.
Designed for food and hospitality services, the BEETLE /iPOS offers an in-
tegrated touch terminal with smallest footprint. The innovative concept of the
BEETLE /iPOS integrates the display, the central processing unit and the
power supply unit in one housing. A variety of options such as the use as
stand or wall mounting system, integrated loudspeakers, integrated scanner
and printer enable the performance of a comprehensive range of features.
About this manual
This manual describes the compact POS system BEETLE /iPOS.
This documentation is intended to help you to work with the POS system
and to serve as a reference work. The detailed table of contents helps you
find the desired information quickly and easily.
The first section describes
everything you need to do before switching on the POS system and
how to connect peripherals to the BEETLE /iPOS.
The second section contains
the installation of Windows operating systems.
The third section provides
a brief overview of the components of your BEETLE system.
The fourth section contains
the possible configuration variants of your BEETLE /iPOS
The five section provides
a brief overview of the Wincor Nixdorf Retail Software.
The Appendix
contains the most important technical data, a glossary and a list of ab-
breviations.
ABOUT THIS MANUAL
4

Notes in the manual are marked by this symbol.
This symbol is used for warnings.
The type and scope of application programs depend on the customer’s own
selection; therefore, software will not be discussed further in this manual.
Separate manuals are included in the scope of the connectable peripherals.
For this reason, a more detailed description of these devices will not be pro-
vided here. For more information see the relevant manuals.
Care of the BEETLE /iPOS
Clean your BEETLE /iPOS at regular intervals with a suitable plastic-surface
cleaner.
Make sure that the power plug is disconnected, connector cables are un-
plugged and that no liquid finds its way into the device.
The glass surface of your Touch Screen should be cleaned with a mild,
commercially available glass cleaning product. All pH neutral materials
(pH 6 to 8) are good for cleaning.
Recycling the BEETLE /iPOS
Environmental protection does not begin when
time comes to dispose of the BEETLE; it
begins with the manufacturer. This product was
designed according to our internal norm
“Environmental conscious product design and
development”.
The compact BEETLE /iPOS system is manufactured without the use of
CFCs and CCHS and is produced mainly from reusable components and
materials.
The processed plastics can, for the most part, be recycled. Even the preci-
ous metals can be recovered, thus saving energy and costly raw materials.
Please do not stick labels onto plastic case parts. This would help us to
re-use components and material.
5
CARE OF THE BEETLE /IPOS

6
You can protect our environment by switching on your equipment only when
it is actually needed. If possible, even avoid the stand-by-mode as this was-
tes energy, too. Also switch your equipment off when you take a longer
break or finish your work.
There are still some parts that are not reusable. Wincor Nixdorf guarantees
the environmentally safe disposal of these parts in a Recycling Center,
which is certified pursuant to ISO 9001 and ISO 14001.
So don’t simply throw your BEETLE system on the scrap heap when it has
served its time, but take advantage of the environmentally smart, up-to-date
recycling methods!
Please contact your competent branch or the Recycling Center Paderborn
(for European countries) for information on how to return and re-use devices
and disposable materials under the following mail address:
Email: [email protected]
We look forward to your mail.
Warranty
Wincor Nixdorf guarantees generally a warranty engagement for 12 months
beginning with the date of delivery resp. the date of acceptance. This war-
ranty engagement covers all those damages which occur despite a normal
use of the product.
Damages because of
nimproper or insufficient maintenance,
nimproper use of the product or unauthorized modifications of the product,
ninadequate location or surroundings
will not be covered by the warranty.
For details please consult your contract documents.
All parts of the product which are subject to wear and tear are not included
in the warranty engagement.
Please order spare parts at the Wincor Nixdorf customer service.
RECYCLING THE BEETLE /IPOS

BEETLE /iPOS
Advantages at a Glance
nErgonomic Terminal Workplace
nDesigned for Touch Operation
n12.1”/15” TFT Flat Screen (Capacative, Resistive Touch Technology or
Infrared- Touch)
nSplash proof Design
nMultimedia Capabilities
nMagnetic/ Smart Card Reader
nUser Identification with waiter lock
nStand or Wall Mounting Options
nHard Disk or Flash Disk
nIntel Mobile Processor
As there is this wide range of possibilities for implementing the
BEETLE /iPOS can be applied in all trade market segments like retailing,
department stores, self-service stores or in restaurants and pubs.
The illustrations below show you how your compact POS system can grow -
from a scanner to integration in a network.
7
ADVANTAGES AT A GLANCE

BEETLE /iPOS Peripherals
BEETLE /IPOS PERIPHERALS
8
Printer
Scanner
Cash Drawer
Scale
Keyboard
Customer Display
Monitor

BEETLE /iPOS in a Network
9
BEETLE /IPOS IN A NETWORK
Server
Ethernet 10/100 Base T

Before switching on the System
Unpacking and checking the System
Unpack the parts and check to see whether the delivery matches the infor-
mation on the delivery note.
The carton contains the basic unit and a country-specific accessories kit.
Some ordered composition may be installed.
Please indicate the number of your delivery ticket and delivery ticket position
and serial number of the respective device. The serial number can be found
on the label illustrated below which is located at the rear of the housing; it
may be necessary to remove the cable cover.
The serial number is located on the label below the bar code.
Transport the device only in its original packaging (to protect it against im-
pact and shock).
Setting up the device
Set up the BEETLE system where it will not be exposed to extreme environ-
mental conditions. Protect the device from vibrations, dust, moisture, heat
and strong magnetic fields.
The BEETLE must not be operated in altitudes above 2000 m (6562 ft
AMSL). Should you have any questions, please contact you retailer or our
service department.
If the equipment is to be fitted, you must ensure that the specified minimum
distances are maintained and constant ventilation is provided. The minimum
BEFORE SWITCHING ON THE SYSTEM
10
Wincor Nixdorf
Made in Singapore
WN0199901107
BEETLE /iPOS Entry
017500 000000
F2B
100-120V / 200-240V
50/60 Hz 5/3 A

distance upwards is 10 mm. The immediate ambient temperature of the
system must not exceed 40° C/104 °F. These requirements are met, for
example, if the equipment is not built into an enclosed piece of furniture.
Adjustment of the Footed Stand
For a better stand or utilisation of the footprint, the footed stand is adjustab-
le. Ensure that the footed stand is inserted in case a 12,1” screen is
installed and is pulled out in case a 15” screen is installed.
Adjust the position of the footed stand as follows:
nRemove the cable cover.
Loosen the screw and lift
the metal cover off the
openings.
Push the bracing (see (1))
into position and then put
the metal cover into front
position. Secure it with the
screw.
CABLING OF THE BEETLE /IPOS
11

Cabling of the BEETLE /iPOS
Always make sure that the system is switched off when you do cabling
works.
Install the system by following the steps described below:
nThe cable cover must be removed, if present.
Press on the
center of the cable
cover (1) and push
it backwards (2).
nRemove the port cover on the bottom side of the BEETLE system.
Tilt the screen
backwards.
12
CABLING OF THE BEETLE /IPOS

First remove the
cover of the loud-
speaker. Now you
can easily reach
the ports.
Press the bezel
upwards. The
faceplate is very
tight.
Pull the cover in
your direction and
take it off.
nPlug in and secure the data cable.
In this case: the
keyboard cable.
13
CABLING OF THE BEETLE /IPOS

Lead the cable
through the back
center so that after
completing the
connection of the
cables all can fit
under the cable
cover.
The delivery
contains a set of
clamps, plastic bin-
ders and a metal
plate for fixing the
strain relief.
Put the clamps
slightly angled into
the opening of the
footed stand (1)
and push it
downward (2).
Insert all the
clamps you need
in this way and
then fix them by
tightening the
metal plate with
the two screws.
14
CABLING OF THE BEETLE /IPOS

Lead the cables
over the clamps
(1) and then fix
them with the
plastic binders (2).
nPlug one end of the power cable into the socket of the BEETLE /iPOS.
nClose the cable cover.
Place the recesses
of the cable cover
on the cross
beams of the
footed stand (1).
Close the cable
cover by moving it
from the rear to the
front side (2).
nConnect the other end of the power cable to the main power supply.
15
CABLING OF THE BEETLE /IPOS
Other manuals for iPOS
1
Table of contents
Other BEETLE Touch Terminal manuals
Popular Touch Terminal manuals by other brands

AAT
AAT KDH-KZ6000FR-IP User’s manual (short form
FALCOM
FALCOM STEPPII-55 Getting started
Siemens
Siemens SIMATIC HMI IPC477C PRO Comapct operating instructions
Avalue Technology
Avalue Technology Rity 10R Series Quick reference guide
Softel
Softel FTTX-PT-M16 instruction manual

Rockwell Automation
Rockwell Automation Allen-Bradley MobileView 2711T-T10I1N1-TC quick start

