8
Setting Home & Guest
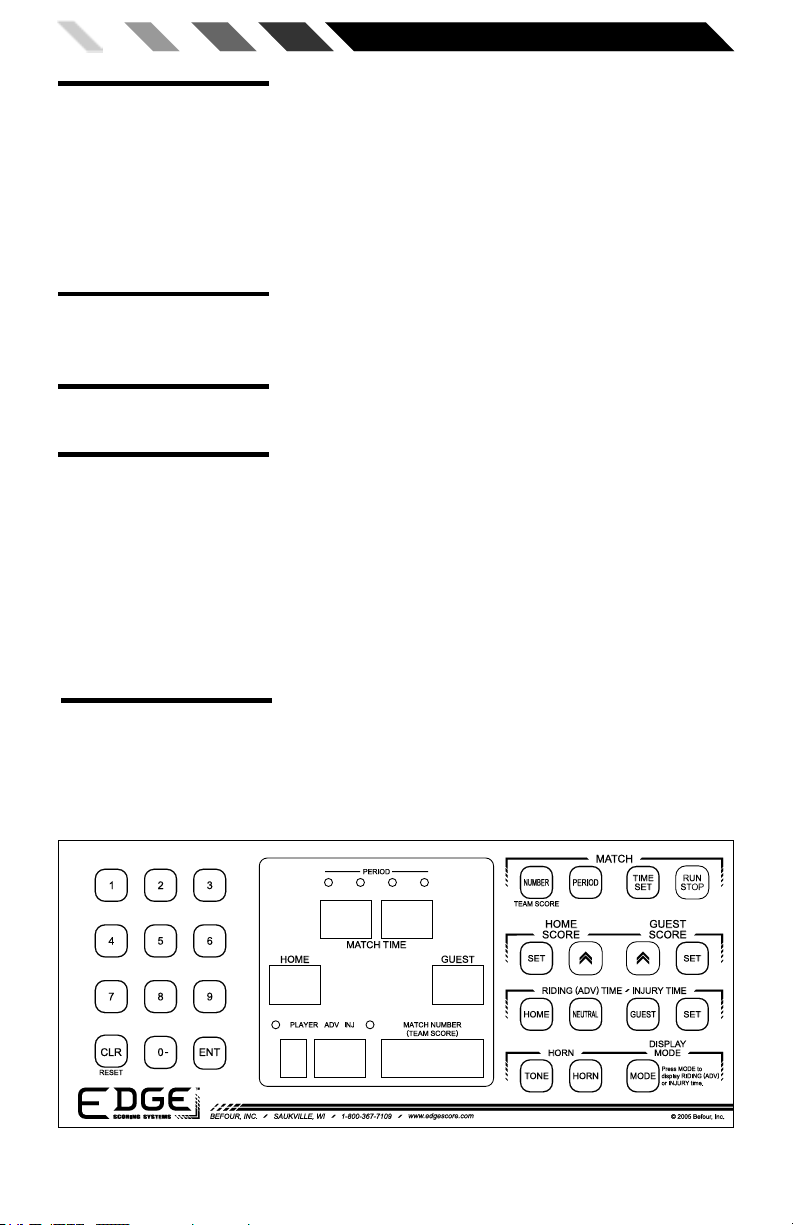
Injury Time
Injury time cannot be set while injury timer is
running.
1. Make sure riding/injury timer is in injury (INJ)
mode (pg 6).
2. Press the SET button and the green and red
indicator will alternate flashing.
3. Press HOME to set the Home injury time or press
GUEST to set the Guest injury time. The injury
timer flashes to indicate user input is needed.
4. Enter injury time using numeric keypad. Press
CLR to reset injury time to zero.
5. Press ENT when finished; player injury time is
now set.
Injury timer seconds cannot exceed 59. If a time is set
where the seconds exceed 59, the time will adjust to
show the standard value. For example, if 90 seconds
is entered, the time will adjust to 1:30.
Riding timer will only run if match timer is running.
Riding timer will not run if being set.
1. Make sure riding/injury timer is in riding (ADV)
mode (pg. 6).
2. If the Home (green) player is in control, press the
HOME button. If the Guest (red) player is in
control, press the GUEST button.
3. If neither player has control, press the NEUTRAL
button to stop the riding timer.
The riding timer will automatically pause when the
match timer is stopped. The riding mode indicator on
the controller will flash to indicate a paused riding
timer. When the user restarts the match timer, the
riding timer will automatically restart and continue
timing for the player in control when the match timer
was stopped. Pressing HOME or GUEST is not
necessary when restarting the match timer since the
riding timer will automatically start. While paused,
press NEUTRAL to stop riding timer completely;
mode indicator will stop flashing and riding timer will
not start when match timer is restarted.
Note: If the riding timer is running when the period
ends, timer will automatically pause. When the user
starts match timer for the next period, the riding timer
will automatically restart and continue timing for the
player in control when the previous period ended.
Running the
Riding (Advantage)
Timer