BEHABELT FZ01 Vario User manual
Bedienungsanleitung
Manual
FZ01 Vario
2

3
Deutsch
Inhaltsverzeichnis
1.0 Allgemeine Informationen..........................................................................................................................4
2.0 Beschreibung.............................................................................................................................................4
3.0 Bedienung FZ01 Vario................................................................................................................................5
3.1 Riemen einspannen.......................................................................................................................5
3.2 Verschweißen ................................................................................................................................5
3.3 Entfernen des Schweißwulstes......................................................................................................6
3.4 Umbau der FZ01 Vario...................................................................................................................7
3.5 Wechsel der Spannbacken.............................................................................................................7
4.0 Übersicht BEHAbelt Schweißtechnik..........................................................................................................8
English
Content
1.0 General information .................................................................................................................................13
2.0 Properties ................................................................................................................................................13
3.0 Instruction manual FZ01 Vario.................................................................................................................14
3.1 Clamp the belt .............................................................................................................................14
3.2 Weld the belt ...............................................................................................................................14
3.3 Remove the bead.........................................................................................................................15
3.4 Modification of the FZ01 Vario.....................................................................................................16
3.5 Change of clamping jaws.............................................................................................................16
4.0 BEHAbelt Welding tools & Accessories....................................................................................................17

4
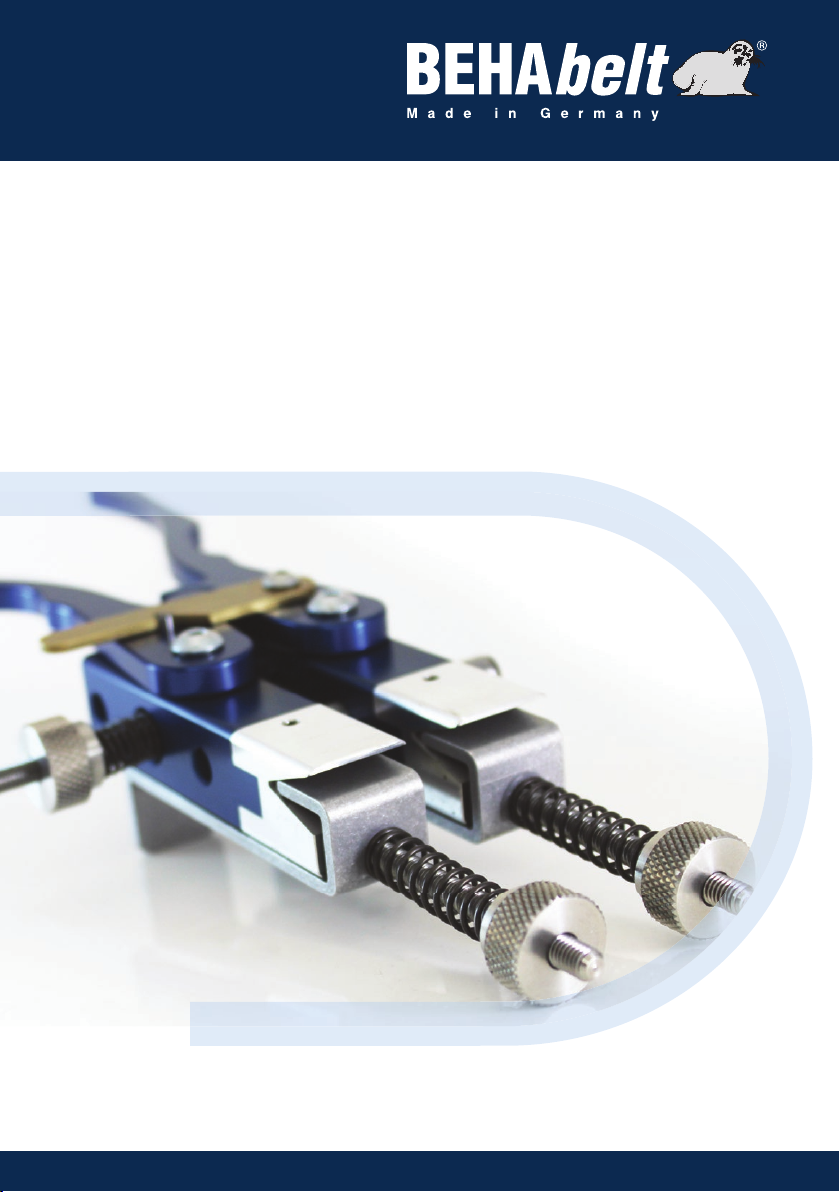
1.0 Allgemeine Informationen
Die FZ01 Vario Führungszange bietet in Kombination mit einem Spiegelschweißgerät (z.B.
BEHAbelt EErgo) das schnelle, sichere und besonders präzise Endverbinden von PU- und
TPE-Profilen.
Für Rundriemen bis Ø 10mm und für Keilprofile bis 10x6mm.
Die FZ01 Vario Führungszange kann in Bauform A (mit Griffen) und Bauform B (ohne
Griffen) umgebaut bzw. verwendet werden.
Die Spannbacken 4sind austauschbar, damit auch Sonderspannbacken für Spezial-
profile montiert werden können.
Robuste Metallausführung.
Maße: 240 x 125 x 50mm
Gewicht: ca. 365 g
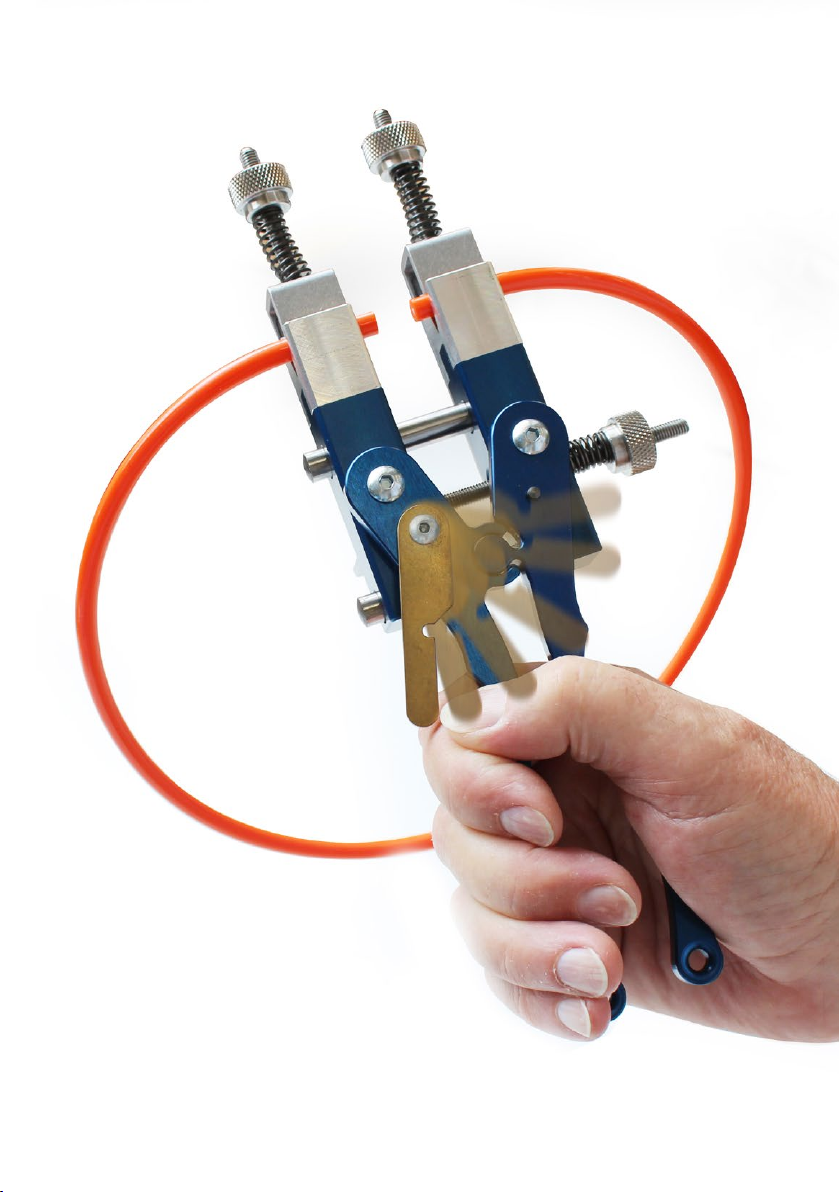
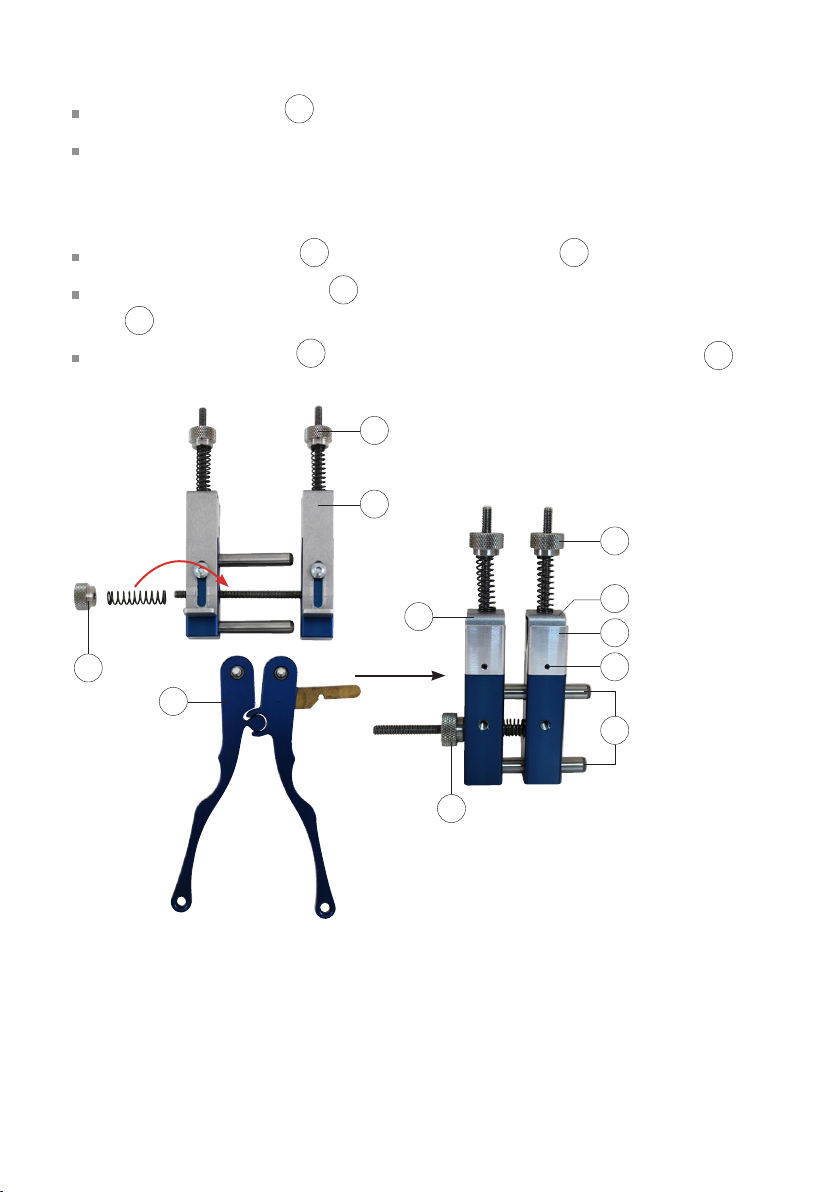
2.0 Beschreibung
1. Rändelschrauben mit Feder
zum Einstellen des Spanndrucks
2. Rändelschraube mit Feder
zum Einstellen des Anpressdrucks
3. Klemmhalter zum Fixieren
der Riemenprofile
4. Auswechselbare Spannbacken
5. Gewindestift zum Festsetzen
der Spannbacken
6. Halteriegel zur Feststellung
der Einlegeposition
7. Führungsbolzen
8. Abnehmbare Haltegriffe
FZ01 Vario ohne Griffe
4
6
2
5
4
1
3
7
8
4
A
B
5
3.0 Bedienungsanleitung
Wir bitten um Beachtung dieser Bedienungsanleitung und empfehlen bei der ersten
Benutzung eine Probeschweißung durchzuführen.
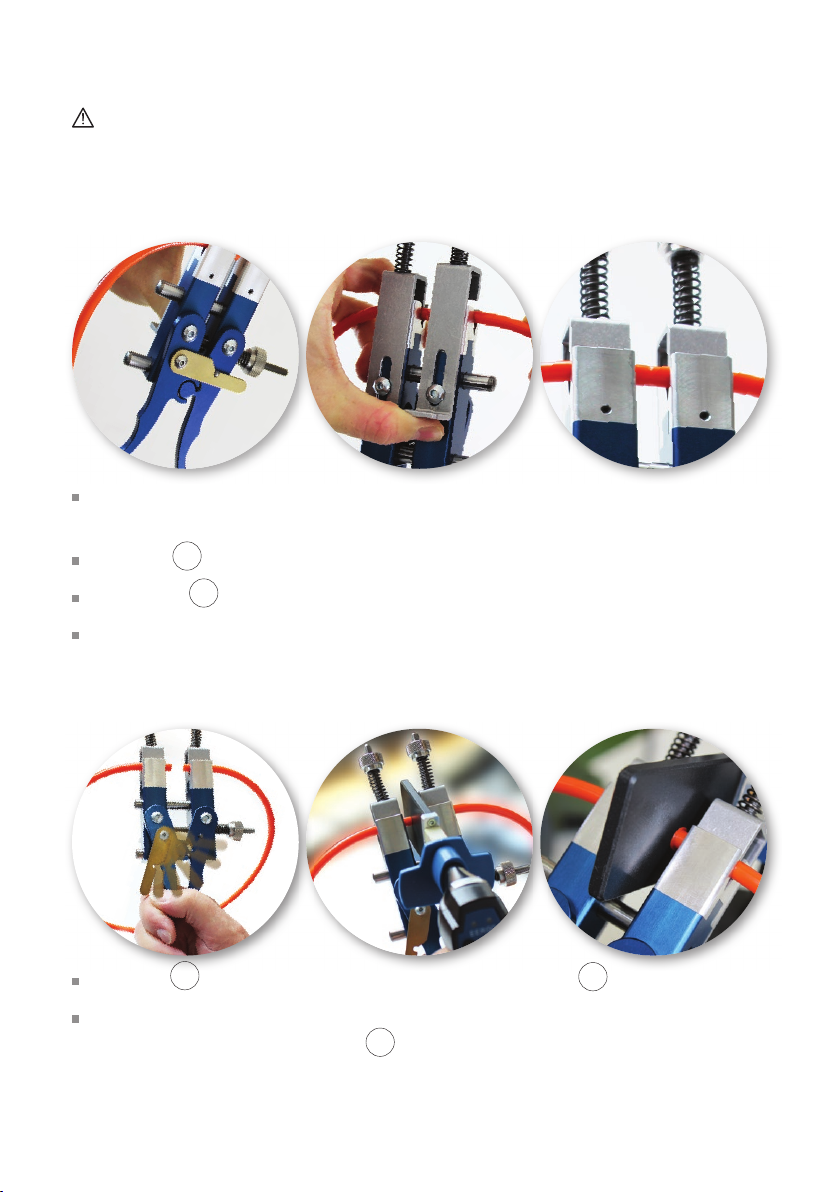
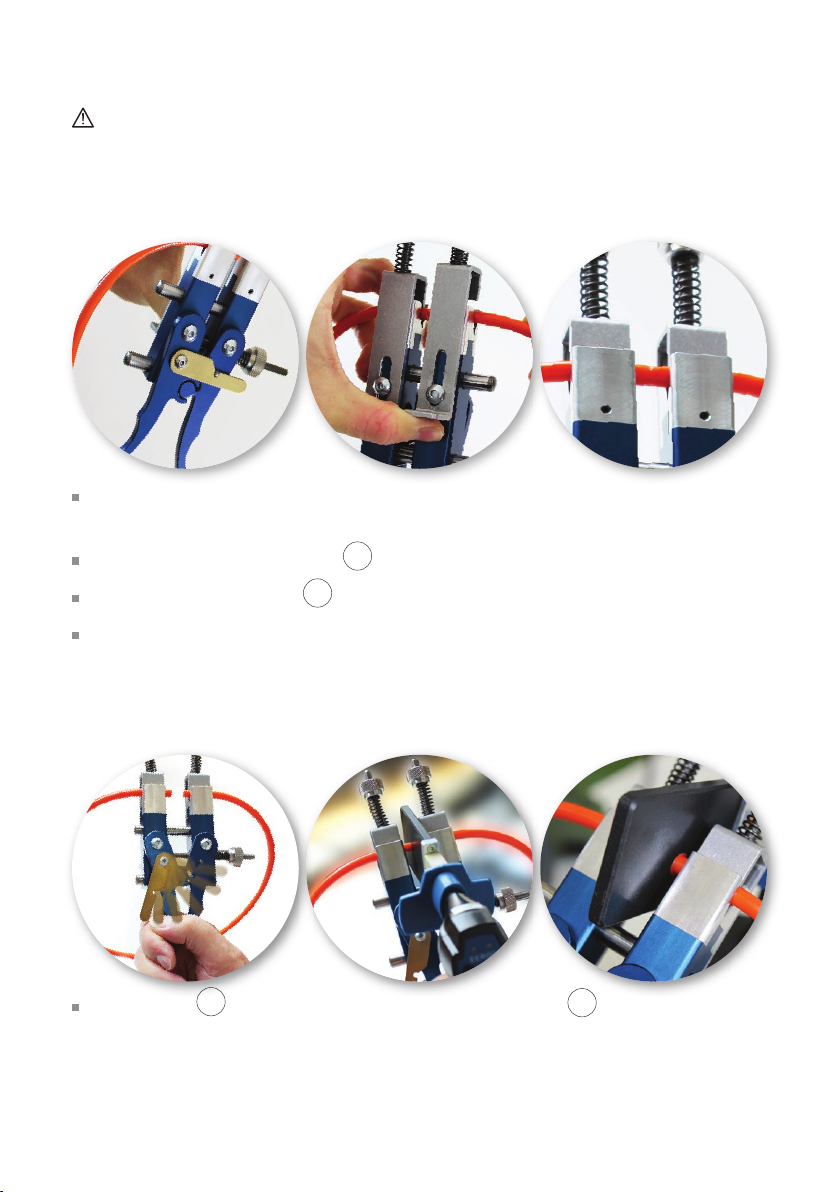
3.1 RIEMEN EINSPANNEN
Riemen vor dem Verschweißen auf Raumtemperatur vorwärmen, um eine gute Schweiß-
naht zu erhalten. Beide Enden des zu verbindenden Profils plan abschneiden.
Halteriegel 6an der Zange einrasten.
Klemmhalter 3jeweils hoch drücken und Profil einschieben.
Profilenden vermittelt in die Zange auf Anschlag einlegen.
3.2 VERSCHWEISSEN
Haltegriffe 8zusammendrücken. Dabei klinkt der Halteriegel 6automatisch aus.
Schweißspiegel zwischen die beiden Riemenenden einführen und die Haltegriffe ent-
spannen. Der seitliche Federdruck 2presst die beiden Riemenenden während des
Schmelzprozesses automatisch an die heiße Spiegelfläche.

6
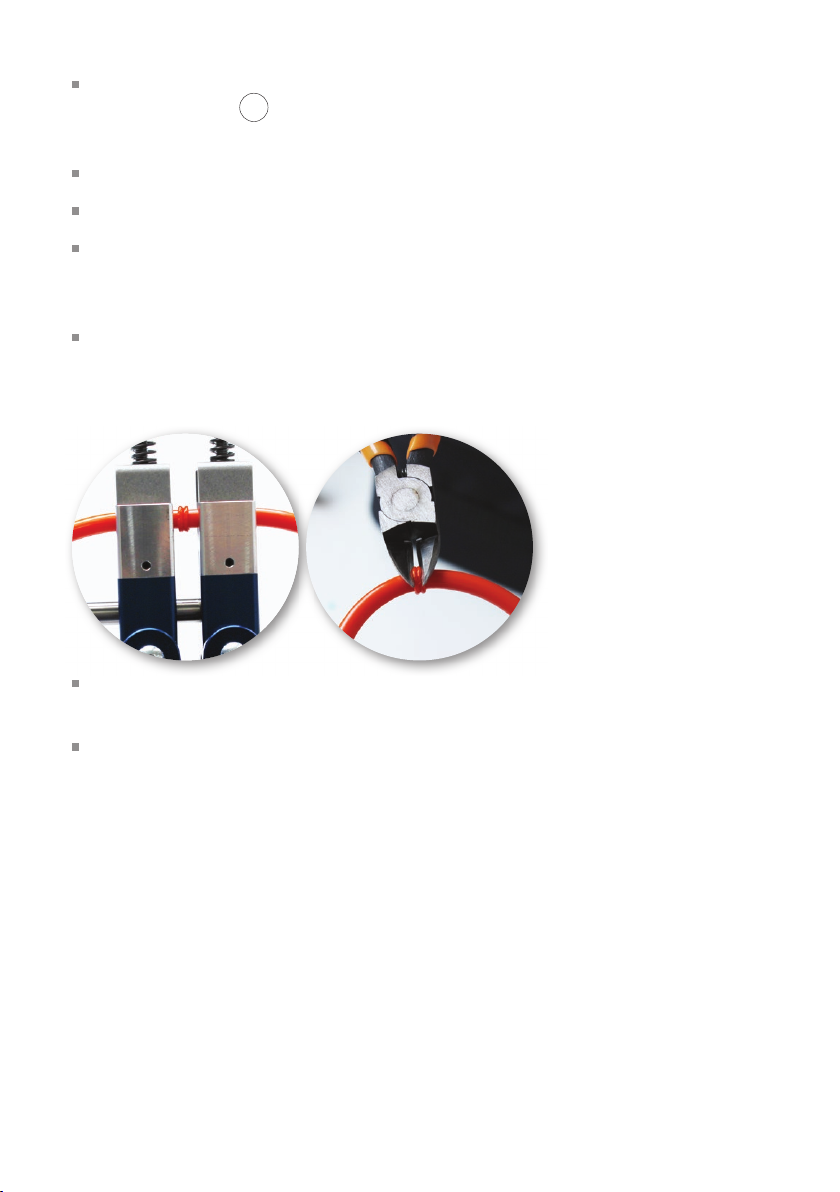
Das Schweißgut quillt bei einer guten Verschweißung blasenfrei ca. 3 - 4mm zwischen
den Riemenenden und dem Schweißspiegel hervor.
Die Führungszange leicht öffnen und den Schweißspiegel schnell herausziehen, ohne
dass größere Mengen Schmelzgut am Spiegel haften bleiben. Danach die Haltegriffe
sofort entspannen. Der zuvor seitlich eingestellte Anpressdruck drückt die Profilenden
mit einem definierten Anpressdruck zusammen.
Verschweißtes Profil ca. 3 - 5 Min. in der Führungszange aushärten lassen.
3.3 ENTFERNEN DES SCHWEISSWULSTES
Der Schweißspiegel muss grundsätzlich nach jeder Schweißung von anhaftenden
Kunststoffresten mit einem Baumwolllappen gereinigt werden, um eine Verunreinigung
der nächsten Schweißnaht zu vermeiden. Auf keinen Fall ein Messer oder harten Gegen-
stand verwenden, da dies die Antihaftbeschichtung beschädigen würde.
Das Profil entnehmen und den Schweißwulst mit dem BEHAbelt Seitenschneider SE02
entfernen.

7
3.4 UMBAU DER FZ01 VARIO
Die Haltegriffe 8mit Hilfe eines Inbusschlüssels (3mm) abmontieren.
Die seitliche Feder von außen nach innen montieren und mit der Rändelschraube 2
seitlich arretieren.
3.5 WECHSEL DER SPANNBACKEN
Rändelschrauben 1, Feder und Klemmhalter 3abmontieren.
Die Gewindestifte 5mit Hilfe eines Inbusschlüssels (1,5mm) lösen. Die Spannbacken
4herausnehmen und die passenden einsetzen.
Klemmhalter 3und Feder wieder einbauen und mit den Rändelschrauben 1
arretieren.
1
4
3
2
5
7
3
1
2
8
3

8
4.0 Übersicht BEHAbelt Schweißtechnik
SPIEGELSCHWEISSGERÄTE
BEHAbelt EErgo
High-End-Spiegelschweißgerät für PU-/TPE-Profile
· Aufheizzeit nur ca. 2 Minuten.
· Innovative Sicherheitsablage.
· Ergonomisches Design.
· Eindeutige Anzeige die richtigen Schweißtemperatur
für PU und TPE.
BEHAbelt Multi TC
Spiegelschweißgerät für PU-/TPE-Profile
· Einfache und sichere Handhabung
· Schnelle Aufheizzeit
· Optische Anzeige bei Erreichen der Schweiß-
temperatur
BEHAbelt SG02 & SG03
Spiegelschweißgeräte für PU oder TPE-Profile
· SG02 Schweißspiegel für Polyurethan (PU)
· SG03 Schweißspiegel für Polyester (TPE)
TPE
PU

9
WEITERE SCHWEISSGERÄTE
BEHAbelt RS02
Reibschweißmaschine für PU-Profile
· Keine Aufheiz- oder Rüstzeiten; drehzahlgesteuerte
Reibwärme verschweißt innerhalb von Sekun-
den.
· Präzisionsspannbacken und automatische
0-Stellung verhindern versetzte Schweißnähte.
· Austauschbare Spannbacken ermöglichen das
Verschweißen unterschiedlichster Rund-
(6 bis 20mm) und Keilriemen (6x4 bis 22x14mm).
BEHAbelt HP01
Heißpresse für perfekte Stoß- und Überlapp-
verschweißungen von PU- und TPE-Profilen
· Vollautomatisierter Vulkanisier- und Kühlprozess
verhindert Anwendungsfehler und gewährt somit
Prozesssicherheit.
· Austauschbare Formschuhe ermöglichen das
Verschweißen unterschiedlichster Profile bis hin zu
Zahnriemen.
· Intuitive Controllermenüführung.
· Datenlogging mit integrierter Funktionsdiagnose
zur Qualitätssicherung der Schweißung
· Speicherung und Änderung von Rezepturen
innerhalb weniger Sekunden
· Beste Schweißmethode für Profile mit Zugträger
(Aramid, Polyester und Stahl) mittels Überlapp-
verschweißung
10
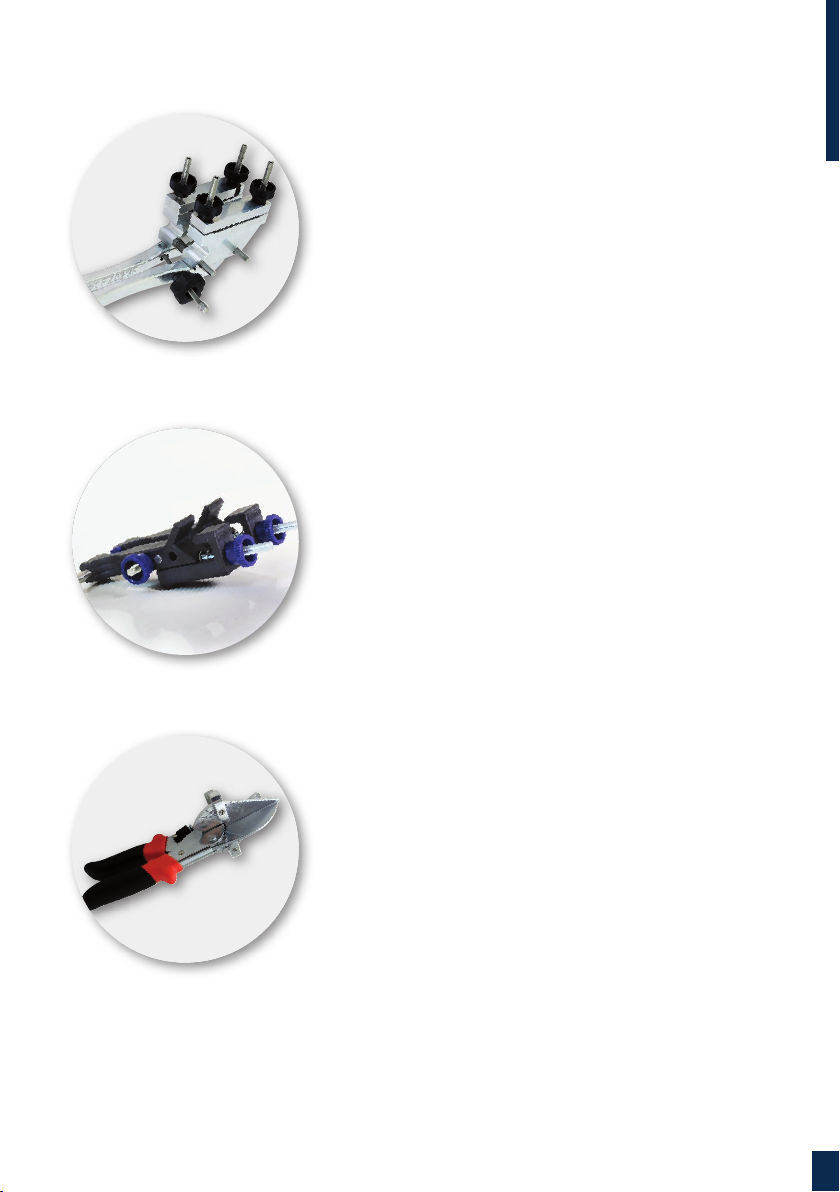
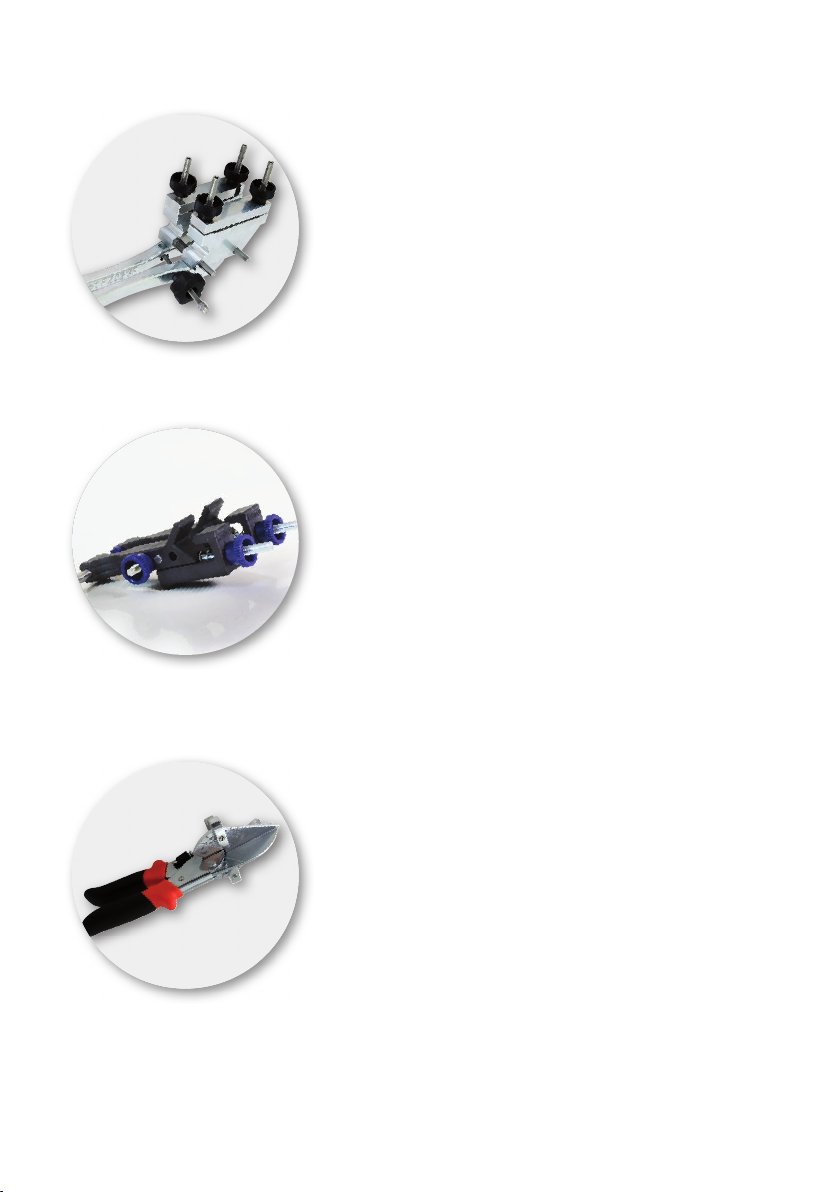
WERKZEUGE
BEHAbelt Führungszangen FZ02/3 und FZ02/3F
für größere Rund- und Keilprofile sowie Flachbänder
bis 60mm
· Anpassungen möglich für Sondergeometrien.
· Robuste und hochwertige Metallausführung.
· Für 90°-Grad-Schweißungen.
BEHAbelt Führungszange FZ01
für Rundriemen bis ∅10 mm und Keilriemen bis
Profil 10 (Z)
· Sehr handlich und leicht.
· Schnelles Endverbinden von PU- und TPE-Profilen
BEHAbelt Scheren und Seitenschneider
verschiedene Ausführungen
· Schere AS02 mit Prisma für Rundriemen.
· Schere AS03 mit Anschlag (fest).
· Schere AS04 mit Winkelanschlag (verstellbar).
· Seitenschneider SE02 zum Entfernen des Wulstes.

Manual
FZ01 Vario

12
English
Content
1.0 General information .................................................................................................................................13
2.0 Properties ................................................................................................................................................13
3.0 Instruction manual FZ01 Vario.................................................................................................................14
3.1 Clamp the belt .............................................................................................................................14
3.2 Weld the belt ...............................................................................................................................14
3.3 Remove the bead.........................................................................................................................15
3.4 Modification of the FZ01 Vario.....................................................................................................16
3.5 Change of clamping jaws................................................................................................................16
4.0 BEHAbelt Welding tools & Accessories....................................................................................................17

13
1.0 General Information
The FZ01 Vario guide clamp works in combination with the temperature-controlled EErgo
welding tool for quick, safe and precise welding of PU and TPE profiles.
For round belts up to Ø 10mm and for V-belts up to 10x6mm.
The FZ01 Vario guiding clamps can be rebuilt and used as Type A (with handles) or as
Type B (without handles).
The jaws 4are interchangeable, hence extra charges jaws for special profiles can be
mounted.
Sturdy metal design.
Dimension: 240 x 125 x 50mm
Weight: approx. 365 g
2.0 Properties
1. Thumb screws with spring
for fixing the belt profile.
2. Thumb screws with spring for
adjusting the contact pressure.
3. Clamping holder for fixing the belt profiles.
4. Replaceable jaws.
5. The threaded pin for locking the jaws.
6. Retaining key.
7. Guide bolts.
8. Removable handles.
FZ01 Vario without handles
FZ01 Vario without handles
4
6
2
5
4
1
3
7
8
4
A
B
14
3.0 Instruction manual
Please follow the instruction manual and perform a test weld when you start to use
this clamp.
3.1 CLAMP THE BELT
In order to ensure a good welding seam, we recommend to ensure that the belt is at
room temperature before commencing the welding procedure.
Click into place the retaining key 6at the clamp.
Push each clamping holder 3to insert the profile ends.
Place the profile ends centered in the clamp up to marking and fix it with the thumb
screws..
3.2 WELD THE BELT
Press handles 8together. At the same time, the retaining key 6latches automatically.
15
Insert welding paddle between the two ends of the belt and relax the handholds. The la-
teral thumb screws 2forces the two ends of the belt automatically during the melting
process onto the hot welding paddle surface.
A total of 3mm to 4mm of material will be used to form a bead on both belt ends.
Wait for a bead to form between each of the belt ends and the paddle.
Open the guide clamp slightly and remove the welding paddle quickly without letting a
large amount of melted material stick to the paddle. Immediately let go of the handle.
The automatic pressure setting is sufficient to get a good welding seam.
Leave profile clamped for 3-5 min. within the guide clamp to cool off.
3.3 REMOVE THE BEAD
After each welding procedure the welding paddle should be cleaned by using a belt rem-
nant piece or a cotton cloth. Otherwise the future weldings get polluted and can break.
Take out the profile and remove the bead upset with the BEHAbelt SE02 edge cutter.
16
3.4 MODIFICATION OT THE FZ01 VARIO
Disassemble the handles 8with an Allen key (3mm).
Move the lateral spring from outside to inside and lock the side with the thumb screw.
3.5 CHANGE OF CLAMPING JAWS
Remove the thumb screws 1, spring and clamping holder 3.
Disassemble the threaded pin 5with an Allen key (1,5mm). Remove the clamping
jaws 4and place the matching clamping jaws.
Insert the clamping holder 3and the spring and lock with the thumb screws 1.
1
4
3
2
5
7
3
1
2
8
3

17
4.0 BEHAbelt Welding Tools & Accessories
PADDLE WELDING TOOLS
BEHAbelt EErgo
High-End Paddle welding tool for PU and TPE profiles
· Heats-up only about 2 minutes.
· Innovative safety rest for safe placement.
· Ergonomic design.
· Easy to use temperature selector allows for the
correct temperature to weld PU or TPE profiles.
BEHAbelt Multi TC
Paddle welding tool for PU and TPE profiles
· Easy and safe handling.
· Very fast heating-up period.
· LED display for display of optimum welding
temperature
BEHAbelt SG02 & SG03
Paddle welding tools for PU or TPE profiles
· SG02 for Polyurethane (PU)
· SG03 for Polyester (TPE)
TPE
PU

18
FRICTION WELDING & HOT PRESS
BEHAbelt RS02
Friction welding machine for PU profiles
· No long heating-up and set-up times, spliced within
seconds.
· Precise pressure and automatical O-positioning
prevents uneven welds and premature failure.
· Thanks to its exchangeable jaws the RS02 is suit-
able for splicing many different round belts up to
∅(6 to 20mm) and V-belts (6x4 bis 22x14 mm).
BEHAbelt HP01
Controller guided hotpress for perfect butt
and overlap welding
· Reduces operator errors through a fully automatic
and controlled welding and vulcanization process.
· Thanks to its exchangeable moulds the HP01 is
suitable for splicing many different profiles and flat
belts made of PU and TPE as well as timing belts.
· User friendly operation through self-explanatory
menu of controller (no expertise required).
· Real time data logging & diagnostics function for
quality assurance of the splice.
· Different types of welds possible (overlap welds,
butt welds and angle welds).
· Best welding solution for reinforced profiles (ara-
mid, polyester and steel) through overlap welding.
19
TOOLS
BEHAbelt Guiding clamps FZ02/3 and FZ02/3F
for larger round and V-belts as well as flat belts up to
60 mm
· Adjustments possible for special geometries.
· Robust and high quality metal design.
· For 90°-welding.
BEHAbelt Guiding clamp FZ01
for round belts up to ∅10 mm and V-belts up to
profile 10 (Z)
· Very handy and lightweight.
· Fast, reliable and exceptionally precise connecting of
PU and TPE profiles
BEHAbelt Scissors and Edge cutter
different versions
· Scissors AS02 with stop for round belts.
· Scissors AS03 for 90° cut and angle cut.
· Scissors AS04 for movable angular stop.
· Edge cutter SE02 with special blade to remove
the welding bead.

Änderungen und Irrtümer vorbehalten.
Subject to change without notice.
BEHA Innovation GmbH
In den Engematten 16
D-79286 Glottertal
Telefon: +49 (0) 7684/907-0
Telefax: +49 (0) 7684/907-101
Internet: www.behabelt.com
InnovationGmbH
®
Version: Dec 2015 · PBMFZ01V001
Other manuals for FZ01 Vario
1
Table of contents
Languages:
Other BEHABELT Power Tools manuals


Popular Power Tools manuals by other brands


RedMax
RedMax Power Auger AG2300 Owner's/operator's manual

Yokota
Yokota Y-90E-JQ manual

Parkside
Parkside PSTK 800 A1 translation of original operation manual

Casals
Casals V@MTLI108 operating instructions

Promotech
Promotech PRO 10 PB Operator's manual

Chicago Electric
Chicago Electric BREAKER HAMMER 94882 Assembly and operating instructions

Westfalia
Westfalia 81 25 05 Original instructions

Craftsman
Craftsman 315.175101 Operator's manual

Ryobi
Ryobi JOBPLUS P570 Operator's manual

PINE64
PINE64 PINECIL user manual

Max
Max SuperSider CN565S2 Operating and maintenance manual

Chicago Electric
Chicago Electric 62866 Owner's manual & safety instructions