Beko BFFD3624SS User manual

Refrigerator
User Manual
Réfrigérateur
Manuel d’utilisation
Refrigerador
Manual del usuari
BFFD3624SS
BFFD3624XSS
EN/FR/ES
57 5838 0000/BK

Congratulations on the purchase of your new Beko Refrigerator! This refrigerator has been
manufactured in modern facilities with the utmost care and meticulous quality controls. We are so
confident in the quality of this product that we back it with a two year parts and labor warranty, and five
years on the sealed system! Please read this entire user manual before using your product, to ensure
you understand all of its features and benefits and know how to operate it properly. This manual should
be kept in an easily accessible location and passed on to any future owners.
This guide will help you use the product quickly and safely.
Please read the user guide carefully before installing and operating the product.
symbols used throughout this manual and what they represent.
Important information and
useful tips.
Risk of life and property.
Risk of electric shock.
The product’s packaging
is made of recyclable
materials, in accordance with
the National Environment
Legislation.
Fill this out and keep for future reference
Model
Serial No
Date of Purchase
Original Purchaser
Dealer
City
State
Zip Code
Country

3 / 29 EN Refrigerator / User Manual
1 Your Refrigerator 4
2 Important instructions for safety and
environment 6
2.1 General safety . . . . . . . . . . . . . . . . . . . . . .6
. . . . . . . . . . . . . . . . . . . . . . .7
2.1.2 For products with a water dispenser. . . . . .7
2.2 Intended use . . . . . . . . . . . . . . . . . . . . . . .7
2.3 Children’s safety . . . . . . . . . . . . . . . . . . . .7
2.4 Package information . . . . . . . . . . . . . . . . .7
3 Installation 8
3.1 Before Installation . . . . . . . . . . . . . . . . . .12
. . . . . . . .12
3.3 Inset installations. . . . . . . . . . . . . . . . . . .13
3.4 Electrical connection . . . . . . . . . . . . . . . .13
. . . . . . . . . . . . . . . . . .13
3.6 Illumination lamp . . . . . . . . . . . . . . . . . . .14
3.7 Door/Drawer Open Warning . . . . . . . . . . .14
3.8 Water connection . . . . . . . . . . . . . . . . . .14
3.9 Connecting the water hose to the . . . . . . .
refrigerator . . . . . . . . . . . . . . . . . . . . . . .14
3.10 Connecting the water line to the water
supply . . . . . . . . . . . . . . . . . . . . . . . . . . .14
3.11 Installing the Internal Water Filter . . . . . .15
3.12 Before using the water dispenser . . . . . . .16
3.12.1 Using the Ice Maker. . . . . . . . . . . . . . . .16
3.13 Transportation of the product . . . . . . . . . .16
4 Preparation 17
5 Display and operating the product 18
5.1 Indicator panel . . . . . . . . . . . . . . . . . . . . .18
5.2 Sabbath Mode . . . . . . . . . . . . . . . . . . . . .19
5.3 Showroom Mode . . . . . . . . . . . . . . . . . . .19
5.4 High Temp Error . . . . . . . . . . . . . . . . . . . .19
5.5 Freezing fresh food. . . . . . . . . . . . . . . . . .21
5.6 Recommendations for preserving frozen food2 1
5.7 Placing the food . . . . . . . . . . . . . . . . . . . .21
5.8 Deep-freeze information . . . . . . . . . . . . . .21
5.9 Removing door shelves. . . . . . . . . . . . . . .22
5.10 Moving the FlexiLift Door Shelf . . . . . . . . .22
5.11 Glass shelves . . . . . . . . . . . . . . . . . . . . . .22
5.12 Crisper bins . . . . . . . . . . . . . . . . . . . . . . .22
5.13 Deli Drawer . . . . . . . . . . . . . . . . . . . . . . .22
5.14 Humidity controlled crisper (EverFresh+) . .23
5.15 Ice container . . . . . . . . . . . . . . . . . . . . . .23
5.16 Butter & Cheese section . . . . . . . . . . . . .23
5.17 Door flappers . . . . . . . . . . . . . . . . . . . . . .23
. . . . . . . . . . . . . . .24
5.19 IonGuard . . . . . . . . . . . . . . . . . . . . . . . . .24
5.20 Odor filter. . . . . . . . . . . . . . . . . . . . . . . . .24
5.21 Changing the temperature scale (Fahrenheit
Celsius) . . . . . . . . . . . . . . . . . . . . . . . . . .24
6. Maintenance and cleaning 25
. . . . . . . . . . . . . . . . . . .25
6.2 Protecting the plastic surfaces . . . . . . . . . .25
7. Troubleshooting 26

4 / 29 EN Refrigerator / User Manual
1 Your Refrigerator
1- Fridge compartment
2- Bottom Freezer
3- Display/indicator panel
4- Butter & cheese section
5- FlexiLift Door Shelves
6- Bottle shelf
7- Deli Drawer
8- Crispers
9- Water dispenser
10-
11- Fan Cover
12- Water filter
13- Ice container
14- Frozen Food Storage Bın
15- Freezer Drawer
16- Separator
2
*3
1
*6
*5
*7
*8
9
11
*12
*10
*4
13 14
15
*16
C
are not included in the product you have purchased, then those parts are only valid for other models.

5 / 29 EN Refrigerator / User Manual
Fridge compartment cantalever shelves, those that only have rear supports, are tested for max 25 kgs
(55 pounds) per each part.
Crispers will hold up to 15 kgs (33 pounds) per each one. Deli Drawer will hold up to 20 kgs (44
pounds).
Ice container bin holds up to 10 kgs (22 pounds), it is for usage without ice. Freezer bin will hold up to 24
kgs (53 pounds) and drawer holds up to 30 kgs (66 pounds).
55 pounds = 25 kgs
33 pounds = 15 kgs
13 pounds = 6 kgs
22 pounds =10 kgs
Up to 11 pounds / 5 kgs day ice production
48 pounds = 22 kgs
66 pounds = 30 kgs
44 pounds = 20 kgs
105 pounds = 48 kgs
8 pounds = 4 kgs
8 pounds = 4 kgs
Refrigerator Shelf Weight Limitations

6 / 29 EN Refrigerator / User Manual
2 Important instructions for safety and environment
This section contains safety instructions that will
damage.
Failure to follow these instructions shall void any
warranty.
AWARNING: Keep ventilation openings,
in the appliance enclosure or in the
built-in structure, clear of obstruction.
A
WARNING: Do not use mechanical
devices or other means to accelerate
the defrosting process, other
than those recommended by the
manufacturer.
AWARNING: Do not damage the
refrigerant circuit.
B
WARNING: Do not use electrical
appliances inside the food storage
compartments of the appliance,
unless they are of the type
recommended by the manufacturer.
2.1 General safety
8 years old and by persons whose physical, sensory
or mental capabilities were not fully developed or
who lack experience and knowledge provided that
they are supervised or trained on the safe usage of
the product and the risks it brings out. Children must
not play with the product. Cleaning and maintenance
should not be performed by children unless they are
supervised.
use.
There is the risk of electric shock!
by a fuse complying with the values in the rating
plate. Have the grounding installation made by a
qualified electrician. Our company shall not be liable
for any damages that may arise when the product is
used without grounding in accordance with the local
regulations.
Do not tuck the power cord under the product. Do
not put heavy items on the power cord. The power
cord should not be bent, crushed, and come into
contact with any heat source.
onto it! There is the risk of electric shock!
pulling on the cable, always pull out by grabbing the
plug.
systems. Such systems are harmful for the product.
repairing procedures.
carried out by the Authorized Service Agent. The
Manufacturer shall not be held liable for damages that
may arise from procedures carried out by unauthorized
persons.
freezer compartment. They may burst!
-
als to clean or defrost the refrigerator. Steam will cause
short circuit or electric shock since it would get into
contact with the electrical parts in the refrigerator!
door and drawer as a means of support or step. This
will cause the product to tip over or parts of it get dam-
aged.
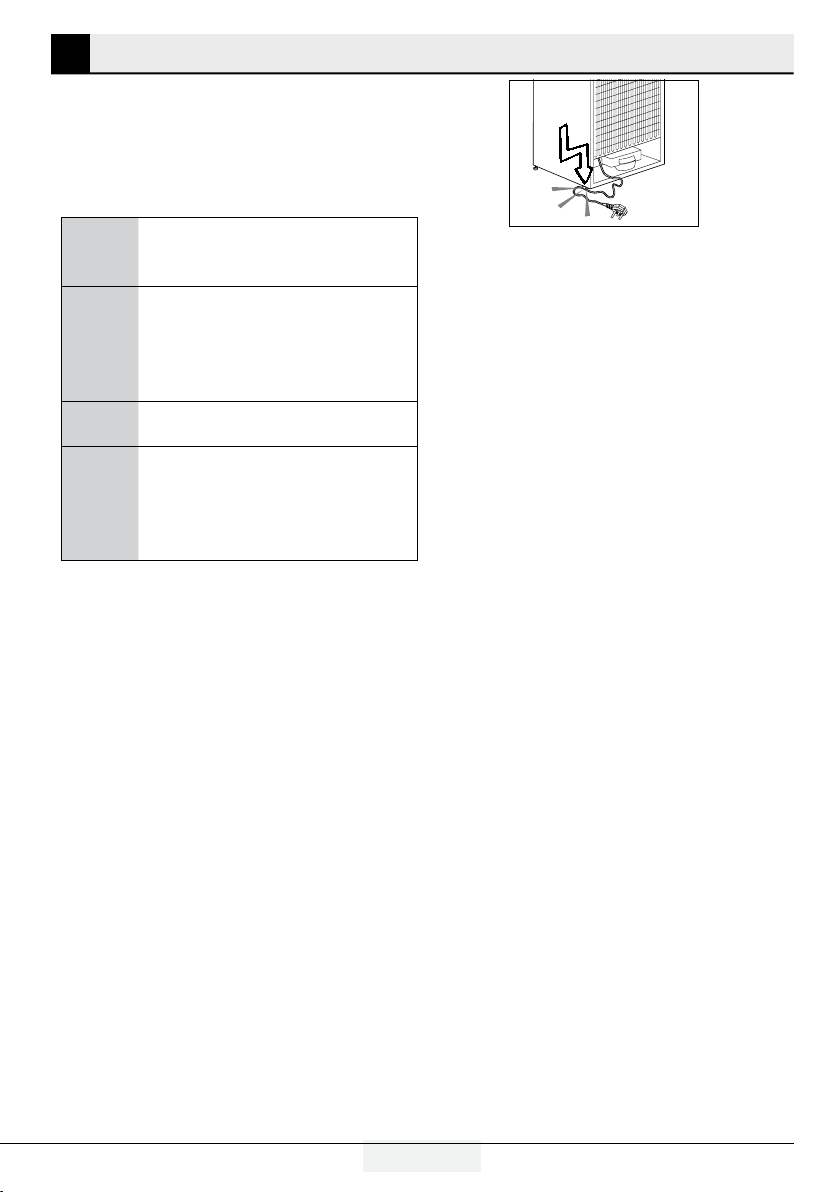
cutting tools.The refrigerant that might blow out when
the gas channels of the evaporator, pipe extensions or
surface coatings are punctured may cause skin irrita-
refrigerator with any material.
there is the risk of fire or explosion!
gases (e.g. spray) as well as the explosive materials
should never be kept in the appliance.
product. Spilling water on an electrical component may
cause electric shocks or risk of fire.
medicines, scientific materials and etc.) that require a
precise temperature control in the refrigerator.

7 / 29 EN Refrigerator / User Manual
Important instructions for safety and environment
2 Important instructions for safety and environment
time, unplug and unload the food in it.
at the blue light with optical tools.
problems may occur in case of putting things on top
of the product.
your body get caught by the moving parts inside the
product.
2.1.1 HCA warning
If your product’s cooling system contains R600a:
This gas is flammable. Therefore, pay attention to not
damaging the cooling system and piping during usage
and transportation. In the event of damage, keep your
product away from potential fire sources that can cause
the product catch a fire and ventilate the room in which
the unit is placed.
C
You can identify the type of gas used in
your product by referring to the the model/
serial tag located on the left wall of the
upper compartment.
AWARNING: Never dispose the product
in fire.
2.1.2 For products with a
water dispenser
Pressure for cold water inlet shall be maximum
90 psi (620 kPa). If your water pressure exceeds
80 psi (550 kPa), use a pressure limiting valve
in your mains system. If you do not know how to
check your water pressure, ask for the help of a
professional plumber.
If there is risk of water hammer effect in
your installation, always use water hammer
prevention equipment in your installation.
Consult professional plumbers if you are not
sure if there is a water hammer effect in your
installation.
Do not install on the hot water inlet. Take
precautions against of the risk of freezing of the
hoses. Normal operating water temperatures
should be between 33F° (0.6°C) minimum and
100F° (38°C) maximum.
Use only potable water.
2.2 Intended use
use. It is not suitable for commercial use and it
must not be used out of its intended use.
arisen from incorrect usage or transportation.
2.3 Children’s safety
from tampering with the product.
A
Before you throw away your old
refrigerator or freezer:
children may not easily climb inside.
2.4 Package information
manufactured from recyclable materials in
accordance with our National Environment
Regulations. Do not dispose of the packaging
materials together with the domestic or other
wastes. Take them to the packaging material
collection points designated by the local
authorities.

8 / 29 EN Refrigerator / User Manual
3 Installation
Allow 1 3/4” min. clearance at the rear for
proper air circulation and water/electrical
connections
Minimum clearances
Top View
Electrical
Outlet Water Line
Recessed electrical outlet
Recessed water
line
23 5/8” (600mm)
Cabinet
25” (635 mm)
Countertop
2” ceiling 5/8” from sides and 1-3/8”
the back.
Allow 1 3/8’’ (35 mm) mm. clearance at
rear for proper air circulation and water/
electrical connections
9/16” (15mm) min, widt
Allow 2’’ (50mm) min. clearance
between the top of refrigerator
and alcove
71 ¹¹/16
36 15/16

9 / 29 EN Refrigerator / User Manual
Installation
"
!
"
"
"
"
"
Height-Overall “A’’ Height-TopOfCabinet
“B”
Depth-CabinetOnly “C”
“O”
Depth-Without Handles “D”
69 3 /4” ( 1771 mm ) 67 5/16”( 1710 mm ) 23 5/8” ( 600 mm ) 26 13/16” ( 680.5 mm )
Depth-With Handles
“E”
Width-Cabinet “F” Depth-DrawerOpen “G” TotalDepth-DrawerOpen “H”
29” ( 737 mm ) 35 3/4”( 908 mm ) 45 9/16” ( 1157 mm ) 46 3/16” ( 1173.5 mm )

10 / 29 EN Refrigerator / User Manual
Installation
Min Clearance From the Top: 2” inches
Min Clearance From the Sides: 5/8”inches
Min Clearance From the Back: 1 3/8”inches
Height-Overall “A’’ Height-TopOfCabinet
“B”
Depth-CabinetOnly “C”
“O”
Depth-Without Handles “D”
69 3 /4” ( 1771 mm ) 67 5/16”( 1710 mm ) 23 5/8” ( 600 mm ) 26 13/16” ( 680.5 mm )
Depth-With Handles
“E”
Width-Cabinet “F” Depth-DrawerOpen “G” TotalDepth-DrawerOpen “H”
29” ( 737 mm ) 35 3/4”( 908 mm ) 45 9/16” ( 1157 mm ) 46 3/16” ( 1173.5 mm )

11 / 29 EN Refrigerator / User Manual
Installation
Depth-Doors Open90° “I” Total Depth-Doors
Open90° “J”
Width-Doors Open90°
WithHandles “K”
Width-Doors Open90°-
FromCabinetToHandle “L”
42 1/4” ( 1072.6 mm ) 43 1/16” ( 1094 mm ) 41 11/16” ( 1059.2 mm ) 3” ( 75.6 mm )
Width- Doors Open130°-
FromHandleToHandle “M”
Width-Doors Open
130°- FromCabinetTo
Handle “N”
Depth-Doors Open 130”
“P”
Depth Doors Open 130° “R”
60 1/4” ( 1530.2 mm ) 12 1/4” ( 311.2 mm ) 15 3/8” ( 391 mm ) 39’’ ( 991mm )

12 / 29 EN Refrigerator / User Manual
Installation
3.2 Appropriate installation location
from heat sources such as cooktops, ovens,
space heaters, radiators and stoves at least
2” (5 cm) away from electrical ovens. Product
kept in humid places after installation.
as rugs or carpets.
prevent wobbling.
temperature falls below 50F°/10ºC.
CIf two refrigerators are to be installed side
by side, there should be at least 1 1/2”
(4 cm) distance between them.
around the appliance to ensure free air
circulation.
gap of at least 1 3/8” (35 mm) between the
refrigerator and the rear wall. To ensure this,
attach the gray, circular buffers, to be installed
on the rear back metal cover of the refrigerator.
These are shipped inside the crisper drawer in
the Fresh Food compartment.
3.1 Before Installation
measurements are sufficient to receive the
product and that the appropriate electrical and
plumbing connections are present.
installation of the product. To make the product
ready for use, make sure that the electricity
installation is appropriate before calling the
electrician to have any necessary arrangements
carried out.
Part number of the filter is 4918450200 and
you can use this part number when ordering
replacement filters.
CPreparation of the location and electrical
installation at the place of installation is
under customer's responsibility.
CPlumbing: The refrigerator should only
be connected to the cold water line.
BProduct must not be plugged in during
installation. Otherwise, there is the risk of
B
WARNING: Installation and electrical
connections of the product must be carried
Manufacturer shall not be held liable for
damages that may arise from procedures
carried out by unauthorized persons.
A
WARNING: Prior to installation, visually
check if the product has any defects on
it. If so, do not have it installed. Damaged
products cause risks to your safety.

13 / 29 EN Refrigerator / User Manual
Installation
3.3 Inset installations
cabinetry or in an alcove, be sure there is
adequate airflow around the product for proper
functionality. This refrigerator requires at least
2” from the top of the unit to the ceiling or
enclosure, 5/8” on each side and 1 3/8” in the
back.
or alcove, be sure the parts shown below are
installed on the unit.
3.4 Electrical connection
Circuit.
but any failure of the GFCI could cause
food spoilage, which is not covered by the
manufacturer’s warranty.
regulations.
after installation.
or multi-plugs.
BWARNING: Damaged power cable must
B
WARNING: If the product has a failure, it
should not be operated unless it is repaired
the risk of electric shock!
3.5 Adjusting the feet
recommend lowering the feet to secure the
if the product is not balanced. Twist the feet in
the desired direction according to the illustration
the doors.
B
WARNING: First unplug the product.
Product must not be plugged in when
electric shock!
The longer screw must
be used on the top.
circulation part
unscrew before the installation
Install the vertical
metal bracket and screw.

14 / 29 EN Refrigerator / User Manual
Installation
Display
3.6 Illumination lamp
Do not attempt to repair yourself but call the
lamps do not go on.
The lamp(s) used in this appliance is not suitable
for household room illumination. The intended
purpose of this lamp is to assist the user to place
foodstuffs in the refrigerator/freezer in a safe and
comfortable way.
3.7 Door/Drawer Open Warning
door of your product is left open for 1 minute. This
warning will be muted when the door is closed or if
any of the display buttons are pressed.
3.8 Water connection
First you must connect the water hose to the
refrigerator.
AWARNING: Refrigerator and the pump, if
any, must be unplugged during connection.
3.9 Connecting the water hose
to the refrigerator
1.
inlet valve.
2.
Connect the water line (C) to the inlet valve (B) and
tighten by hand to secure it. It is not necessary to use
pliers, but if there is a leak, you may tighten slightly
with a pair of pliers.
3.10 Connecting the water line
to the water supply
Connect the water line to a water supply valve. If a
valve is not present or you are not sure, consult a
qualified plumber.

15 / 29 EN Refrigerator / User Manual
Installation
3.11 Installing the Internal
Water Filter
Installing the internal water filter consists of two
steps:
1.
Press and hold the Freezer Temp Set key for 3
seconds, or until the no ice icon appears in the display.
2.
Slide the filter cover forward to open the filter
compartment.
3.
Tilt the bypass plug down and pull straight out to
remove it.
4.
Insert the filter into the housing and push it up to a
horizontal position.
5.
Close the filter cover and push it back into place.
6.
Press and hold the Freezer Temp Set key
again for 3 seconds.
You have successfully installed your filter.
The Filter End of Life warning will appear in
approximate 130 days, requiring you to replace
key for 3 seconds, or until the Filter End of
Life Warning goes out in the display. BYPASS PLUG

16 / 29 EN Refrigerator / User Manual
Installation
3.12 Before using the water dispenser
The water system connections should be made
tools.
only with water. Do not attempt to connect to
bled out of the system before the intial use.
To remove the air in the line, place a container
beneath the water dispenser nozzle and depress
the dispenser paddle for 1-2 minutes until only
water comes out.
consumed.It will take approximately 12 hours
before the water being dispensed cools down to
refrigerated temperatures.
paddle before removing your container, as this
will reduce the potential for dripping into the
dispenser tray.
3.12.1 Using the Ice Maker
The ice maker is not turned on from the factory.
Freezer Temp Set key for 3 seconds, or until the no
ice icon ( ) disappears in the display.It will take
approximately 1-2 days for the ice bin to fill with
ice.If a power outage occurs while the refrigerator
is running, the ice cubes may partially melt and
then stick together when the re-freeze. If the power
outage is prolonged, the ice cubes may turn into
water, causing leakage. If such a problem occurs.
stick together if they are left in the bin for too
long.
3.13 Transportation of the product
1.
Unplug the product before transporting it.
2.
Remove water connections.
3.
Secure the shelves, accessories, crisper and etc. in
the refrigerator by adhesive tape before repackaging it.
CPackaging must be tied with thick tapes or
strong strips and the rules of transportation
printed on the package must be followed.
AWARNING: Packaging materials
are dangerous for the children. Keep
packaging materials in a safe place away
from reach of the children.
Freezer Temp Set
ıce on keyno ıce icon

17 / 29 EN Refrigerator / User Manual
4 Preparation
CYou will hear a noise when the compressor
starts up. The liquids and gases sealed
within the refrigeration system may also
give rise to noise, even if the compressor is
not running and this is quite normal.
CFront edges of the refrigerator may
feel warm. This is normal. These areas
are designed to be warm to avoid
condensation.
To allow the fresh food compartment keep its
ideal storage temperature, sensor must not be
covered by food.
Before starting to use the product, check that all
preparations are made in accordance with the
instructions in sections "Important instructions for
safety and environment" and "Installation".
Clean the interior of the refrigerator as
recommended in the “Maintenance and
cleaning (Page 25)” section. Ensure that
interior is dry before operating.
Plug the refrigerator into the grounded wall
outlet. When the door is opened the interior
illumination will turn on.
Run the refrigerator without putting any food
for 6 hours and do not open its door unless
absolutely required.
Do not allow the food to touch the temperature
sensor in fresh food compartment.

18 / 29 EN Refrigerator / User Manual
5 Display and operating the product
C*optional: Figures in this user manual are schematic and may not match the product exactly. If the
models.
5.1 Indicator panel
Touch-control indicator panel allows you to set the temperature and control the other functions of the
refrigerator. Just press the relevant buttons for function settings.
1-Power key
Press and hold this key for 3 seconds to turn the refrigerator on and off.
2-Quick Cool Key
Press this key to turn on the Quick Cool option, which drops the
temperature in the Fresh Food compartment to its lowest setting (33 F°)
for two hours. It will return to the previously set temperature after this time.
2b. Vacation Mode
If you hold the Quick Cool key for three seconds, you will turn on the
Vacation Mode. In Vacation mode the Fresh Food compartment will stay
at 50 F° while the Freezer maintains its set temperature. You will know
that Vacation Mode is on by the dashes in the Fresh Food temperature
display (6) and the illumination of the “beach umbrella” (7). Press and
hold the Quick Cool key for 3 seconds to turn this option off.
3- Fresh Food Temperature set key
Press this key to change the temperature in the Fresh Food section from
between 33 F° and 40 F°. The set temperature will be displayed in the
Fresh Food temperature display (6).
4- Power “off” indicator light
turned on. Once the refrigerator is turned on, the red light will go out.
5-Quick Cool Indicator
you know the Quick Cool option is on.
6-Fresh Food Temperature display
The set temperature in the Fresh Food compartment will be displayed
here.
7-Vacation Mode indicator
The “beach umbrella” icon will be illuminated when Vacation Mode is
turned on. You will also see dashes in the Fresh Food temperature display.
8- High Temp Warning
The red exclamation point will be illuminated if the temperature in Freezer
is too high after the initial 72 hours of operation. (See page 19 for more
details)
9-Ice Maker Off icon
The ice cubes with a slash through them will be illuminated when the ice
maker is turned off.
10-Filter Change icon
The filter reset icon will illuminate when it is time to replace the water
filter. (For instructions on how to do that, see page 12.)
11-Freezer Compartment temperature display
The set temperature of the Freezer compartment will be shown in
this display.
12-Eco-Extra icon
The Eco-Extra icon will be illuminated when Eco-Extra is turned on.
(See 15b for more information on this option.)
13-Quick Freeze Indicator
display will be illuminated when the Quick Freeze option is turned on.
(See 15 for information on that option.)
14-Freezer Temperature set key
between -8 F° and 5 F°.
14.b. Ice Maker on/off key
Press and hold the Freezer Temp Set key for 3 seconds to turn the Ice
Maker on and off.
15-Quick Freeze key
Press and hold the Quick Freeze key to turn on the Quick Freeze opti-
on, which will drop the temperature in the Freezer to its lowest setting
(-8 F°
temperature.
15b. Eco-Extra key
Press and hold the Quick Freeze key for 3 seconds to turn on the
Eco-Extra option. In this mode
the refrigerator will operate in its most efficient way. It will only stay in
this mode while the doors remain closed.
16. Alarm Off key
If the doors remain open for more than 1 minute, or if an error is
detected, an alarm will sound. If this key is pressed, the alarm will be
silenced.
16b. Filter Change Timer Reset
key for 3 seconds to reset the timer. The filter reset light will come on
after 130 days of operation.
Note: Keys 2, 14, 15, and 16 have two functions. The second function has a “b” after the number below.
Display and operating the product

19 / 29 EN Refrigerator / User Manual
5.2 Sabbath Mode
Press the Fresh Food Temp Set Function key for 3 seconds to activate or deactivate the Sabbath Mode.
will appear in the display. The cooling algorithm is set according to the sabbath fashion. If the user does
not deactivate the Sabbath mode, the refrigerator will automatically cancel it in 72 hours.
Fresh Food Temp Set key
The High Temp Error icon is displayed when the Freezer temperature is too warm after the initial 72 hours of
operation. If the Freezer temperature reaches 28Fº (-2.2ºC) or higher, and doesn’t drop below 16 Fº (-9ºC)
within 12 hours, the High Temp Error icon will be illuminated, an alarm will sound and the set temperature
the alarm will be silenced, but the icon and flashing temperature will continue until the Freezer gets below
16Fº (-9ºC). If the Freezer does not cool below 16Fº (-9ºC) in the next 3.5 hours, the audible alarm will
the circuit to which the refrigerator is connected. If the icon continues to return, an authorized service agent
should be called to inspect the unit.
5.4 High Temp Error
5.3 Showroom Mode
Showroom Mode is an option primarily used in dealer's showrooms. It allows the product to be turned
on without the operation of the fans and cooling system. To activate this mode, Press and hold “Power”
Then press “Fresh Food Temperature Set” key to activate. To deactivate, press and hold the “Power” &
Power Alarm Off
Freezer Temp Set
Fresh Food Temp Set
High Temp Error Icon
Display and operating the product

20 / 29 EN Refrigerator / User Manual
Freezer
Compartment
Setting
Fridge
Compartment
Setting
Explanations
5F°/-15°C 39 F° /4°C This is the normally recommended setting.
-4F°/-20°C 37 F° / 3°C These settings are recommended when the ambient temperature
exceeds 86 F° /30°C.
Quick Freeze 39 F° / 4°C
Use when you wish to freeze your food in a short time. Your
refrigerator will return to its previous mode when the process is
over.
5 F° /-15°C or
colder Quick Fridge
Use this function when you place large quantities into the fridge
compartment or when you need to cool your food quickly. It is
recommended that you activate Quick Fridge function 4-8 hours
before placing the food in the compartment.
Operating Temperatures
This manual suits for next models
1
Table of contents
Languages:
Other Beko Refrigerator manuals

Beko
Beko CXFD5104 W User manual

Beko
Beko B5RCNA366HG User manual

Beko
Beko BTS 114200 User manual

Beko
Beko RDNE650E60DZXHN User manual

Beko
Beko TSE 1280 User manual

Beko
Beko RDNT340I20S User manual

Beko
Beko BCSA285K3SFN Instruction Manual

Beko
Beko BCSA306K2S Instruction Manual

Beko
Beko RCHE365K30WN User manual

Beko
Beko CNG4792VPS User manual

Beko
Beko B5RCNE406HXB1 User manual

Beko
Beko GN162340PT User manual

Beko
Beko CSA31020 User manual

Beko
Beko CSA24031X User manual

Beko
Beko GN163120X User manual

Beko
Beko RCNA365E40XP User manual

Beko
Beko DN 143120 User manual

Beko
Beko RCSA365K20W Instruction Manual

Beko
Beko CSA 22020 User manual

Beko
Beko GN1426234ZDXN User manual