8 /38 EN Refrigerator / User Manual
3Installaton
3.1.Appropriate
installation location
Contact an Authorized Service for the
installation of the product. In order to
prepare the product for use, refer the
information in the user manual and
ensure that electrical installation and
water installation are appropriate. If not,
call a qualified electrician and technician
to have any necessary arrangements
carried out.
BWARNING: Manufacturer shall
not be held lable for damages that
may arse from procedures carred
out by unauthorzed persons.
BWARNING: Product must not
be plugged n durng nstallaton.
Otherwse, there s the rsk of
death or serous njury!
A
WARNING: If the door clearance
of the room where the product
shall be place s so tght to prevent
passng of the product, remove
the door of the room and pass
the product through the door by
turnng t to ts sde; f ths does
not work, contact the authorzed
servce.
surface to prevent jolts.
away from heat sources such as hobs,
heater cores and stoves and at least 5
cm away from electrcal ovens.
drect sun lght and kept n humd
places.
crculaton to functon effcently. If
the product wll be placed n an alcove,
remember to leave at least 5 cm
clearance between the product and
the celng, rear wall and the sde walls.
• If the product wll be placed n an
alcove, remember to leave at least 5
cm clearance between the product
and the celng, rear wall and the
sde walls. Check f the rear wall
clearance protecton component s
present at ts locaton (f provded
wth the product). If the component
s not avalable, or f t s lost or fallen,
poston the product so that at least
5 cm clearance shall be left between
the rear surface of the product and
the wall of the room. The clearance
at the rear s mportant for effcent
operaton of the product.
where the temperature falls below
-5°C.
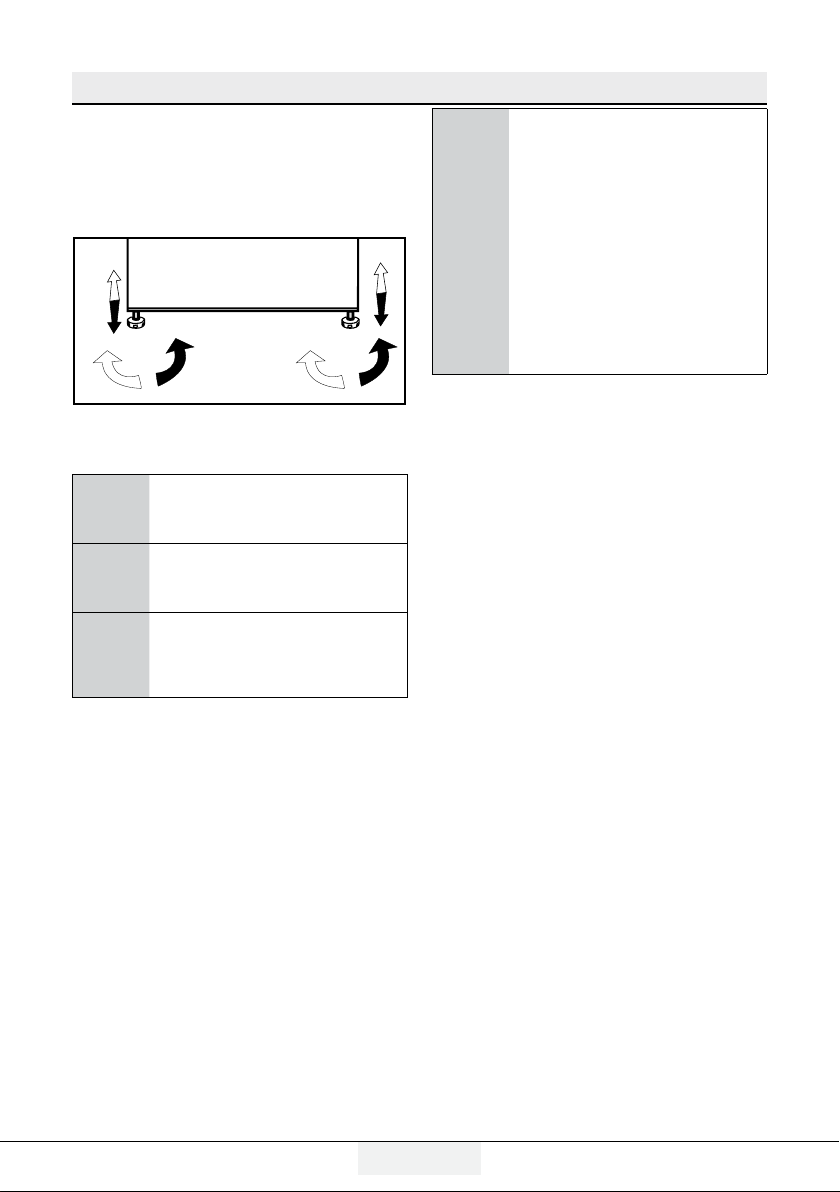
3.2.Installing the
plastic wedges
Plastc wedges suppled wth the
product are used to create the dstance
for the ar crculaton between the
product and the rear wall.
1. To nstall the wedges, remove the
screws on the product and use the
screws suppled together wth the
wedges.
2. Insert the 2 plastc wedges onto the
rear ventlaton cover as llustrated n
the fgure.