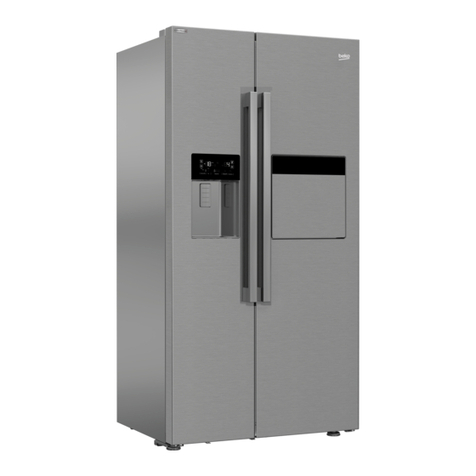
Beko NCB 9760 User manual

en
fr
ru
ar
NCB 9760


en-Index 1-1
1
Safety first ................................................../1
Transport instructions................................./2
Disposal ...................................................../2
Device Setup............................................../2
Get to know your device............................./3
How to use the accessories ......................./3
Prior to startup............................................/4
Setting the operating temperature ............./4
Cooling......................................................./5
Defrosting of the device (Fresh Food)......../5
Freezing ...................................................../6
Defrosting of the device (Frozen Food)....../6
Replacing the interior light bulb................../7
Cleaning and care....................................../7
Practical tips and notes............................../8
Examples of use........................................./9
Normal operating noises ............................/9
What, if......................................................./10
Reversing the doors.................................../10
Meaning of energy fiche ....../11
fr-Index
1-1
1
La sécurité d'abord...................................../1
Instructions de transport............................./2
Mise au rebut ............................................./2
Installation de l'appareil............................../2
Apprendre à connaître votre appareil ......../3
Comment utiliser les accessoires.............../3
Avant la mise en service ............................/4
Réglage de la température de
fonctionnement.........................................../4
Réfrigération.............................................../5
Dégivrage de l'appareil (Produits frais)....../5
Congélation................................................/6
Dégivrage de l'appareil (Produits
congelés)..................................................../6
Remplacer l'ampoule intérieure ................./7
Nettoyage et entretien................................/7
Conseils pratiques et remarques .............../8
Exemples d'utilisation................................./9
Bruits normaux de fonctionnement ............/9
Et si... ........................................................./10
Réversibilité des portes............................../10
Signification de la fiche énergétique ........./11
11-1

Fig.1
1 2
4
A
B
17
16
15
10
9
8
7
13
12
12
11
14
3
3
5
4
4
4
6
12

Fig. 3 Fig.4
Fig. 2
1
234
9
812
7
10
5
11 6

Fig. 7
Fig. 5 Fig. 6
Fig. 8
Fig.9

en en
1
Congratulations on your choice of our product which will certainly provide you with many
years of good service.
Safety comes first!
Please read this Instruction Manual carefully. It contains important information on how
to use your new appliance. If instructions are not adhered to, you may lose your right to
service at no charge during the warranty period. Please keep this manual in a safe place
and pass it on to later users if applicable.
• Do not connect your appliance to the power supply until all packing and transit protectors
have been removed.
• Leave to stand upright for at least 4 hours before switching on to allow the system to
settle if transported horizontally.
• This appliance must only be used for its intended purpose, i.e. the storing and freezing
of edible foodstuff.
• We do not recommend use of this appliance in an unheated, cold room e.g. garage,
conservatory, annex, shed, outdoors etc., see ‘Location’.
• On delivery, check to make sure that the product is not damaged and that all the parts
and accessories are in perfect condition.
• Do not operate a damaged appliance if in doubt, check with your dealer.
• Do not allow children to play with the appliance.
• Do not sit or stand on, or let the children sit or stand on the appliance or on the pull-
out parts.
• Do not hang on the appliance door.
• Do not dispose of the appliance in a fire. Your appliance contains non CFC substances
in the insulation which are flammable.
• Please contact your local authority in your region for information on disposal methods
and facilities available.
Warning -Keep ventilation openings on the appliance enclosure or in the built-in
structure, clear of obstruction.
Warning -Do not use mechanical devices or other means to accelerate the defrosting
process, other than those recommended by the manufacturer.
Warning -Do not damage the refrigerant circuit.
Warning - Do not use electrical devices inside the food storage compartments of the
appliance, unless they are of the type recommended by the manufacturer.
• Avoid touching the metal condenser wiring on the backside of the appliance there is
risk of injury.
• In the event of a possible malfunction, disconnect the appliance from the power supply
first.
• Prior to cleaning the appliance always unplug the appliance or switch off the circuit
breaker. Do not pull from the power cable. Pull from the plug.
• Repairs to the electrical equipment may only be made by qualified experts. If the power
cable is damaged, the manufacturer or customer service must replace it in order to
avoid danger.

en en
Transport instructions
The appliance should be transported only in
upright position.
The packing as supplied must be intact during
transportation.
f the appliance is transported in the horizontal
position, it must be placed vertically and left
in this position for 4 hours before taking into
operation.
The appliance must be protected against rain,
moisture and other atmospheric influences.
The manufacturer assumes no liability if safety
instructions are disregarded.
Disposal
Make the appliance unusable immediately.
Pull out the mains plug and cut the power
cable. Remove or destroy snap or latch locks
before disposing of the appliance. In this
manner you prevent children from locking
themselves in and endangering their lives.
Appliance setup
• Do not operate your appliance in a room
where the temperature is likely to fall below
10 °C at night and/or especially in winter. At
lower temperatures the appliance may not
operate, resulting in a reduction in the storage
life of the food.
• The climate class rate of your appliance is
given on the rating label located inside the
appliance. It specifies the appropriate operating
ambient temperatures as explained below.
Climatic class Ambient temperatures
SN.......................+10 °C to 32 °C
N .........................+16 °C to 32 °C
ST .......................+18 °C to 38 °C
T..........................+18 °C to 43 °C
SN-ST.................+10 °C to 38 °C
SN-T ...................+10 °C to 43 °C
Location
Only place the device in dry rooms which can
be aired.
Avoid direct sunlight or direct heat sources
such as a stove or a heater.
If this cannot be avoided, the following
minimum distances should be maintained:
Electric stoves: 3,00 cm
Heater: 3,00 cm
Cooling devices: 2,50 cm
• Ensure sufficient air circulation for your
device.
• Make sure that sufficient room is provided
around the appliance to ensure free air
circulation.
• The device should be located on a smooth
surface. The two front feet can be adjusted as
required. To ensure that your appliance is
standing upright adjust the two front feet by
turning clockwise or counter-clockwise, until
the product is in firm contact with the floor.
Correct adjustment of feet avoids excessive
vibration and noise.
Lower air-circulation cover (Fig.9)
Fit the bottom airing lid given in your appliance
as shown in the diagram to the pins facing
one another on the feet at the bottom of the
door. Make sure claws and pins to hold each
other for the pins-claws connection.
Electrical connections
Warning
This appliance must be grounded.
• Check whether the power type and voltage
your region corresponds to the one stated on
the rating label inside the appliance.
• The electrical safety of the appliance is only
assured when the grounding system in the
house is installed in accordance with
regulations.
• When placing the appliance, do not let the
power cable get stuck under it; otherwise the
cable will be damaged.
• Ensure that the plug remains readily
accessible. Do not use a multiple adapter bar
or an extension cable.
• The electrical specifications of your appliance
is given on the rating label located inside the
appliance.
• Route power cable to allow easy connection
and disconnection after installation.
• A contact separator should be used if the
power cable is not accessible. (for built-in
models)
2

en en
Cold air-circulation channels
Fast-freezing compartment
Freezer-compartment door shelf
Refrigerating-compartment door shelves
Handled egg racks
Bottle-holder
Adjustable front feet
Lower air-circulation cover
Crisper parts for vegetables
Crisper cover
Humidty filters
Adjustable glass shelves
Refrigerating-compartment illumination
glass
Cold air-circulation channels
Fridge compartment thermostat knob
Ice-box
Ice-matic
1.
2.
3.
4.
5.
6.
7.
8.
9.
10.
11.
12.
13.
14.
15.
16.
17.
3
Get to know your appliance
Warning
Below information about accessories are
supplied only for reference. Below accessories
may not be exactly same as the accessories
of your appliance.
How to use the accessories
Ice-matic
Fill the ice-matics with water and put them in
place. Your ice will be ready in about two
hours. You needn’t take the ice-matic out in
order to get ice; just turn it 90° to the right,
and the ice will drop into the ice-bowl below.
Then take out the ice-bowl to serve the ice. If
you wish, you can leave the ice in the bowl
for a while (Fig. 3-4).
Attention! The ice-bowl is only meant for
collecting ice. If you put water in, it will break.
The fast-freeze compartment (Fig. 5).
Hold the fast freeze-compartment cover as
shown in the diagram and lift it up, allowing it
to move freely on its groove. To close it, bring
it back down in similar fashion.
Attention! Be sure that the fast freeze cover
is closed before closing the freezer-
compartment door.
Crisper separators (Fig. 6)
These colourful separators in the crispers
have been designed to keep your vegetables
and fruit fresh and protect them against
smashing. By moving the separator forward,
you can keep them in the created room at the
back of it. As it is not required in use, the
separator can be pushed back and locked.
Odor Filter (Fig. 8)
It is placed on the ceiling of the appliance and
prevents formation of bad smell in the product.
A)
B) Freezer compartment
Fridge compartment
Fig. 1

en enen en
1 = Lowest cooling setting (Warmest setting)
5 = Highest cooling setting (Coldest setting)
(Or)
Min. = Lowest cooling setting
(Warmest setting)
Max. = Highest cooling setting
(Coldest setting)
The average temperature inside the fridge
should be around +5°C.
Please choose the setting according to the
desired temperature.
Please note that there will be different
temperatures in the cooling area.
The coldest region is immediately above the
vegetable compartment.
The interior temperature also depends on
ambient temperature, the frequency with which
the door is opened and the amount of foods
kept inside.
Frequently opening the door causes the interior
temperature to rise.
For this reason, it is recommended to close
the door again as soon as possible after use.
Display Functions
Please see the figure Fig.2
1- Displays the actual temperature inside
the freezer compartment.
2- Displays the set temperature inside the
freezer compartment.
3- Displays the actual temperature inside
the fresh food compartment.
4- Becomes active when freezer
temperature is set to -18°C which means
economic usage.
5- Becomes active when eco-fuzzy function
is on.
6- Becomes active when focus-cool function
in on.
7- High Temperature Alarm: Activates
when the temperature values reach to high
values which will spoil your food.
If freezer-compartment temperature display
shows a message like E0, E1, ....,
you should contact the Authorised Service.
8- Becomes active when quick freeze
function is on.
9- Freezer Set Button: You can set the
freezer temperature by the help of this
button. Each time this button is pressed the
following numbers will be displayed by order
on the display, -18, -20, -22, -24. Displayed
values will be the freezer set temperature
for your appliance. Unit for these numbers
is °C.
10- Focus cool Button: This function is
designed for fast cooling of fresh food
compartment of your appliance. Push smart
function button to start the function, smart
lamb will be active on the display. When
hot food is placed inside the fresh food
compartment, smart function will
automatically activate. And smart lamb will
start flashing. As soon as the inside
temperature reaches desired values,
flashing will stop. And smart function will
Setting the operating
temperature
(Fig. 7)
The operating temperature is regulated by the
temperature control.
Prior to startup
Before you begin operating your device, the
following points should be re-checked for
safety:
• Is the device standing properly on the floor?
•Is there sufficient space for good air
circulation?
•Is the interior clean?(Also see the section
“Cleaning and care”)
• Set the thermostat knob half way between
1 and 5 or Min. and Max.
• Now connect the device to the mains.
The compressor is turned on; the interior light
comes on when the door is opened.
Do not place foodstuff into the refrigerator until
the temperature has reached the desired level.
4
Warm Cold
1 2 3 4 5
(Or) Min. Max.

en enen en
Cooling
Food storage
The fridge compartment is for the short-term
storage of fresh food and drinks.
Store milk products in the intended
compartment in the refrigerator.
Bottles can be stored in the bottle holder or
in the bottle shelf of the door.
Raw meat is best kept in a polyethylene bag
in the compartment at the very bottom of the
refrigerator.
Allow hot foods and beverages to cool to room
temperature prior to placing them in the
refrigerator.
Attention
Store concentrated alcohol only standing
upright and tightly closed.
Attention
Do not store explosive substances or
containers with flammable propellant gases
(canned cream, spray cans etc.) in the device.
There is a danger of explosion.
Defrosting of the device
The appliance is a frost free refrigerator.
So there will not be any frost accumulation
inside the food storage area.
However there will be an automatic defrost at
the evaporation area of the appliance when
it needs. The water drams into a reservoir at
the back of the appliance and evaporates
automatically through the compressor heat.
5
be sleeping until the next time you place
hot food to your fresh food compartment.
You can cancel the function by pressing
smart function button.
11- Eco-fuzzy Function Button: This
function is designed to save power when
you do not use your appliance. Push eco-
fuzzy button to start the function. When
this function is selected, your appliance will
operate more economically during
weekends, vacations and nights. If you
open the doors or change the settings,
product will start operating within its set
values and eco-fuzzy function will be on
when ever you do not use the product
again. Press eco-fuzzy button again to
cancel the function.
12- Quick Freeze Function Button: Press
quick freeze function button when you place
food in the freezer compartment for the first
time. Freezer set temperature will display
-27°C and quick freeze function lamb will
be on. Quick freeze function lasts for
maximum 3 hours. When Quick Freeze
Function is completed, lamb will be
automatically off and original settings
will take place. If you want to cancel the
function before the time is completed, press
quick freeze button once.

en enen en
Making ice cubes
Fill the ice-cube tray 3/4 full with water and
place it in the freezer.
As soon as the water has turned into ice, you
can take out the ice cubes.
Never use sharp objects such as knives or
forks to remove the ice cubes. There is a risk
of injury!
Let the ice cubes slightly thaw instead, or put
the bottom of the tray in hot water for a short
moment.
Defrosting of the appliance
The appliance is a frost free refrigerator.
So there will not be any frost accumulation
inside the food storage area.
However there will be an automatic defrost at
the evaporation area of the appliance when it
needs. The water drams into a reservoir at the
back of the appliance and evaporates
automatically through the compressor heat.
Ensure that the reservoir is fixed properly
above the compressor.
Freezing
Freezing food
The freezing compartment is marked with
this symbol.
You can use the appliance for freezing fresh
food as well as for storing pre-frozen food.
Please refer to the recommendations given
on the packaging of your food.
Attention
Do not freeze fizzy drinks, as the bottle may
burst when the liquid in it is frozen.
Be careful with frozen products such as
coloured ice-cubes.
Do not exceed the freezing capacity of your
appliance in 24 hours. See the rating label.
In order to maintain the quality of the food, the
freezing must be effected as rapidly as possible.
Thus, the freezing capacity will not be
exceeded, and the temperature inside the
freezer will not rise.
Attention
Keep the already deep-frozen food always
separated with freshly placed food.
When deep-freezing hot food, the cooling
compressor will work until the food is completely
frozen. This can temporarily cause excessive
cooling of the refrigeration compartment.
If you find the freezer door difficult to open just
after you have closed it, don’t worry. This is
due to the pressure difference which will
equalize and allow the door to open normally
after a few minutes.
You will hear a vacuum sound just after closing
the door. This is quite normal.
6

en enen en
Replacing the interior
light bulb
Warning!
Light bulb must be changed by on
authorized service personnel.
Should the light fail, switch off at the socket
outlet and pull out the mains plug.
Then ensure the bulb is screwed securely in
the bulb holder. Replace the mains plug and
switch on.
If the light still fails, obtain a replacement E14
screw-cap type 15 Watt (Max) bulb from your
local electrical store and then fit it .Carefully
dispose of the burnt-out light bulb immediately.
Cleaning and care
Interior and Exterior Surfaces
Attention
Always unplug the power cable or switch
off the circuit breaker before cleaning.
Clean the exterior using lukewarm water and
a mild detergent.
Never use detergents, abrasive or acidic
agents.
Wipe the inside compartment dry.
Be careful to prevent water from getting into
contact with the electrical connections of the
temperature control or the interior light.
If the device is not going to be used for a long
period of time, switch it off and remove all food.
Clean the device and keep the door open.
To preserve the appearance of your device,
you can polish the exterior and the door
accessories with a silicone wax.
Cleaning of the accessories
Door shelves:
Remove all food from the door shelves.
Lift the cover of the shelf upwards and pull it
off sideward.
Remove the bottom of the door shelf by
pushing it upwards.
Crisper or Drawers:
To clean a drawer, pull it out as far as possible,
tilt it upwards and then pull it out completely.
7

en enen en
Practical tips and notes
Cooling
• Clean fresh food and vegetables before
storing in the crisper bin.
• Always pack or wrap food, or put it in a
suitable container, before storing it in the
appliance.
• Wrap food which is not suitable for storage
at cold temperatures in polyethylene bags
(pineapple, melons, cucumbers, tomatoes
etc.).
• Food with strong odour or apt to acquire
odour should be wrapped in airtight or smell-
proof packaging material.
• Keep fresh food separate from cooked
food, to avoid bacteria contamination.
• Never keep fresh meat in the fridge for
more than 2 or 3 days.
• Remove any left-over canned food from
the can and store it in a suitable
container.
• Refer to the shelf life indicated on the
food packaging.
• Do not obstruct the air circulation inside
the device by covering the shelves.
• Never keep any dangerous or poisonous
substances inside your device.
• Always check food that has been stored
for a long period of time for its suitability for
consumption.
• Do not store fresh and cooked food
together in the same container.
• Close the door immediately after
opening, to avoid unnecessary energy
consumption.
• Do not load hot food into your device.
Freezing
• Always leave food to thaw in a container that
allows the thawing water to run off.
• Do not exceed the maximum allowable
freezing capacity when freezing fresh food
(see the section "Freezing")
• Do not give children ice-cream and water ices
direct from the freezer.
The low temperature may cause freezer burns
on lips.
• Never re-freeze defrosted food; defrosted food
must be consumed within 24 hours. Only food
that has been cooked can be refrozen.
• Do not take out frozen food with wet hands.
• Store only fresh and impeccable food.
• Always use appropriate packaging material
to avoid odour penetration or degradation of
the food.
• Store commercially frozen food in accordance
with the instructions given on the packaging.
• Freeze cooked food in small quantities. This
ensures rapid freezing and maintains the
quality of the food.
• Do not freeze liquid in tightly closed bottles
or containers.
The bottles/containers may burst at low
temperatures.
• Carry pre-frozen food in suitable bags and
place it in your freezer as soon as possible.
Always defrost food in the fridge compartment.
8

en en
Examples of Use
White wine, beer and mineral water
Bananas
Fish or offal
Cheese
Melons
Raw meat and poultry
chill before use
do not store in a fridge
store in polyethylene bags only
use airtight containers or polyethylene
bags; for best results, take out from the
fridge an hour before consumption.
store only for a short period of time,
use airtight packaging/wrapping
do not store together with delicate
food such as cooked food or milk
Normal operating noises
Various functional noises are completely
normal due to the operation of the cooling
system of your appliance;
• Gurgling, hissing, boiling or bubbling noises
are caused by the refrigerant, circulating inside
the cooling system. These noises can still be
heard for a short period of time after the
compressor shuts off.
• Sudden, sharp cracking or popping noises
are caused by the expansion and contraction
of the inside walls or some components inside
the cabinets.
• Buzzing, whirring, pulsating or high-pitched
humming noises are caused by the
compressor. These noises are slightly louder
at the start-up of the compressor and reduce
when the appliance reaches the operating
temperatures.
9
Also to avoid disturbing vibrations and
noises make sure that;
• Your refrigerator is standing level on all four
feet.
• Your refrigerator is not in contact with the
walls, surrounding objects or kitchen cabinets
and furniture.
• Cans, bottles or dishes inside the refrigerator
are not touching and rattling against each
other.
• All shelves and bins are mounted correctly
inside the refrigerator cabinets and doors.

en en
What, if....
1- The device will not work, even though
it is switched on.
• Check if the mains plug is properly connected!
• Check if the mains supply is in order, or if a
fuse has been tripped!
• Check the temperature control for correct
setting!
2- There is a power failure.
Your freezer is suitable for the long-term
storage of frozen food that are available
commercially and also can be used to freeze
and store fresh food.
Do not open the door in case of a power failure.
For a rated appliance, frozen food in
the freezer compartment will not be affected
if the power failure lasts shorter than the
“Conservation Time From Failure (hours)”
mentioned in the rating label.
If the power failure is longer than the
“Conservation Time From Failure (hours)”,
then the food should be checked and either
consumed immediately or cooked and then
re-frozen.
3- The interior light does not work.
Check the power supply!
Check the installation of the light bulb! Unplug
the power supply before checking the light
bulb. (Also see the section “Replacing the
interior light”)
4- Other possible malfunctions
Not every malfunction is a case for our
customer service. Very often, you can easily
resolve the problem without requesting service.
Before requesting service, please check if the
malfunction has been caused by an operating
error. If this is the case, and a service has
been requested, a service charge will be levied
even if the device is still under guarantee.
10
If the problem persists please contact your
dealer or customer service.
Please have the type and serial number of
your device when calling. The rating label is
located inside.

Chill compartment volume l
Meaning of energy fiche (
Only for information purpose)
en
Noise
(dB(A) re 1 pW)
A
B
C
D
E
F
G
More efficient
Less efficient
Energy consumption kWh/year
(Based on standard test results for 24 h)
Actual comsumption will
depend on how the appliance is
used and where it is located
Fresh food volume l
Frozen food volume l
Manufacturer
Model
Energy
You may stick the energy fiche given in the polybag to the area above.
11

fr fr
1
Nous vous félicitons d'avoir choisi l'un de nos produits qui vous procurera certainement
de nombreuses années de fonctionnement de qualité.
La sécurité d'abord !
Veuillez lire la notice d'utilisation attentivement. Elle contient des informations importantes
relatives à l'utilisation de votre nouvel appareil. Si vous ne vous conformez pas aux
instructions, vous risquez de perdre votre droit à au service après-vente sans frais pendant
la période de garantie. Veuillez conserver ce manuel soigneusement et le transmettre
aux utilisateurs ultérieurs le cas échéant.
•Ne branchez pas votre appareil à l'alimentation électrique avant d'avoir enlevé tous les
emballages et protections de transport.
•Laissez-le dans la position verticale pendant au moins 4 heures avant de le brancher
afin que le système se stabilise s'il a été transporté à l'horizontale.
•L'utilisation de cet appareil s'applique exclusivement à l'usage prévu, c'est-à-dire à la
conservation et congélation des denrées alimentaires.
•L'utilisation de cet appareil dans une pièce non chauffée et froide telle qu'un garage,
jardin d'hiver, annexe, abri, à l'extérieur, etc. n'est pas recommandée. Se référer à la
section « Emplacement ».
•À la réception de l'appareil, vérifiez qu'il n'est pas endommagé et que les pièces et
accessoires sont en parfait état.
•N'utilisez pas un appareil endommagé. En cas de doute, vérifiez auprès de votre
vendeur.
•Veillez à ce que les enfants ne jouent pas avec l'appareil.
•Ne pas s'asseoir ou monter sur l'appareil ou les pièces coulissantes, et ne pas permettre
aux enfants de s'y asseoir ou monter dessus.
•Ne pas se suspendre à la porte de l'appareil.
•Ne jetez pas l'appareil au feu. L'isolation de votre appareil contient des substances sans
CFC qui sont inflammables.
•Veuillez contacter les autorités locales de votre région pour obtenir des renseignements
concernant les méthodes de mise au rebut et les installations possibles.
Avertissement -Veillez à ce que les conduits d'aération de l'enceinte de l'appareil
ou de la structure intégrée ne soient pas obstrués.
Avertissement -N'utilisez pas d'outils mécaniques ou d'autres moyens pour accélérer
le processus de décongelation autres que ceux recommandés par le fabricant.
Avertissement -Do not damage the refrigerant circuit.
Avertissement - Do not use electrical devices inside the food storage compartments
of the appliance, unless they are of the type recommended by the manufacturer.
• Évitez de toucher l'installation métallique du condenseur situé au dos de l'appareil ;
vous risquez de vous blesser.
• En cas d'anomalie éventuelle, débranchez d'abord l'alimentation électrique de l'appareil.
• Avant de procéder au nettoyage de l'appareil, débranchez toujours l'appareil ou coupez
le disjoncteur. Ne tirez pas sur le câble d'alimentation. Débranchez à partir de la prise.
• Les réparations de l'appareillage électrique sont réservées exclusivement aux spécialistes
qualifiés. Si le câble d'alimentation est endommagé, il doit être remplacé par le constructeur
ou service clientèle afin d'écarter tout danger.

fr fr
Instructions de transport
L'appareil doit être transporté en position debout
uniquement.
L'emballage fourni doit rester intact pendant
le transport.
Si l'appareil est transporté dans la position
horizontale, il ne peut être mis en service que
4 heures après avoir été redressé.
L'appareil doit être protégé contre la pluie,
l'humidité et autres conditions atmosphériques.
La responsabilité du fabricant n'est pas
engagée en cas de non-respect des instructions
de sécurité.
Mise au rebut
Rendez l'appareil inutilisable immédiatement.
Débranchez la prise d'alimentation et couper
le câble électrique. Retirez ou détruisez les
fermetures à bascule ou à ressort avant de
vous débarrasser de l'appareil. Ceci permet
d'éviter aux enfants de s'enfermer dans
l'appareil et de mettre ainsi leur vie en danger.
Installation de l'appareil
• Ne faites pas fonctionner votre appareil dans
un local dont la température peut descendre
en dessous de 10 °C la nuit et/ou
particulièrement en hiver. En cas de
températures inférieures, l'appareil peut ne
pas fonctionner correctement et réduire ainsi
la durée de conservation des denrées.
• La classe climatique de votre appareil est
indiquée sur la plaque signalétique située à
l'intérieur de l'appareil. Elle stipule les
températures ambiantes de fonctionnement
appropriées comme suit.
Classe climatique Températures ambiantes
SN.......................+10 °C à 32 °C
N .........................+16 °C à 32 °C
ST .......................+18 °C à 38 °C
T..........................+18 °C à 43 °C
SN-ST.................+10 °C à 38 °C
SN-T ...................+10 °C à 43 °C
Emplacement
Placez l'appareil uniquement dans des endroits
secs pouvant être aérés.
Évitez la lumière du soleil directe ou sources de
chaleur directes telles qu'un four ou un radiateur.
Si cela n'est pas possible, il est indispensable
d'observer les distances minimales suivantes:
Cuisinières électriques : 3,00 cm
Radiateur : 3,00 cm
Dispositifs de réfrigération : 2,50 cm
•Veillez à ce que votre appareil dispose d'une
circulation d'air appropriée
•Assurez-vous de laisser suffisamment d'espace
autour de l'appareil pour que l'air puisse circuler
librement.
•L'appareil doit être placé sur une surface lisse.
Les deux pieds avant peuvent être ajustés si
nécessaire. Pour faire en sorte que votre appareil
soit à niveau, réglez les deux pieds avant en
tournant dans le sens des aiguilles d'une montre
ou dans le sens inverse jusqu'à ce que l'appareil
soit bien calé au sol. Un bon réglage des pieds
évite les vibrations et bruits excessifs.
Couvercle de circulation d'air en bas (Fig.9)
Fixez la grille d'aération inférieure fournie avec
l'appareil tel qu'illustré dans le schéma, les
fixations placées face à face au niveau des pieds
en bas de la porte. Assurez-vous que les fixations
sont correctement engagées.
Branchements électriques
Avertissement
Cet appareil doit être branché à une borne de
mise à la terre.
•Vérifiez si le type de courant et le voltage de
votre installation correspondent aux indications
de la plaque signalétique située à l'intérieur de
l'appareil.
•La sécurité électrique de l'appareil n'est assurée
que si le système de mise à la terre de l'habitation
est installé conformément aux prescriptions.
•Lors de l'installation de l'appareil, veillez à ce
que le câble d'alimentation ne soit pas coincé
dessous, dans quel cas ce dernier serait
endommagé.
•Veillez à ce que la prise soit facile d'accès. Ne
pas utiliser de prise multiple ni de rallonge.
•Les spécifications électriques de votre appareil
sont indiquées sur la plaque signalétique située
à l'intérieur de l'appareil.
•Placez le câble d'alimentation électrique de
façon à faciliter le branchement et la coupure
après l'installation.
•Un séparateur de contact doit être utilisé si le
câble d'alimentation n'est pas accessible. (pour
les modèles encastrés)
2

fr fr
Canalisations de circulation d'air froid
Compartiment de congélation rapide
Etagère de la porte du compartiment
congélateur
Etagères du compartiment réfrigérateur.
Support à œufs amovible
Casier à bouteilles
Pieds avant réglables
Couvercle de circulation d'air en bas
Bacs à légumes
Couvercle du bac à légumes
Filtres d'humidité
Clayettes en verre réglables
Eclairage en verre du compartiment
réfrigérateur
Canalisations de circulation d'air froid
Bouton de thermostat du compartiment
réfrigétateur
Bac à glaçons
Distributeur de glaçons
1.
2.
3.
4.
5.
6.
7.
8.
9.
10.
11.
12.
13.
14.
15.
16.
17.
3
Apprendre à connaître votre
appareil
Avertissement
Les renseignements suivants relatifs aux
accessoires sont fournis à titre indicatif
uniquement. Les accessoires ci-dessous
peuvent ne pas correspondre exactement aux
accessoires de votre appareil.
Comment utiliser les
accessoires
Distributeur de glaçons
Remplissez les distributeurs de glaçons avec
de l'eau et placez-les correctement. Vos
glaçons seront prêts en environ deux heures.
Vous n'avez pas besoin de sortir le distributeur
de glaçons pour obtenir des glaçons ; tournez-
le simplement à 90° sur la droite et les glaçons
tomberont dans le bas à glaçons situés en
dessous. Puis sortez le bac à glaçon pour
servir les glaçons. Si vous le désirez, vous
pouvez laisser les glaçons dans le bac un
moment (Fig. 3-4).
Attention Le bac à glaçons a pour seul usage
de collecter les glaçons. Si vous mettez de
l'eau dedans, il cassera.
Compartiment de congélation rapide
(Fig. 5).
Tenez le couvercle du compartiment de
congélation rapide tel qu'illustré dans le
schéma, et soulevez-le en le faisant bouger
librement dans sa rainure. Pour le refermer,
réalisez l'opération inverse.
Attention Assurez-vous que le coucercle du
compartiment de congélation rapide est fermé
avant de refermer la porte du compartiment
congélateur.
Séparateurs du bac à légumes (Fig. 6)
Ces séparateurs colorés des bacs à légumes
ont été conçus pour conserver vos fruits et
légumes frais et empêcher qu'ils ne soient
écrasés. En déplaçant le séparateur, vous
pouvez les placer dans l'espace ainsi
aménagé. S'il n'est pas nécessaire, le
séparateur peut être collé contre le fond et
bloqué dans cette position.
Filtre d'odeurs (Fig. 8)
Il est situé sur le plafond de l'appareil et
empêche la formation de mauvaises odeurs
sur vos produits.
A)
B) Compartiment congélateur
Compartiment réfrigérateur
Fig. 1
Table of contents
Languages:
Other Beko Refrigerator manuals

Beko
Beko 74785 MSD User manual

Beko
Beko CFD6914W User manual

Beko
Beko FSE 21906 S User manual

Beko
Beko BCSA306KFSN LH Instruction Manual

Beko
Beko DSA 25021 X User manual

Beko
Beko CNA365E20ZX Instruction Manual

Beko
Beko GNE 60500 X User manual

Beko
Beko CN 136222 X User manual

Beko
Beko RCSA270K30WN User manual

Beko
Beko RDNE455E30DZXPN User manual

Beko
Beko DNE69623 User manual

Beko
Beko nstallation & operating instructions and washing... User manual

Beko
Beko CN228220S type II User manual

Beko
Beko CS234022 User manual

Beko
Beko FXS 3584 S User manual

Beko
Beko LSG1545DS User manual

Beko
Beko DS 145010 User manual

Beko
Beko B5RCNA365HW User manual

Beko
Beko B 1752 User manual

Beko
Beko CN153220DH_1 User manual