Pleasereadthefollowinginformation.
Otherwise,theremaybetheriskof
personal injury or material damage.
Moreover,anywarrantyandreliability
commitment will become void.
General Safety
• Neverplaceyourmachineona
carpetcoveredfloor.Otherwise,
lack of airflow from below your
machine may cause electrical parts to
overheat. This may cause problems
with your washing machine.
• Ifthepowercableormainsplugis
damaged you must call Authorized
Service for repair.
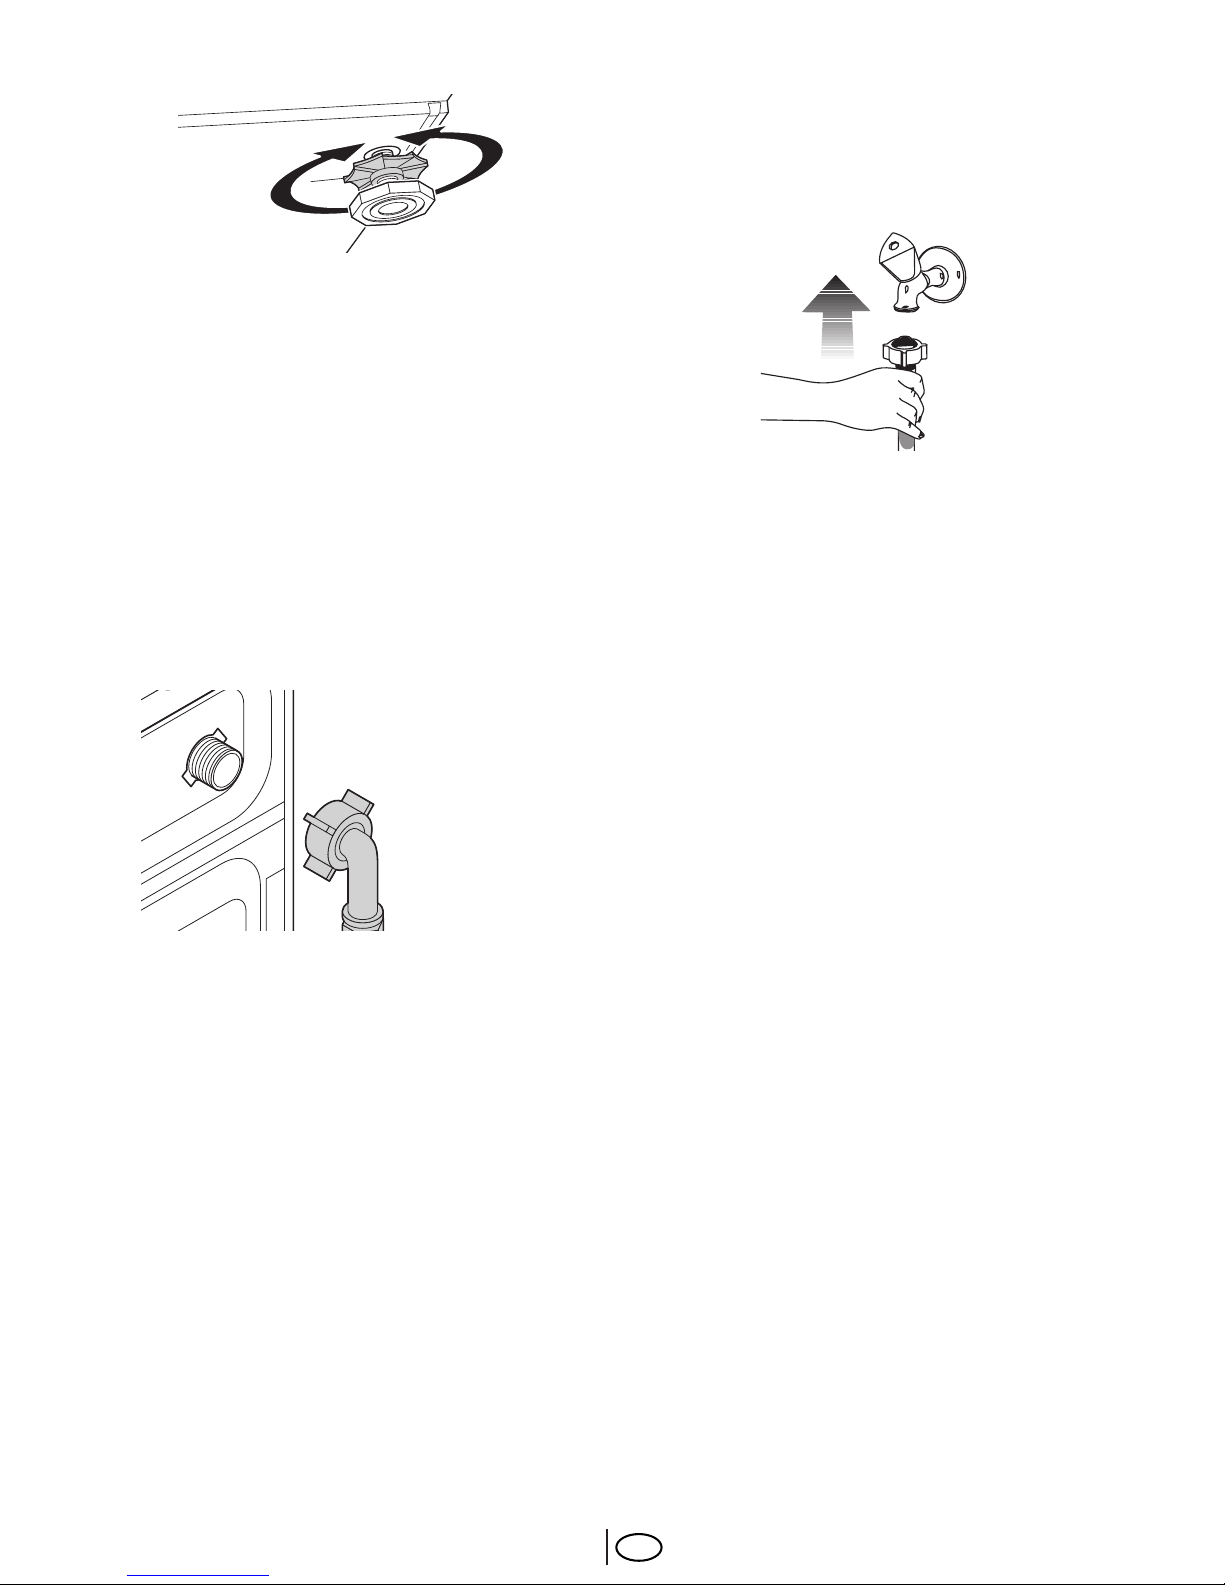
• Checkwaterhosesforwear.Donot
use old/used water inlet hoses. These
may cause stains on your laundry.
• Fitthedrainhoseinto the waste
water system securely to prevent any
water leakage and to allow machine
to take in and discharge water as
required. It is very important that the
water intake and drain hoses are not
folded, squeezed, or broken when
the appliance is pushed into place
after it is installed or cleaned.
• Yourwashingmachineisdesignedto
continue operating when the power
restores after a power interruption.
Youcannotcancelanyprogramby
pressingthe“On/Offbutton.”The
machine will resume its program
whenthepowerrestores.Pressthe
“Start/Pause/Cancel”buttonfor3
secondstocanceltheprogram(See,
CancellingaProgram)
• Theremaybesomewaterinyour
machine when you receive it. This is
from the quality control process and
is normal. It is not harmful to your
machine.
• Someproblemsyoumayencounter
may be caused by the software.
Press“Start/Pause/Cancel”button
for 3 seconds to cancel the program
set in your machine before calling the
authorized service.
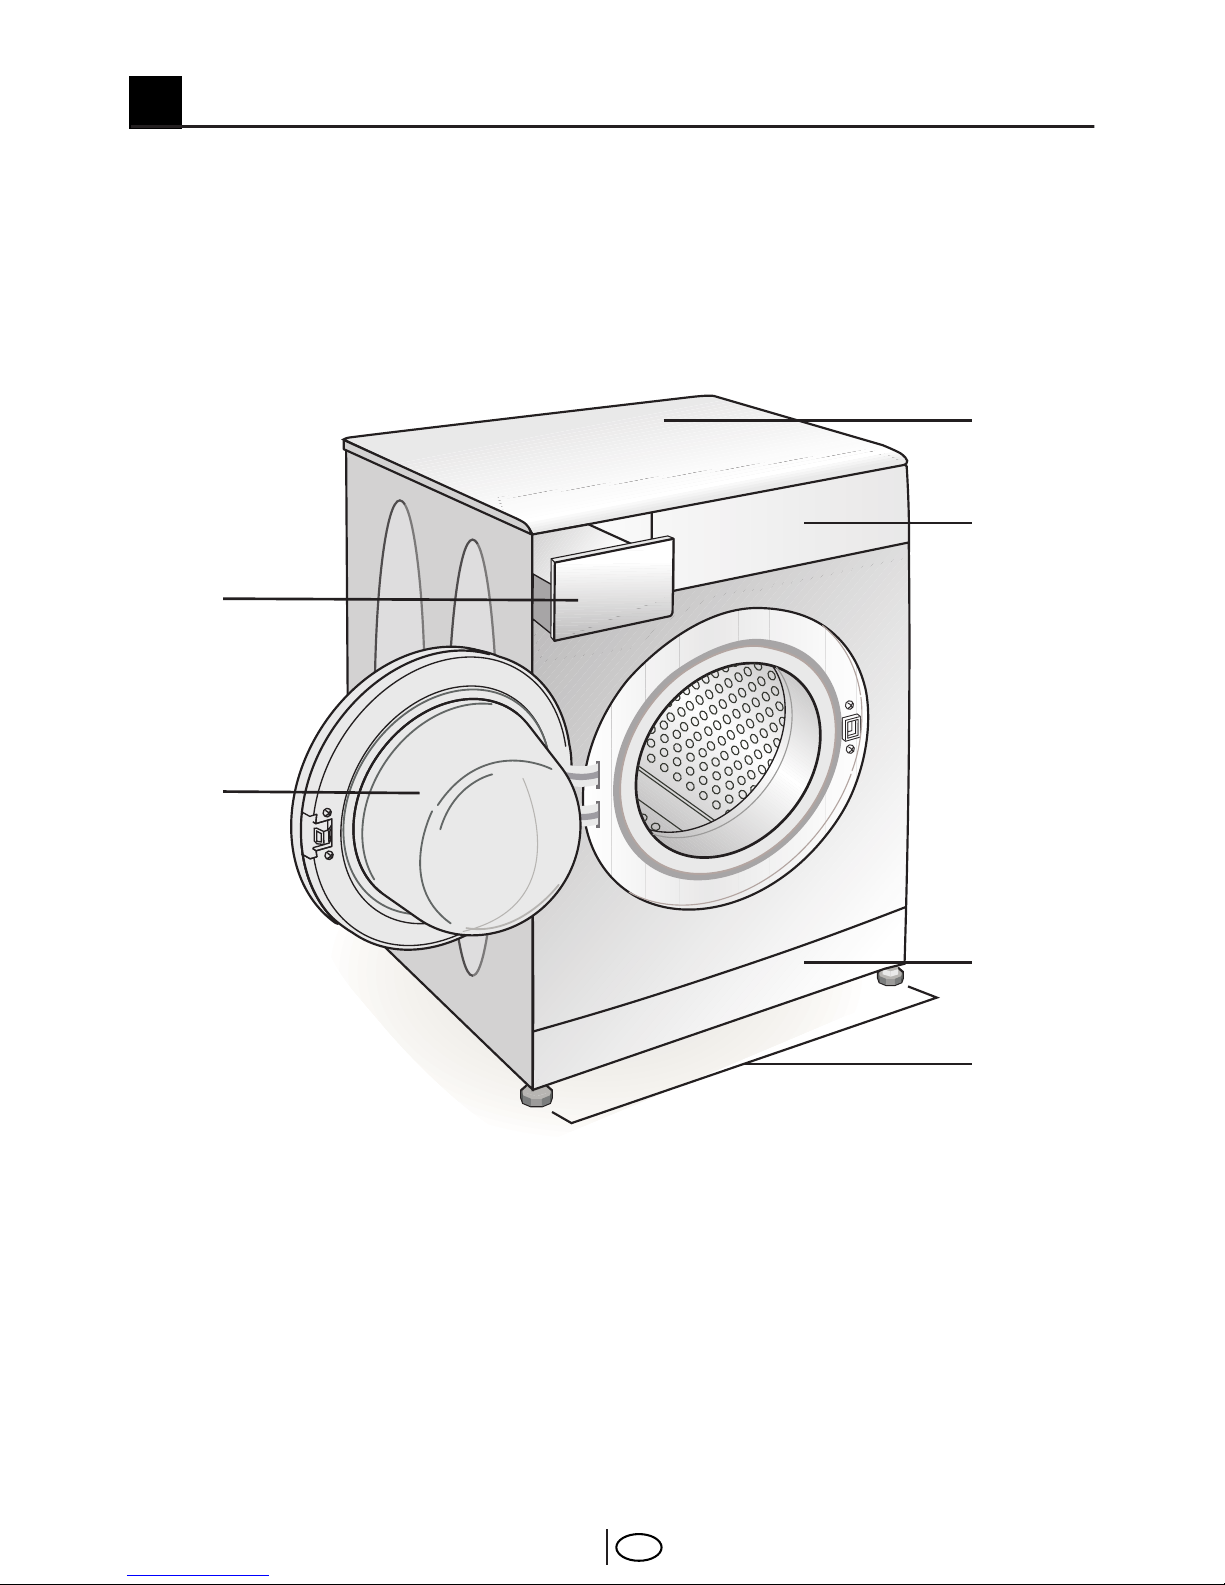
First Use
•Toprepareyourmachinefor
washing, carry out your first washing
process without loading your
machine and with detergent under
“Cottons90°C”program.
• Ensurethatthecoldwater
connections has been made correctly
when installing your machine.
• Ifthecurrentfuseorcircuitbreakeris
less than 15 Amperes, please have
a qualified electrician install a 15
Ampere fuse or circuit breaker.
• Tomakeyourmachinereadyforuse,
please be sure that the tap water
supply and water drainage systems
are appropriate before calling the
authorized service. If they are not,
call a qualified plumber to have any
necessary arrangements carried out.
Intended use
• Thisproducthasbeendesignedfor
home use.
•Theappliancemayonlybeusedfor
washing and rinsing of textiles that
are marked accordingly.
•Onlydetergents,softenersand
supplements suitable for washing
machines may be used.
•Observethecareinstructionslabelled
on textile products and any other
instructions given by companies that
produce detergents for your machine.
Safety instructions
•Thisappliancemustbeconnectedto
an earthed outlet protected by a fuse
of suitable capacity.
•Thesupplyanddraininghosesmust
always be securely fastened and
remain in an undamaged state.
• Fitthedraininghoseto a washbasin
or waste system securely before
starting up your machine. There may
be a risk of being scalded due to high
washing temperatures!
• Neveropenthedoororremovethe
filter while there is still water in the
drum.Otherwise,theremaybethe
2 Warnings