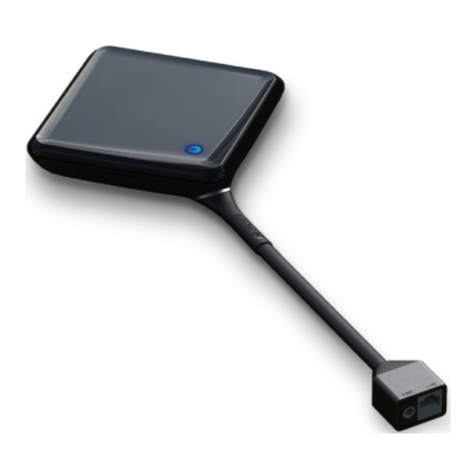
Belair BelAir20E User manual

BelAir20E
Page 1 of 8
Document Date: March 23, 2012
Document Number: BDTQ02201-A04
Document Status: Standard
Security Status: Confidential
Customer Support: 613-254-7070
1-877-BelAir1 (235-2471)
techsupport@belairnetworks.com
© Copyright 2012 by BelAir Networks.
The information contained in this document is confidential and proprietary to BelAir Networks. Errors and Omissions Excepted.
Specifications may be subject to change. All trademarks are the property of their respective owners.
Protected by U.S. Patents: 7,171,223, 7,164,667, 7,154,356, 7,030,712 and D501,195. Patents pending in the U.S. and other countries.
BelAir Networks, the BelAir Logo, BelAir200, BelAir200D, BelAir100, BelAir100S, BelAir100C, BelAir100T, BelAir20, BelAir20M, BelAir20E, BelAir20EO, BelAir100M,
BelAir100i, BelAir100SN, BelAir100SNE, BelAir100N, BelAir100P, BelAir1000, BelAir1100, BelAir2100, BelAir3200, BelAirCC8000, BelView, BelView NMS and BelAir
Business Intelligence are trademarks of BelAir Networks Inc.
BelAir20E
Quick Install Guide

BelAir20E Quick Install Guide Getting Started
March 23, 2012 Confidential Page 2 of 8
Document Number BDTQ02201-A04 Standard
Getting Started
Package Contents
BelAir20E Power Adapter
Ethernet Cable Fastening
Hardware
Quick Install
Guide
Screw Hole
Te m p l a t e

BelAir20E Quick Install Guide Getting Started
March 23, 2012 Confidential Page 3 of 8
Document Number BDTQ02201-A04 Standard
Hardware
Description
Internet Port The
Internet
port of the BelAir unit supports IEEE 802.3af or IEEE 802.3at
Power over Ethernet (PoE) from a 48 V DC switch or power injector:
• Use IEEE 802.3af PoE if only connecting to the
Internet
port.
• Use IEEE 802.3at PoE if connecting to the
Internet
port and any of the
LAN
ports.
The PoE switch or power injector must meet local and national regulatory
requirements.
Power Connector The BelAir unit does not have a power switch. It is powered on when
connected to a power source. The power adapter automatically adjusts to any
voltage between 100~240 volts at 50 or 60 Hz. The BelAir unit draws up to
0.35 A at 48 V DC (16.8 W).
Reset Button This button is used to restore the factory default configuration using a paperclip
or pen tip. If you hold down the button for 15 seconds or more, until all of the
LEDs turn off, any configuration changes you may have made are removed, and
the factory default configuration is restored to the BelAir20E.
Warning
The AC Power Adapter relies on the rated fuse or circuit
breaker of the wall outlet (15 A in North America, 10 A in
Europe).

BelAir20E Quick Install Guide Getting Started
March 23, 2012 Confidential Page 4 of 8
Document Number BDTQ02201-A04 Standard
For More
Information
The
BelAir20E User Guide
and the
BelAir20E Troubleshooting Guide
are
available online at http://support.belairnetworks.com.
In general, BelAir Networks recommends that you do the following steps to
seek the information you want:
1 Refer to the
Troubleshooting Guide
of the unit to see if it describes your
situation. If it does, do the provided corrective actions.
2 If the troubleshooting guide does not cover your situation, contact your
BelAir Networks product representative
3 If you still need assistance, use the BelAir Networks online support center
at http://support.belairnetworks.com
4 Finally, if your issue is not resolved, contact BelAir Networks:
—613-254-7070, option 2
—1-877-BelAir1 (235-2471), option 2

BelAir20E Quick Install Guide Installing the BelAir20E
March 23, 2012 Confidential Page 5 of 8
Document Number BDTQ02201-A04 Standard
Installing the BelAir20E
Step 1—Select
Location
Choose a proper place for the BelAir unit. In general, the best location is at the
center of your wireless coverage area, within line of sight of all wireless devices.
For optimum performance, consider these guidelines:
• Mount the BelAir unit as high as possible above any obstructions in the
coverage area.
• Avoid mounting next to or near building support columns or other
obstructions that may cause reduced signal or null zones in parts of the
coverage area.
• Mount away from any signal absorbing or reflecting structures (such as those
containing metal).
The BelAir unit can be mounted on any horizontal surface, on a wall or from a
hanging ceiling.
The BelAir unit is UL2043 Certified for Plenum mounting. Installers must use
Plenum rated Ethernet cable for installations in a building’s environmental air
space such as above suspended ceilings. Installers must follow local and national
codes for above ceiling installations.
Warning
Do not install the BelAir unit in any areas where blasting
(blasting caps, radio controlled equipment) or explosive gases
may be present.
Warning
The BelAir unit, its AC power adapter, and its cables are not
designed for outdoor use. They must be located indoors.
Warning
To comply with FCC radio frequency (RF) exposure limits
(FCC OET 65C) for the general population, antennas must be
located at a minimum distance of 10 8 inches (approx. 25 cm)
or more from the body of all persons.

BelAir20E Quick Install Guide Installing the BelAir20E
March 23, 2012 Confidential Page 6 of 8
Document Number BDTQ02201-A04 Standard
Step 2—Mount on
a Flat Surface
The BelAir unit should be mounted only to a flat surface that is at least 1/2-inch
plywood or its equivalent. To mount the BelAir unit on a ceiling or wall, always
use the pan head Phillips screws provided with the unit.
1 Attach the mounting screws to a ceiling:
—Use the include Screw Hole Template as a guide.
—For concrete or brick walls, drill holes and use the included nylon wall plugs.
—For T-rail installations, drill 3/32-inch (2.4-mm) pilot holes.
—Leave a 5/16-inch (8-mm) gap so you can slide the BelAir unit over the screw
heads.
2 Attach the BelAir unit to the mounting screws:
a Line up the two mounting slots on the bottom of the unit with the two mounting screws.
b Slide the unit across into position so that the mounting screws support the BelAir unit.
c Adjust the screw depth as required so that there is a snug fit between the BelAir unit and
the mounting screws.

BelAir20E Quick Install Guide Installing the BelAir20E
March 23, 2012 Confidential Page 7 of 8
Document Number BDTQ02201-A04 Standard
Step 3—Connect
and Power On
The BelAir20E can get its operating power directly from an AC wall outlet or
from the
Internet
port when connected to a device that provides IEEE 802.3af
or 802.3at compliant Power over Ethernet (PoE). If the BelAir20E is connected
to both a PoE source device and an AC power source, AC will be disabled.
Figure 1: Wall Outlet Power
Figure 2: Power over Ethernet
Warning
Use ONLY the power adapter supplied with this BelAir20E.
Otherwise, the product may be damaged.
Warning
If PoE is used, the BelAir20E must be connected to a power
source that complies to IEEE 802.3af or 802.2at, or to an IEC/
EN 60950-1 compliant power limited source.
BelAir20E
Outlet
Existing Modem
Ethernet Jack
48 V DC
100 to
240 V AC
Internet
BelAir20E
IEEE 802.3af
or 802.3at
Power
Injector Internet
Ethernet Source
Note: Inserting the PoE cable into a LAN port does not harm the unit.
Outlet

BelAir20E Quick Install Guide Installing the BelAir20E
March 23, 2012 Confidential Page 8 of 8
Document Number BDTQ02201-A04 Standard
BelAir Networks Inc.
603 March Road
Kanata, Ontario
Canada
K2K 2M5
1-877-BelAir1 (235-2471)
613-254-7070
General Information
info@belairnetworks.com
Sales
sales@belairnetworks.com
Technical Support
Visit us on the web at:
www.belairnetworks.com
8
Step 4—Check
LEDs
After powering on, wait 2 minutes and check that the unit’s LED match those in
Ta b l e 1 .
If the LED behavior does not match Ta b l e 1 , refer to the BelAir20E
Troubleshooting Guide.
Step 5—Configure
Unit
You can configure the BelAir20E through its Web interface or Command Line
Interface (CLI). Refer to the
BelAir20E User Guide
for complete details.
POWER INTERNET2.4G 5G
Table 1: LED Behavior
LED Behavior
POWER Blue
2.4G Blue
5G Blue
INTERNET Blue or flashing blue
Table of contents
Other Belair Wireless Access Point manuals

