BelFone BF-TD512 User manual

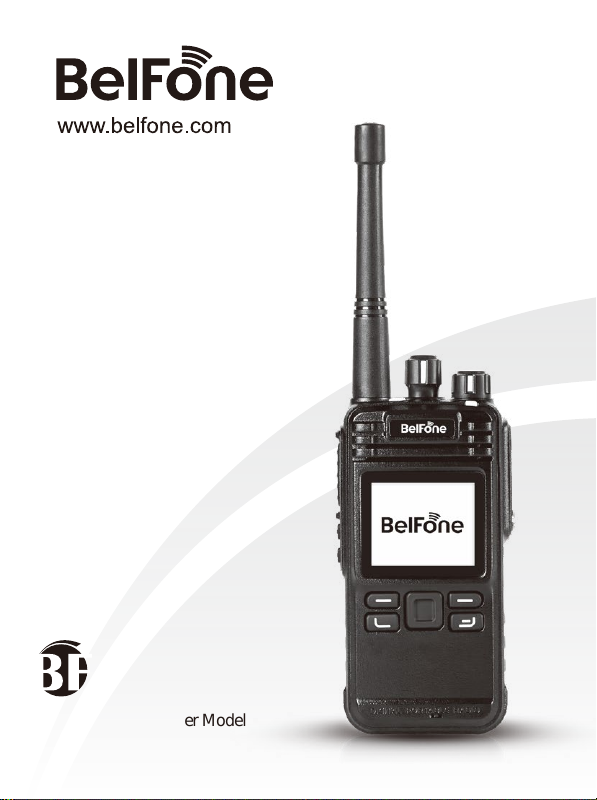
Digital FM Transceiver Model
-TD512


THANK YOU!
Notice to the user
We are grateful you choose BelFone series professional radio
communications products!
Since 1989, BelFone has been always engaging in research and exploration
of radio communications technologies, In order to lead intelligent technologies
in the industry. We still make every effort to research and design products
according to modern complicated communications environment, and we offer
complete and customized communication solutions to clients. Our products
will satisfy you because of its excellent performance and outstanding
communications strength. No matter what field you are in. You will be Satisfied
with the radio.
This manual is applicable to
VHF/UHF digital FM transceiver model: BF-TD512
Government law prohibits the operation of unlicensed radio transmitters
within the territories under government control.
Illegal operation is punishable by fine or imprisonment or both.
Warning!
◆ In explosive atmospheres(inflammable gas, dust particles, much powder
area,etc.),please turn the power off.

Precautions
It’s important that the operator is aware of and understands hazards
common to the operation of any radio .Please observe the following
safety precautions to prevent radio damage or personal injury. The
following precautions shall be observed during operation, service and
repair of this radio.
◆ The recommended usage rate is 1 minute for TX and 4 minutes for RX,
when the radio is used for transmission for many hours continuously, the
radiator and chassis will become hot, allow the rear panel of the radio to
contact surface of low melting point /low Ignition point object;
◆ Don’t leave the transceiver in direct sunlight for a long time, don’t place the
transceiver on extremely heat, damp, dusty area, and don’t put it on unstable
surfaces;
◆ When restriction or warnings are posted regarding the use of radio devices,
please obey the regulation turn the transceiver power off;
◆ Use of the radio while you are driving may be against traffic laws, please
prohibit using it ;
◆ If you notice any problems on the radio, please turn off at first. Then contact
with local dealer. Do not modify this radio unless instructed by this manual or
refer service to a qualified licensed or certified technician only;
◆ If you want to use the machine for secondary development, please contact
with BelFone’s technical engineer or dealer for technical assistance;
◆ Please keep the surface of radio is clean and dry, clean the radio using a
cloth moistened with clean water and a mild dishwashing liquid.

Content
Supplied Accessories······················· · ·····················01
Installation of Accessories········································02
Getting Acquainted···············································06
Basic Operation·················································07
LCD Icons·····················································07
Turning the power on /off··········································08
Adjusting the volume·············································08
Selecting a Channel·············································08
Selecting a Zone·········································· · ·····08
Call··························································09
Button Setting··················································10
Functions and Operations·········································12
Contacts ·····················································12
Scan·························································13
Zone·························································14
SMS·························································14
Call Logs·····················································15
Setting·························································15
Digital Emergency··············································17
Alone Worker·················································18
Man Down····················································19
GPS Positioning ········································· · ·····19
Voice Encryption········································· · ·····20
Dual Capacity Direct Mode······································20
Radio Priority-Based Interrupt····································20
Time-Out-Timer(TOT)········································ · 20
TX Permission··········································· · ···· · 21
Battery Saver··················································· · 21
Low Battery Warning············································ · 21
Voice Recording········································· · ·····22
Analog Mode··················································22
CTCSS/CDCSS·············································· · · 22
CTCSS Frequency Table···········································23
CDCSS Standard Code Table·······································24
Specifications················································ · · · 24
Statement················································· · · · · · 26

Supplied Accessories
Notes: The accessories listed below are covered by BelFone dealer, authorized
BelFone agents or factories.
After carefully unpacking the transceiver, identify the items listed in the table
below. If any items are missing or have been damaged during shipment please
contact with dealer immediately.
Accessories
Number Quantity
1
1
1
1
1
1
1
1
1
Items
Antenna
Strap
Belt Clip
Charger
Li-ion Battery
Screws
User Manual
Warranty Card
Certificate
01
StrapAntenna
Belt Clip ScrewsLi-ion Battery
Charger

Hold the supplied antenna by its
base, then screw it into the connector on
the top panel of the radio until fasten.
Turn the antenna anti-clockwise to
remove it.
Attaching/Removing the
belt clip
Installation/ removing the
antenna
Attach the belt clip using the two
supplied3*4mm binding screws.
Attaching/Removing the Strap
Thread the hand strap to the loop back
of your two-way radio.
Installation of Accessories
02

Warning!
Don’t short-circuit the battery, it may cause the battery damaged or burst into flame;
Never attempt to remove the casing from battery, that avoid to short the battery terminal;
Battery is flammable objects, don’t throw it into fire or don’t use it on dangerous area.
Attaching/Removing the Battery
Match the guides of the battery with
the corresponding grooves on the upper
rear of the radio, then press the battery
until a click is heard to lock it in place.
To remove the battery, please turn the
power off then press the release latch to
unlock the battery pull the battery away
from the radio.
Note: Don’t attach / remove the battery if
the transceiver turned on.
Battery Information
New battery is shipped not fully charged from the factory, please charge your
battery before using it, charging a new battery for 5 hours before initial use. The
maximum battery capacity and performance is achieved after three full
charge/discharge cycles. If you notice the battery power runs lows, please
recharge the battery.
03

To reduce the risk of injury, please only use the battery and charger specified by
BelFone, other batteries may burst, causing bodily injury and property damage.
Applicable Battery
● When charging your battery, keep it at a temperature among 5 -40 .
Temperature out of the limit may cause battery leakage or damage.
● When charging a battery attached to a radio, turn the radio off to ensure a full
charge.
● Do not cut off the power supply or remove the battery when charging a battery.
● Never charge a battery that is wet, please dry it with soft cloth prior to charge.
● Even if the battery is full charged, the operating time is noticeably shorter than
normal performance; it is time to buy a new battery.
Battery Tips
To Prolong Battery Life
1. Battery performance will be greatly decreased at a temperature below 0 , a
spare battery is necessary in cold weather, the cold battery unable to work in this
situation may work under room temperature, so keep it for later use.
2. The dust on the battery contact may cause battery breakdown, please use a
clean dry cloth to wipe it before attaching the battery to the radio.
Battery Storage
1. Fully charge a battery before you store it for a long time, to avoid battery
damage due to over-discharge.
2. Recharge a battery after several months’ storage, to avoid battery capacity
reduction due to over-discharge. (NI-MH batteries: 3 months, Li-Ion& Li-polymer
batteries: 6 months)
3. Store your battery in a cool, dry place under room temperature, to reduce
self-discharge.
04

Use only the charger specified by the manufacturer, the charge indicator indicates
the charging progress.
1. Plug the AC connector of the switching power into the AC outlet socket.
2. Place the battery or the radio is attached with a battery in the charger.
3. Making sure the battery is connected to the charger, the charging process
initiates when the charger indicator glows red.
4. The charger indicator glows green when the battery is fully charged, please
remove the battery then.
Note: While charging the temperature out of the limit the LED indicator
of charger will flash red and green; if battery has damaged or battery is
not connected to the charger correctly,
The LED indicator of charger also will flash red and green
Charging the battery
Charge Steps:
Attaching the
Speaker/Microphone
Open the accessory jack cover, then align
the plug with the accessory jack and tighten
the screw on the plug.
05
Charger Status
Standby(No-load)
Battery is charging
Battery is fully charged
Charger Indicator
Charge Indicator glows green
Charge Indicator glows red
Charge Indicator glows green

Getting Acquainted
①Channel Selector Knob
Turn the knob to select channel 1-16.
②Power switch/volume adjust keys
Turn clockwise to switch the radio power on, when the radio is turned on, rotate
clockwise to increased volume, counter- clockwise to decrease the volume. Turn
counterclockwise fully to switch the radio off.
③LED Indicator
When transmitting LED glows red, when receiving LED glows green; when
un-programmed LED flashes red; when scanning LED flashes red.
④Orange Button
Press to activate the programmable function. (The detailed consult to basic
operation)
⑤Speaker
⑥MIC
06
1
2
3
4
5
6
7
8
9
10
11
12
13
14
15

Basic Operation
⑦PTT Key
Press and hold down the PTT key then speak into the microphone to transmit.
⑧Button 1
Press to activate the programmable function. (The detailed consult to basic
operation)
⑨Button 2
Press to activate the programmable function. (The detailed consult to basic
operation)
⑩ MIC-SP-USB Jack
Connect to optional speaker/MIC and USB programming cable.
07
Signal Strength
High/Low Power
Digital Mode
Analog Mode
Analog compatible digital
Digital compatible analog
Private Call
Group Call
All Call
Scanning On
Unread message
Inbox or Outbox Full
Message send successfully
Message send Failed
Read Message Inbox
Unread Message Inbox
Missed Call
Keypad Locked
Disable All Tone Alert
Emergency On
VOX on
Plug in earphone
Direct /Talk around Mode
Monitoring/Permanent Monitoring
Connect to Computer
GPS On
Record On
Battery Capacity
LCD Icons

Turning the power on /off
Rotate the power switch/volume adjusting keys clockwise to turn the power on.
Rotate the power switch/volume adjusting keys anti-clockwise to turn the power off.
Adjusting the volume
After the radio is power on, you can rotate the power switch/volume adjust keys
to adjust the volume level, rotate the knob clockwise to increase the volume, or
rotate the knob anti-clockwise to decrease the volume.
Selecting a Channel
Turn the channel selector knob to select channel 1 to 16, rotate the knob
clockwise to increase the channel number, or rotate the knob anti-clockwise to
decrease the channel number, while enable all tone alert ,handover channel will
hear a channel number.
Note: If a channel is not programmed, the display appears:Un-programmed Channel
and prompt no channel, LED indicator flash red.
Selecting a Zone
The radio supports up to 32 zones, each with a maximum of 16 channels, 32
zones all support up to 512 channels. You may select a desire zone through
enter zone menu or setting zone selection function to orange button, button 1 or
button 2, then handover zone. While enable all tone alert, select zone will hear a
channel number.
Dual Modes Switching
If current channel mode is D/A compatible, press side button【AD Switch】
function to switch the channel mode. The current channel mode is digital
compatible analog , press 【AD Switch】button to switch to analog compatible
digital mode; the current channel mode is analog compatible digital, press 【AD
Switch】button to switch to digital compatible analog mode.
Note: AD Switch function only switching the channel mode temporarily, while you
restart the radio or rotate channel selector knob, the current channel will resume to
default mode.
08

Call
Each digital channel may preset a contact, the preset contact could be a private
call contact, a group call contact or an all call contact; on analog channel press and
hold down the PTT key to transmit. On digital compatible analog channel press
PTT key, if is not within hang time to transmit analog call, within the preset time
period to call back; On analog compatible digital channel press PTT key, if is not
within hang time to transmit digital call, within the preset time period to call back;
To transmit press and hold down the PTT key, LED indication glows red, speak
into the microphone, hold the palm microphone approximately 3 to 4 centimeters
away from your mouth.
Note: While enable talk permit indication feature, if the channel available, press PTT key
to transmit will with a tone.
● If you preset a group call contact for current digital channel, press PTT key to
transmit a group call;
● Enter Contacts menu to select the group call number you want to call, then
press PTT key to transmit a group call;
● Enter Call Log menu to select the group call number you want to call, then
press PTT key to transmit a group call;
● You can set the One Touch Call key as group call feature, then press
programmed key to transmit a group call.
If the feature “private call ACK” is enabled, to transmit a private call need to
confirm whether it is power on or activate on the current channel.
● If you preset a private call contact for current digital channel, press PTT key to
transmit a private call;
● Enter Contacts menu to select the private call number you want to call, then
press PTT key to transmit a private call;
● Enter Contacts menu and go to manual dial menu input a private call number
you want to call, then press PTT key to transmit;
● Enter Call Log menu to select the private call number you want to call, then
press PTT key to transmit a private call.
● You can set the One Touch Call key as private call feature, then press
programmed key to transmit a private call.
2. Group Call
1. Private Call
09

● If you preset an all call contact for current digital channel, press PTT key to
transmit an all call;
● Enter Contacts menu to select the all call number you want to call, then press
PTT key to transmit an all call.
● Enter Call Log menu to select the all call number you want to call, then press
PTT key to transmit an all call;
3. All Call
On digital channel, while a private call is received, you may press the PTT key
within the preset time period to call back. If you do not respond to a received
private call within the preset time period, the radio will display the missed call
icon; while a group call is received, you may press the PTT key within the preset
time period to call back. If you do not respond to a received group call within the
preset time period, the radio will display the missed call icon; while an all call is
received, you can’t respond to an all call.
Note: While enable channel free indication feature, if the transmitter release PTT key
will with a tone.
Receiving and responding to a call
For enhanced convenience, you may program the keys button1, button2, short
and Long press of a key can be assigned with different functions.
Programmable keys are including functions listed below, icon
indicates functions that are available on analog mode.
Button Setting
10

11
Description
Not assigned with any function
Quick transmit group call/ private call/call
alert or preset SMS
To send emergency information, only set
short press on orange button
To exit emergency mode, only set long
press on orange button
To enable or disable monitor function
Quick switch backlight mode
To lock or unlock the keypad quickly
To enable or disable scan function quickly
To enable or disable all tones quickly
Quick view battery capacity
Quick access to short message
Quick access to Zone Toggle
To enable or disable GPS quickly
To interrupt activity of current channel
forcibly
To temporarily switch channel mode to
AD or DA
To enable or disable flashlight quickly
Quick access to Address List
Quick access to Radio Enable
Quick access to Radio Disable
Quick access to Radio Check
Quick access to Remote Monitor
To switch High/Low Power quickly
To enable or disable talk around quickly
To enable or disable VOX quickly
To temporarily ignore unwanted channel
activity
To enable or disable record quickly
To enable or disable permanent monitor
function
No.
1
2
3
4
5
6
7
8
9
10
11
12
13
14
15
16
17
18
19
20
21
22
23
24
25
26
27
Shortcut Keys
Unassigned
On Touch Call 1-6
Emergency On
Emergency Off
Monitor
Backlight Auto On/Off
Keypad Lock
Scan On/Off
All Alert Tones On/Off
Battery Indication
Short Message
Zone Toggle
GPS On/Off
Priority Interrupt
AD Switch
Flashlight On/Off
Address List
Radio Enable
Radio Disable
Radio Check
Remote Monitor
High/Low Power
Repeater/Talkaround
Vox On/Off
Nuisance Delete
Record On/Off
Permanent Monitor

Contacts
Functions and Operations
Contacts list can contain a maximum of 512 members, including private call,
group call, all call.
1. Group Call()
While the contacts type as group call, you can select the menu to view its ID or
send message.
2. Private Call()
While select a contact as private call, a private call can view its detail、send call
alert 、send message、edit name or number 、delete、send device check、
disable or enable、send remote monitor.
● Call Alert:Call alert is used for prompting the private receiver; ask them
respond to transmitter if communication is available. While receiving call alert
command the radio will generate alert tone.
● Device Check:This function can check if the target radio is active in the
system while don’t send any tone alert to the target radio. When the radio is
available, the screen displays: target radio has replied, while the radio is
unavailable, the screen displays: fail!
● Remote Monitor: Allow a user to send a "Remote Monitor" request to the target
device via menu. If the request is successful, you can enable the microphone of
the target radio, and monitor its activities. Only the target radio is set remote
monitor decode, that enable monitor its activities.
● Device enable : Allow a user to send "Device enable" command to the target
killed device, to allow it to be used normally.
● Device Disable: Allow a user to send "Device Disable" command to the target
device via menu. If the device is lost or stolen, a user can use this function to
disable the device. However, this device will continue monitoring air interface to
receive its "Device Enable" command.
● Delete: Delete unwanted contacts from the address list, if private call contact is
set as channel default address or call number on one touch call, its unable to
delete.
12

Zone
The radio supports up to 32 zones, each of zone supports 16 channels, totally
512 channels supported. Enter “Zone” menu to select a desired zone.
Scan
1. Scan On/Off
While current channel add scan list and the list contain 2 channels at least, you
may enable the feature. Scanning allows the device to search the scan list
connected to the current channel to locate qualified channel for receiving or
voicing. During scanning, the icon “ ”flashes, when activities are detected on
a channel, the radio will stay on the channel to receive current activities, the icon
“ ”stop flashes. If you don’t want to receive activities on the channel, press the
programmed Nuisance Delete key to remove the channel from the scan list
temporarily. To exit the scanning process, enter scan menu, switch channel or
press the programmed Scan key.
Note:
● If the channel enables the feature “Auto Scan” via the programming software, switch
to the channel will enter scanning automatically;
● While button 1 or 2 programmed as Scan on/off, press it to enable scan feature.
2. View/Edit List
Allow a user to view/edit the scan list via menu, "View Member" allows a user to
view the scan member, deleting a member from the scan list; Add Member allow
a user to add a new member to the scan list, the list contain 16 channels at most.
It is not allowed to create a new scan list or delete existing scan lists from the
device. Digital and analog channel will be appear in the same scan list.
3. All Call( )
While the contacts type as group call, you can select the menu to view its ID or
press PTT to call.
13

SMS
1. Inbox
The Inbox can save up to 30 received messages. Inbox the unread message
displays: , read message displays: . For each message, you can choose
to perform any of these operations: Reply, Forward and Delete.
2. Preset SMS
Via programming software, user can save 10 entries text messages and each of
a message contains 140 characters at most on preset SMS. You can choose to
edit and send any entry.
Note: Preset text messages also can assign to one touch call, and press the
programmed key to send messages.
3. Outbox
Enter outbox menu, you can view the message is sent successfully or failed,
outbox can save up 30 sent messages. If sent message is successful
displays , you can choose to forward or delete it; If sent message is failed
displays , you can choose to resend, forward or delete.
4. Delete All
This function is convenient to delete all messages on inbox or outbox, Clear All
will delete all messages on Inbox and Outbox at the same time, but the preset
messages can’t be deleted.
14

Call Logs
1. Missed Call
The missed calls list can save up to 10 entries, when the memory for call logs is
full, the oldest entry will be deleted automatically. You can add it to contact list or
delete it.
2. Answered Calls
The answered calls list can save up to 10 entries, when the memory for call logs
is full, the oldest entry will be deleted automatically. You can add it to contact list
or delete it.
3. Outgoing Calls
The outgoing calls list can save up to 10 entries, when the memory for call logs is
full, the oldest entry will be deleted automatically. You can add it to contact list or
delete it.
4. Clear Record
This function is convenient to delete Missed call logs Answered or Outgoing call
logs, Clear All will delete all call logs at the same time.
Settings
1. Settings
Allow a user to perform basic settings for the radio.
● Talk Around: When your repeater malfunctions, or when radio is out of
repeater’s range, you can continue to communicate in talk around mode. While
enable talk around feature, the screen displays: ,By this time TX frequency
the same as to RX frequency. If switch channel 、enable scan feature or restart
radio will disable the feature.
Note:
● To enable this function, TX frequency should be different from RX frequency, and the
channel will set as allow talk around on the programming software.
● Press the programmed Talk Around key to switch DM mode and RM mode.
● Tone/Alerts: To set tones for your radio, tone alerts include settings of all
tones, call alert tone, message tone and keypad tone. If disable all tones, all
alerts will be off except emergency tone.
● TX Power : Allow a user to change the power level, there are two levels
available: high (indicated by H) and lower (indicated by L).
15
Table of contents
Other BelFone Transceiver manuals