BelFone BF-TD300 User manual

1
TD300
Service Manual

2
Notice to the user
Government law prohibits the operation of unlicensed radio transmitters within
the territories under government control.
Illegal operation is punishable by fine or imprisonment or both.
THANK YOU
We are grateful you choose BelFone series professional radio
communications products!
Since 1989, BelFone has been always engaging in research and exploration of
radio communications technologies, In order to lead intelligent technologies in
the industry. We still make every effort to research and design products
according to modern complicated communications environment, and we offer
complete and customized communication solutions to clients. Our products will
satisfy you because of its excellent performance and outstanding
communications strength. No matter what field you are in. You will be Satisfied
with the radio.
VHF/UHF digital FM transceiver model: BF-TD300
Warning!
◆In explosive atmospheres(inflammable gas, dust particles, much powder
area,etc.),Please turn the power off.

3
Precautions
It’s important that the operator is aware of and understands hazards common
to the operation of any radio .Please observe the following safety precautions
to prevent radio damage or personal injury. The following precautions shall be
observed during operation, service and repair of this radio.
◆The recommended usage rate is 1 minute for TX and 4 minutes for RX,
when the radio is used for transmission for many hours continuously, the
radiator and chassis will become hot, allow the rear panel of the radio to
contact surface of low melting point /low Ignition point object;
◆Don’t leave the transceiver in direct sunlight for a long time, don’t place the
transceiver on extremely heat, damp, dusty area, and don’t put it on unstable
surfaces;
◆When restriction or warnings are posted regarding the use of radio devices,
please obey the regulation turn the transceiver power off;
◆Use of the radio while you are driving may be against traffic laws, please
prohibit using it ;
◆If you notice any problems on the radio, please turn off at first. Then contact
with local dealer. Do not modify this radio unless instructed by this manual or
refer service to a qualified licensed or certified technician only;
◆If you want to use the machine for secondary development, please contact
with BelFone’s technical engineer or dealer for technical assistance;
◆Please keep the surface of radio is clean and dry, clean the radio using a
cloth moistened with clean water and a mild dishwashing liquid.

4
Content
Supplied Accessories.........................................................................................................................5
Installation of Accessories ................................................................................................................6
Getting Acquainted .........................................................................................................................12
Basic Operation...............................................................................................................................13
Turning the power on /off .......................................................................................................13
Adjusting the volume..............................................................................................................13
Selecting a Channel.................................................................................................................13
Selecting a Zone......................................................................................................................14
Dual Modes Switching............................................................................................................14
Call..........................................................................................................................................15
Receiving and responding to a call .........................................................................................16
Button Setting .........................................................................................................................16
Functions and Operations................................................................................................................18
Scan.........................................................................................................................................18
Auto Scan................................................................................................................................19
Monitor and Permanent Monitor.............................................................................................20
Message...................................................................................................................................20
One Touch Call .......................................................................................................................20
Talk Around.............................................................................................................................22
TX Power................................................................................................................................22
Bandwidth...............................................................................................................................23
Squelch Level..........................................................................................................................23
Emergency ..............................................................................................................................23
Time Out Timer (TOT) ...........................................................................................................25
Voice Encryption.....................................................................................................................25
VOX........................................................................................................................................26
Warning Tones.........................................................................................................................26
Reject Stranger Call................................................................................................................27
TX Permission.........................................................................................................................27
Battery Saver...........................................................................................................................28
Lowery Battery Alert ..............................................................................................................29
CTCSS/CDCSS.......................................................................................................................29
PC Mode .........................................................................................................................................30
CTCSS Standard Frequency Table..................................................................................................31
CDCSS Standard Code Table..........................................................................................................31
Circuit Description..........................................................................................................................33
PC Board -Top layer .......................................................................................................................52
PC Board -Bot layer.....................................................................................................................53
Schematic Diagram.........................................................................................................................54
Block Diagram................................................................................................................................54
Specifications..................................................................................................................................55
Statement.........................................................................................................................................56
5
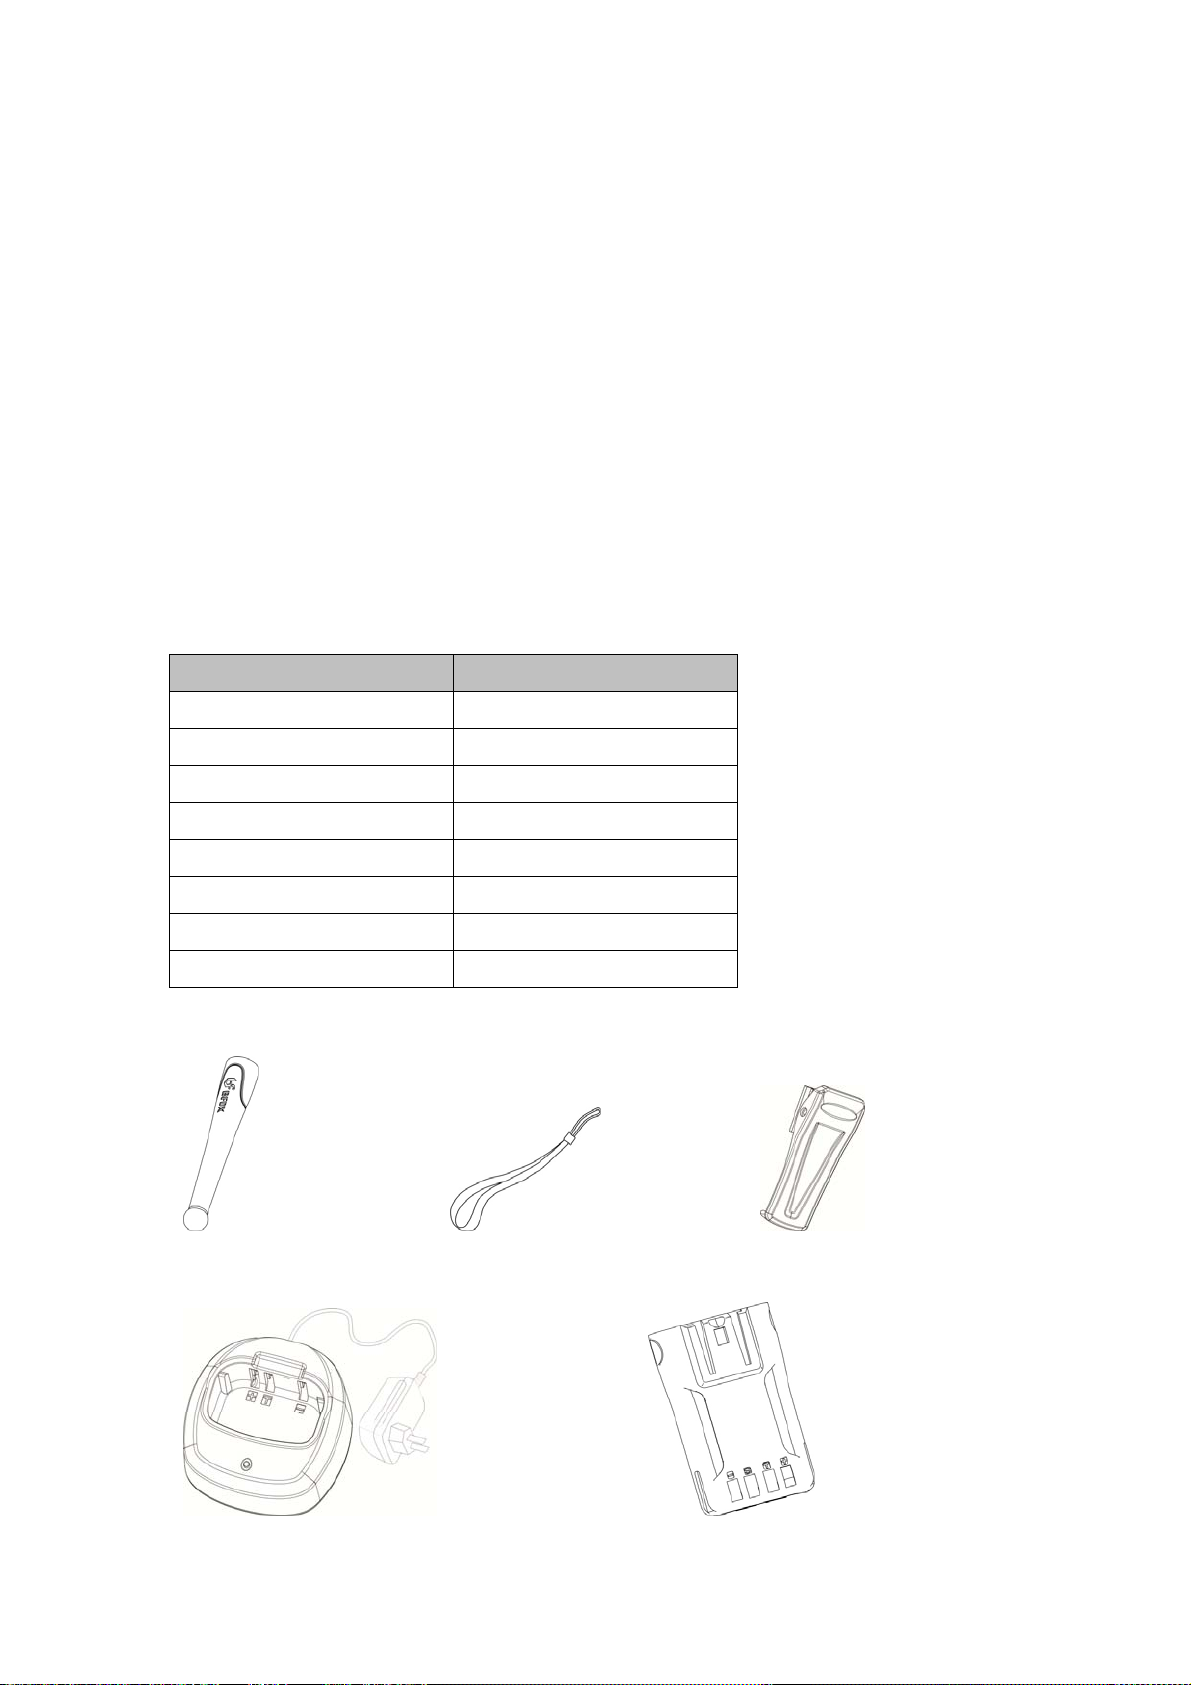
Supplied Accessories
Notes: The accessories listed below are covered by BelFone dealer、authorized
BelFone agents or factories .
After carefully unpacking the transceiver, identify the items listed in the
table below. If any items are missing or have been damaged during shipment
please contact with dealer immediately.
Accessories
Items Quantity
Antenna 1
Strap 1
Belt Clip 1
Charger 1
Li-ion Battery 1
User Manual 1
Warranty Card 1
Certificate 1
Antenna Strap Belt Clip
Charger Li-ion Battery
Table of contents
Other BelFone Transceiver manuals


Popular Transceiver manuals by other brands

Kenwood
Kenwood ProTalk TK-3201 instruction manual

City Theatrical
City Theatrical SHoW DMX SHoW Baby user manual

Standart Horizont
Standart Horizont HX407 owner's manual

B&G
B&G V90S quick start guide

VictelGlobal
VictelGlobal ALK300 series Operation manual

Cactus
Cactus Wireless Flash Transceiver V6 user manual


