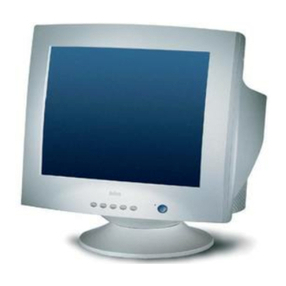
BELINEA Belinea 103052 User manual

Service Manual
Model: Belinea 103052
Art. No. 121721
MAXDATA Systeme GmbH
Elbestrasse 12-16
45768 Marl / Germany
121721 Service Manual

121721 Service Manual
Table of Contents
CONTENTS PAGE
Sections
1. Safety Precaution 1
2. X-Ray Radiation Precaution 2
3. Genera Information 3
4. Control Description 4
5. Video Input Signal 4
6. Timing Table 5
7. Video Input Terminal 6
8. Connecting with External Equipment 7
9. Theory of Operation 8
10. Trouble Shooting 10
11. Adjustment Method 12
12. Specification 15
13. Critical Parts Specification ___________________________________________ 16
14. Block Diagram _____________________________________________________ 37
15. Part List __________________________________________________________ 38
16. Circuit Diagram ____________________________________________________ 57
17. Wave Form ________________________________________________________ 61
18. Exploded View _____________________________________________________ 70

--1--
Belinea 103052 Technical Service Man al
Safety Precaution
WARNING
Service should not be attempted by anyone unfamiliar with the necessary precautions on this monitor.
The followings are the necessary precautions to be observed before servicing.
1. Always discharge the high voltage to the CRT conductive coating before handling the CRT.
The picture tube is highly evacuated and if broken, glass fragments will be violently exploded. Use
shatter proof goggles and keep picture tube away from the bare body while handling.
2. When replacing a chassis in the cabinet, always be certain that all the protective devices are
put back in place, such as nonmetallic control knobs, insulating covers, shields, isolation resistor
capacitor network etc.
3. Before returning the monitor to the customer, always perform an AC leakage current check
on the exposed metallic parts of the cabinet, such as signal connectors, terminals, screw heads, metal
overlays, control shafts etc, to be sure the monitor is safe to operate without danger of electrical
shock. Plug the AC line cord directly into a AC outlet (do not use a line isolation trasformer during
this check.). Use an AC voltmeter having 1500 ohm per volt or more sensitivity in the following
manner : Connect ground (water pipe, conduit, etc.) and the exposed metallic parts, one at a time.
Measure the AC Voltage across the combination of 1500 ohm resistor and 0.15 capacitor. Reverse the
AC plug at the AC outlet and repeat AC voltage measurements for each exposed metallic part. The
Voltage must not exceed 0.3 volts RMS. This corresponds to 0.2 milliamp AC. Any value exceeded this
limit constitutes a potential shock hazard and must be corrected immediately.
INSTRUCTIONS TO USER
This equipment generates and uses radio frequency energy and if not installed and used properly, that
is, in strict accordance with the manufacturer's instruction, may cause interference to radio and
television. It has been tested and found to comply with the limits for the specifications in Subpart J of
Part 15 FCC Rules, which are designed to provide reasonable protection against such interference in a
residential installation. However, there is no guarantee that interference will not occur in a particular
installation.
If this equipment does cause interference to radio or television reception, which can be determined by
turning the equipment off and on, the user is encouraged to try to correct the interference by one or more
of the following measures.
• reorient the receiving antenna
• relocate the computer with respect to the receiver
• plug the computer into a different outlet so that computer and receiver are on different
branch circuits.
AC VOLTMETER
Good earth ground
such as the water pipe,
conduit, etc
P1500 ohm
10 WATT
0.15µF
Place this probe
on each exposed
metallic part.
0.15µF

--2--
X-Ray Radiation Precaution
1. Excessive high voltage can produce potentially hazardous X-RAY RADIATION. To avoid
such hazards, the high voltage must be under the specified limit. The nominal value of the high
voltage of this monitor is 26.0KV 0.5KV at zero beam current (minimun brightness) under a 120V
AC power source. The high voltage must not (under any circumstances) exceed 29KV. Each time a
monitor requires servicing, the high voltage should be checked.
It is recommended the high voltage be recorded as a part of the service record. It is important to use
an accurate and reliable high voltage meter.
2. This monitor is equipped with a protection circuit which prevents the monitor from producing
excessively high voltage. Each time the monitor is serviced, the protection circuit must be checked to
determine that the circuit is properly functioning.
3. The only source of X-RAY RADIATION in this monitor is the picture-tube.
For continued X-RAY RADIATION protection, the replacement tube must be exactly the same type
tube as specified in the parts list.
4. Some parts in this monitor have special safety-related characteristics for X-RAY RADIATION
protection. For continued safety, parts replacement should be undertaken only after referring to the
product safety notice.
PRODUCT SAFETY NOTICE
Many electrical and mechanical parts in this monitor have special safety-related characteristics.
These characteristics are often not evident from visual inspection.
Replacement parts which have these special safety characteristics are identified in this manual;
electrical components having such features identified by " ! " in the replacement parts list and
schematic diagram.
For continued protection, replacement parts must be identical to those used in the original circuit.
The use of substitute replacement parts which dose not have the same safety characteristics as the
factory recommended replacement parts shown in this service manual, may create shock, fire,
X-RAY RADIATION or other hazards.
PRODUCT CDRH NOTICE
Electrical potentiometers which is marked as caution " ! " in parts list are crititial components
of safety & CDRH.
Therefore, for continued protection, replacements parts must be used it which is used in original
PCB ASS’Y.

--3--
Belinea 103052Technical Service Manual
General Information
1. Description
This Belinea 103052, 17” (15.8" viewable) color display monitor is operated in R, G, B, drive mode
input.
2. Operating instructions
2-1. External instructions
2-2. Front
Power Switch, Menu, Select, Down( ), Up( ), Power LED.
2-3. Rear
Input connection, (AC & SIGNAL CABLE)
2-4. Service Instruction(internal controls)
High-Voltage, Focus
2-5. OSD Controls
Contrast, Brightness, H/V Position, H/V Size, Pincushion, Trapezoid, Parallelogram, Pin Balance,
Corner Top/BTM, H/V Moire, Degauss, Color Control, Recall, OSD H/V Position, H/V Linearty,
Language, Information, Rotation
3. Electrical Characteristics
3-1. 100-240 Volt 60Hz/50Hz for use all over the world.
This power supply is a 90Watt multi output SMPS for monitor.
3-2. Video
Input : 0.7V p-p analog signal (at 75 ohm terminated)
Bandwidth : 205MHz (Max. Dot Rate)
Polarity : Positive
3-3. Horizontal Drive
Level : TTL High : 2.4V min
Low : 0.4V max
Polarity : Negative or Positive
Frequency : 30KHz 97KHz
Timing Limits : Pulse width (0.5µs Thp 5.5µs)
3-4. Vertical Drive
Level : TTL High : 2.4V min
Low : 0.4V max
Polarity : Negative or Positive
Frequency : 50Hz 150Hz
Timing Limits : Pulse width (0.02ms Tvp 0.2ms)
4. Model Description
Tco’03
CRT Type : - SAMSUNG SDI
M41QAQ261X132(T4)

--4--
Control Description
Front View
Video Input Signal
Recommended signals are shown below.
• Video Signal
Video Level : 0 to 700mV
Polarty : Positive
Video Input : RGB separated
Analog level
Sync input : H-Sync ; TTL level
V-Sync ; TTL level
• Waveform
Video input(R, G, B)
0
1
2
3
4
59
60
61
62
63 700mV
• Signal: 64 level gray scale
• Linear stepping:
(11.1mV-64 Steps)
Power LED Power Switch

--5--
Belinea 103052 Technical Service Manual
Timing table
Note : * Indicates horizontal front / back porch includes borders
# Indicates vertical front / back porch includes borders
• H-Sync • -Sync
Pix Rate
Sync Pol
Timing 1
Industry
640
480
31.469
59.942
25.175
0.636*
3.813
1.907*
25.422
31.778
0.381
0.064
1.048#
15.253
16.683
- / -
2
ESA
640
480
37.500
75.000
31.500
0.508
2.032
3.810
20.317
26.667
0.027
0.080
0.427
12.800
13.333
- / -
3
ESA
720
400
31.467
70.082
28.320
0.616
3.813
1.907
25.442
31.778
0.382
0.064
1.111
12.711
14.268
- / +
4
ESA
800
600
46.875
75.000
49.500
0.323
1.616
3.232
16.162
21.333
0.021
0.064
0.448
12.800
13.333
+ / +
5
ESA
800
600
53.674
85.061
56.250
0.569
1.138
2.702
14.222
18.631
0.019
0.056
0.503
11.179
11.756
+ / +
6
ESA
1024
768
60.023
75.029
78.750
0.203
1.219
2.235
13.003
16.660
0.017
0.050
0.466
12.795
13.328
+ / +
7
ESA
1024
768
68.667
84.997
94.500
0.508
1.016
2.201
10.836
14.561
0.015
0.044
0.524
11.183
11.765
+/+
8
ESA
1024
768
80.741
99.803
109.00
0.449
1.057
1.491
9.39
12.387
0
0.037
0.471
9.513
10.021
+/+
9
ESA
1280
1024
79.976
75.025
135.000
0.119
1.067
1.837
9.481
12.504
0.013
0.038
0.475
12.804
13.329
+/+
10
ESA
1280
1024
91.146
85.024
157.500
0.406
1.016
1.422
8.127
10.971
0.011
0.033
0.483
11.215
11.761
+/+
11
ESA
1600
1200
93.750
75.000
202.500
0.316
0.948
1.501
7.901
10.667
0.011
0.032
0.491
12.800
13.333
+/+
12
MAC
1152
864
68.681
75.062
100
0.320
1.280
1.440
11.520
14.560
0.044
0.044
0.568
12.667
13.322
-/-
Standard
Data Pixel
Data Line
H-Freq KHz
F-Freq Hz
Hor.A(us)
Hor.B(us)
Hor.C(us)
Hor.D(us)
Hor.E(us)
ert.A(us)
ert.B(us)
ert.C(us)
ert.D(us)
ert.E(us)
Active (4)
Active (4)
Front Porch
(A)Front Porch (A)
Period (E)
Period (E)
Sync Width (B)
Sync Width (B)
Back Porch (C)Back Porch (C)

--6--
Video Input Terminal
A 15 Pin D-sub connector is used as the input signal connector.
Pin and input signals are shown in the table below.
Pin Description
D-Sub miniature connector
SIGNAL
PIN NO.
SEPERATE
SYNC
1RED
2GREEN
3BLUE
4
NC
5DDC RETURN
6RED GROUND
7GREEN GROUND
8BLUE GROUND
9+5V (NOT USED)
10 LOGIC GROUND
11
NC
12 SDA
13 H-SYNC
14 V-SYNC(VCLK)
15 SCL

--7--
Belinea 103052Technical Service Manual
Connecting with External Equipment
Cautions
Be sure to turn off the power of your computer before connecting the monitor.

--8--
Theory of Operation
1. Power Supply
The AC voltage range is from 100 - 240V AC.
The conducted noise is filtered by Line filter (LP01), X and Y Capacitor (CP01,CP02,CP03,CP04,CP11)
NTC01 reduces the inrush AC to DC and this DC Voltage is charged CP05.
The ICF01 (MC33260)IC is a PFC Circuit. QF01 Drive Signal is generated from ICF01 Pin 7.
The STR-F6654 is a hybrid IC (ICP01) with a built in control IC and MosFET.
The start-up circuit starts and stops the operation of the control IC by detecting the voltage appearing
at the VIN (PIN4).
At start-up of the power supply, CP12 is charged though the start-up registor RP02.
When the VIN (PIN4) voltage reaches 16V, the control circuit starts operation by the function of the
start-up circuit.
In normal state, VIN of ICP01 is supplied by CP12 dc voltage. In Off Mode, Vin of ICP01 is supplied
by CP10 dc voltage.
The switching frquency is locked to Horizontal scan frequency by horizontal flyback pulse from sync
trans transfomer (LP03).
The output pulse width is controled by current of OCP/F.B(PIN1).
The SMPS output has +185V,+80V,+15V,+13V,-13V,+7V.
2. DPMS
The power supply supports the DPMS function. Its operation is shown in the table below.
3. Signal Processing and MCU Control
When the H and V sync are input to MCU, MCU can measures the H and V frequency to detect the
video mode. MCU has digital to analog converter (DACs) control function like Brightness, Rotation,
H/V-Lin, Degaussing and MCU can control H/V Size, H/V Position Pincushion, Trapezoide,
Parallel, Corner TOP/BTM, Pin balance, H/V Moire, OSD H/V-Position, R/G/B Cut off, R/G/B
drive by I2C Bus line.
The operation of MCU is shown in the table below.
MODE
NORMAL
H-Sync V-Sync
OOHON
MCU
PIN 9 QP07
STAND-BY XOLOFF
SUSPEND OX L OFF
OFF
H-Freq.
[kHz]
H < 36
36 H < 40
40 H < 46
46 H < 51
51 H < 62
62 H < 66
66 H < 71
71 H < 85
L
L
H
H
H
H
H
L
H
H
L
L
H
H
H
L
L
H
L
H
L
L
H
L
L
L
L
L
L
H
L
85 H < 95 HHHH
CS 1
PIN 30 CS 2
PIN 29 CS 3
PIN 28 CS4
PIN 27
XXL OFF

--9--
Belinea 103052 Technical Service Manual
4. Horizontal Deflection
TDA4841(ICH01) is an I2C auto sync deflection controller for H/V sync and drive processing.
All function are controlled by I2C bus.
When H-sync applied, the internal oscillator is automatically locked. The duty cycle of H-output
pulse (ICH01 pin 8 ) is 45% (at 31.5 KHz).
Horizontal B+ Drive Signal is generated from ICH01 pin 6.
QH08 and TH01 are used to drive the H-output transistor QH09. QH09 is turned on, it conducts
current through the deflection yoke on the right hand side of the screen. This current comes from the S
correction capacitors (CH27,CH29,CH32,CH34,CH64), which have a charge equal to the effective
supply voltage.
When the QH09 is opened up, the damper diode DH11 allows current for left hand side of the screen
to flow back through the deflection yoke to the S capacitors.
The flyback capacitor CH23 determines the size and length of the flyback pulse. The S capacitors
correct outside versus center linearity in the horizontal scan.
QH11,QH12,QH13,QH22 select the value of S capacitors.
B+ Drive singal is amplifier by push pull (QH24,QH25) amplifiered, this amplifiered signal the
switching .
B+ Voltage is supplied horizontal deflection coil though coil TH03.
5. High Voltage and Focus
High Voltage Control circuit is working basically by using switching therory with the main
component ICH03 (KA3843).
When power ON and the VCC DC level of pin 7 of ICH03 exeeding 8.4V, ICH03 starts to work and the
oscillate frequency is decided by RH24, CH11.
ICH03 is working normally the output square wave of pin6 will turn on QH04. The ON/OFF cycle
of QH04 will make the primary of FBT acted like a swiching power transformer
AFC signal is differntial by CH10, RH04 and connected with CH11in order to force ICH03 in
synchronization. This high voltage will be always synchronized with horizontal deflection.
Usually loading change will cause unstable condition, so a high voltage feed back system is designed
to maintain the stability of the high voltage circuit.
This feed back system is started from voltage sensor on the pin12 of the FBT. This sensor voltage
compares with voltage of the OP1 via the butter (OP2) of ICH02 (LM358) and returns to ICH03.
A feed back reference high voltage circuit that consists of RH50,VRH01 and RH52 to adjust the high
voltage.
During the period the horizontal frequency is changed, for example, H-Unlock will be from low to
high (the time frequency changes).
H-Unlock is controlled by pin 17 of ICH01(TDA4841). After differential circuit that consists of RH43
and RH44, the signal will turn QH03 on When frequency changed and reduce the high voltage by
paralleling with RH50,VRH01,RH52.
Dynamic Focus is user to get perfect focusing of each dot on the screen.
ICH01, pin 32 outputs a parabolic waveform (H+V Focus)
QH06, QH17 and QH18 amplify this focus signal.

--10--
6. Vertical Deflection
Vertical defiection saw-tooth waveform is provided by ICH01 pin 12, 13 (VOUT1,2) and amplified
by ICV01(KA2142).
7. X-ray Protection
X-Ray High Voltage Protection circuit is to get a DC level voltage by utilizing the output waveform
of FBT pin 4 to pin 7(GND) via a rectifier consists of DH07,CH36 This DC level voltage inputs to the
pin2(X-Rey) of ICH01 TDA4841.
The preset X-Rey protection voltage is 5.2V. if the high voltage is higher than the preset voltage, the
DC level voltage input into the pin 2 will also be higher than 6.4V. It also means the HDRV signal is
off, then horizontal deflection is off and the high voltage is also off.
8. Video Amplifier and OSD Interface
KA2506-01(ICC01) is a wide band video amplifier with three matched video amplifiers, contrast
control, OSD interface, OSD contrast control, drive controls, blanking gate and clamp gate ICC01 is
controlled by I2C bus. H blank signal is applied to Pin 19.
During blanking all three outputs are thrown to the pedestal level.
A insert H-Sync is used to a clamp signal. The signal is applied to Pin 18.
Three OSD inputs (Pin 1,2,3 of ICC01) are TTL compatible and typical bandwidth is 80MHz.
A fast commutate pin is provided to select either the video or the OSD inputs as a source for the
amplification.
OSD contrast controlled by I2C bus.
MTV021(ICC02) is a high performance HCMOS device designed to interface with a micro
controller unit (ICM01) to allow colored symbols or characters to be displayed on the monitor screen.
The output stage is made of 3-channel power amplifier (ICC03, LM2435T).
The output capable of 40 volt swing in less than 7 n Sec.
The three cathodes are AC coupled to the video amplifiers.
The DC level on each cathode is set by a cut-off amplifier and clamp diode.
Trouble Shooting
1. Instroduction
This trouble shooting guide is arranged by fault conditions. Following each fault conditior a check for
a signal on condition to be answered YES or NO.
For NO answer proceed to the right and continue until the fault is located.
For a YES answer continue in the left column to the next numbered check.
Again followed this procedure until the fault is located.
2. Trouble shooting procedure
When Trouble shooting this monitor, some precaution should be observed.
Never connect primary ground and secondary ground together including use with an isolation
transformer.
Measure high voltage with respect to chassing ground only, and with a high impedance probe of 1000
mega-ohm or higher and rated for 30KV DC or higher.
Measure QH09 collector pulse with a high quality 100:1 probe rated for 1500 volts or higher.
3. Trouble shooting procedure
Symptom
a) Image is scrolling
Check(YES)
1) Check for V-sync at Pin 32 of ICM01
2) Check for positive going V-sync at
Pin 14 of ICH01
3) Will V-oscillator is locked with input
signal
Pin 24 of ICH01
4) Check V-ramp at Pin 13 , 14 of ICH01
Action(NO)
Check 15 Pin connector ZDM02
Check ICM01, ICH01
Check CH02
Replace ICH01.

--11--
Belinea 103051 Technical Service Manual
Symptom
c) Screen is black
but high voltage
is present
d) Screen is black
with no high
voltage.
Check(YES)
1) Check for 80V at anode of
DP12
2) Check for 12V at pin7 of ICH03
3) Check Switching pulse of pin6
of ICH03
4) Check Switching pulse at Drain of
QH04
5) Check TH04(FBT)
Action(NO)
Check 15pin connector
ZDM01,QM04.
Check ICM01,ICH01
Check CH03, RH06, CH04,RH07,RH08
CH05, CH06
Replace ICH01
Check RH10, TH05
e) Focus Bad 1) Check for focus waveform at
pin32 ICH01
2) Check for 700V at anode of DH24
3) Check Emitter pules of QH18
4) Adjust Focus VR of FBT
f) No Power 1) Check for AC input voit of AI01
2) Check ICP01 pin 3,4
3) Check switch pulse at Drain of QF01
4) Check voltage for, 180V at anode of
DP11 and 5V at pin3 of ICH01
Check ICH01
Check DH24, TH04
Check QH05,QH06,QH17,QH18
Check Power cord,AI01
Check ICP01,NTC01,DP01
Check ,ICP01,TP01,ICF01,ICP03,DP11
Recheck above ltem d
Check 80V with no load if no 80V
Check SMPS If 80V OK, Check TH04
QH04,DH05
Check 12V with no load If no 12V,
Check QP10,DP15,QP07, SMPS
If 12V OK, Check ICH01,ICH03,ICC01
Check ICH03, RH24, CH11
Check QH04
1) Check for G2, Pin 4 of CRT.
Around 550 volt
2) Check for heater voltage at Pin 6 of
CRT. (6.3V)
3) Can screen be lit with brightness
control at MAX
4) Check for video at Pin 5,8,10 of ICC01
5) Check for positive pulse for clamp at
Pin 18 of ICC01.
6) Check for video pin 21,24,26
of ICC01
7) Check for video at Pin 6,7,9 of ICC03.
8) Check for video at Pin 1,2,3 of
ICC03.
9) Check if R,G,B cut-off control the
video DC level at Pin 4,6,9 of CRT.
10) Check CRT.
Check RC06,SGC05,CC36,CC38
Socket
Check CNC01,RC66,DP13
Check RC35,CC32,QC13,QC14,RC59
Check connector CNC02,DC15~DC20,
RC46~48
Check pin 33 of ICM01
Check ICC01, ICM01
Check ICC03, RC26, RC27, RC28
Check ICC03, 80V(dc pin4),
12V(dc pin10)
Check QC03~QC08, CRT socket
b) Image is
unstable. 1) Check for H-sync at Pin 33 at ICM01
2) Check for positive going V-sync at
Pin 15 at ICH01.
3) Will H-oscillator is locked with input
signal Pin 29 of ICH01.
4) Check H-out at Pin 8 of ICH01.
5) Check for flyback pulse at Pin 1
of ICH01

--12--
Adjustment Method
1. Caution
Extremely high voltage are present in the area around the TH04 and the anode high voltage lead. Do
not touch ICP01 or its heatsink as high voltage is present on these components.
2. Equipment Required
Digital Voltmeter
Frequency Counter: about 40 Hz to 100 KHz
Color Analyzer
Video Signal Generator
High Voltmeter: up to 30 KV
3. Before Adjustment
Verify that the video output level is 0.7 Vpp at 75 ohm termination and the video timings are same as
standard timing given in specification. Place the AC power switch to the ON position.
Allow the monitor to stabilize thermally for 15 minutes at least before any adjustment about the image
parameters. The CRT tube and components of system require time of stabillizing.
4. Adjustment Procedure
4-1 Voltage setting
1) High Voltage Setting
- Video Signal: Black pattern in 80kHz, 1280*1024@75Hz mode
- Measuring Point : HI-POT (With CRT B’d)
- Adjustment: VRH01, main board
- Limits : -158 V
4-2 Factory mode setting
- Turn off the power
- Keep pressing the menu key and turn on the power
- After turn on the power, press the menu select key one more time, and you can see the
message on the botton of the OSD main menu.
- This is the factory mode
- Select the "Recall" menu before you exiting the factory mode.
- Turn off the power to save the adjusted state.
4-3 Rotation setting
- Video signal: Cross Hatch pattern in 94kHz, 1600 mode
- Adjust the tilt of screen by using the MENU , and select keys.

--13--
Belinea 103052Technical Service Manual
4-4 Color setting
- Adhere color Analyzer sensor closely to CRT center.
- Video mode: 94kHz, 1600 mode
1) Color Temperature 9300°K setting
- Video Signal: Back Raster pattern
- Select " RGB" by using the MENU , and select keys.
Cut-off Setting
• Select "CUT OFF" by using the , and select keys.
• Press the select key to get the desired R, G or B Cut-off.
• Press the or keys to limit the X and Y color coordinate.
• Limits: x=0.283 0.02, y=0.297 0.02, Y=0.5 0.08Fl
Drive Setting
• Video signal: 2” square white box
• Select the "9300 " by the using , and select keys.
• Adjust the brightness go to 31 3Flcd/m2by pressing the rotating the and keys of
contrast.
• Press the SELECT key to get the desired R/G/B drive.
• Press the or keys to limit the X and Y color coordinte.
• Limits: X=0.283 0.02, Y=0.297 0.02
Contrast Setting
• Adjust the brightness of 2” square white box by pressing the rotating the and keys of
contrast.
• Limits: 44.6 0.5Fl
2) Color Temperature 6500°K Setting
- Video Signal: Back Raster pattern
- Select " COLOR CONTROL " by using the MENU , and select keys.
Drive, contrast Setting
•The method of Adjust is same to 9300°K.
•The color coordinate is X=0.313 015, Y=0.329 0.020
3)ABL Setting
- Video Signal: Full White Pattern
- Select”AB” by using the manu ,and select keys
- Adjust the brightness to 23 0.5Fl by pressing the keys of ABL
4-5 Focus
•Video Signal: Full “H” character Pattern in 94KHZ
•Adjust H/V Focus VR on the top or center of the FBT so that image of whole screen look clear
5. X-Ray Protection Test
1) In any signal input condition, short RH11 (main board) by using the JIG.
2) At this moment, check out whether raster disappears.
3) Remove the JIG.
4) After the power switch of the set off and on, check out proper working.

--14--
AGING and Self Test Mode
The monitor has an enhanced level of self-diagonostics.
When the signal cable is removed or signal isn't detected, the monitor is operated to OFF-Mode.
If Function Button is pushed on OFF-Mode, the system has the ability to generate an R.G.B test
pattern and the following OSD image is displayed on screen.
Note
1) Until press information Icon in main menu, the monitor is operated burn-in mode (full white
pattern) display.
2) After press information Icon in main menu, the monitor display random BOX pattern.
NO SIGNAL
NO SIGNAL

--15--
Belinea 103052Technical Service Manual
Specification
CRT
SIZE(15.8" viewable) Diagonal FST
Dot Pitch0. 6 mm
Type Non-glare
Input Signal R.G.B Analog
Connector 15 pin D-Type
SYNC H-Freq 30.0 kHz~97 kHz
V-Freq 50Hz ~150 Hz
DisplayArea(HXV)320 x 40 mm
max. Resolution
User Control
&
OSD Control
Power Management As per VESA Standard, Lower than EPA's recommendation
VESA DDC 1/ B, B+ Basic
Compatibility VESA, 8514/A, XGA, EVGA, MAC II
Power Source100- 40 VAC (Universal Power) .5A/90W
Safety &
Regulation
EMC
Ergomomi
Safety
FCC CLASS B , CE
TCO’03
cULus, CE, TUV-GS, FIMKO, GOST-R, PCBC
Temperature
35% to 80% (Non-condensing)
5% to 85%
packed
Humidity
Operating
Operating
Storage
Storage
5 to 35 °C
- 0 to 60 degree celsius
Weight
unpacked
Dimension(WXHXD mm)
* Specification is subject to change without notice for performance improvement.
16.7Kg
404 X 408 X 414mm (W/O Packaging
13.7Kg
1600X1 00 @ 75Hz (94kHz)
H/V Position, H/V Size,Pincushion, Trapezoid,
Parallelogram, Pin balance, Rotation, H/V Moire,
Degauss,Color Control, Information, Brightness,
Contrast,OSD H/V position,Corner Top/BTM
Language Select (10 Language), Recall
Power Switch, Menu, Select, Up, Down

--16--
Critical Parts Specification
FEATURES
Concept features
• Full horizontal plus vertical autosync capability
• Extended horizontal frequency range from 15 to 130kHz
• Comprehensive set of I2C-bus driven geometry adjustments and functions, including standby mode
• Very good vertical linearity
• Moire cancellation
• Start-up and switch-off sequence for safe operation of all power components
• X-ray protection
• Power dip recognition
• Flexible switched mode B+ supply function block for feedback and feed forward converter
• Internally stabilized voltage reference
• Drive signal for focus amplifiers with combined horizontal and vertical parabola waveforms
• DC controllable inputs for Extremely High Tension (EHT) compensation
• SDIP 32 package.
Synchronization
• Can handle all sync signals (horizontal, vertical, composite and sync-on-video)
• Output for video clamping (leading/trailing edge selectable by I2C-bus), vertical blanking and
protection blanking
• Output for fast unlock status of horizontal synchronization and blanking on grid1 of picture tube.
Horizontal section
• I2C-bus controllable wide range linear picture position, pin unbalance and parallelogram correction
via horizontal phase
• Frequency locked loop for smooth catching of horizontal frequency
• Simple frequency preset of fmin and fmax by external resistors
• Low jitter
• Soft start for horizontal and B+ control drive signals.
Vertical section
• I2C-bus controllable vertical picture size, picture position, linearity (S-correction) and linearity balance
• Output for I2C-bus controllable vertical sawtooth and parabola (for pin unbalance and parallelogram)
• Vertical picture size independent of frequency
• Differential current outputs for DC coupling to vertical booster.
• 50 to 160Hz vertical autosync range.
East-West (EW) section
• I2C-bus controllable output for horizontal pincushion, horizontal size, corner and trapezium
correction
• Optional tracking of EW drive waveform with line frequency selectable by I2C-bus.
Focus section
• I2C-bus controllable output for horizontal and vertical parabolas
• Vertical parabola is independent of frequency and tracks with vertical adjustments
• Horizontal parabola independent of frequency
• Adjustable pre-correction of delay in focus output stage.
TDA4841

--17--
Belinea 103052Technical Service Manual
V-sync
clamping
blanking
HUNLOCK
TDA 4841
SDA
SCL
Vcc
9.2 to 16 V
H-sync
(TTL level)
(video)
15
25
7
10
18
19
17
16
14
23 24 22 11
12
13
20 or
6
32
4
3
8
2
9
13029282726
3.3 k R
(1)
HBUF
R
HREF
12 nF
10 nF
8.2 nF
100 nF 2%
1% X-RAY
XSEL
HFLB
MHB603
5
7V
1.2V
V-SYNC INPUT
AND POLARITY
CORRECTION
VIDEO
CLAMPING
AND V-BLANK
V-POSITION
V-SIZE, VOVSCN
PROTECTION
AND SOFT START
HUNLOCK
OUTPUT
I C-BUS
RECEIVER
SUPPLY
AND
REFERENCE
COINCIDENCE DETECTOR
FREQUENCY DETECTO
PLL2, PARALLELOGRAM
PIN UNBALANCE AND
SOFT START
OUTPUT
ASYMMETRIC
EW-CORRECTION
H/C-SYNC INPUT
AND POLARITY
CORRECTION
PLL1 AND
H-POSITION
HORIZONTAL
OSCILLATOR
X-RAY
PROTECTION B+
CONTROL
H-OUTPUT
STAGE
B+ CONTROL
APPLICATION
X-RAY
V
OUT2
V
OUT1
22 k
1% 100
nF
5%
150
nF EWDRV
HDRV
(2)
2
I C-BUS REGISTERS
2
VERTICAL
OSCILLATOR
AND AGC
V-OUTPUT
V-LINEARITY
V-LINEARITY BALANCE
EW-OUTPUT
H-PINCUSHION
H-CORNER
H-TRAPEZIUM
H-SIZE
V-SYNC
INTEGRATOR
(TTL level)
FOCUS
HORIZONTAL
AND VERTICAL
EHT COMPENSATION
H-SIZE AND V-SIZE
EHT compensation
via vertical size
21 31
EHT compensation
via horizontal size
VSMOD HSMOD
VREF
VCAP
VAGC
HREF HCAP
ASOR
BDRV
BSENS
BOP
BIN
BLOCK DIAGRAM

--18--
HFLB
XRAY
BOP
BSENS
BIN
BDRV
PGND
HDRV
XSEL
Vcc
EWDRV
VOUT2
VOUT1
VSYNC
HSYNC
CLBL
1
2
3
4
5
6
7
8
9
10
11
12
13
14
15
16
FOCUS
HSMOD
HPLL2
HCAP
HREF
HBUF
HPLL1
SGND
VCAP
VREF
VAGC
VSMOD
ASCOR
SDA
SCL
HUNLOCK
32
31
30
29
28
27
26
25
24
23
22
21
19
18
17
20
TDA4841
Vertical sync slicer and polarity correction
Vertical sync signals (TTL) applied to VSYNC (pin
14) are sliced at 1.4V. The output signal of the sync
slicer is integrated on an internal capacitor to
detect and normalize the sync polarity. The output
signals of vertical sync integrator and sync
normalizer are disjuncted before they are fed to the
vertical oscillator.
Video clamping vertical blanking generator
The video clamping vertical blanking signal at
CLBL (pin 16) is a two-level sandcastle pulse
which is especially suitable for video ICs such as
the TDA488x family, but also for direct
applications in video output stages.
The upper level is the video clamping pulse, which
is triggered by the horizontal sync pulse. Via I2C-
bus Control either the leading or trailing edge can
be selected by setting control bit CLAMP. The
width of the video clamping pulse is determined
by an internal single-shot multivibrator.
The lower level of the sandcastle pulse is the
vertical blanking pulse, which is derived directly
from the internal oscillator waveform. It is started
by the vertical sync and stopped with the start of
the vertical scan. This results in optimum vertical
blanking. Via I2C-bus Control two different
vertical blanking times are accessible by control bit
VBLK.
Blanking will be activated continuously, if one of
the following conditions is true:
Soft start of horizontal and B+ drive (voltage at
HPLL2 (pin 30) pulled down externally or by I2C-
bus)
PLL1 is unlocked while frequency-locked loop is in
search mode
No horizontal flyback pulses at HFLB (pin 1)
X-Ray protection is activated
Supply voltage at Vcc (pin 10) is low see Fig.22
Via I2C-bus Control horizontal unlock blanking
can be switched off by control bit BLKDIS while
vertical blanking is maintained.
Frequency-locked loop
The frequency locked loop can lock the horizontal
oscillator over a wide frequency range. This is
achieved by a combined search and PLL
operation. The frequency range is preset by two
external
resistors and the recommended maximum
ratio is
FUNCTIONAL DESCRIPTION
Horizontal sync separator and polarity correction
HSYNC (pin 15) is the input for horizontal
synchrodization signals, which can be DC-coupled
TTL signals (horizontal or composite sync) and AC-
coupled negative-going video sync signals. Video
syncs are clamped to 1.28V and sliced at 1.4V. This
results in a fixed absolute slicing level of 120mV
related to sync top.
For DC-coupled TTL signals the input clamping
current is limited. The slicing level for TTL signals is
1.4V.
The separated sync signal (either video or TTL) is
integrated on an internal capacitor to detect and
normalize the sync polarity.
Normalized horizontal sync pulses are used as input
Signals for the vertical sync integrator, the PLL1
phase detector and the frequency-locked loop.
Vertical sync integrator.
Normalized composite sync signals from HSYNC
are integrated on an internal capacitor in order to
extract vertical sync pulses. The integration time is
dependent on the horizontal oscillator reference
current at HREF (pin 28). The integrator output
directly triggers the vertical oscillator.
PIN CONFIGURATION
fmax 6.5
=
fmin 1
Table of contents
Other BELINEA Monitor manuals

BELINEA
BELINEA 10 User manual

BELINEA
BELINEA 101930 User manual

BELINEA
BELINEA 10 User manual
BELINEA
BELINEA 10 20 05 User manual
BELINEA
BELINEA 101911 User manual
BELINEA
BELINEA 101830 User manual

BELINEA
BELINEA 102035W User manual
BELINEA
BELINEA 10 17 28 User manual

BELINEA
BELINEA 101925 User manual

BELINEA
BELINEA 2080 S2 User manual

BELINEA
BELINEA 10 18 30 User manual

BELINEA
BELINEA 2025 S1 User manual
BELINEA
BELINEA 106055 User manual

BELINEA
BELINEA 101555 User manual
BELINEA
BELINEA 101730 User manual
BELINEA
BELINEA 1905 G User manual

BELINEA
BELINEA 10 17 10 User manual

BELINEA
BELINEA Belinea 2025 S1W User manual
BELINEA
BELINEA 2225 S1W User manual
BELINEA
BELINEA 101710 User manual


