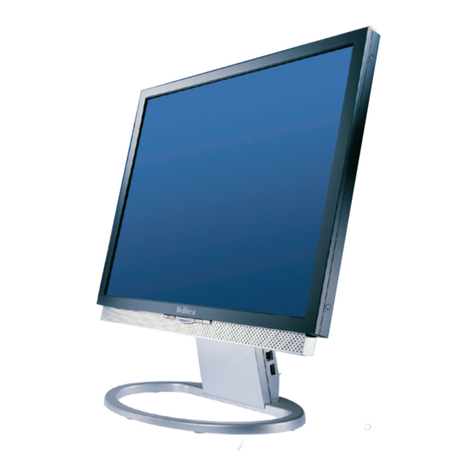
BELINEA 10 18 30 User manual

USER MANUAL
TFTDisplay
Belinea 10 18 30

Français
BELINEA PREMIUM SERVICE
The three-year return to base warranty for your Belinea monitor includes all parts and labour. In
addition many countries offer a free of charge swap out warranty programme. This does not affect
your Statutory Rights. Please visit ftp.maxdata.com or call the numbers below for further warranty
or service information.
Please have the serial and model number ready when calling.
ie Garantie für Ihren Belinea Monitor beträgt drei Jahre und umfaßt alle Bauteile. arüber hinaus
bieten wir in vielen Ländern einen zusätzlichen, kostenlosen Austausch-Service an. Von dieser
o.g. Garantie bleiben etwaige gesetzliche Gewährleistungsrechte unberührt. Nähere Informationen
zu Garantie- und Servicefragen erhalten Sie im Internet unter ftp.maxdata.com sowie unter den u.
g. Rufnummern.
Bitte halten Sie für Ihren Anruf Serien- und Modellnummer bereit.
La garantie internationale de trois ans sur les écrans Belinea sentend pièces et main duvre.
Pour obtenir plus dinformations sur la garantie et le service après-vente contactez-nous sur Internet
ftp.maxdata.com ou aux numéros de téléphone ci-dessous. Vous pouvez obtenir également plus
de détails sur les possibilités déchange gratuit, service offert dans de nombreux pays.
Pour votre appel, tenez les numéros de série et darticle à portée de main.
All other countries
Alle anderen Länder
Les autres pays
Country Phone number Additional s ap out service
Land Telefonnummer Zusätzlicher Austausch-Service
Pays Numéro de téléphone Service supplémentaire déchange sur site
Belgie/Belgique +32 (0) 900 10630 3 year on-site warranty (swap out)
eutschland +49 (0) 2365 952 1010 3 Jahre Garantie-Austausch-Service
España +49 (0) 180 5 62 94 68 3 años de garantia con intercambio a domicilio
Ελλαδα +49 (0) 180 5 62 94 68 Εγγυηση 3 χρονια επιτοπου αντικατασταση
France +33 (0) 1 69 78 97 93 3 ans de garantie avec échange standard sur site
Italia +49 (0) 180 5 62 94 68 3 anni di Garanza di sostituzione a domicilio
Luxemburg/Luxembourg +352 (0) 900 74235 3 year on-site warranty (swap out)
Nederland +31 (0) 900 BELINEA (2354632) 3 year on-site warranty (swap out)
Norge +49 (0) 180 5 62 94 68 3 års utbytteservice
Österreich +43 (0) 1 277 89 88 3 Jahre Vor-Ort-Austausch-Garantie
Portugal +49 (0) 180 5 62 94 68 3 Anos de Troca em Garantia On-Site
Schweiz 0900 575 111 (2,13 CHF/Min) 3 Jahre Vor-Ort-Austausch Service
Suomi +49 (0) 180 5 62 94 68 3-vuoden vaihtotakuu
Sverige +49 (0) 180 5 62 94 68 3 års garanti på platsen utbytesservice
United Kingdom +44 (0) 1344 788920 3 year on-site swap out warranty
(UK mainland only)
English
Deutsch
+49 (0) 180 5 62 94 68

Bedienungsanleitung - 1
DEUTSCH
DEUTSCH 2 ~ 10
ENGLISH 11 ~ 18
FRANÇAIS 19 ~ 26
Belinea 10 18 30
DEUTSCH ENGLISH FRANÇAIS
Revision 1.0

2 - Belinea 10 18 30
DEUTSCH
WILLKOMMEN BEI BELINEA
Herzlichen Glückwunsch zu Ihrem neuen Belinea-Monitor. Sie haben sich ür einen innovativen Hersteller entschie-
den, der High-Tech-Monitore mit sehr hohem Qualitätsniveau ertigt. Wir sind sicher, dass dieser Monitor Ihre
Erwartungen er üllt und dass Sie mit ihm einen zuverlässigen Partner gewinnen.
Der Monitor ist die Schnittstelle zwischen Mensch und Technik. Wer mit dem Computer arbeitet, hat nicht den PC,
sondern den Monitor im Fokus. Wir sind uns der wichtigen Funktion des Monitors bewusst. Was Sie im Blick haben,
haben auch wir im Blick und setzen deshalb konsequent die Grundwerte unserer Produktphilosophie um:
Technologie
Die bei Belinea eingesetzten Technologien bringen Qualität und Aktualität in Einklang. Eine um angreiche Techno-
logieprü ung sorgt da ür, dass nur ausgerei te Technologien ins Programm genommen werden. Erweist sich dann
eine Technologie als zukun tsweisend, wird sie schnellstens umgesetzt. So beträgt z. B. bei Belinea die Zeit bis zur
Marktein ührung ür reigegebene Produkte nur 8 Wochen.
Anwendernut en
Letztendlich ist Technologie immer nur ein Mittel zum Zweck. Bei all unseren Entwicklungen steht deshalb immer
eines im Vordergrund: der Mensch, der am Monitor arbeitet. Unsere Arbeit soll ihm seine leichter machen, und die
Produkteigenscha ten der Belinea-Monitore sorgen ür ein durch und durch angenehmes Arbeiten.
Bildqualität: Das kann sich sehen lassen! Alle Belinea-Monitore überzeugen mit einer Brillanz und Bildquali-
tät, die ihresgleichen sucht.
Gesundheit: Ist das höchste Gut des Menschen. Deshalb bietet Belinea auch eine breite Palette von Monito-
ren, die nach TCO 99 zerti iziert sind.
Ergonomie: Wenn sie nicht stimmt, ist es mit dem Spaß an der Arbeit schnell vorbei. Die hohe Ergonomie der
Belinea-Monitore zeigt sich in den Spezi ikationen und ist nach TCO und TÜV Ergonomie zerti iziert.
Per ormance: Die Leistungs ähigkeit des Monitors muss an die jeweiligen An orderungen angepasst sein.
Mit Belinea-Monitoren können Sie auch bei anspruchsvollsten Programmen entspannt weiterarbeiten.
Service: Zuverlässig von An ang bis Ende. Wir garantieren ür die ständige Ver ügbarkeit Ihres Belinea-
Monitors: durch eine pünktliche Lie erung, durch seine hohe Qualität und durch unsere dreijährige Garantie,
wenn doch einmal etwas passiert. Und wenn Sie Fragen zu unseren Produkten haben, steht Ihnen die
Belinea-Hotline mit Rat und Tat zur Seite.
Qualität
In Um ragen erreicht die Marke Belinea besonders hohe Werte bei den Punkten Qualität, Technologie und Service.
Für uns eine schöne Bestätigung, dass wir mit unserem Qualitätskonzept au dem richtigen Weg sind. Wir werden
auch in Zukun t alles tun, um den Anspruch unserer Kunden noch zu übertre en. Nur wenn unsere Produkte Ihnen
hel en, Ihre Au gaben so e izient wie möglich zu erledigen, sind auch wir zu rieden. Die hohe Qualität der Belinea-
Monitore wird von uns ständig überprü t und sie ist nicht ein ach nur ein Versprechen, sondern wird durch zahlrei-
che Spezi ikationen und Zerti izierungen bestätigt.
Service
Ob man bei der Wahl des Monitors die richtige Entscheidung getro en hat, weiß man spätestens, wenn man den
Service benötigt. Bei Belinea stehen Werte wie Freundlichkeit und Zuverlässigkeit nicht nur in der Firmenphiloso-
phie, sie werden auch tagtäglich gelebt. Dabei sucht unser Servicekonzept seinesgleichen: So gilt z. B. die dreijäh-
rige Garantie auch ür Bildröhren, Panels sowie LCD-Backlights und um asst in vielen Ländern einen kostenlosen
Austausch-Service. Von dieser o. g. Garantie bleiben etwaige gesetzliche Gewährleistungsrechte unberührt. Nähe-
re In ormationen zum Belinea Premium-Service inden Sie au der Umschlaginnenseite.

Bedienungsanleitung - 3
DEUTSCH
EINLEITUNG
Dieses Handbuch wird Sie mit der Installation und der
Bedienung des Belinea-Monitors vertraut machen.
Sehen Sie diese Anleitung auch dann kurz durch, wenn
Ihnen die Bedienung eines Monitors bereits vertraut
ist.
Wir haben alle Sorg alt walten lassen, um in diesem
Handbuch korrekte und akkurate In ormationen zu
geben. Für möglicherweise vorhandene Fehler kann
jedoch keine Ha tung übernommen werden. Weiterhin
übernehmen wir keine Garantie da ür, dass die Hard-
ware den von Ihnen gewünschten Zweck er üllt. Für
Hinweise au vorhandene Fehler, Ihre Verbesserungs-
vorschläge und Kritik sind wir stets dankbar.
© Copyright 2002
MAXDATA Systeme GmbH
45768 Marl, Deutschland
www.maxdata.com
Alle Rechte vorbehalten. Kein Teil dieses Handbuchs dar in
irgendeiner Form (Druck, Fotokopie, Mikro ilm oder andere Ver-
ahren) ohne vorherige schri tliche Genehmigung des Herstel-
lers reproduziert oder unter Verwendung elektronischer Syste-
me verarbeitet, verviel ältigt oder verbreitet werden.
Änderungen, die dem technischen Fortschritt dienen, bleiben
vorbehalten. Belinea ist ein international eingetragenes
Warenzeichen. Andere Markennamen können eingetragene
Warenzeichen sein und müssen als solche behandelt werden.
Umweltschutz ist auch unsere Au gabe: Dieses Handbuch wurde von der ersten bis zur
letzten Seite au einem Papier gedruckt, bei dessen Herstellung keinerlei Chlor mehr ver-
wendet wird.
INHALTSVERZEICHNIS
Verwendung von Symbolen
In diesem Handbuch wurden olgende Symbole ver-
wandt, um au eine mögliche Personenge ährdung,
Sachschäden bzw. nützliche In ormationen hinzuwei-
sen:
GEFAHR! Bezeichnet eine mögliche Ge ähr-
dung des Anwenders. Bei Nichtbeachtung kön-
nen Tod oder schwerste Verletzung die Folge
sein.
ACHTUNG! Weist au mögliche Sachschäden
hin. Bei Nichtbeachtung können Geräte ernst-
ha t beschädigt werden.
WICHTIG! Bezeichnet Anwendungstipps und
andere besonders nützliche In ormationen.
Willkommen bei Belinea ............................................ 2
Einleitung ................................................................... 3
Eigenscha ten im Überblick ....................................... 4
Wichtige Hinweise...................................................... 4
Auspacken ................................................................. 4
Anschliessen .............................................................. 5
Einschalten ................................................................ 5
Kon igurieren ............................................................. 6
Grundlegende Einstellungen ..................................... 6
Bildeinstellung über das OSD-Menü ......................... 6
Funktionen des OSD-Menüs ..................................... 7
Monitor drehen .......................................................... 8
Wartung und P lege ................................................... 8
Standard- und benutzerde inierte Gra ikmodi ........... 8
Wandmontage ........................................................... 8
Problemlösungen ....................................................... 9
Stromspar unktionen ................................................. 9
Technische Daten .................................................... 10
Sti tbelegung des Signalsteckers ............................ 10

4 - Belinea 10 18 30
DEUTSCH
Heben Sie den Monitor vorsichtig aus der Verpackung,
und überprü en Sie das Zubehör au Vollständigkeit
(siehe Abbildung 1).
Bewahren Sie den Originalkarton und das Verpak-
kungsmaterial ür den Fall au , dass Sie den Monitor
einschicken oder anderweitig transportieren müssen.
AUSPACKEN
EIGENSCHAFTEN IM ÜBERBLICK
Dieser Monitor eignet sich zum Anschluß an IBM-kompatible Systeme mit analogem VGA- oder DVI-D- bzw. DVI-
I-Anschluß. Nach olgend inden Sie einen Überblick über die viel ältigen Funktionen und Leistungsmerkmale des
Gerätes.
Aktives TFT-Display
18,1" Bilddiagonale
1280 x 1024 Punkte
Pivot-Funktion
Multiscan
30-82 kHz, 56-76 Hz
Digital Front Control
Extrem geringer
Stromverbrauch
< 60 Watt
Plat sparend
Stereolautsprecher
TCO 99
WICHTIGE HINWEISE
Sicherheitshinweise um Betrieb
Das Netzkabel dar nicht beschädigt werden.
Stellen Sie keine Gegenstände au das Netzka-
bel, und sorgen Sie da ür, dass keine Knoten
am Kabel au treten. Um das Kabel zu lösen,
ziehen Sie stets am Stecker und nie am Kabel
selbst. Ein beschädigtes Netzkabel kann zu
Brand oder Stromschlägen ühren.
Achten Sie darau , dass die Lü tungsschlitze
nicht verdeckt werden. Die Lu tzirkulation im
Monitor ist er orderlich, um eine Überhitzung zu
vermeiden. Wird sie beeinträchtigt, können
Brand oder ein Aus all des Monitors die Folge
sein.
Verwenden Sie zum Reinigen des Monitors kei-
ne Lösungsmittel, da andern alls die Gehäuse-
ober läche beschädigt werden kann. Weitere
Hinweise zur P lege des Geräts inden Sie im
Abschnitt Wartung und P lege.
Ö nen Sie den Monitor niemals eigenständig.
Andern alls besteht die Ge ahr eines Strom-
schlags oder anderer Personenschäden. Der
Monitor dar nur von Fachpersonal geö net und
gewartet werden.
Hinweise um Aufstellungsort
Der Au stellungsort dar weder extrem heiß oder
kalt, noch eucht oder staubig sein. Hitze und
Kälte können die Funktions ähigkeit des Moni-
tors beeinträchtigen. Feuchtigkeit und Staub
können zu einem Aus all des Monitors ühren.
Stellen Sie den Monitor nicht in unmittelbarer
Nähe von Wärmequellen wie Heizkörpern oder
Radiatoren au . Das Gerät dar zudem keinen
mechanischen Vibrationen oder Stößen ausge-
setzt sein.
Stellen Sie den Monitor so au , dass kein direk-
tes Licht oder Sonneneinstrahlung au die Bild-
schirmober läche ällt. Andern alls können Spie-
gelungen entstehen, so dass die Bildbrillanz
beeinträchtigt wird.
Hinweise um Net anschluß
Verwenden Sie ausschließlich das ür Ihr Land
geeignete Netzkabel.
Die Netzsteckdose sollte sich in direkter Nähe
be inden und leicht zugänglich sein. Der Moni-
tor kann nur durch Ziehen des Netzsteckers aus
der Steckdose ganz vom Netz getrennt werden.
Der Bildschirm ver ügt über eine e ektive Bilddiagonale von 45,97 cm (18,1") und
entspricht damit hinsichtlich der Bildgröße annähernd einem normalen 19"-Röhren-
monitor. Der Bildschirm erreicht eine maximale Au lösung von 1280 x 1024 Punkten.
Der Bildschirm ist mit einer Pivot-Funktion und der dazugehörigen So tware ausge-
stattet, die eine Rotation des LCD-Bildschirms vom Quer- zum Hoch ormat erlaubt.
Der Bildschirm tastet automatisch alle Horizontal requenzen im Bereich zwischen
30 und 82 kHz sowie alle Vertikal requenzen im Bereich zwischen 56 und 76 Hz ab.
Das Digital-Front-Control-System mit 40 Speicherplätzen (32 voreingestellte und
8 benutzerde inierte) ermöglicht das leichte Einstellen der verschiedenen Gra ik- und
Farbstandards.
Der LCD-Bildschirm verbraucht bei typischem Betrieb ca. 50% weniger Strom als
herkömmliche Röhrenmonitore. Er unterstützt zudem den EPA-Standard, so dass
der Stromverbrauch in Leerlau zeiten drastisch reduziert wird (< 2 Watt).
Der LCD-Bildschirm ist nur 18,4 cm tie und beansprucht dadurch nur minimale Stell-
läche au Ihrem Schreibtisch.
Der Monitor ver ügt über ein integriertes Stereolautsprecher-System (Verstärkerleistung
2 Watt bei 8 Ohm / 1 KHz - 15 KHz, Lautsprecherleistung 2 Watt Spitzenleistung).
Der Monitor unterschreitet die Strahlengrenzwerte nach TCO 99.
Netzkabel
Audiokabel
VGA-Kabel
Abbildung 1. LCD-Monitor mit Schwenkfuß
ivot-CD

Bedienungsanleitung - 5
DEUTSCH
ANSCHLIESSEN
1. Schalten Sie zuerst den PC und anschließend den
Belinea-Monitor mit der Netztaste (Q in Abb. 5)
ein. Die Betriebsanzeige (siehe R in Abb. 5) leuchtet
grün au .
2. Stellen Sie das Bild gemäß Ihren An orderungen
ein (siehe die nachstehenden Abschnitte Grundle-
gende Einstellungen und Bildeinstellung über das
OSD-Menü).
3. Wird au dem Monitor kein Bild angezeigt, lesen
Sie die In os im Abschnitt Problemlösungen.
➧ Schließen Sie das Signalkabel an ............................................................................................................................
Signalkabel
EINSCHALTEN
1. Stellen Sie sicher, dass Ihr PC und der LCD-Bild-
schirm vom Netz getrennt sind.
2. Wenn Sie über eine herkömmliche Gra ikkarte mit
analogem VGA-Anschluss (15polige Buchse) ver-
ügen, so schließen Sie das VGA-Kabel an die VGA-
Buchse des Monitors (Q in Abb. 2a) und den PC
an.
3. Wenn Sie über eine Gra ikkarte mit DVI-D- oder
DVI-I-Anschluß ver ügen, so schließen Sie das DVI-
Kabel (optional) an die DVI-Buchse des Monitors
(Q in Abb. 2b) und den PC an.
Abbildung 2a. Anschluß über die VGA-Schnittstelle
DVI-Kabel
Abbildung 2b. Anschluss über die DVI-D-Schnittstelle
➧ Schließen Sie die Stromversorgung an ...............
Um das Netzkabel anzuschließen, müssen Sie zuerst
den LCD-Bildschirm im Uhrzeigersinn (von hinten ge-
sehen) drehen. Schließen Sie dann das Netzkabel (Q
in Abb. 3) an die Monitor-Netzbuchse und an eine ge-
erdete Schuko-Steckdose an.
➧ Monitorlautsprecher anschließen ........................
Wenn Ihr Computer über einen Audioausgang ver ügt,
schließen Sie das mitgelie erte Audiokabel an die
Audioeingangsbuchse des Monitors (R in Abb. 3) und
die Line-Out-Buchse des PCs an.
➧ Monitormikrofon anschließen ..............................
Wenn Ihr Computer über einen Mikro oneingang
ver ügt, schließen Sie ein Mikro onkabel (3,5 mm Mini-
Klinkenstecker an beiden Enden, nicht im Lie erum ang
enthalten) an die Buchse MIC OUT an der Rückseite
des Monitors und die Mic-In-Buchse des PCs an.
➧ Externe Kopfhörer anschließen ...........................
Wenn Sie die Monitorlautsprecher angeschlossen
haben (siehe vorstehenden Abschnitt), können Sie
alternativ zur Lautsprecherwiedergabe auch Kop hörer
an die Buchse an der rechten Seite des Monitors an.
Abbildung 3. Stromversorgung und optionale Komponenten
anschließen
➧ Externes Mikrofon anschließen ............................
Wenn Sie das Monitormikro on angeschlossen haben
(siehe oben), können Sie alternativ zum internen
Mikro on auch ein externes an die Buchse an der
rechten Seite des Monitors an.

6 - Belinea 10 18 30
DEUTSCH
GRUNDLEGENDE EINSTELLUNGEN
Das OSD-Menü ist ein Fenster, in dem Sie die aktuel-
len Bildeinstellungen einsehen und ändern können. Es
wird olgendermaßen au geru en:
1. Drücken Sie die OSD-Taste MENU (U in Abb. 5).
Das OSD-Hauptmenü erscheint am Bildschirm.
2. Es gibt insgesamt 9 verschiedene, nach Kategori-
en gegliederte OSD-Untermenüs. Wählen Sie durch
Drücken der OSD-Taste oder die gewünschte
Kategorie (siehe Abschnitt Funktionen des OSD-
Menüs).
3. Drücken Sie die OSD-Taste MENU, um die ausge-
wählte Funktion bzw. das dazugehörige Unterme-
nü zu aktivieren.
4. Wenn Sie ein Untermenü au geru en haben, so
wählen Sie erneut mit den OSD-Tasten oder
die gewünschte Unter unktion aus.
5. Stellen Sie gg . mit den OSD-Tasten oder den
gewünschten Wert ein.
6. Drücken Sie nochmals die OSD-Taste MENU, um
den Wert abzuspeichern. Wiederholen Sie gg . die
Schritte 2-5, um weitere Einstellungen vorzuneh-
men.
7. Das OSD-Menü verschwindet von selbst, nachdem
ca. 60 Sekunden lang keine Bedienung er olgt ist.
Dabei werden die aktuellen Einstellungen gespei-
chert. Sie können es aber auch manuell ausblen-
den, indem Sie die Option HAUPTFUNKTIONEN
BEENDEN auswählen.
BILDEINSTELLUNG ÜBER DAS OSD-MENÜ
➧ Monitor unter Windows® 9x/ME/2000 und XP
konfigurieren:
Um den Monitor unter Windows® 9x/ME/2000 und XP
in Betrieb zu nehmen, wird dringend emp ohlen, die
Belinea-Einstellungsdatei zu installieren. Sie können
diese über Ihren Belinea-Händler beziehen oder vom
MAXDATA FTP-Server ftp.maxdata.com laden.
Wählen Sie hier die Rubrik Belinea Treiber/Driver,
und laden Sie die Dateien Belinea.in und
README_Belinea.TXT herunter. Be olgen Sie
KONFIGURIEREN
die Installationsanweisungen in der Datei
README_Belinea.TXT.
➧➧
➧➧
➧ Monitor unter Windows® NT 4.0 konfigurieren:
Unter Windows® NT 4.0 benötigen Sie keine separate
Einstellungsdatei. Wählen Sie die Bildwiederhol-
requenz und Anzahl der Farben direkt unter den Me-
nüpunkten Einstellungen, Systemsteuerung, Anzei-
ge, Einstellungen aus.
➧ Signalanschluss wählen .........................................
Wenn Sie den Monitor über die DSUB- und die DVI-
Buchse gleichzeitig an zwei Computer angeschlossen
haben, können Sie mit den OSD-Tasten und (V
und W in Abb. 5) zwischen den beiden Darstellungen
wechseln.
➧➧
➧➧
➧ Automatische Bildjustierung .................................
Sie können die Bildeinstellungen (wie Helligkeit, Kon-
trast, Bildposition, Phase etc.) entweder manuell ein-
stellen oder die automatische Justierungs unktion des
LCD-Monitors verwenden. Hiermit werden die einzel-
nen Bildparameter au die optimalen Werte ür den ak-
tuellen Gra ikmodus eingestellt. Drücken Sie zum Au -
ru en der automatischen Justierung die Taste AUTO
(X in Abb. 5). Warten Sie kurz, bis die automatische
Justierung abgeschlossen ist.
➧ Helligkeit direkt einstellen .....................................
Sie können die Helligkeit direkt einstellen, indem Sie
die Tasten (S und T in Abb. 4) drücken, wäh-
rend das OSD-Menü nicht angezeigt wird. Drücken Sie
die Taste , um die Helligkeit zu erhöhen oder , um
sie zu reduzieren.
➧ Audiosystem ein-/ausschalten ..............................
Wenn Sie die Monitorlautsprecher an Ihren PC an-
schlossen haben, schalten Sie das Audiosystem mit
dem Netzschalter am Monitor uß (R in Abb. 4) ein bzw.
aus.
➧ Ton stummschalten (MUTE) ..................................
Sie können die Tonwiedergabe durch Drücken der Ta-
ste MUTE (S in Abb. 4) stummschalten. Drücken Sie
die Taste erneut, um den Ton wieder einzuschalten.
➧ Bass (BASS) .............................................................
Sie können die Bassbooster-Funktion (Verstärkung der
Basswiedergabe) durch Drücken der Taste BASS (Q
in Abb. 4) ein- und ausschalten.
Abbildung 5. Bedienelemente des Monitors
Abbildung 4. Bedienelemente des Audiosystems

Bedienungsanleitung - 7
DEUTSCH
SPRACHE
Wählt die Sprache des OSD-Menüs: Englisch,
Spanisch, Französisch, Deutsch, Italienisch, Japa-
nisch.
BILDLAGE EINSTELLEN
HORIZONTAL: Regelt die horizontale Position
des Bildes.
VERTIKAL: Regelt die vertikale Position des
Bildes.
HELLIGKEIT & KONTRAST
HELLIGKEIT: Regelt die Helligkeit des Bildes.
KONTRAST: Regelt den Kontrast des Bildes.
BILDRAUSCHEN
PHASENLAGE: Regelt die vertikale Fein-
justierung.
TAKT: Regelt die horizontale Pixelverteilung zur
Optimierung der Bilddarstellung.
FARBEINSTELLUNG
In diesem Menü können Sie durch Drücken der OSD
Tasten oder eine voreingestellte Farbtemperatur
(9300 K oder 6500 K) auswählen. Die Auswirkung der
von Ihnen gewählten Farbtemperatur ist so ort am Bild-
schirm sichtbar. Falls Sie die Farbwerte einzeln ein-
stellen möchten, wählen Sie die Option Benutzerein-
stellung. Wählen Sie dann durch Drücken der Taste
oder die Einstellmöglichkeiten ür Rot, Grün und
Blau, und stellen Sie mit den OSD-Tasten oder
den gewünschten Wert ein. Wenn alle Farbwerte ge-
eignet eingestellt sind, drücken Sie die OSD-Taste
MENU, um zum OSD-Hauptmenü zurückzukehren.
FUNKTIONEN DES OSD-MENÜS
OSD-EINSTELLUNGEN
HORIZONTAL: Wählt die horizontale Position
des OSD-Menüs.
VERTIKAL: Wählt die vertikale Position des
OSD-Menüs.
PRODUKTINFORMATION
Zeigt die aktuelle Gra ikau lösung samt der Horizon-
tal- und Vertikal requenz (keine Einstellungen
möglich) sowie den verwendeten Videoeingang.
WERKSEINSTELL. AUFRUFEN
Stellt die werkseitigen Bildeinstellungen wieder her.
Wählen Sie die Option YES, um dies zu bestätigen
oder NO, um ohne Änderungen zum Hauptmenü
zurückzukehren.
EINGANGSAUSWAHL
ANALOG (DSUB)/DIGITAL (DVI), ANALOG (DVI):
Wählt den Anschluss zwischen dem DSUB-Anschluss
und dem DVI-Anschluss (analog oder digital) aus. Sie
können den Monitor somit auch an zwei Computer an-
schließen (durch gleichzeitige Nutzung beider Anschlüs-
se) und mit dieser Funktion zwischen der jeweiligen
Anzeige wechseln.
HAUPTFUNKTIONEN BEENDEN
Schließt das OSD-Fenster.

8 - Belinea 10 18 30
DEUTSCH
Lösen Sie zuerst das Netzkabel von der Stromver-
sorgung, indem Sie den Stecker aus der Steckdo-
se ziehen.
Wenn der Monitor stark verschmutzt ist, reinigen
Sie ihn mit einem ange euchteten Tuch. Verwen-
den Sie nur warmes Wasser, und reiben Sie den
Monitor danach trocken. Durch Lösungsmittel bzw.
schar e Reinigungsmittel kann die Gehäuseober-
läche beschädigt werden. Reinigen Sie die Bild-
schirm läche nur mit einem weichen Tuch, da an-
sonsten die LCD-Beschichtung Schaden nehmen
kann.
Reinigen Sie den Monitor bei leichter Verschmut-
zung nur mit einem trockenen, weichen und anti-
statischen Tuch.
Die vorderseitige LCD-Bildschirm läche ist sehr
emp indlich. Vermeiden Sie daher jeglichen Druck
au die Bildschirm läche (Finger, Sti t etc.), und ge-
hen Sie besonders beim Transportieren des Ge-
räts vorsichtig vor, damit der Bildschirm keinen stär-
keren Stößen ausgesetzt ist und keine Kratzer
entstehen (verwenden Sie stets die Original-
verpackung).
STANDARD- UND BENUTZERDEFINIERTE GRAFIKMODI
In der nach olgenden Tabelle inden Sie die werkseitig
vorde inierten Gra ikmodi mit den dazugehörigen Au -
lösungen und Frequenzen. Für jeden dieser Modi sind
alle Bildeinstellungen (Breite, Höhe, Position etc.) be-
reits optimal kon iguriert.
Sie können bis zu 8 weitere Einstellungen abspeichern.
Verwenden Sie eine andere Au lösung oder eine an-
gegebene Au lösung mit anderen Frequenzen, so ju-
stieren Sie ein ach das Bild bis es optimal dargestellt
wird (siehe Abschnitt Bildeinstellung über das OSD-
Menü). Wenn Sie später nach einem Moduswechsel
diese Au lösung wieder einschalten (z.B. durch Au ru-
en des entsprechenden Programms), werden die von
Ihnen gespeicherten Werte ür Bildgröße, -position etc.
automatisch übernommen (d.h. der Monitor erinnert
sich an Ihre Einstellungen).
WARTUNG UND PFLEGE
Standard Auflösung H-Freq. V-Freq. Pixeltakt
(kH ) (H ) (MH )
VGA 720 x 400 31,469 70,087 25,175
VGA 640 x 480 31,469 59,940 25,175
VESA 640 x 480 37,500 75,000 31,500
VESA 800 x 600 37,879 60,317 40,000
VESA 800 x 600 46,875 75,000 49,498
VESA 1024 x 768 48,363 60,004 65,000
VESA 1024 x 768 60,023 75,029 78,750
VESA 1280 x 1024 63,981 60,020 108,000
VESA 1280 x 1024 79,976 75,025 135,000
TV-PAL 668 x 556 31,250 50,000 27,000
➧ Pivot-Software installieren ....................................
Um die Pivot-Funktion zum Drehen des Monitors nut-
zen zu können, müssen Sie zuerst die Pivot-So tware
installieren. Legen Sie hierzu die mitgelie erte CD Pivot
Pro in das CD-ROM-Lau werk ein. Wenn die Auto-
start-Funktion des PC aktiviert ist, wird Installation di-
rekt au geru en. Dopppelklicken Sie andern alls au die
Datei START_PIVOT.EXE und olgen Sie den Anwei-
sungen am Bildschirm.
➧ Monitor drehen ........................................................
Nachdem die Pivot-So tware installiert ist, klicken Sie
in der Symbolleiste rechts unten am Bildschirm au das
Pivot-Symbol und wählen Sie die Option '270°'.
Drehen Sie dann physisch den LCD-Bildschirm gegen
den Uhrzeigersinn.
Weitere In ormationen zur Pivot-So tware inden Sie
unter der Hil e-Option der So tware.
MONITOR DREHEN
WANDMONTAGE
Der Belinea-Monitor ist werkseitig als Standgerät kon iguriert. Sie können das Gerät jedoch auch an der Wand oder
au einem Monitorschwenkarm (optional erhältlich) montieren. Folgen Sie hierzu bitte der entsprechenden Anleitung
(4-Loch-Montage im Abstand von 100 x 100 mm gemäß dem internationalen VESA FPMPMI-Standard).
Standard Auflösung H-Freq. V-Freq. Pixeltakt
(kH ) (H ) (MH )
VGA 640 x 480 37,5 75 ---
VGA 800 x 600 46,9 75 ---
VESA 1024 x 768 48,4 60 ---
VESA 1024 x 768 60,0 75 ---
VESA 1280 x 1024 64,0 60 ---
VESA 1280 x 1024 80,0 75 ---
Analog: Digital:

Bedienungsanleitung - 9
DEUTSCH
PROBLEMLÖSUNGEN
Kein Bild
Net an eige leuchtet nicht
- Prü en Sie, ob das Netzkabel richtig angeschlossen ist (siehe Abschnitt Anschließen).
- Stellen Sie sicher, dass der Monitor mit dem Netzschalter eingeschaltet wurde (siehe Abschnitt Einschal-
ten).
Net an eige leuchtet orange
- Be indet sich der Monitor in einem Stromsparmodus (siehe Abschnitt Stromspar unktionen)?
- Ist das Signalkabel am Monitor und an der Gra ikbuchse des PC angeschlossen (siehe Abschnitt Anschlies-
sen)?
- Ist der PC eingeschaltet (siehe Dokumentation zu Ihrem PC)?
Net an eige leuchtet grün
- Evtl. ist ein Bildschirmschoner au Ihrem PC installiert und wurde nach einer bestimmten Zeit der Inaktivität
eingeschaltet. Drücken Sie eine Taste au der Tastatur, oder bewegen Sie die Maus.
Meldung Kein Videoeingangssignal
- Ist das Signalkabel am Monitor und an der Gra ikbuchse des PC angeschlossen (siehe Abschnitt Anschlies-
sen)?
- Ist der PC eingeschaltet (siehe Dokumentation zu Ihrem PC)?
Fehler der Bilddarstellung
Bild ist nach links/rechts oder oben/unten verschoben
- Wenn das Bild zwar normal, aber nicht zentriert erscheint, können Sie dies mit den OSD-Funktionen justie-
ren. Weitere In ormationen hierzu inden Sie im Kapitel Grundlegende Einstellungen, Abschnitt Automati-
sche Bildjustierung oder unter Bildlage einstellen im Abschnitt Funktionen des OSD-Menüs.
Bild ist verschwommen oder unscharf
- Überprü en Sie die Helligkeits- und Kontrasteinstellung (siehe Untermenü Helligkeit & Kontrast im Abschnitt
Funktionen des OSD-Menüs).
- Überprü en Sie die Bildrauschen-Einstellung (siehe Funktion Bildrauschen im Abschnitt Funktionen des
OSD-Menüs).
- Bei niedrigeren Au lösungen als 1280 x 1024 Punkte wird die Bilddarstellung durch Interpolation ermöglicht,
die zu einer leicht verschwommenen Darstellung ühren kann. Wählen Sie daher möglichst die optimale
Au lösung von 1280 x 1024 Bildpunkten.
Farbdarstellung ungenügend
- Wenn die Farben etwas anders aussehen, als sie eigentlich sollten (z.B. Weiß nicht richtig weiß ist), sollten Sie die
Farbtemperatur nachregeln (siehe Funktion Farbeinstellung im Abschnitt Funktionen des OSD-Menüs).
STROMSPARFUNKTIONEN
Der Monitor ist mit Stromspar unktionen nach dem
EPA-Standard ausgestattet. Soweit Ihr Computer über
eine kompatible Gra ikkarte oder eine entsprechende
So tware ver ügt, kann der Stromverbrauch des Moni-
tors in Leerlau zeiten automatisch reduziert werden.
Wenn der Monitor sich im Energiesparmodus be indet,
leuchtet die Betriebsanzeige (siehe R in Abb. 5) oran-
ge. Sobald eine Eingabe über die Tastatur, Maus oder
ein anderes Eingabegerät er olgt, schaltet sich der
Monitor automatisch wieder ein. In der olgenden Ta-
belle inden Sie die Stromverbrauchswerte und Anzei-
gen dieser automatischen Stromspar unktion:
Modus Video H-Sync V-Sync Stromverbrauch Strom- Farbe der
einsparung (%) Betriebsan eige
Normal aktiv normal normal < 60 Watt 0 grün
O -Status ehlt ehlt < 2 Watt 90 orange
Dieser Monitor ist ENERGY STAR®-kompatibel. MAXDATA versichert als ENERGY STAR®-Partner, dass dieses
Gerät den ENERGY STAR®-Richtlinien zur Optimierung des Stromverbrauchs entspricht.

10 - Belinea 10 18 30
DEUTSCH
TECHNISCHE DATEN
LCD-Panel 18,1 Zoll Bilddiagonale (45,97 cm sichtbar),
strahlungsarm nach TCO 99, Antire lexbeschichtung,
Kontrastverhältnis 350:1 (typisch),
Sichtwinkel vertikal 160°, horizontal 160° (typisch bei Kontrastverhältnis 10:1)
Eingangssignal DSUB (15-polig) und DVI-D / DVI-I
Bildschirmfarben 16,7 Mio. Farben
Synchronisierung 30 - 82 kHz horizontal
56 - 76 Hz vertikal
Bandbreite 135 MHz
Auflösung max. 1280 x 1024 Punkte
Lautsprecherleistung Verstärker: 2 Watt bei 8 Ohm / 1 KHz - 15 KHz
Lautsprecher: 1 Watt Dauerbelastung, 2 Watt Spitzenleistung
Net anschluß 100 - 240 V~, 50 - 60 Hz
Leistungsaufnahme max. 60 W (O -Status: < 2 W)
Stromspar unktionen nach EPA
Abmessungen Breite 402 mm, Höhe 424 mm, Tie e 184 mm (netto)
Gewicht 9,0 kg (netto)
Umgebungsbedingungen Betrieb: 0 bis 40 °C, r. L. 20 - 95 % (nicht kondensierend)
Lagerung: -20 bis 60 °C, r. L. 20 - 95 % (nicht kondensierend)
STIFTBELEGUNG DES SIGNALSTECKERS
15poliger D-SUB-Stecker
Stift Belegung
1 Rot
2 Grün
3 Blau
4 Masse
5 Nicht belegt
6 Masse Rot
7 Masse Grün
8 Masse Blau
Stift Belegung
9 + 5V DDC
10 Masse
11 Masse
12 SDA (DDC Data)
13 Hor. Synch.
14 Vert. Synch.
15 SCL (DDC Clock)
Stift Belegung
1 TMDS data2-
2 TMDS data2+
3 TMDS data2/4 shield
4 TMDS data4-
5 TMDS data4+
6 DDC Clock
7 DDC Data
8 Analog Vertical Sync.
9 TMDS data1-
10 TMDS data1+
11 TMDS data1/3 shield
12 TMDS data3-
24poliger DVI-Stecker
Stift Belegung
13 TMDS data3+
14 + 5V Power
15 Masse (Return ür + 5V und H/V sync)
16 Hot plug detect
17 TMDS data0-
18 TMDS data0+
19 TMDS data0/5 shield
20 TMDS data5-
21 TMDS data5+
22 TMDS clock shield
23 TMDS clock+
24 TMDS clock-
Stift Belegung
C1 Analog Red
C2 Analog Green
C3 Analog Green
C4 Analog Hor. Sync.
C5 Analog Vert. Sync.

Operating Instructions - 11
ENGLISH
INTRODUCTION
This manual will familiarize you with the installation and
use of your Belinea Monitor. Please take the time to look
through these instructions even if you are familiar with
monitors.
e have taken all possible care to ensure that this manual
contains correct, accurate information. However, the
manufacturer cannot assume liability for any possible
errors. In addition, the manufacturer cannot guarantee that
the hardware will meet the purpose you require. e would
appreciate reports of any errors, suggestions or criticism.
© Copyright 2002
MAXDATA Systeme GmbH
45768 Marl, Germany
www.maxdata.com
All rights reserved. No part of this manual may be reproduced,
processed or distributed in any form (print, photocopy, microfilm
or any other process) or processed by an electronic system
without prior written permission from the manufacturer.
e reserve the right to make changes according to technical
progress. Belinea is an internationally registered trademark.
Other brand names may be registered trademarks and must be
treated as such.
e are all responsible for the environment: this manual was printed from front to back on paper
that was produced without chlorine.
TABLE OF CONTENTS
Guide to symbols
The symbols below are used in this manual to indicate
where there is risk of injury or damaging devices or to
indicate especially useful information:
DANGER! Indicates risk of injury. hen not
following instructions, severe injury or death may
result.
ATTENTION! Indicates possible damage to
devices. hen not following instructions,
devices may be heavily damaged.
IMPORTANT! Indicates hints on operation and
other useful information.
Import nt S fety Instructions
Some Belinea monitor models come with 2 power cords.
Please ensure you use the UK plug (3 pin) in the UK and
not the European plug (2 pin).
Do not place the monitor in very hot or cold, nor damp or
dusty surroundings. Do not put vases etc. on the monitor,
water may cause short circuits. Do not block or cover the
ventilating openings. All products that produce magnetic
fields, i.e. laser printers, loud-speakers etc., must not be
placed close to the monitor. Do not install this monitor in
areas where too much light or sunshine might directly hit
the screen, otherwise the brightness of the picture will be
poor due to reflections. Refer all servicing and maintenance
to authorised service personnel only!
CAUTION
Do not remove the cover!
Serious electrical shock hazards exist inside this
monitor.
NOTE
Removal of cover invalidates your warranty.
Introduction ................................................................ 11
Features .................................................................... 12
Important information ................................................. 12
Unpacking ................................................................. 12
Connecting ................................................................ 13
Startup ....................................................................... 13
Configuration ............................................................. 14
Basic Setup ............................................................... 14
Image Settings Using the OSD Menu ........................14
OSD Menu Functions ................................................ 15
all mounting ............................................................ 16
Rotating the monitor ................................................... 16
Caring for Your LCD monitor ...................................... 16
Preset and user defined graphic modes .....................16
Troubleshooting ......................................................... 17
Energy Saving Functions ...........................................17
Technical Specifications .............................................18
Pin Assignment .......................................................... 18

12 - Belinea 10 18 30
ENGLISH
Carefully lift the monitor out of the packaging and make
sure that all components are included (see fig. 1).
Save the original box and packing material in case you
have to ship or transport the monitor.
UNPACKING
FEATURES
This monitor is suitable for connection to IBM-compatible systems with an analog VGA or DVI-D or DVI-I connector.
An overview of its numerous functions and features is provided below.
Active TFT Displ y
18.1" diagonal size
1280 x 1024 pixels
Pivot Function
Multisc n
30 - 82 kHz, 56 - 76 Hz
Digit l Front Control
Very Low Power
Consumption
< 60 atts
Minim l Sp ce
Requirements
Stereo spe ker system
TCO 99
IMPORTANT INFORMATION
S fety instructions for oper tion
The power cord must not be damaged. Do not
place any objects on the power cord and make
sure it does not have any knots. To unplug the
cord, always pull on the plug and not on the cable
itself.
Avoid covering the ventilation slots. Air circulation
is necessary to prevent the monitor from
overheating. If the air circulation is restricted it
could cause fire or damage the monitor.
Do not use any solvents to clean the monitor, as
the housing could be damaged. For more
information about cleaning the monitor, please see
Caring for your Monitor.
Never open the monitor housing yourself. There
is a danger of electric shock and other hazards.
The monitor may only be opened and serviced by
qualified professionals.
Note on monitor pl cement
The setup location must not be extremely hot, cold,
humid or dusty. Heat and cold can impair the
functionality of the monitor. Humidity and dust can
cause the monitor to fail.
Dont place the monitor near heaters such as
radiators or the like. Dont expose the monitor to
mechanical vibrations or jarring.
Position the monitor so that no direct light or sun
strikes the screen, which could cause reflections
that reduce the quality of the image.
Notes on power connection
Only use the power cord designated for use in
your country.
The wall outlet should be within easy reach. Pulling
the power plug is the only way to disconnect the
monitor from the power source.
The LCD monitor has an effective diagonal size of 18.1" (45.97 cm) so as far as the
effective display size is concerned, it is comparable to a standard 19" monitor. The
monitor attains a maximum resolution of 1280 x 1024 pixels.
The screen is equipped with a pivot function and the associated software to enable you
to rotate the LCD screen from landscape to portrait format.
The monitor automatically scans all horizontal frequencies between 30 and 82 kHz as
well as all vertical frequencies between 56 and 76 Hz.
Digital Front Control with 40 memory settings (32 preset and 8 user defined) and digital
control keys make setting the various graphic and color standards easy.
The LCD monitor has a power consumption 50% below that of ordinary CRT monitors
during typical operation. In addition, it is EPA compliant, drastically reducing power
consumption when not in use (< 2 atts).
The LCD monitor has a depth of only 7.25" (18.4 cm), minimizing its space requirements
and leaving more desktop space to you.
The monitor is equipped with an internal stereo speaker system (amplifier: 2 at 8 ohms
/ 1 kHz - 15 kHz, speakers: 2 peak, 1 rated) which can be connected to your sound
card.
This monitor exceeds the TCO 99 emission requirements.
Power cord
Audio cable
VGA cable
Figure 1. Monitor with swivel base
Pivot CD

Operating Instructions - 13
ENGLISH
CONNECTING
1. Make sure that your computer and the LCD monitor
are disconnected from the power supply.
2. If you have a conventional graphic card with an analog
VGA connector (15-pin socket), connect one end of
the VGA cable to the VGA connector of your monitor
( in fig. 2a), the other end to the computer.
➧ To connect the monitor to the power source .........
To connect the power cable, you first need to rotate the
monitor clockwise (as viewed from the rear). Now plug
the power cable ( in fig. 3) into the monitor power socket
and the other end to a grounded power socket.
➧ Connecting the monitor spe kers ...........................
If your computer is equipped with an audio output port,
then connect one end of the sound cable to the audio
input connector of the monitor ( in fig. 3) and the other
end to the Line-Out connector of the computer.
➧ Connecting the monitor microphone .....................
If your computer has a microphone input, then connect a
microphone cable (3.5mm mini stereo jacks at both
ends, not supplied) to the MIC OUT socket on the back
of the monitor and to the Mic In socket on your PC.
➧ Connecting extern l he dphones ...........................
If youve connected the monitor speakers (see section
above), as an alternative to output through the loudspeakers
you can connect headphones to the socket on the right
hand side of the monitor.
➧ Connecting the Sign l C ble ......................................................................................................................................
3. If you have a graphics card with a DVI-D or DVI-I
connector, then connect one end of the DVI cable
(optional) to the DVI connector of your monitor ( in
fig. 2b), the other end to the computer.
Signal cable
Figure 2a. Connection via the VGA interface
DVI-D cable
Figure 2b. Connection via the DVI-D interface
Figure 3. Connecting power supply and optional co ponents
➧ Connecting n extern l microphone ......................
If youve connected the monitor microphone (see above),
then as an alternative to the internal microphone you can
connect an external microphone to the socket on the
right hand side of the monitor.
STARTUP
1. First start your PC and then turn on your Belinea
monitor using the power switch ( in fig. 5). The status
indicator ( in fig. 5) should light up green.
2. Adjust the image to meet your requirements (see the
following sections Basic Setup and Image settings
using the OSD menu).
3. If there is no image displayed on the monitor, consult
the section Troubleshooting.

14 - Belinea 10 18 30
ENGLISH
CONFIGURATION
➧ Monitor setup under Windows® 9x/ME/2000 nd
XP:
If using the monitor under indows® 9x/ME/2000 or XP
we strongly recommend installing the Belinea settings file.
You can get this file from your Belinea dealer or download
it from the MAXDATA FTP server at ftp. axdata.co .
Here, click the Belinea_Treiber_Driver directory and
download the Belinea.inf and README_Berlinea.TXT
files. Follow the installation instructions in the
README_Belinea.TXT file.
➧➧
➧➧
➧ Monitor setup under Windows® NT 4.0:
Under indows® NT 4.0 no separate setup file is required.
Select the vertical frequency and the number of colors
directly from within the Settings à Control Panel à
Display à Settings menu.
BASIC SETUP
Selecting the sign l connection .................................
If you have connected the monitor to 2 computers
simultaneously via the DSUB and DVI connectors, you
can switch between the two displays using the and
OSD buttons ( and in fig. 5).
➧➧
➧➧
➧ Autom tic im ge djustment ..................................
You can adjust the image settings (such as brightness,
contrast, image position, phase etc) manually or by using
the LCD monitors automatic image adjustment feature.
This will adjust the image parameters to their optimal
settings for the current graphics mode. Press AUTO (
in fig. 4) to start the automatic adjustment. The process
will take a short while to complete.
➧ Direct brightness djustment ..................................
You can adjust the brightness directly by pressing the
buttons ( and
in fig. 4) while the OSD menu
is not displayed. Press the button to increase
brightness or to reduce it.
➧ Switching udio system on/off ................................
If you have connected the monitor loudspeaker to your
PC, use the on/off switch on the base of the monitor (
in fig. 4) to switch the audio system on or off.
➧ Mute (MUTE) ..............................................................
If your monitor is connected to your PCs sound card,
you can mute the sound by pressing the MUTE button
( in fig. 4). Press the button again to turn the sound
back on.
➧ B ss (BASS) .............................................................
You can switch the bass boost function (amplify bass
playback) on and off by pressing the BASS button ( in
fig. 4).
IMAGE SETTINGS USING THE OSD MENU
The OSD menu is a window on your screen that allows
you to view and change display settings. To change an
OSD setting:
1. Press the MENU button ( in fig. 5) to display the
OSD menu on the screen.
2. There are a total of 9 OSD submenus divided by
categories. Select the desired submenu by pressing
the OSD button or (see section OSD Menu
Functions).
3. Press the MENU OSD button to activate the selected
function or associated submenu.
4. If you selected a submenu, now select the subfunction
you want using the or OSD buttons.
5. Set the desired value using the OSD button or .
6. Press the MENU button again to save the setting.
Repeat steps 2-5 to make further adjustments as
needed.
7. The OSD menu automatically disappears if no changes
are made for more than 60 seconds. The current
settings will be saved. You can close it manually by
pressing the EXIT MAIN CONTROLS button.
Figure 5. Monitor features
Figure 4. Audio syste controls

Operating Instructions - 15
ENGLISH
OSD MENU FUNCTIONS
LANGUAGE
Selection of the OSD menu language: English,
Spanish, German, French, Italian, Japanese.
ADJUST POSITION
HORIZONTAL: Controls the horizontal position.
VERTICAL: Controls the vertical position.
BRIGHTNESS & CONTRAST
BRIGHTNESS: Controls the picture brightness.
CONTRAST: Controls the picture contrast.
VIDEO NOISE
PHASE: Controls the vertical fine adjustment.
CLOCK: Controls the horizontal pixel
distribution for optimizing the image display.
ADJUST COLOR
This menu lets you select a pre-defined color temperature
(9300K or 6500K) by pressing the or OSD buttons.
The color temperature you select takes effect immediately
on screen. If you wish to set individual color values, select
the user settings option. Then press the or buttons
to select the red, green and blue settings and use the
or OSD buttons to set the value you want. Once you
are satisfied with your color settings, press the MENU
OSD button to return to the OSD main menu.
OSD SETTINGS
HORIZONTAL: Adjusts the horizontal position
of the OSD menu.
VERTICAL: Adjusts the vertical position of the
OSD menu.
PRODUKT INFORMATION
Displays the current resolution as well as the horizontal
and vertical frequency (no adjustment possible) and the
video input being used.
RESET TO FACTORY SETTINGS
Restores factory display settings. Select the YES option
to confirm, or NO to return to the main menu without
making changes.
INPUT SELECTION
ANALOG (DSUB)/DIGITAL (DVI), ANALOG (DVI):
Selects either the DSUB connector or the DVI
connector (analog or digital). This also lets you connect
the monitor to 2 computers (by using both connectors
at the same time) and use this function to switch
between each computers display.
EXIT MAIN CONTROLS
Closes the OSD menu.

16 - Belinea 10 18 30
ENGLISH
St nd rd Resolution H-Freq. V-Freq. Pixel clock
(kHz) (Hz) (MHz)
VGA 720 x 400 31.469 70.087 25.175
VGA 640 x 480 31.469 59.940 25.175
VESA 640 x 480 37.500 75.000 31.500
VESA 800 x 600 37.879 60.317 40.000
VESA 800 x 600 46.875 75.000 49.498
VESA 1024 x 768 48.363 60.004 65.000
VESA 1024 x 768 60.023 75.029 78.750
VESA 1280 x 1024 63.981 60.020 108.000
VESA 1280 x 1024 79.976 75.025 135.000
TV-PAL 668 x 556 31.250 50.000 27.000
St nd rd Resolution H-Freq. V-Freq. Pixel clock
(kHz) (Hz) (MHz)
VGA 640 x 480 37.5 75 ---
VGA 800 x 600 46.9 75 ---
VESA 1024 x 768 48.4 60 ---
VESA 1024 x 768 60.0 75 ---
VESA 1280 x 1024 64.0 60 ---
VESA 1280 x 1024 80.0 75 ---
First, unplug the power cord from the wall socket.
If the LCD screen is extremely dirty, clean it with a
moist cloth. Use only warm water and then wipe the
monitor dry. Solvents or harsh cleaners can damage
the housing. Clean the display surface only with a
soft cloth, otherwise you may damage the displays
coating.
If the monitor is only slightly dirty, clean it using a soft,
dry and antistatic cloth.
The LCD monitors screen surface is very sensitive.
Please avoid any contact with the surface (finger,
pencil etc.) and be especially cautious during
transportation since jolts and shocks can cause the
screen to become scratched (always use the original
packaging).
PRESET AND USER DEFINED GRAPHIC MODES
The following table lists the factory preset graphic modes
and their resolutions and frequencies. For all these graphic
modes all image adjustments (width, height, position, etc.)
are already optimally configured.
You can save up to 8 additional settings. If you use a
different resolution or one of the given resolutions with other
frequencies, you can adjust the image until it is perfectly
displayed. If you switch back to this resolution after
changing modes (i.e. by running the same software), the
values you saved for image size, position, etc., will
automatically be recalled (that is, the monitor remembers
your settings).
CARING FOR YOUR LCD MONITOR
ROTATING THE MONITOR
➧ Inst lling the pivot softw re ....................................
You first need to install the pivot software before you can
use the pivot function for rotating the monitor. To install
the software, place the supplied Pivot Pro CD in your
computers CD-ROM drive. If your PCs autorun function
is active, installation will begin straight away. If not, double-
click the START_PIVOT.EXE file and follow the
instructions on screen.
➧ Rot ting monitor ......................................................
Once the pivot software is installed, click the pivot symbol
in the toolbar at the bottom right of the screen and
select the 270° option. Then physically rotate the LCD
screen in the counterclockwise direction.
You can find additional information on the pivot software
in the softwares help option.
Analog: Digital:
WALL MOUNTING
The Belinea-monitor is shipped with the standard desktop configuration. However, you can optionally mount the device
on a wall or on a monitor swivel arm (optional accessory). Please follow the corresponding instructions
(4-hole assembly with a spacing of 3 x 3 inches (100 x 100mm) according to the international VESA FPMPMI standard).

Operating Instructions - 17
ENGLISH
TROUBLESHOOTING
Bl nk Screen
Power indic tor is off
- Make sure the power cable is connected properly (see section Connecting).
- Make sure that the monitor was turned on using the power switch (see section Startup).
Power indic tor lights or nge
- Perhaps a power saving mode is active (see section Energy Saving Functions)?
- Is the signal cable connected to the monitor and the PCs graphics port (see section Connecting)?
- Is the PC turned on (see your PCs documentation)?
Power indic tor lights green
- A screen saver may have activated automatically after a certain period of inactivity. Press any key on your
keyboard or move the mouse.
No Sign l mess ge
- Is the signal cable connected to the monitor and the PCs graphics port (see section Connecting)?
- Is the PC turned on (see your PCs documentation)?
Displ y Problems
Im ge is displ ced to the left/right or to the top/bottom
- If the image appears normal but off-center, you can adjust it using the OSD functions. For further information, see
chapter Basic Setup, section Automatic Image Adjustment or chapter OSD Menu Functions, section Adjust
Position.
Im ge is blurred
- Check brightness and contrast settings (see chapter OSD Menu Functions, section Brightness & Contrast").
- Check the video noise setting (see chapter OSD Menu Functions, section Video Noise).
- At resolutions lower than 1280 x 1024 pixels the image is displayed using interpolation, which can lead to a slightly
blurred image. For this reason, select the optimum resolution of 1280 x 1024 pixels wherever possible.
Color problems
- If the colors are off (e.g. white is not really displayed as white etc), you should adjust the color temperature (see
Adjust Color function in section OSD Menu Functions).
ENERGY SAVING FUNCTIONS
This monitor is equipped with power management functions
according to EPA standard. If your computer is using a
compatible graphics adapter or appropriate software, energy
consumption can be automatically reduced when your
monitor is idle. hen the monitor is in power saving mode,
the color of the status LED (see
in figure 5) will turn orange.
The monitor will automatically switch back on when you
use the keyboard, mouse or another input device.
The following table illustrates power consumption values
and display indications for this automatic power saving
feature:
Mode Video H-sync V-sync Power Power LED
Used S ving (%) color
On aktive yes yes < 60 watts 0 green
Off blanked no no < 3 watts 90 orange
This monitor is ENERGY STAR®-compatible. MAXDATA is an ENERGY STAR® partner and guarantees that this device
complies with the ENERGY STAR® guidelines for optimizing power consumption.

18 - Belinea 10 18 30
ENGLISH
LCD displ y 18.1 inch diagonal size (45.97 cm visible),
low radiation according to TCO 99, glare-free coating,
contrast ratio 350:1 (typical)
viewing angle: vertical 160°, horizontal 160°(typical contrast ratio 10:1)
Input sign l DSUB (15-pin) and DVI-D / DVI-I
Displ y colors 16.7 mill. colors
Synchroniz tion 30 - 82 kHz horizontal
56 - 76 Hz vertical
B nd width 135 MHz
Resolution max. 1280 × 1024 pixels
Audio system Amplifier: 2 at 8 ohms / 1 kHz - 15 kHz
Speaker: 2 peak, 1 rated
Power supply 100 - 240VAC, 50 - 60Hz
Power consumption max. 60 (Off-Status: < 3 )
Power saving functions EPA certified
Dimensions 402mm (width) x 424mm (height) x 184mm (depth); (monitor only)
Weight 9.0 kg (monitor only)
Oper ting environment Operation: 0 - 40 °C, humidity: 20 - 95 % (non-condensing)
Storage: -20 - 60 °C, humidity: 20 - 95 % (non-condensing)
Pin Assignment
1 Red
2 Green
3 Blue
4 Ground
5 NC
6 Red return
7 Green return
8 Blue return
TECHNICAL SPECIFICATIONS
PIN ASSIGNMENT
Pin Assignment
9 + 5V DDC
10 Ground
11 Ground
12 SDA (DDC Data)
13 Hor. sync.
14 Vert. sync.
15 SCL (DDC Clock)
Pin Assignment
1 TMDS data2-
2 TMDS data2+
3 TMDS data2 shield
4NC
5NC
6 DDC Clock
7 DDC Data
8 Not connected
9 TMDS data1-
10 TMDS data1+
11 TMDS data1 shield
12 NC
Pin Assignment
13 NC
14 + 5V
15 Ground (return for + 5V and H/V sync)
16 Hot plug detect
17 TMDS data0-
18 TMDS data0+
19 TMDS data0 shield
20 NC
21 NC
22 TMDS clock shield
23 TMDS clock+
24 TMDS clock-
15-pin D-SUB connector
24-pin DVI-D connector
Pin Assignment
C1 Analog Red
C2 Analog Green
C3 Analog Green
C4 Analog Hor. Sync.
C5 Analog Vert. Sync.
Table of contents
Languages:
Other BELINEA Monitor manuals
BELINEA
BELINEA 2080 S2 User manual
BELINEA
BELINEA 10 User manual
BELINEA
BELINEA 101536 User manual
BELINEA
BELINEA 10 30 50 User manual
BELINEA
BELINEA 101903 User manual

BELINEA
BELINEA 101715 User manual
BELINEA
BELINEA 101930 User manual
BELINEA
BELINEA 1705 S1 User manual
BELINEA
BELINEA 15 User manual
BELINEA
BELINEA 101830 User manual
BELINEA
BELINEA 101910 User manual

BELINEA
BELINEA 10 User manual
BELINEA
BELINEA 101935 User manual
BELINEA
BELINEA 10 20 05 User manual
BELINEA
BELINEA 2225 S1W User manual
BELINEA
BELINEA 101730 User manual
BELINEA
BELINEA 103026 User manual
BELINEA
BELINEA 10 60 65 User manual

BELINEA
BELINEA 10 19 20 User manual
BELINEA
BELINEA 2025 S1 User manual
