Bell Tent Emperor User manual
Hello and thanks for buying one of our Emperor Bell Tents.
Here is the best way to put up your Bell Tent.
One person can do this but the more people there are, the faster it goes up (our
current record is 20 mins).
If you look at the bottom of this document you will see a list of tips to help you get
years of use out of your tent but the golden rule is:
ALWAYS, WITHOUT FAIL, STORE YOUR BELL TENT BONE DRY OR YOU
RUN THE RISK OF GETTING A MOULDY TENT!
Enjoy! And please don’t hesitate to contact us if you have any more questions,
good ideas on better ways of Bell Tenting, or just to send in pictures of you
Camping with Soul for the gallery on the site.
The first time you put up your tent it may take over half an hour as you have to
attach all the guy ropes. This is a one off thing so the next time you put it up it will
be much quicker.
To keep your tent looking its best always try to keep the canvas off the ground
and don’t walk on it in shoes. You can do this easily by always keeping it on the
groundsheet and off the grass. It is worth the effort.
Putting up an Emperor Bell Tent
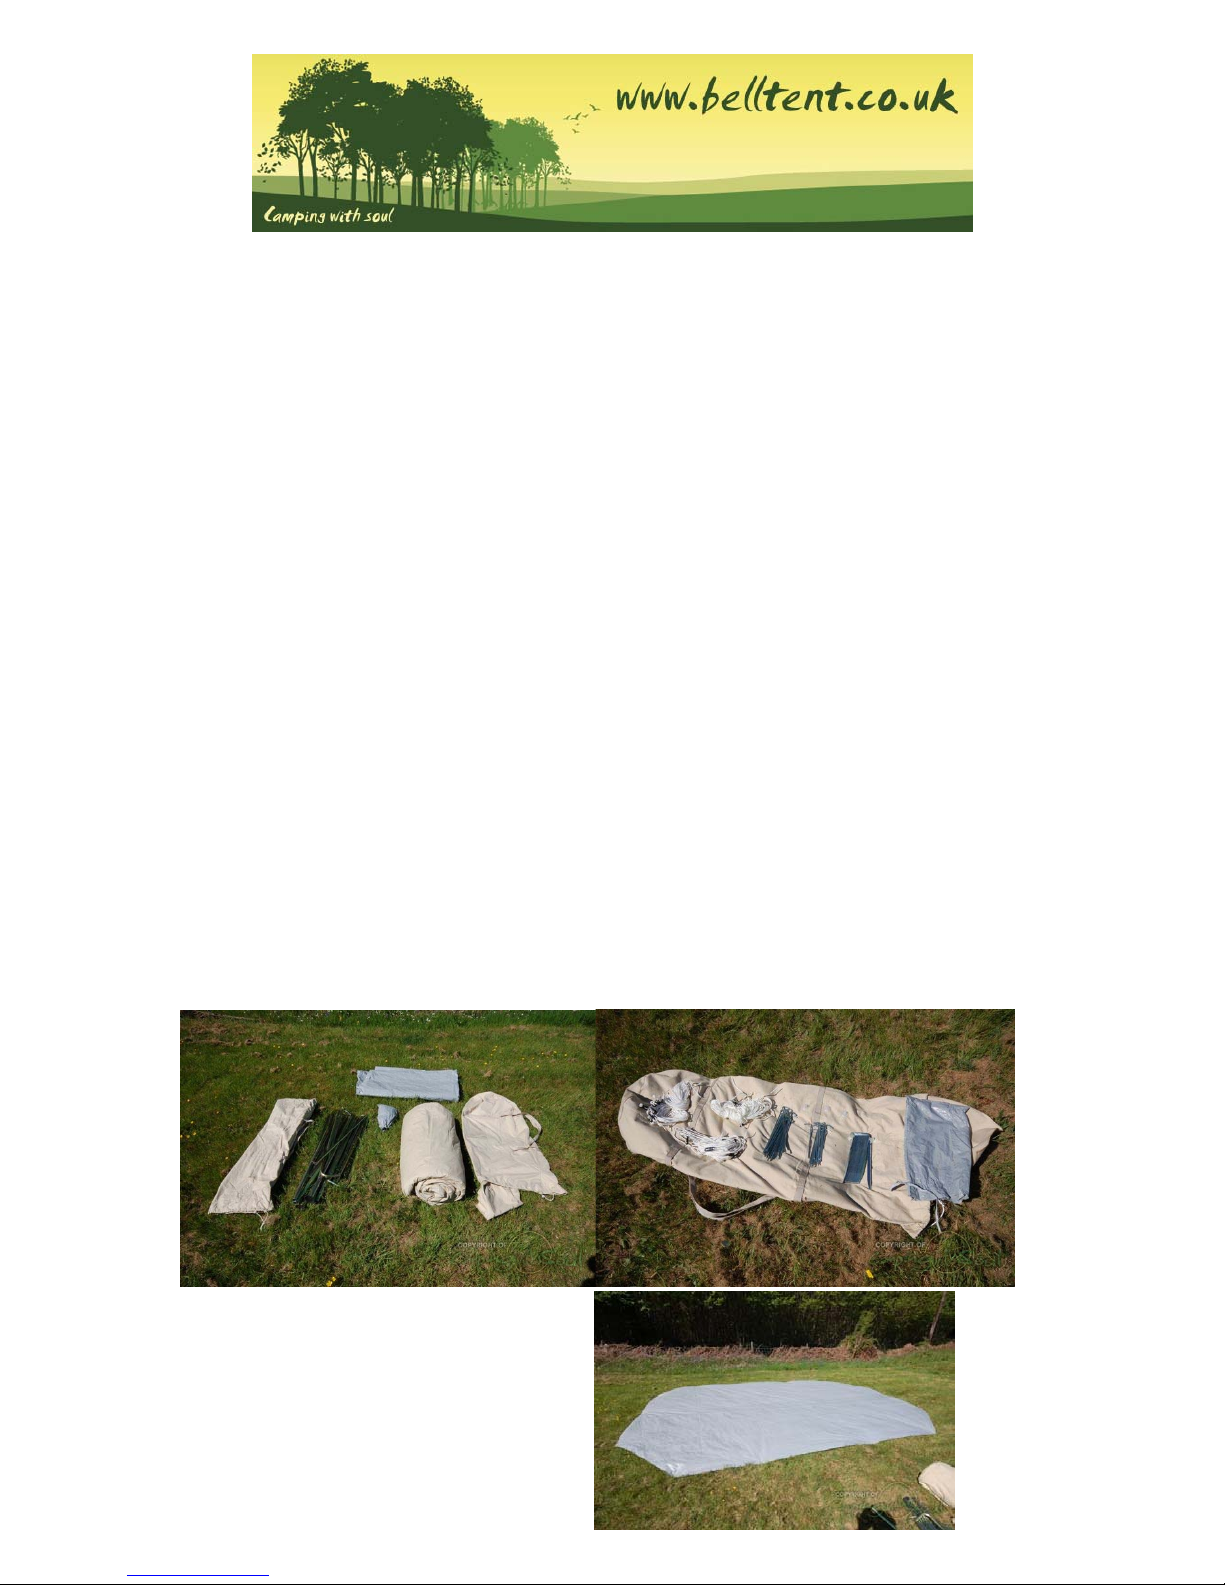
1) Unpack the bell tent and get the canvas out of its bag. Using that bag as a
base to stop you loosing bits lay out all the pegs and guy ropes.
2) Lay out the ground sheet and
position and pin it down tightly
with the smallest set of pegs
3) As this is the first time you’ve put it up
it’s a good idea to put the poles together
and place them on the groundsheet so
you get an idea of how it all goes together
before you put the canvas down.
There are 3 A frames, 1 for the front door
and 1 for each end. The two main poles
connect to the cross bar. (see pic)
4) Once you’ve got that remove the poles and place the canvas on the
groundsheet. Find the front door and then find a front corner. Using the middle
sized pegs peg the loops on the bottom of walls right next to the corresponding
pegs in the groundsheet.
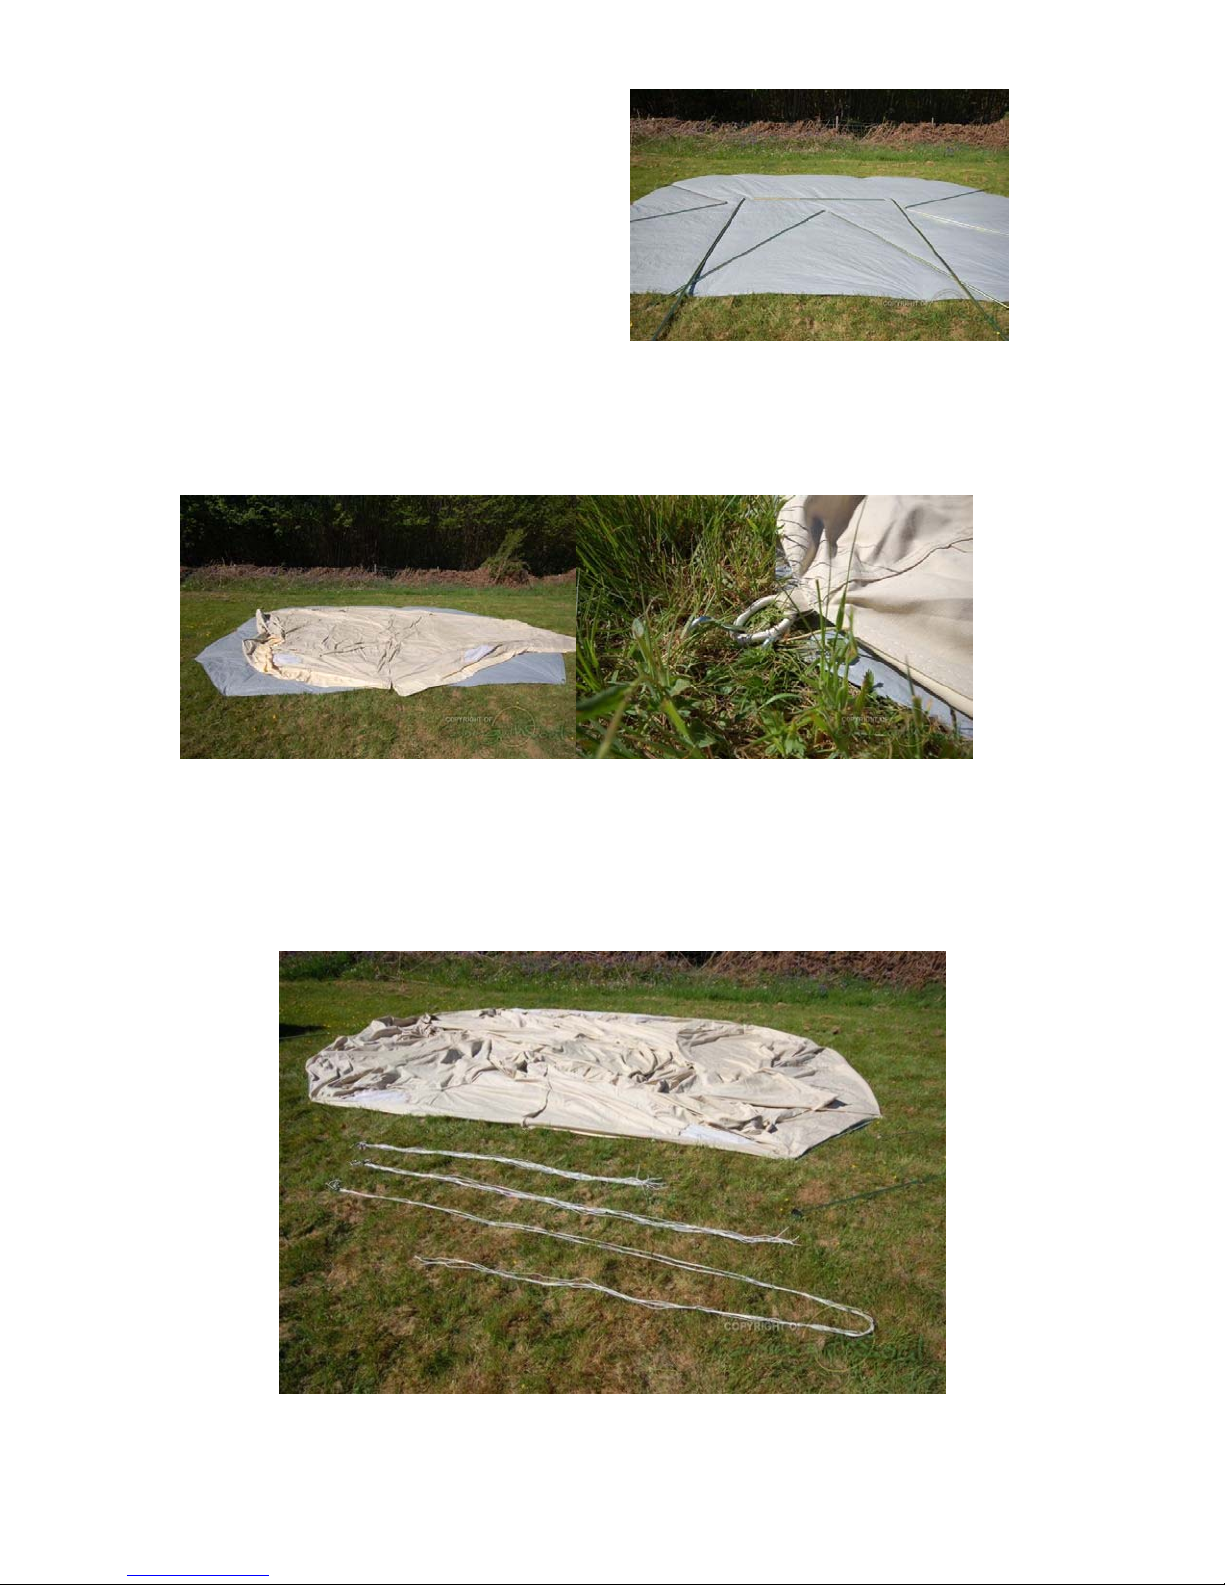
5) Once you have pegged out the whole tent it’s time to attach the guy ropes.
This takes a bit of time but you only do it once. Firstly you need to sort out the
guy ropes into their different sizes. As below you’ll see there three different
lengths, the short ones are for the top of the wall, the middle ones are for the
tops of the A frames and the long ones are for the top of the tent.
6) Tying the guy ropes on
Take the same end and doubling it over create a loop and tie it off. We’ve shown
this below not treaded through the canvas loop on the tent as it’s easier to make
out but you want to tread it through the tent first so you end up with the canvas
loop on the tent being where the thumb is in the right hand image.
7) Tie all the short top of wall guy ropes on right around the tent. Do the same for
medium guy ropes on top of the A frames and half way up roof (Shoes off).
Lastly tie the long guy ropes to the tabs either side of the top cone.
That’s you guy roping done forever.
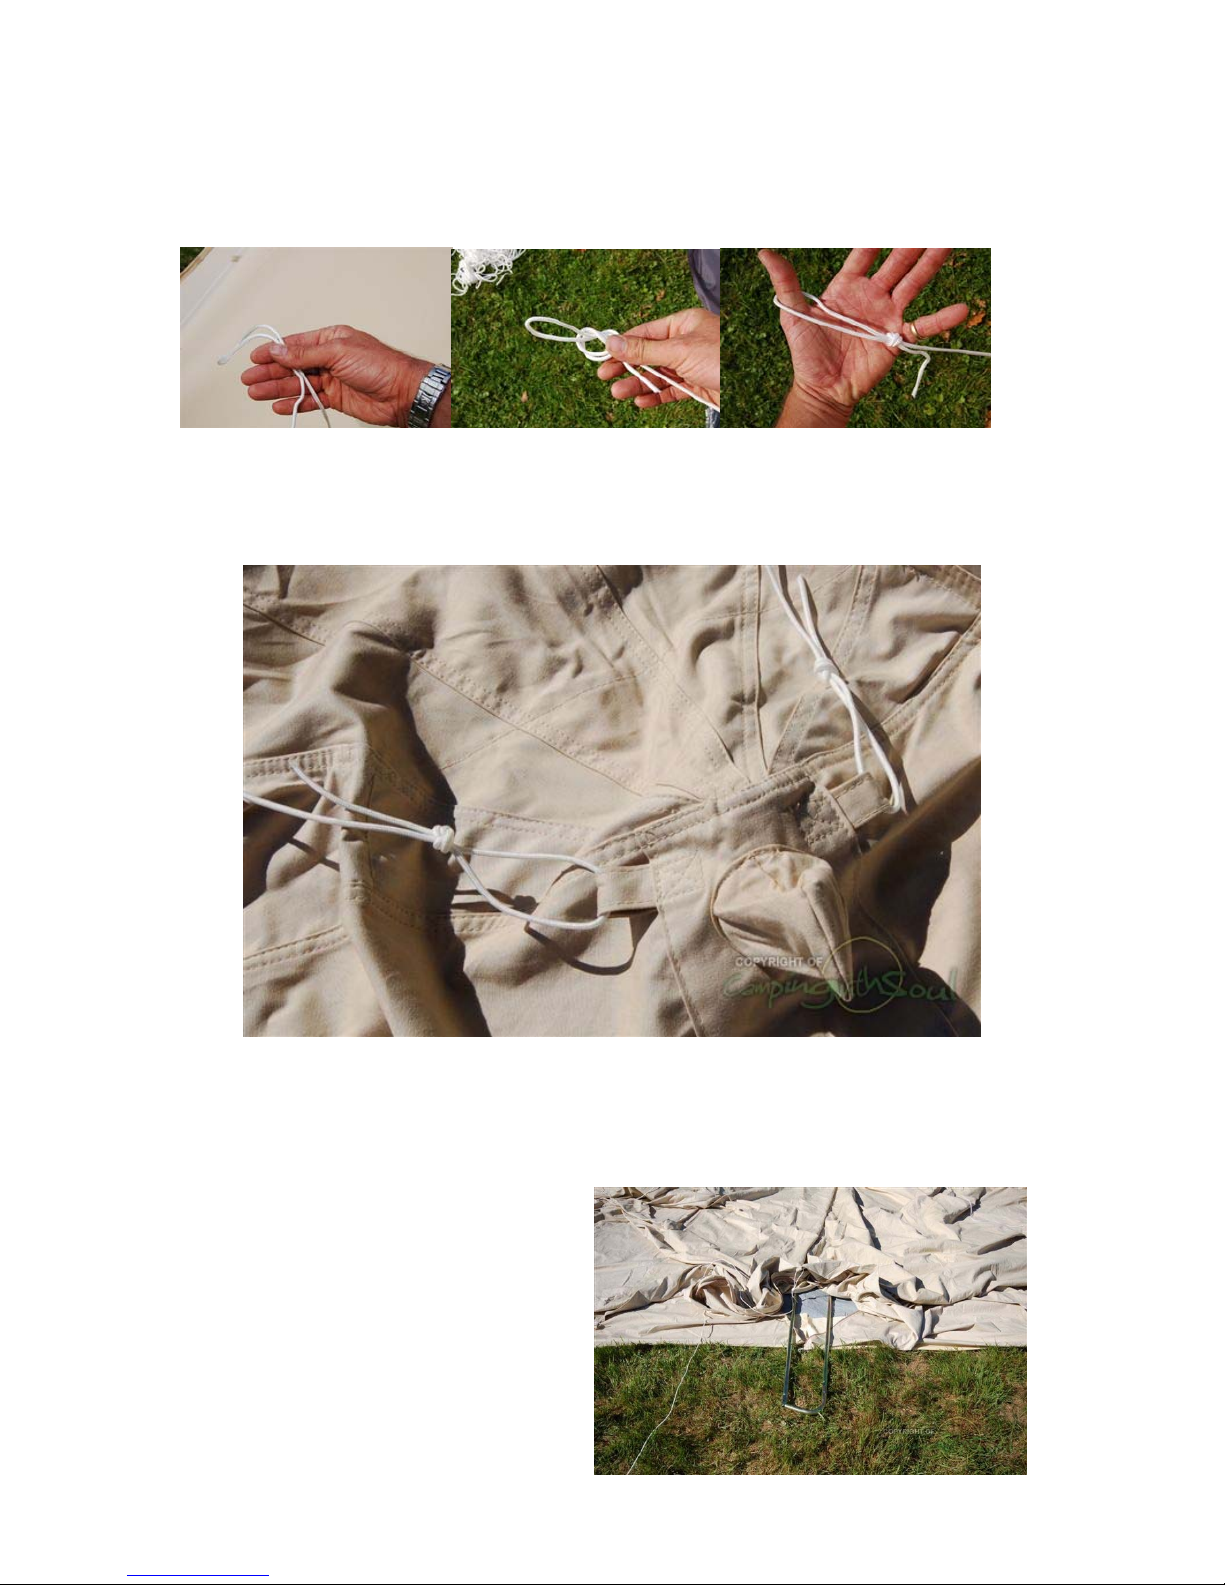
8) Get the A frames and loosen one of the sides next to the top which means
both of the sides of the A frame can be put next to each other making it much
easier to manoeuvre inside the tent.
Unzip the front door and put the first
A frame in place inside it. Position the
feet of the A frame just off the
groundsheet and then push them
against the side of the groundsheet.
This positions them correctly and
helps stop them sliding out of position.

9) Repeat this for all three A frames
10) Now it’s time to fit the two
central poles and the cross bar.
This is the only bit of the build that
really needs two people. Saying that
we did it with one but it’s a bit of a
balancing act getting both poles up
at the same time while keeping them
lined up.
Push both poles to vertical, leave the tent and zip up the door.
11) Using the large pegs, attach the first guy rope above the door. And then
work your way around the tent pegging in the guyropes
N.B. All the guy ropes need to follow the lines of the seams in the roof when
there are some as you want to keep the tension even. Adjust the guy rope slider
so you have approx 50cm of loop to the peg. This allows adjustment in both
directions. It is important to make sure the Bell Tentstays symmetrical and that
the tension is evenly spread.
It is also important not to have too much tension on any of the guy ropes at this
point. Get all the pegs in then go round adjusting the guy ropes to create the
desired tension.
By doing it this way, and following the seam lines, your Emperor Bell Tent will
look like this: perfect and without creases.
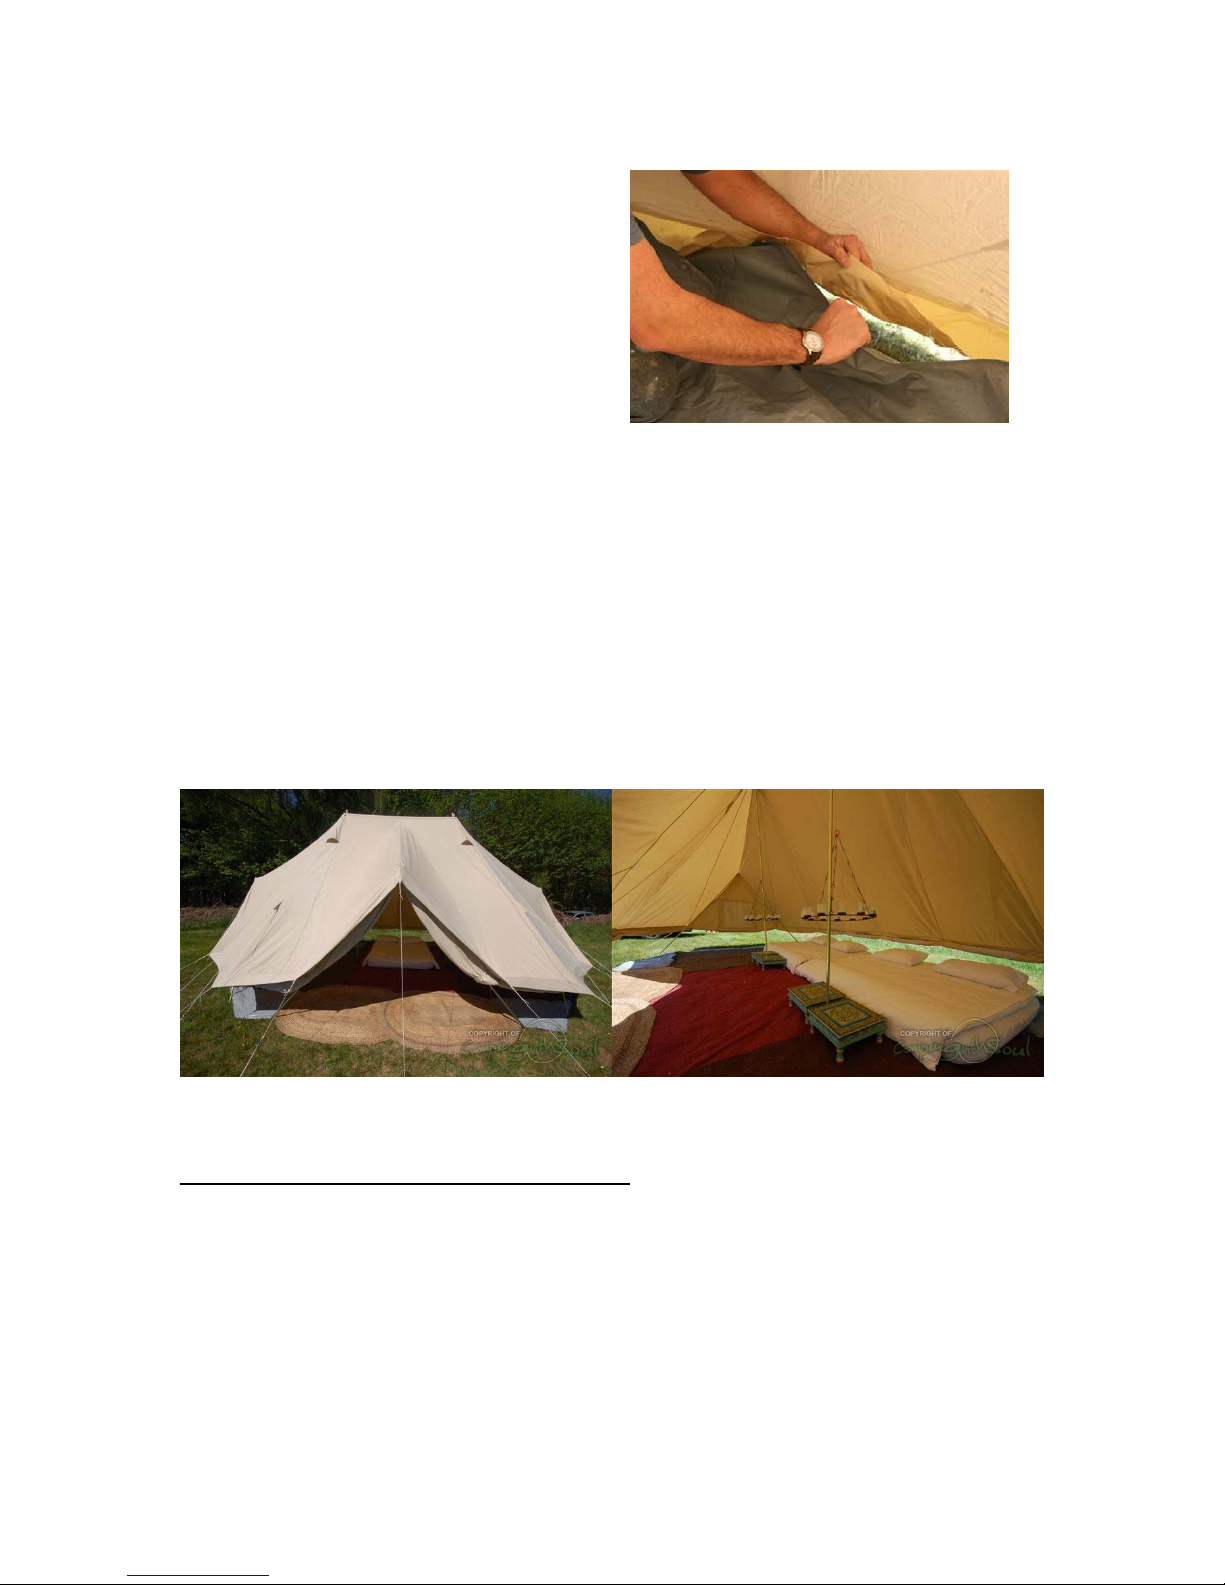
12) Finally go inside the tent and tuck the flap/plastic skirt at the bottom of the
canvas walls under the ground sheet folding the flap to go round the ground
sheet pegs
TIP: If the door seems too tight move
the two guy ropes either side of the door
in towards the middle of the door to
relieve some tension.
There you go -
job done!!!
Walls up?
If it’s a hot day there is nothing better that rolling the walls up and letting the
breeze brush over you. Simply unhook the loops at the bottom of the canvas
walls from the pegs and roll up (inwards) and tie using the strings provided.
NB. It is vital that the walls are rolled back down and attached to the floor if the
tent is left unattended for some time (over night etc) With the walls up you have
created a massive kite that’s just waiting to take off should the wind get up. Don’t
get caught out and end up with a broken tent.
Don’t forget to deck it out with your personal touches, and then you are Camping
with Soul……………………….. enjoy xx
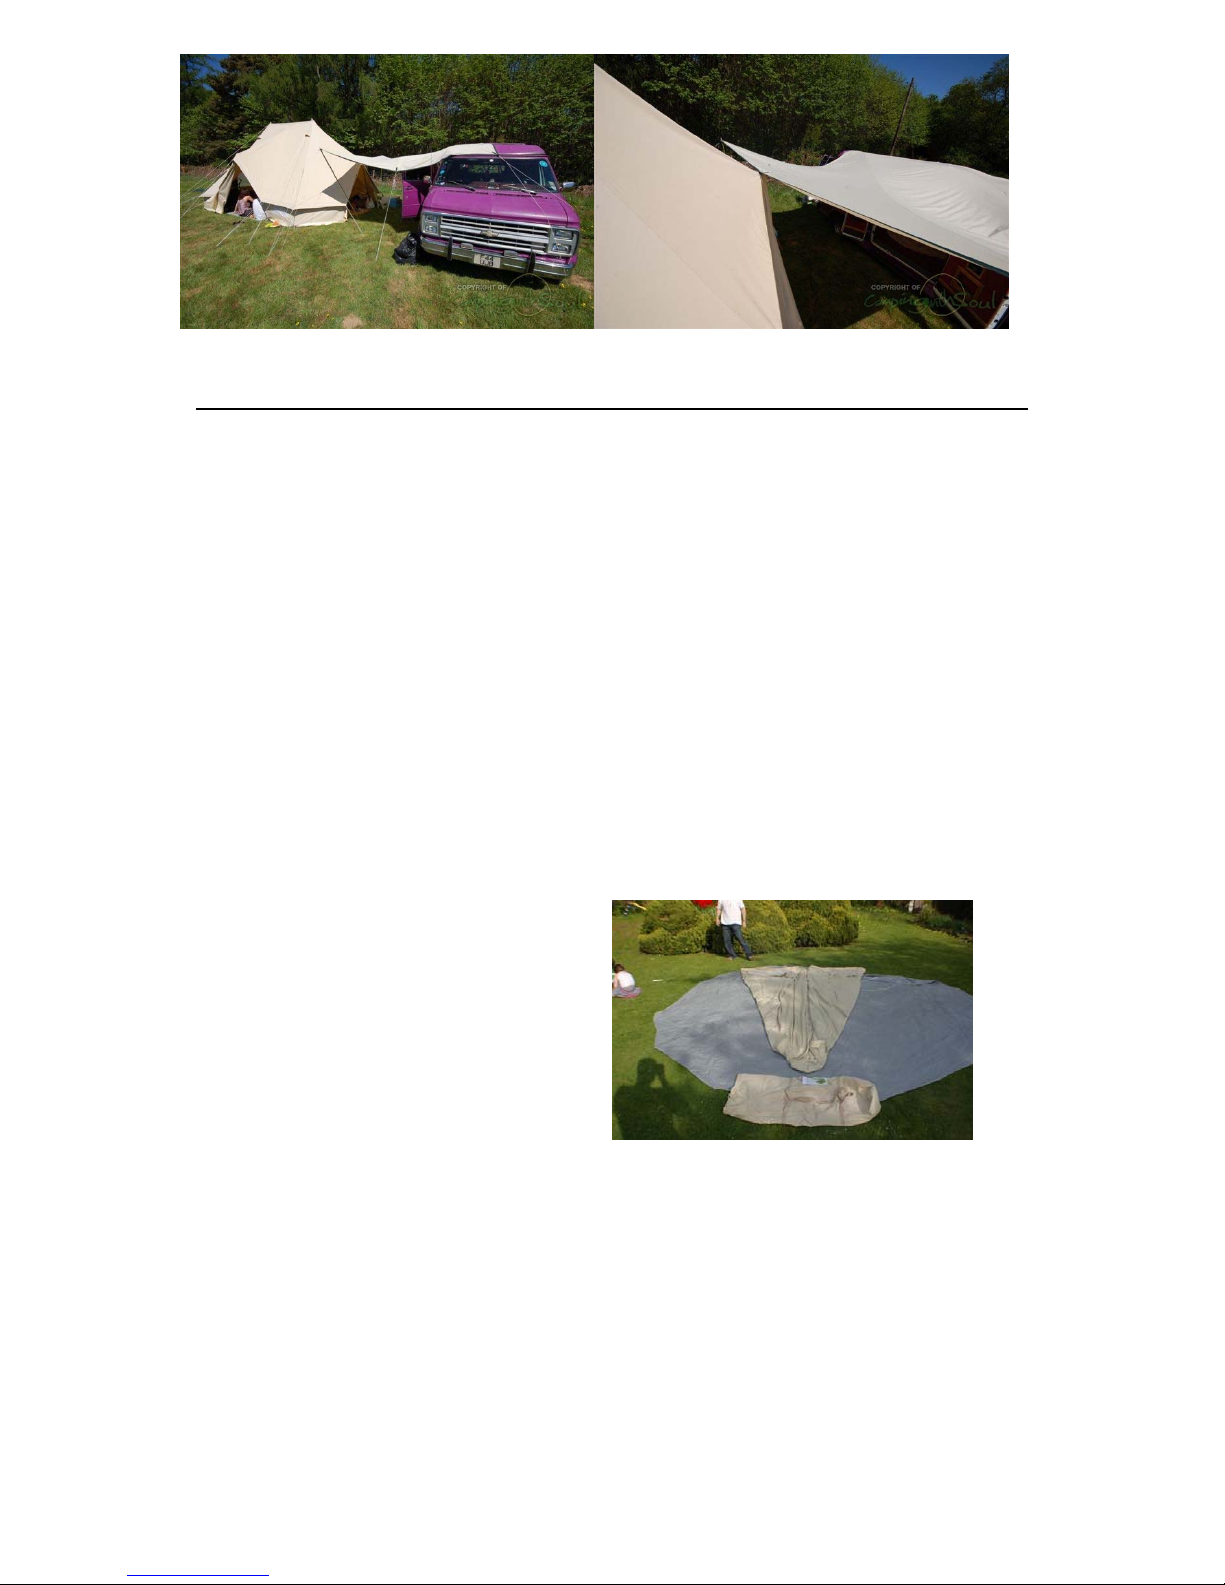
Connecting to the side door.
We’ve designed the Emperor with two doors so you can get a through draft
without the walls being rolled up. It also means that you can connect another bell
tent or vehicle to the side of the tent without blocking the door. We sell a
matching Maul Awning that does the job perfectly and means you have all the
amenities of your wagon on hand or a bell tent annex / bedroom off the main
tent. (Oh the joys of Glamping)
The Maul has a rivet hole half way along each side so you can put this over the
spike of the A frame and peg the guy rope down the side of the door to stop it
lifting off. We’ve also found the A frame is fine if you remove the guy rope in the
middle and run that down the side of the door too. Stops it being in the way.
How to pack up a Bell Tent & get it back into its bag:
Here are some tips on packing up your Bell Tent after use.
As stated all over the set up instructions it is VITAL that your bell tent is stored
bone dry otherwise it will get attacked by mould. It’s fine taking it down damp
however, you MUST ensure you hang it up to dry within 24 hours. You don’t have
to set the tent up again, just hang it on a washing line, over a car or over some
chairs - basically it just needs some air.
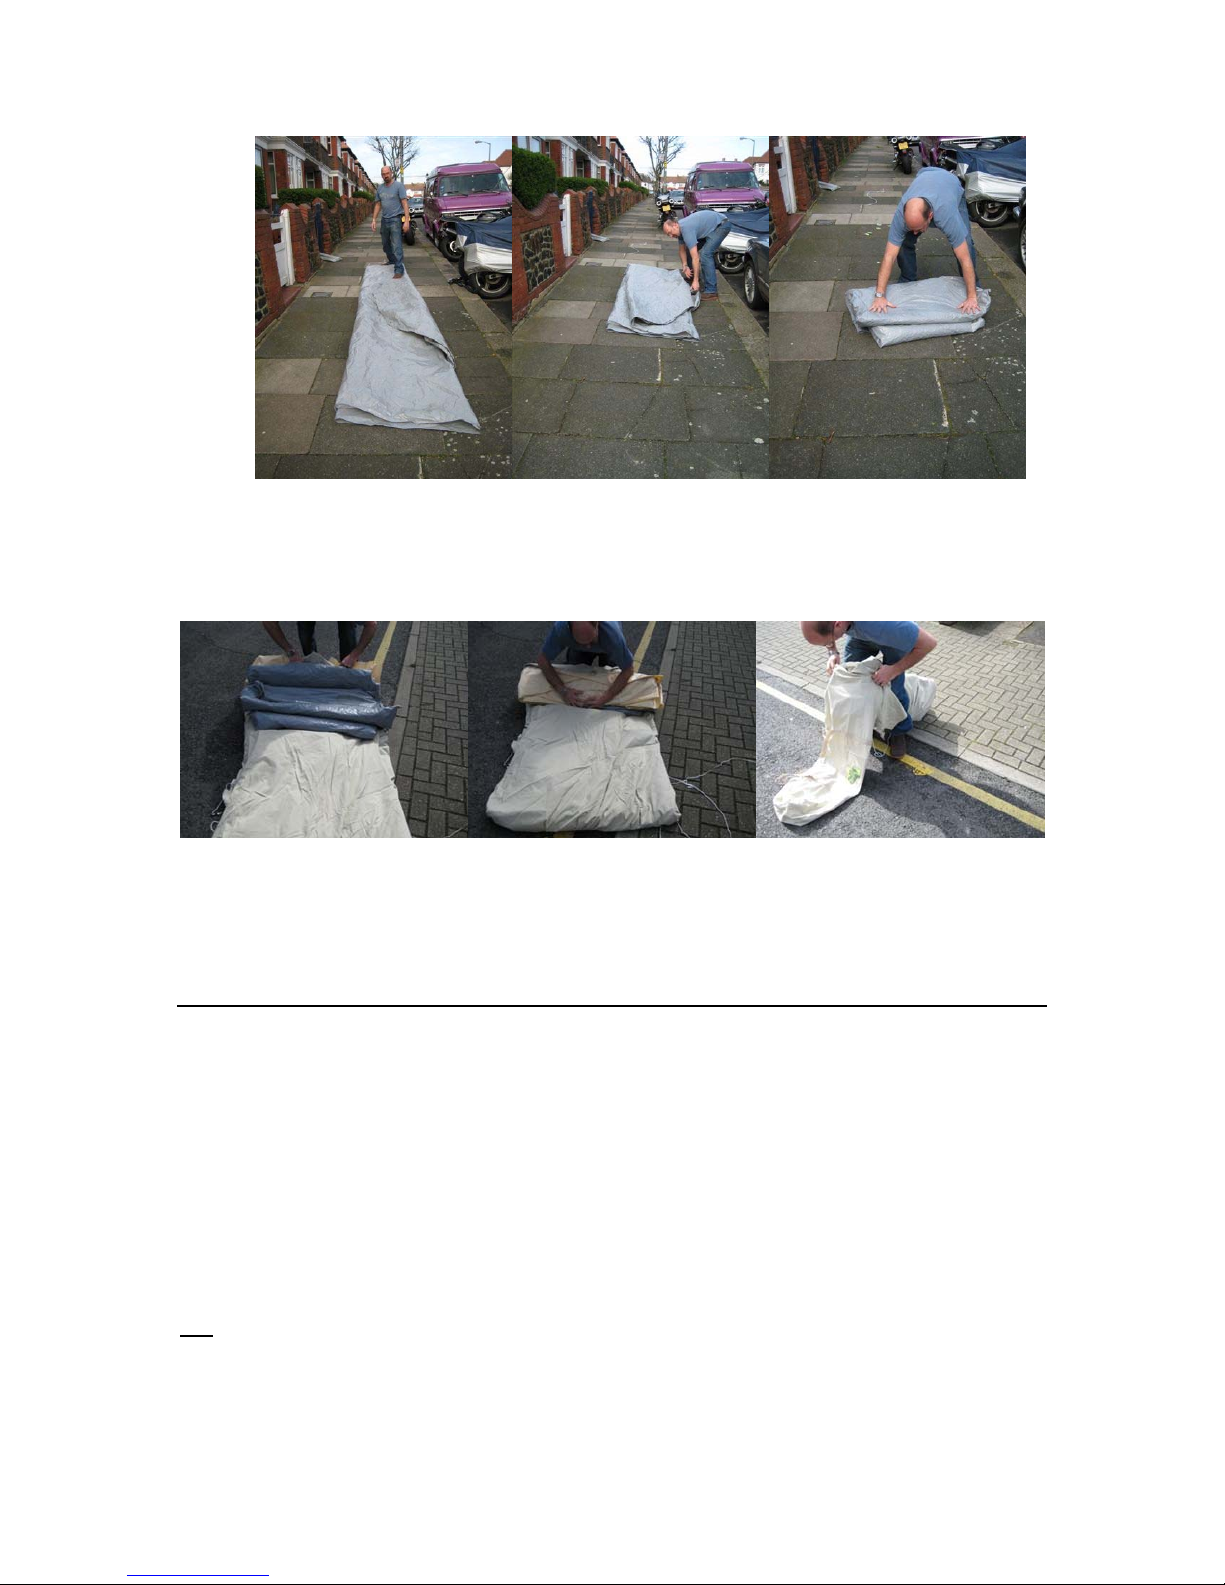
This is how to get your tent back in the bag without hassle:
Take all the poles and pegs out of the tent (not the groundsheet) and fold the tent
over itself so you have a double-layer half moon. Keep the tent on the
groundsheet and off the ground to keep it clean and dry
Place the tent bag alongside the tent so you have a template for how wide you
want the tent to end up. Now start folding it in so you end up with a strip of
canvas the width of the bag.
(This picture gives you an idea
even though it’s of standard
5m bell Tent )
Once you have folded the tent into a
strip that is the same width as the bag,
fold both ends in so you end up all the
guy ropes tidied in and a strip of canvas
about a metre long.
Next take the canvas off ground sheet (remember to keep it off grass if the grass
is wet)
Now un-peg the ground sheet, turn it over, and give it a couple of minutes for the
condensation to dry off the bottom. You may want to put a couple of pegs back in
to stop it being blow away and it’s a good idea to not put it on the same spot as
before as you’ll get condensation on the new underside.
Once both sides are dry, fold the groundsheet in half and in half again so you
end up with a strip the same width as the folded tent. Now fold it over on itself
until you end up with a square (sometimes it’s not possible to get the ground
sheet bone dry in the field, if that’s the case roll up the dry tent into it’s bag,
roughly pack up the wet ground sheet and pop it in something water proof. Once
home dry it out and continue putting the tent away)
Now place the groundsheet on the folded tent, followed by the pole bag and peg
bag and then roll the whole thing into a tight bundle, using the ties to secure the
tent in a roll. Next, lift one end and slip the bag over the tent.
Bingo - you’ve done it!
Enjoy your Emperor Bell Tent and remember, please only store it bone dry.
Many thanks and feel free to call us if you get stuck.
Other info.
Cotton shrinks when wet, making itself waterproof when it rains. The first time
your tent gets wet it may leak a little - don’t worry THIS IS TOTALLY NORMAL!!
Once it dries out for the first time that shrinkage closes up any little holes to
ensure it won’t happen again.
The canvas has been impregnated to protect it from dirt, ultraviolet radiation and
fungus. This makes it mould-resistant, but not mould-proof.
If the canvas remains damp in a place where mould can grow, eventually mould
will grow. If you put your tent up in a damp corner of the garden, next to a hedge,
or under a tree long term it will eventually get mouldy (as would a car or anything
left there). Therefore, it’s worth considering the right spot that has some
ventilation as mould is not covered by the manufacturer’s warranty.
Advantages of a cotton canvas tent:
- Strong
- Breathing and humidity regulating

Disadvantages of a cotton canvas tent:
- Dries slowly
- Sensitive for dirt and fungus
Maintenance:
•The cotton must be bone dry before storing the tent.
•Never keep the tent stored away wet for longer than two days, otherwise
fungus can affect the canvas which will then create permanent little black
dots.
•The canvas has been impregnated with anti-fungi and made waterproof
that is effective for up to 60 weeks of use (so a year). Once used passed
this period of camping you may need to re-proof certain areas that appear
more translucent. Please contact us if this is the case, as we also sell re-
proofer.
•Maintenance starts when setting up your Bell Tent. If a Bell Tent has not
been set up correctly, uneven forces will pull on the canvas, which could
eventually lead to damage. To ensure your tent stays set up correctly,
daily guy rope maintenance is necessary.
•It is in your interest to keep the canvas as clean as possible and remove
stains when created. Dust and dried mud is best removed once the
canvas is dry by brushing clean with a hard brush like a floor scrubbing
brush.
Lifespan:
The lifespan of your tent is very dependent upon camping conditions - air
pollution, ultraviolet radiation, natural dirt (bird droppings, sand, salt water) and
domestic dirt (cooking stains, soda, wine, sun cream), as these all limit the
lifespan of your cotton canvas tent.
The canvas or your tent should be good for over 60 weeks of outdoor usage if
cared for correctly.
Zippers:
Zippers sometime have to endure extreme tension caused by wind, incorrect tent
set ups or pressures caused by people or objects leaning into the tent.
In order to limit damage to any zippers:
- Close all zippers before setting up your tent
- Handle them with care
- To protect the zippers treat them with silicones once in a while
- Verify zippers before setting up your tent as there is no insurance on them after
use
Fungus and stains:
With insufficient ventilation, fungus can affect the canvas. It is important to store
your tent dry so no fungus or other stains can appear. If you have to temporarily
store the tent wet be sure to remove the mud and dirt from the bottom of the tent
put your tent back out to dry within 48 hours.
In order to limit fungus and stains on your tent:
- Store your tent 100% dry.
- When dealing with fungus, use a soft brush or sponge and a lot of fresh water.
- Only use specialised tent cleaning product to remove difficult stains. Other
chemical products can cause the cotton to leak. We suggest you have your tent

re-impregnated with waterproofer on any area has been cleaned using a cleaning
product.
Leaking:
Cotton can, when new, let some air through and leak around the seams. After the
canvas has been wet once this will no longer happen because of the cotton
expanding. Very light stains can appear on a wet tent - these stains cause no
problems.
In order to preserve your tent’s water resistance and prolong its lifespan after a
considerable amount of use, the outside of the canvas can be re-treated with a
sealant. There are many good spay can sealants on the market, and, as
mentioned, we also sell re-proofer.
History of Bell Tents
The Bell Tent is a type of tent with walls (about 60cm high) are held up by a
single central pole (up to 3 metres high). It has a circular floor plan up to 5 metres
across. Guy ropes were connected every 60cm around the top of the walls -
these had to be carefully tensioned to hold the pole upright and keep the tent in
shape. Original Bell Tents had no porches but A frames were added later to
create a vertical door that is more resistant to letting in the rain.
The Bell Tent was invented by Henry Hopkins Sibley, who had studied the Tipi
tent during the expeditions he carried out in the Old West. He patented his tent
design in 1858. In accordance in an agreement with the Department of War, he
would have received five dollars for every tent they made, however, Sibley joined
the Confederate States Army after the outbreak of the American Civil War and
did not receive the royalty. The Federal Army used almost 44,000 Bell Tents
during the war. After Sibley's death, his relatives unsuccessfully attempted to
collect the royalties.
We have taken the classic Bell Tent design and have brought it up to date using
modern materials and proofing, so it’s no longer necessary to hump around a
heavy old tent that leaks if you touch it in the rain. We are constantly updating
our tents with developments like the Ultimate, and are always happy to listen to
peoples ideas on how improve things.
We hope you have many seasons of enjoyment from your tent, and hope to see
you in a field soon.
Enjoy!!
www.belltent.co.uk [email protected] +447830 355993
Copyright © 2007 Bell Tent UK
Table of contents
Other Bell Tent Tent manuals


