Bellini Leonardo User manual

group 0+
0 - 13 kg
group 1
9 - 18 kg
03ISLEO02
Leonardo
GROUPS 0+/1
MADE in ITALY
bellelli srl
via meucci, 232
45021 badia polesine
rovigo
italy
www.bellelli.com
1
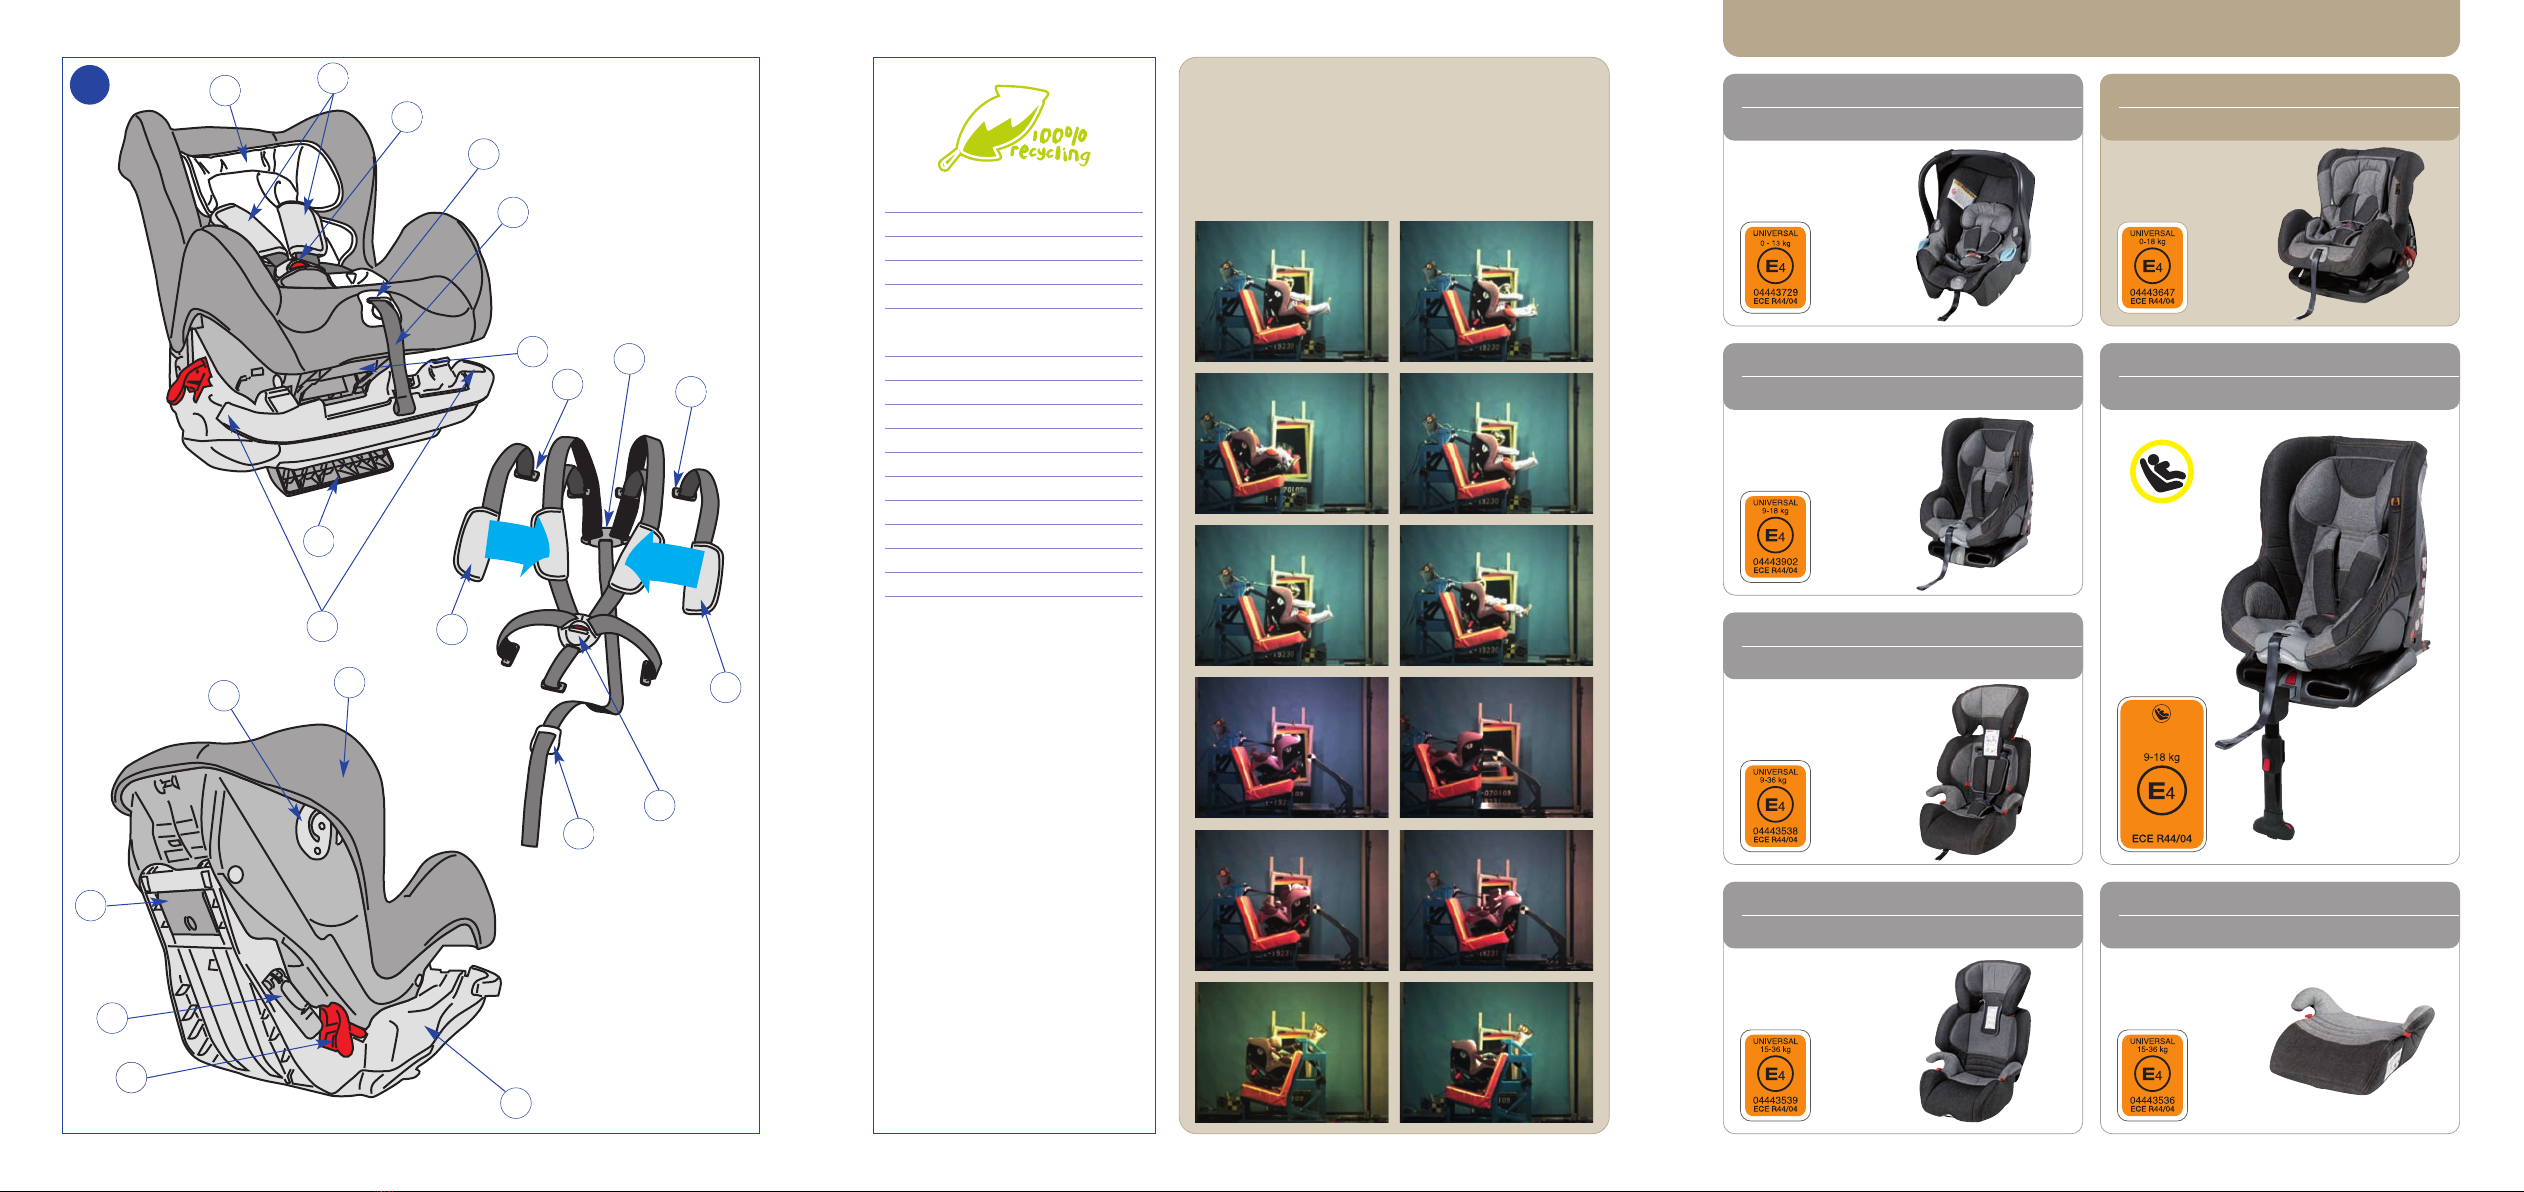
A PA + AL + ACC
B PA+ACC
C ACC
DPP
E ACC+AL
F PP+ACC+POM+EPS+look at the
cover
G look at the cover
H look at the cover
I polyester+ACC
J PA+ACC
K PP+ACC
LPP
M polyester
N PP+ACC
OPP
P ACC
testato con i più severi criteri
di omologazione
tested with the most stringent
type-approval criteria
A
AUTO seats
NANNA GURI
group 0+_0-13 kg
LEONARDO
groups 0+/1_0-18 kg
TIZIANO
group 1_9-18 kg
TIZIANO isofix
group 1_9-18 kg
GIOTTO
groups 1/2/3_9-36 kg
MICHELANGELO
groups 2/3_15-36 kg
EOS
groups 2/3_15-36 kg
ISOFIX class A
SEMI-UNIVERSAL
04443916
GH
C
P
P
I
J
M
L
N
H
H
J
I
K
D
EF
B
A
O
i
s
o
f
i
x
s
y
s
t
e
m

IT
EN
DE
FR
ES
PT
NL
SV
DA
CS
PL
SK
SL
HU
TR
HE
ISTRUZIONI D’USO - ITALIANO
INSTRUCTIONS FOR USE - ENGLISH
BEDIENUNGSANLEITUNG - DEUTSCH
INSTRUCTIONS D’UTILISATION - FRANÇAIS
INSTRUCCIONES DE USO - ESPAÑOL
INSTRUÇÕES DE USO - PORTUGUÊS
GEBRUIKSAANWIJZING - NEDERLANDS
BRUKSANVISNING - SVENSKA
BRUGSANVISNING - DANSK
NÁVOD K POUŽITÍ - ČEŠTINA
INSTRUKCJA OBSŁUGI - POLSKA
NÁVOD NA POUŽITIE - SLOVENSKÝ
NAVODILA ZA UPORABO - SLOVENŠČINA
HASZNÁLATI UTASÍTÁS - MAGYAR
KULLANMA TALIMATLARI - TÜRKÇE
03ISLEO02
‰Â¯‡Â˙ ˘ÈÓ¢ -Ú·¯È˙
2 3
4 5
6 7
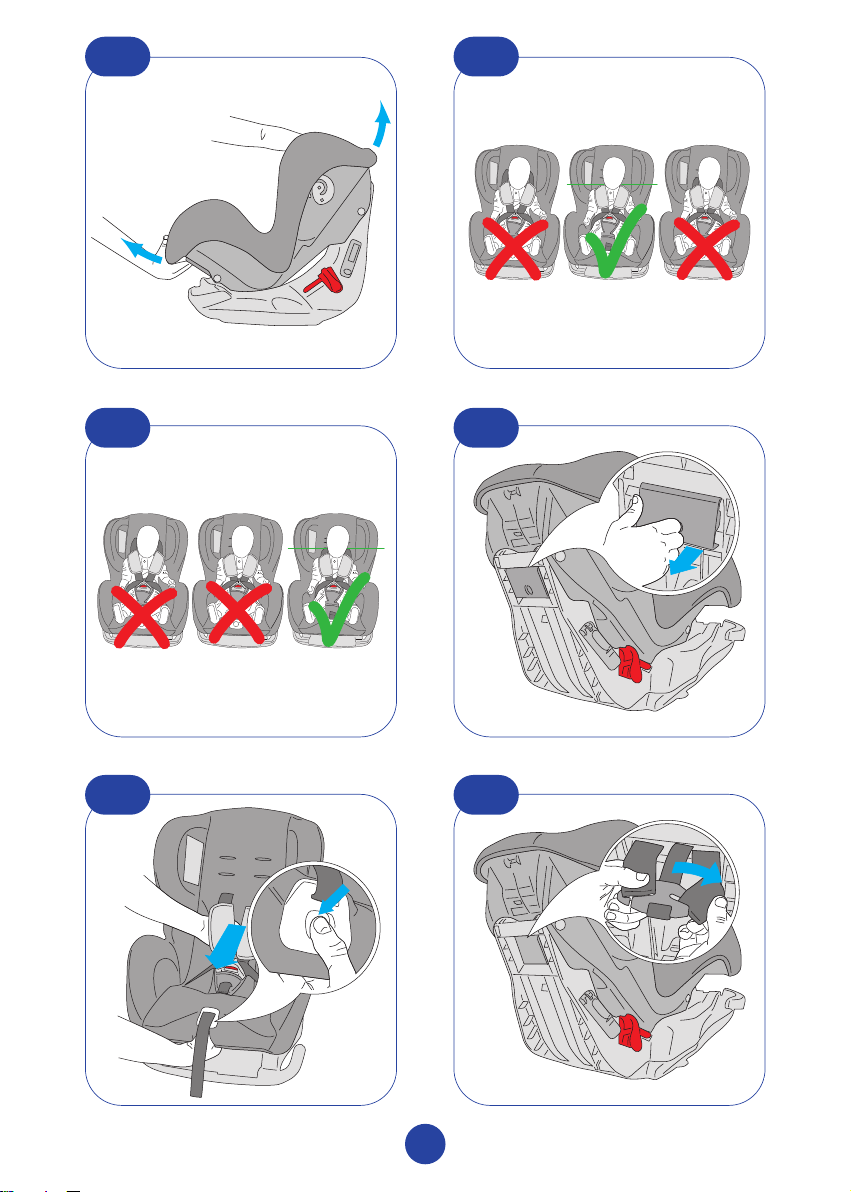
2
GROUP 0+
GROUP 1
8 9
10 11
12 13
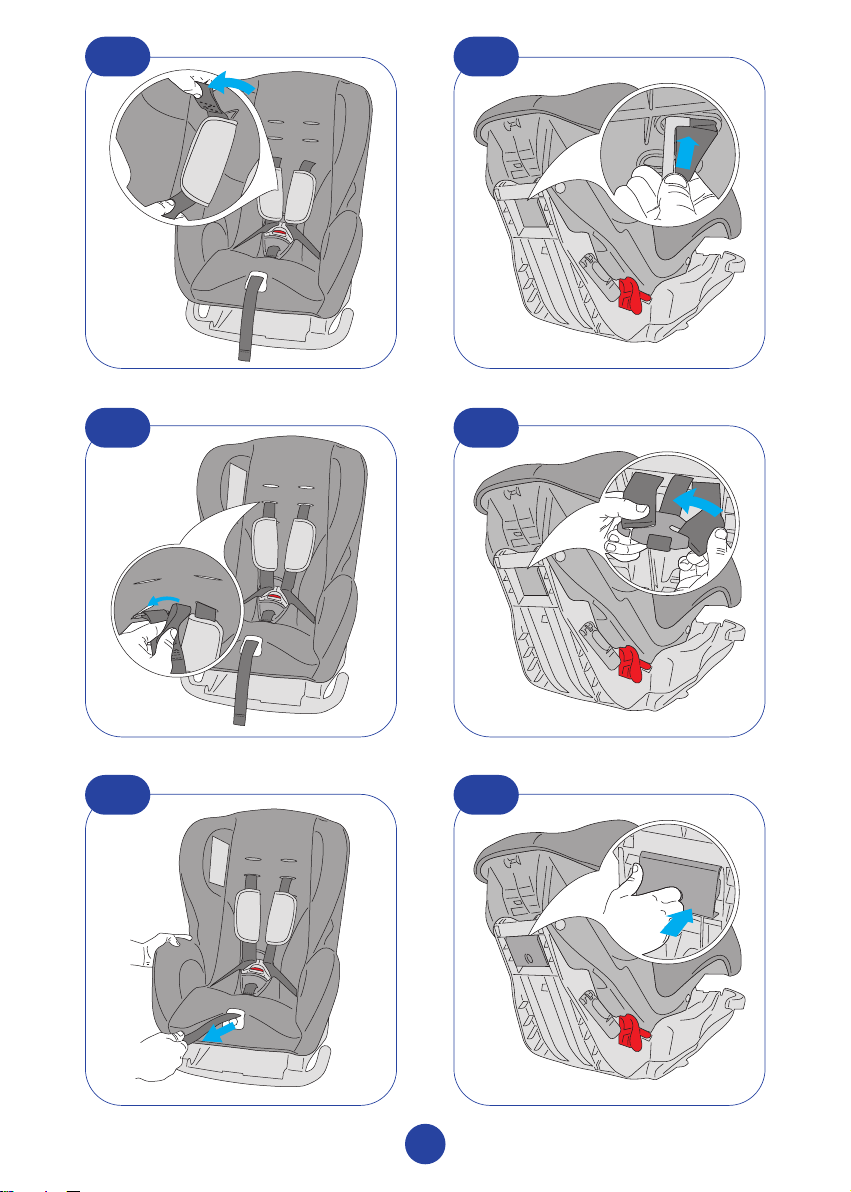
3
Table of contents
Languages:


