Voice Mail Services: allows you to access Messaging System
services provided by your local telephone company.
Review Scrolling: easily scroll
through
the stored list
of
incoming calls.
Read Scrolling: the display will automatically scroll to the next
screen after 3 seconds to view additional call information when
the information does not fit completely on the screen.
Delete Button: allows you to delete one orall caller ID records.
Contrast Button: allows you to adjust the
contrast
of the
display easily.
Real Time Clock: displays real time (hour, minute, second) in
idle mode. The time will be set by the first incoming call on the
Caller
ID
and reset each time an incoming Caller
ID
is received.
Dual-language: users
may
select
English
or
Spanish as
desired.
Speaker Volume Control: high/medium/low.
4
Content
Control Location ............
..
.
..
....
..
..........
..
.
..
.......
..
...
..
.....
..
....
..
.
..
....
..
7
Installation ............................................................
..
.......
...
...........
11
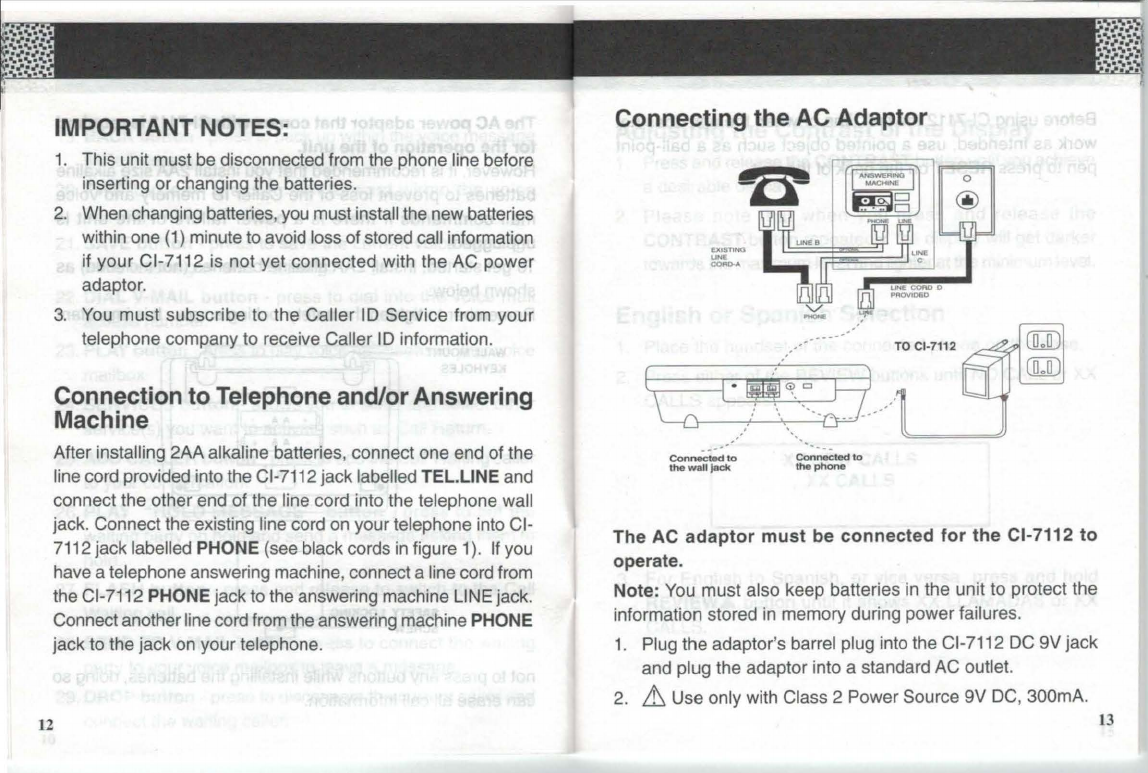
Connection to Telephone and/or Answering Machine...............12
Connecting the AC Adaptor .....................................................13
Reset ....................................................................
....
................... 14
Operation .......................
..
...............
...
..........................................15
Adjusting the Contrast of the Display ...
...
..
..............
..
.......
......
..
15
English
or
Spanish Selection ...................................................15
Dialing a Number from the Caller ID Record ...............
...
......... 16
Receiving and Storing Calls
..
.......................
..
................
..
....... 17
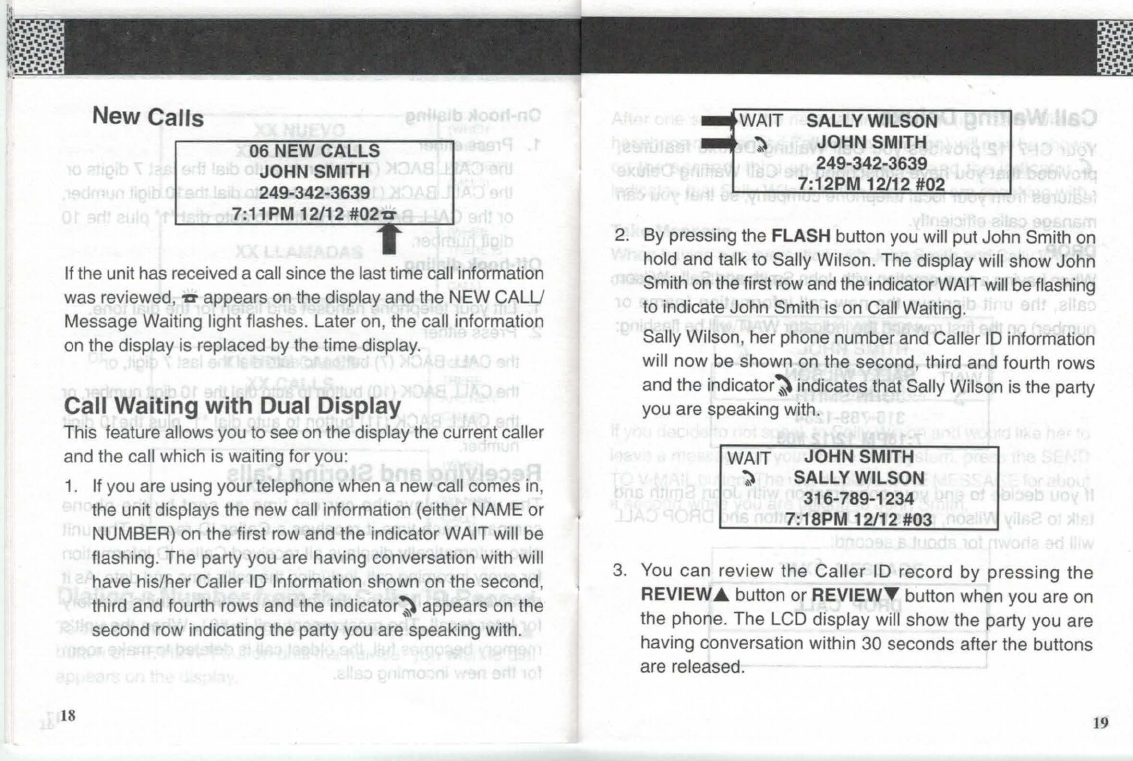
New Calls
..
...........................................................
..
......
..
......... 18
Call Waiting with Dual Display
...
..
..
..................
..
...
................... 18
Call Waiting Deluxe................
..
...
..
.
..
........................................ 20
Long Distance Calls..................................
...
............................ 24
Forwarded Calls ...................................................................... 24
Private Calls ..
..
.
...
....
...
...........
...
..
..
...
....
..
...
..
..
..
..
.
..
..
...
.......
...
..
.. 25
Out ofArea Calls...................................................................... 26
Error .................................
...
.................................................... 27
Reviewing Caller ID
..
............................................
..
................. 27
Deleting Caller ID ...
..
........................................................
..
..
...
28
New Call/Message Waiting/Line
In
Use Light .......................... 29
Flash Button .........
..
................................................................. 30 ·
Battery Low Indicator .....................
..
.....................
..
................ 30
Repeat Calls ...........................................................................
31
Additional Services............................................
..
..
..
..............
...
31
Selecting a Service.
..
..
....
..
...
........................
...
..........................32
Voice Mail Message Waiting
...
..
..
..................
..
....
..
.................... 32
Different Voice Mail Systems.....................................................32
5
TCI Library: www.telephonecollectors.info