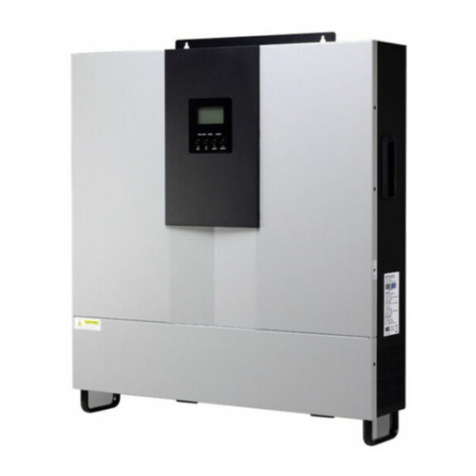
Belta RPI M50A_12s User manual

RPI M50A_12s
Quick Installation Guide
Europe

2Quick Installation Guide for solar inverter RPI M50A_12s V1 EU EN 5013237400 00 2016-04-11
This quick installation guide applies for the following
inverter models:
●RPI M50A_12s (with string fuses and overvoltage con-
ductor)
with model number:
RPI503M221000
and
with rmware versions:
DSP: 1.41 / RED: 1.22 / COM: 1.22
The model number can be found on the type plate of the inverter.
The rmware versions are listed on the view in menu Inverter
information.
Table of Contents
1 Basic safety instructions........................................................................................................................................................... 3
2 Components of the inverter ...................................................................................................................................................... 4
3 Scope of delivery........................................................................................................................................................................ 6
4 Planning installation .................................................................................................................................................................. 7
5 Mounting the inverter................................................................................................................................................................. 8
6 Connecting to the grid (AC) .................................................................................................................................................... 10
7 Connecting solar modules (DC) ............................................................................................................................................. 12
8 Connect to a data logger via RS485 ....................................................................................................................................... 14
9 Connecting digital inputs, external shutdown and dry contacts (optional) ....................................................................... 16
10 Startup – basic settings........................................................................................................................................................... 17
11 Startup - further settings (optional)........................................................................................................................................ 18
Date and time ............................................................................................................................................................................. 18
AC connection type .................................................................................................................................................................... 18
Inverter ID................................................................................................................................................................................... 19
Baud rate for RS485................................................................................................................................................................... 19
Active power limitation................................................................................................................................................................ 20
External shutdown...................................................................................................................................................................... 20
Dry contacts ............................................................................................................................................................................... 21
12 Technical data........................................................................................................................................................................... 22
© Copyright – Delta Energy Systems (Germany) GmbH – All
rights reserved.
This manual is intended for installers.
The information in this manual is to be treated as condential and
no part of this manual may be reproduced without prior written
permission from Delta Energy Systems. The information in this
manual may not be used for any purpose not directly connected
to use of the inverter.
All information and specications can be modied without prior
notice.
If you notice discrepancies between the descriptions in this instal-
lation guide and the information on the inverter display, to www.
solar-inverter.com and download the version of the installation
guide that matches the model number and the rmware version
of your inverter.
On the website, you will also nd the installation and operating
instructions with detailed information on the inverter.
Delta Energy Systems (Germany) GmbH
Tscheulinstraße 21
79331 Teningen
Germany

3
Quick Installation Guide for solar inverter RPI M50A_12s V1 EU EN 5013237400 00 2016-04-11
1 Basic safety instructions
DANGER
Electrical shock
Potentially fatal voltage is applied to the inverter
during operation. When the inverter is discon-
nected from all power sources, this voltage
remains in the inverter for up to 10 seconds.
Therefore, always carry out the following steps
before working on the inverter.
1. Place the AC/DC isolating switch in the OFF
position.
2. Disconnect the inverter from all AC and DC
voltage sources and make sure that none
of the connections can be accidentally
restored.
3. Wait for at least 10 seconds until the internal
capacitors have discharged.
DANGER
Electrical shock
Potentially fatal voltage is applied to the invert-
er's DC connections during operation. When light
falls on the solar modules, they immediately start
to generate electricity. This also happens when
light does not fall directly on the solar modules.
►Never disconnect the inverter from the solar
modules when it is under load.
►Place the AC/DC isolating switch in the OFF
position.
►Uncouple the connection to the grid so that
the inverter cannot supply energy to the grid.
►Disconnect the inverter from all AC and DC
voltage sources. Ensure that none of the
connections can be restored accidentally.
►Ensure that the DC cables cannot be touched
accidentally.
WARNING
Electrical shock
When the cover is removed from the fuse box,
this exposes current-carrying parts and protec-
tion conforming to IP65 is no longer guaranteed.
►Remove the cover only when it is absolutely
necessary.
►Do not remove the cover if water might enter
the inverter.
►After work is completed, ensure that the
cover is properly replaced and screwed in.
Check that the cover is properly sealed.
●To comply with the IEC 62109-5.3.3 safety requirements
and avoid injury or damage to property, the inverter must
be installed and operated in accordance with the safety and
operating instructions set out in this manual. Delta Energy
Systems is not responsible for damage resulting from failure
to follow the safety and operating instructions set out in this
manual.
●The inverter may only be installed and started by installers
who have been trained and certied for the installation and
operation of grid-based solar inverters.
●All repair work on the inverter must be carried out by Delta
Energy Systems. Otherwise, the warranty will be void.
●Warning instructions and warning symbols attached to the
inverter by Delta Energy Systems must not be removed.
●The inverter has a high leakage current value. The grounding
cable must be connected before commencing operation.
●Do not disconnect any cables while the inverter is under load
due to risk of a fault arc.
●To prevent damage due to lightning strikes, follow the provi-
sions that apply in your country.
●The surface of the inverter can get very hot during operation.
Only touch the inverter (outside of the display) with safety
gloves.
●The inverter is very heavy. The inverter must be lifted and
carried by at least three people.
●Only equipment in accordance with SELV (EN 60950) may
be connected to the RS485 interfaces.
● All connections must be sufciently insulated in order to
ensure the IP65 protection class. Unused connections must
be closed using cover caps.

4Quick Installation Guide for solar inverter RPI M50A_12s V1 EU EN 5013237400 00 2016-04-11
2 Components of the inverter
1 2 3 4 5 6
Electrical connections
Overview
1
2
3
4
5
6
1Grounding connection 3AC connection 5Communication port 1
2AC/DC isolating switch 4DC connections 6Communications port 2 (not used)
1Display, buttons, and LED 4Electrical connections
2Fuse box with string fuses and overvoltage conductors 5Fans
3Air inlets 6Type plate

5
Quick Installation Guide for solar inverter RPI M50A_12s V1 EU EN 5013237400 00 2016-04-11
Label Designation Use
LEDs
Grid
Grid Green LED; lights up when the inverter is supplying power to the grid.
AlArm
Alarm Red LED; displays a warning, an error or a fault.
Buttons
ESC Exit Exit the current menu.
Cancel the setting for a parameter. Changes are not adopted.
Down Move downwards in the menu.
Reduce the value of a congurable parameter.
Up Move upwards in the menu.
Increase the value of a congurable parameter.
ENT Enter
Select menu item.
Open a congurable parameter for editing.
Cancel the setting for a parameter. Changes are adopted.
10 s
Danger to life through electric shock
Potentially fatal voltage is applied to the inverter during operation. This voltage persists even 10 seconds after
disconnection of the power supply.
Never open the inverter. The inverter contains no components that must be maintained or repaired by the opera-
tor or installer. Opening the housing will void the warranty.
Before working with the inverter, you must read the supplied manual and follow the instructions contained
therein.
This inverter is not separated from the grid with a transformer.
The housing of the inverter must be grounded if this is required by local regulations.
WEEE marking
The inverter must not be disposed of as standard household waste, but in accordance with the applicable elec-
tronic waste disposal regulations of your country or region.
Display, buttons, and LEDs
Information on the Type Plate

6Quick Installation Guide for solar inverter RPI M50A_12s V1 EU EN 5013237400 00 2016-04-11
3 Scope of delivery
Part Quantity Description Part Quantity Description
Inverter 1 AC plug 1
China Aviation Optical-Electrical
Technology Co. PVE5T125KE36
Mounting plate 1 Grounding
screw 1
To ground the inverter housing;
with spring washer, washer and
lock washer; mounted on the
inverter
DC plug
12
Multi-contact MC4-plug for DC +
(32.0017P0001-UR for 4/6 mm2)
Quick installa-
tion guide and
basic safety
instructions
1
RPI M50A_12s
Installationskurzanleitung
Deutschland Österreich SchweizBelgien
12
Multi-contact MC4-plug for DC–
(32.0016P0001-UR for 4/6 mm2)
Keep the packaging.
Check the delivery for completeness and all com-
ponents for damage before starting installation
work.
Do not use any damaged components.

7
Quick Installation Guide for solar inverter RPI M50A_12s V1 EU EN 5013237400 00 2016-04-11
>80 cm
>30 cm>30 cm >30 cm
>20 cm
► Ensure sufcient air circulation. Warm air must be able
to escape from below. Leave enough space around
each inverter.
►Do not mount the inverters one above the other. This
would result in the upper inverter heating the lower
inverter.
►Note the Betriebstemperaturbereich ohne Abrege-
lung (Operating temperature range without derat-
ing) and the Gesamt-Betriebstemperaturbereich
(Total operating temperature range). When the
Temperaturbereich ohne Abregelung (Temperature
range without derating) is exceeded, the inverter
reduces output. When the Gesamt-Betriebstemper-
aturbereich (Total operating temperature range)
is exceeded, the inverter switches off. This is normal
operating behavior for the inverter and is necessary to
protect the internal electronics.
► In areas with many trees or elds, pollen can clog the
air inlets and outlets, hindering the air ow.
Ambient temperature and air circulation
?
?
?
?
✔✘ ✘
►The inverter is very heavy. The wall
has to be able to bear the weight of the
inverter.
►Always use the mounting plate supplied
with the inverter.
►Use mounting material (dowels, screws
etc.) that are suitable for the wall or the
mounting system, as well as the heavy
weight.
►Mount the inverter on a vibration-free wall
to avoid disruptions.
►When using the inverter in residential
areas or in buildings with animals, pos-
sible noise emissions can be disturbing.
Therefore, carefully choose the place of
installation.
► Mount the inverter on a reproof wall.
Mounting alignment
►Mount the inverter vertically.
►The inverter is very heavy, see “Technical
data”, page 22 (Technical Data, page 22).
The inverter must be lifted and carried by at
least three people.
4 Planning installation
Mounting location for the inverter
►Attach the inverter so that the information on the display
and the buttons can be read without any problems. .
Outdoor installations
►The inverter is designed in ac-
cordance with protection class
IP65 and can be installed indoors
or in protected outdoor areas (i.e.
outside but protected by a roof
from direct sun, rain and snow).

8Quick Installation Guide for solar inverter RPI M50A_12s V1 EU EN 5013237400 00 2016-04-11
5 Mounting the inverter
Mounting the inverter on the wall
1. Attach the mounting plate to the wall / the mounting system
with 6 or 12 M6 screws.
2. Mount the inverter on the mounting plate.
3. Check that the inverter is correctly mounted on the mounting
plate.
4. Check that the inverter is correctly positioned at the lower
end of the wall / mounting system.

9
Quick Installation Guide for solar inverter RPI M50A_12s V1 EU EN 5013237400 00 2016-04-11
5. Secure the inverter to the wall or the mounting system.
Grounding the inverter housing
6. Screw the grounding cable onto the inverter. M4 screw,
spring washer, washer, and lock washer are already mount-
ed on the inverter.
2
1
3
4
5
1Lock washer
2Grounding cable with cable lug
3Washer
4Spring washer
5M4 screw
7. Perform a continuity check of the grounding connection. If
there is no sufcient conductive connection, scratch away
the paint from the inverter housing under the lock washer to
achieve a better electrical contact.
Attaching warning notices to the inverter
►Attach all necessary warning notices to the inverter. Always
follow the local regulations.
Some examples of warnings are listed below.
WARNING
Dual Supply
Do not work on this equipment until it is isolated from
both mains and on site generation supplies
Isolate on-site Generating Unit(s) at ………………………………………………….
Isolate mains supply at………………………………………………………
Warning – Only persons authorised by the DNO may remove the main cut out fuse
Warning
Two voltage sources
- Distribution network
- PV modules
Prior to any work, disconnect
both sources

10 Quick Installation Guide for solar inverter RPI M50A_12s V1 EU EN 5013237400 00 2016-04-11
6 Connecting to the grid (AC)
The inverter can be connected to 3-phase grids
without neutral conductor (3P3W, 3 phases + PE)
and 3-phase grids with neutral conductor (3P4W,
3 phases + N + PE).
►If the inverter is connected to a grid without
neutral conductor, after operation on the
display, the AC connection must be changed
to 3P3W, see “AC connection type” (AC con-
nection type, page).
Wiring for 3-phase grids with neutral conductor (L1,
L2, L3, N + PE)
Use cable end sleeves on every wire.
L1
L2
PE
N
L3
L3N
L2
L1
PE
L1
L2PE
L3N
Wiring for 3-phase grids without neutral conductor
(L1, L2, L3, N + PE)
Use cable end sleeves on every wire.
L3N
L2
L1
PE
L1
L2PE
L3
L1
L2
L3
PE
Allowable grounding systems
Grounding system TN-S TN-C TN-C-S TT IT
Allowed Yes Yes Yes Yes No
TT is not recommended. The voltage of N must
be very close to the grounding voltage (differ-
ence <20 Vrms)
Requirements for the grid voltage
3-phases without neutral
conductor (3P3W)
3-phases without neutral con-
ductor (3P4W)
L1-L2 400 VAC ± 20% L1-N 230 VAC ± 20%
L1-L3 400 VAC ± 20% L2-N 230 VAC ± 20%
L2-L3 400 VAC ± 20% L3-N 230 VAC ± 20%

11
Quick Installation Guide for solar inverter RPI M50A_12s V1 EU EN 5013237400 00 2016-04-11
Important safety instructions
Always follow the specic regulations of your country
or region.
► Always follow the specic regulations of your energy pro-
vider.
►Install all stipulated safety and protective devices (e.g. auto-
matic circuit breakers and/or surge protection devices).
►Protect the inverter with a suitable upstream circuit breaker:
Upstream circuit breaker 100 A
G N L1 L3L2
N
L1
L2
L3
PE
to the
inverter
Residual current circuit breaker
Due to its design, the inverter cannot supply the grid with DC
residual current. This means that the inverter meets the require-
ments of DIN VDE 0100-712.
Possible error events were assessed by Delta in accordance with
the current installation standards. The assessments showed that
no hazards arise from operating the inverter in combination with
an upstream, type A residual current circuit breaker (FI circuit
breaker, RCD). There is no need to use a type B residual current
circuit breaker.
Minimum tripping current of the type A residual
current circuit breaker ≥300 mA
Integrated residual current monitoring unit
The integrated, universal current-sensitive residual current moni-
toring unit (RCMU) is certied in accordance with VDE 0126 1-1/
A1:2012-02, section 6.6.2, for a tripping current of 300 mA.
NOTE
The required tripping current of the residual cur-
rent circuit breaker depends rst and foremost
on the quality of the solar modules, the size of
the PV system, and the ambient conditions (e.g.
humidity). The tripping current must not, how-
ever, be less than the specied minimum tripping
current.
Integrated string fuses and overvoltage conductors
If the fuse box cover is removed, the protection class
is no longer IP65.
►Only remove the cover when the inverter is in a
dry environment.
►Replace damaged string fuses and overvoltage conductors
with devices of the same type and from the same manufac-
turer.
AC cable requirements
The AC plug provided with the inverter has the following technical
characteristics:
AC connection
China Aviation Optical-Electri-
cal Technology Co.
PVE5T125KE36
Rated current 100 A
Min./max. cable diameter 37 ... 44 mm
Min./max. wire cross-section 25 ... 35 mm2
Recommended torque for ter-
minal screws 3 Nm
The AC plug can only be used with a exible copper cable.
Consider the following factors when calculating the cable diam-
eter:
●Cable material
●Temperature conditions
●Cable length
●Installation type
●Voltage drop
●Loss of power in the cable
►Always follow the applicable installation instructions for AC
cables.
France: Follow the installation instructions of UTE 15-712-1. This
standard contains the requirements for minimum cable diameters
and for avoiding overheating due to high currents.
Germany: Follow the installation instructions of UTE VDE 0100-
712. This standard contains the requirements for minimum cable
diameters and for avoiding overheating due to high currents.
Grounding the inverter
The inverter must be grounded via the PE conductor. To do this,
connect the PE conductor of the AC cable to the AC plug pin
provided for that purpose.

12 Quick Installation Guide for solar inverter RPI M50A_12s V1 EU EN 5013237400 00 2016-04-11
7 Connecting solar modules (DC)
DANGER
Electrical shock
Potentially fatal voltage is applied to the in-
verter's DC connections during operation. When
light falls on the solar modules, they immediately
start to generate electricity. This also happens
when light does not shine directly on the solar
modules.
►Never disconnect the inverter from the solar
modules when it is under load.
►Place the AC/DC isolating switch in the OFF
position.
►Uncouple the connection to the grid so that
the inverter cannot supply energy to the grid.
►Disconnect the inverter from all AC and DC
voltage sources. Ensure that none of the
connections can be restored accidentally.
►Ensure that the DC cables cannot be touched
accidentally.
NOTE
Maximum power at the DC connections.
Exceeding the maximum current can cause over-
heating of the DC connections.
►Always take into account the maximum
current of the DC connections when planning
the installation.
NOTE
Incorrectly dimensioned solar plant.
An solar system of the wrong size may cause
damage to the inverter.
►When calculating the module string, always
pay attention to technical specications
(input voltage range, maximum current
and maximum input power), see chapter
"Technical data".
NOTE
Ingress of moisture.
Moisture can enter via open DC connections.
►To ensure protection class IP65, close un-
used DC connections with the rubber plugs
that are attached to the DC connections.
►In order to start the inverter, DC voltage run
through both DC inputs!
Tools
The protective caps lock the DC plug so
that it can only be disconnected from DC
connections using the mounting tool.
►Observe the local regulations with
regards to the protective caps.
Mounting tool for disconnecting the DC
plug and the protective caps from the DC
connections. Available from multi-contact.
Polarity of the DC voltage
►Check the polarity of the DC voltage of the DC strings before
connecting the solar modules.
Note on security
►Before connecting the solar modules turn the DC connection
switch to the OFF position.

13
Quick Installation Guide for solar inverter RPI M50A_12s V1 EU EN 5013237400 00 2016-04-11
Protective devices
When selecting the necessary protective devices (e.g. fuses)
take into account the Maximale Rückstrombelastbarkeit (Maxi-
mum reverse current) of the solar modules.
+
–
+
–
+
–
+
–
+
–
+
–
DC plugs and DC cables
The DC plugs for all DC connections are provided along with the
inverter.
If you want to order more or need a different size, see the infor-
mation in the following table.
a
b
DC connections on the inverter DC plugs for DC cables
a b
MultiContact
mm2mm
DC–
^
4/6 3-6 32.0014P0001-UR
5.5-9 32.0016P0001-UR 1)
10 5.5-9 32.0034P0001
DC+
4/6 3-6 32.0015P0001-UR
5.5-9 32.0017P0001-UR 1)
10 5.5-9 32.0035P0001
1) Included in delivery

14 Quick Installation Guide for solar inverter RPI M50A_12s V1 EU EN 5013237400 00 2016-04-11
8 Connect to a data logger via RS485
The connections for RS485, the dry contacts, the
digital inputs and the external shutdown (EPO)
are all on the communication card. This means
that the installation work can be combined!
1 2
3 4
1Terminal block for dry contacts
2DIP switch for VCC and RS485 termination resistor
3Terminal block for external shutdown (EPO) and digital
inputs
4Terminal block for VCC and RS485
Terminal pairs 3/4 or 5/6 can be used. It doesn't matter which
terminal pair is used. The second terminal pair is only required
when connecting several inverters via RS485.
If you want to use SOLIVIA Monitor, Delta's Internet-based moni-
toring system, you also need a SOLIVIA Gateway M1 G2.
Terminal assignments of the RS485 terminal block
1 2 3 4 5 6
1VCC (+12 V; 0.5 A)
2GND
3DATA+ (RS485)
4DATA– (RS485)
5DATA+ (RS485)
6DATA– (RS485)
The baud rate can be set on the inverter display after startup, see
“Baud rate for RS485”, page 19 (Baud rate for RS485, page).
Data format
Baud rate 9600, 19200, 38400; standard: 19200
Data bits 8
Stop bit 1
Parity Not applicable
DIP switch for VCC and RS485 termination resistor
1 2

15
Quick Installation Guide for solar inverter RPI M50A_12s V1 EU EN 5013237400 00 2016-04-11
Wiring diagram for a single inverter
ON
1 2
Termination resistor = ON
Data logger
Wiring diagram for several inverters
►If the data logger does not have an integrated RS485 termi-
nation resistor, switch on the RS485 termination resistor on
the rst inverter.
► After the startup of each inverter, congure another inverter
ID, see “Inverter ID”, page 19 (Inverter ID, page).
...
ON
1 2
ON
1 2
ON
1 2
RS485
Termination resistor = OFF Termination resistor = OFFTermination resistor = ON
Datalogger
Datalogger
Connection to a Delta SOLIVIA Gateway M1 G2
Requirements include a CAT5 cable with RJ45 plugs on one side
and an open end on the other side.
Inverter SOLIVIA Gateway M1 G2
18
DATA+ Terminal 3 or 5 Pin 7
DATA– Terminal 4 or 6 Pin 6 or 8

16 Quick Installation Guide for solar inverter RPI M50A_12s V1 EU EN 5013237400 00 2016-04-11
9 Connecting digital inputs, external shutdown and dry con-
tacts (optional)
1 2
3 4
1Terminal block for dry contacts
2DIP switch for VCC and RS485 termination resistor
3Terminal block for external shutdown (EPO) and digital
inputs
4Terminal block for VCC and RS485 termination resistor
Digital inputs and external shutdown
1 2 3 4 5 6 7 8
Terminal Des. Short circuit Assigned action
1 V1 - -
2 K0 V1 + K0 External shutdown
(E-Power off, EPO)
3 K1 V1 + K1 Set maximum active
power to 0%
4 K2 V1 + K2 Set maximum active
power to 30 %
5 K3 V1 + K3 Set maximum active
power to 60 %
6 K4 V1 + K4 Set maximum active
power to 100 %
7 K5 V1 + K5 Reserved
8 K6 V1 + K6 Reserved
To control the active power, an external ripple control receiver
can be connected to the digital inputs.
After startup, the relays can be dened as make-contact or
break-contact for the external shutdown on the display. (See
“External shutdown”, page 20 (External Shutdown, page)).
Dry contacts
1 2
1Dry contact A
2Dry contact B
Event Description
Deactivated The function of the dry contacts is disabled.
On grid The inverter has connected to the grid.
Fan failure The fans are defective.
Insulation The insulation test has failed.
Alarm A message has been sent about an error, a
fault or a warning.
Error An error message was sent.
Fault A fault message was sent.
Warning A warning was sent.
The default setting for both contacts has been "Disabled".
After startup, an event can be assigned to the dry contacts on the
display, see “Dry contacts”.

17
Quick Installation Guide for solar inverter RPI M50A_12s V1 EU EN 5013237400 00 2016-04-11
10 Startup – basic settings
To make the settings as described in this chapter, the inverter
must be powered with alternating current (power supply).
The inverter also needs a DC voltage in order to operate fully
from the energy provider.
Français
Deutsch
English
Select language 1. Use the buttons and to select the language English.
Press the ENT button to conrm.
TH PEA
UK G59-3 230
2. Use the buttons and to select your country or grid type.
Press the ENT button to conrm.
YES / NO
UK G59-3 230
set country:
Are you sure to
3. If the correct country is selected, use the buttons and to choose entry Yes.
Press the ENT button to conrm.
To change the selection, press the ESC button.
→The inverter starts a self-test lasting approx. 2 minutes. The remaining time is shown
on the display.
þThe basic settings are now complete. The standard menu is displayed.
E-Today: 0kWh
Power: 0W
Status: On Grid
10.Sep 2014 15:32
►Use the next chapter to check whether you need to make additional settings.

18 Quick Installation Guide for solar inverter RPI M50A_12s V1 EU EN 5013237400 00 2016-04-11
Date and time
E-Today: 0kWh
Power: 0W
Status: On Grid
10.Sep 2014 15:32
1. If the default information is displayed, press the ESC button to open the main menu.
Otherwise, press the ESC button repeatedly until the main menu is displayed.
Inverter Info.
General Settings
Install Settings
Active/Reactive Pwr
FRT
2. Use the buttons and to select the entry General Settings and press the
ENT button.
Baud rate
Date & Time
Language 3. Press the and buttons to select the entry Date and Time and press the ENT
button.
→The day is marked.
16.Sep 2014 14:55
4. Press the and buttons to congure the value and press the ENT button.
→Repeat the procedure for the other settings.
11 Startup - further settings (optional)
AC connection type
By default, the AC connection type is set to 3P4W (3 phases + N + PE). You only need to change this setting if you are
using an AC system with 3 phases + PE (3P3W). For a description of how to connect the inverter to the grid, see “Con-
necting to the grid (AC)”, page 10 (Connecting to the grid (AC).
E-Today: 0kWh
Power: 0W
Status: On Grid
10.Sep 2014 15:32
1. If the default information is displayed, press the ESC button to open the main menu.
Otherwise, press the ESC button repeatedly until the main menu is displayed.
Inverter Info.
General Settings
Install Settings
Active/Reactive Pwr
FRT
2. Use the buttons and to select the Installation Settings button and press the
ENT button.
Password 0 * * *
energy production.
Adj. would affect
Warning:
3. This function is protected with password 5555.
Use the buttons and to congure the individual numbers.
Press the ENT button to conrm a number.
AC Connection: 3P4W
EPO: Normal Close
Anti-islanding: ON
Max. Power: 100%
Return to Factory
4. Use the buttons and to select the entry AC connection and press the ENT
button.
AC Connection: 3P4W
EPO: Normal Close
Anti-islanding: ON
Max. Power: 100%
Return to Factory
5. Press the and buttons to congure an option and press the ENT button.

19
Quick Installation Guide for solar inverter RPI M50A_12s V1 EU EN 5013237400 00 2016-04-11
Baud rate for RS485
E-Today: 0kWh
Power: 0W
Status: On Grid
10.Sep 2014 15:32
1. If the default information is displayed, press the ESC button to open the main menu.
Otherwise, press the ESC button repeatedly until the main menu is displayed.
Inverter Info.
General Settings
Install Settings
Active/Reactive Pwr
FRT
2. Use the buttons and to select the entry General Settings and press the
ENT button.
Baud rate
Date & Time
Language
3. Use the buttons and to select the Baud rate button and press the ENT but-
ton.
38400
19200
9600 4. Press the and buttons to congure the value and press the ENT button.
Inverter ID
E-Today: 0kWh
Power: 0W
Status: On Grid
10.Sep 2014 15:32
1. If the default information is displayed, press the ESC button to open the main menu.
Otherwise, press the ESC button repeatedly until the main menu is displayed.
Inverter Info.
General Settings
Install Settings
Active/Reactive Pwr
FRT
2. Use the buttons and to select the Installation Settings button and press the
ENT button.
Password 0 * * *
energy production.
Adj. would affect
Warning:
3. This function is protected with password 5555.
Use the buttons and to congure the individual numbers.
Press the ENT button to conrm a number.
Grid Settings
Country
Insulation
Inverter ID: 001
4. Use the buttons and to select the entry Inverter ID and press the ENT but-
ton.
ID=001
Setting ID:
5. Press the and buttons to congure the value and press the ENT button.

20 Quick Installation Guide for solar inverter RPI M50A_12s V1 EU EN 5013237400 00 2016-04-11
Active power limitation
Change this setting only after consultation with
Delta customer service.
To change this setting, you need a special
password that you receive from Delta customer
service. You can nd the contact information on
the back of this document.
E-Today: 0kWh
Power: 0W
Status: On Grid
10.Sep 2014 15:32
1. If the default information is displayed, press the ESC button to open the main menu.
Otherwise, press the ESC button repeatedly until the main menu is displayed.
Inverter Info.
General Settings
Install Settings
Active/Reactive Pwr
FRT
2. Use the buttons and to select the Installation Settings button and press the
ENT button.
Password 0 * * *
energy production.
Adj. would affect
Warning:
3. Enter the password you were given by Delta customer service.
Use the buttons and to congure the individual numbers.
Press the ENT button to conrm a number.
AC Connection: 3P4W
EPO: Normal Close
Anti-islanding: ON
Max. Power: 50000W
Return to Factory
4. Use the buttons and to select the entry Max. Power and press the ENT but-
ton.
5. Press the and buttons to congure the value and press the ENT button.
11 Startup – further settings (update)
External shutdown
E-Today: 0kWh
Power: 0W
Status: On Grid
10.Sep 2014 15:32
1. If the default information is displayed, press the ESC button to open the main menu.
Otherwise, press the ESC button repeatedly until the main menu is displayed.
Inverter Info.
General Settings
Install Settings
Active/Reactive Pwr
FRT
2. Use the buttons and to select the Installation Settings button and press the
ENT button.
Password 0 * * *
energy production.
Adj. would affect
Warning:
3. This function is protected with password 5555.
Use the buttons and to congure the individual numbers.
Press the ENT button to conrm a number.
Grid Settings
DC Injection
Dry Contact
RCMU: ON
EPO: Normal Close
4. Use the buttons and to select the EPO button and press the ENT button.
5. Press the and buttons to congure an option and press the ENT button.
Table of contents
