BEMMA TERRA VT-TR48 User manual

1 (833) 66 BEMMA
48” Vanity
Available Base Finish: Available Countertops:
TERRA
Designed By: Bemma Design Lab
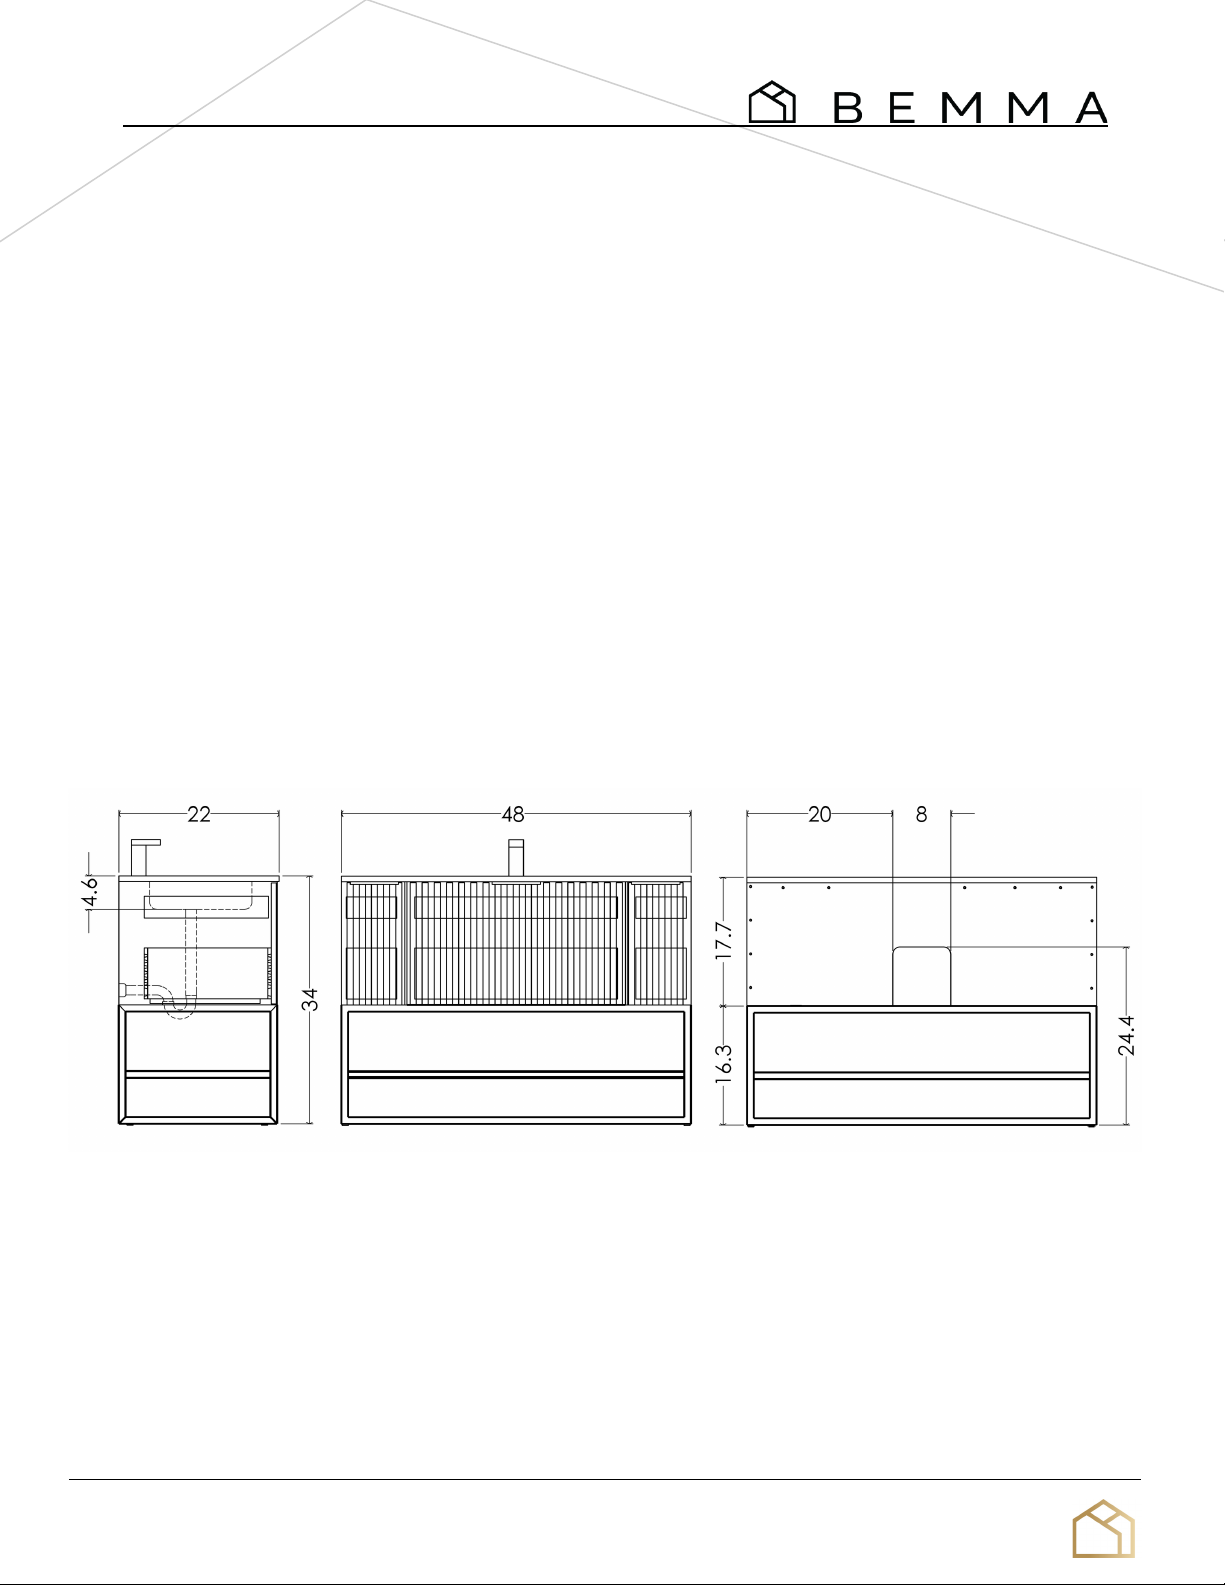
SPECIFICATION SHEET
FRONTSIDE
bemmadesign.com
BACK
Features
All BEMMA bath cabinets are made of solid hardwood and engineered wood, and meet strict CARB-2 Standards.
No MDF is used.
Ceramic sink is cUPC certified.
Model : VT-TR48
3 soft-close large drawers/3 interior drawers soft-close
Single hole faucet drilling
Premium Under-mount drawer Glides with soft-close
Solid wood /plywood construction
Plated Stainless Steel base or powdercoating with wood shelf
5 step finish resists moisture and scratches
Fully finished interiors
Solid Wood drawers with Dovetail Joints
Box 1-base. Box 2 Ceramic Sink and top pre mounted.
Backsplash not included
Finished plywood backing pre-cut to accept plumbing
Walnut finish veneer(E24) Satin Brass trim
Walnut finish veneer (E24) Black Matte trim
Greywash veneer (E85) Brushed Nickel trim
18mm Italian Carrara Marble (M03O-3)
18mm White Quartz/Engineered Stone (C03O-3)

1 (833) 66 BEMMA
48” Vanity
Model : VT-TR48
TERRA
Designed By: Bemma Design Lab
SPECIFICATION SHEET
bemmadesign.com
TERRA 48
SINK TOP DIMENSIONS

1 (833) 66 BEMMA
Designer Vanities & Accessories
T E R R A A S S E M B L Y I N S T R U C T I O N S
1 (833) 66 BEMMA
B E F O R E
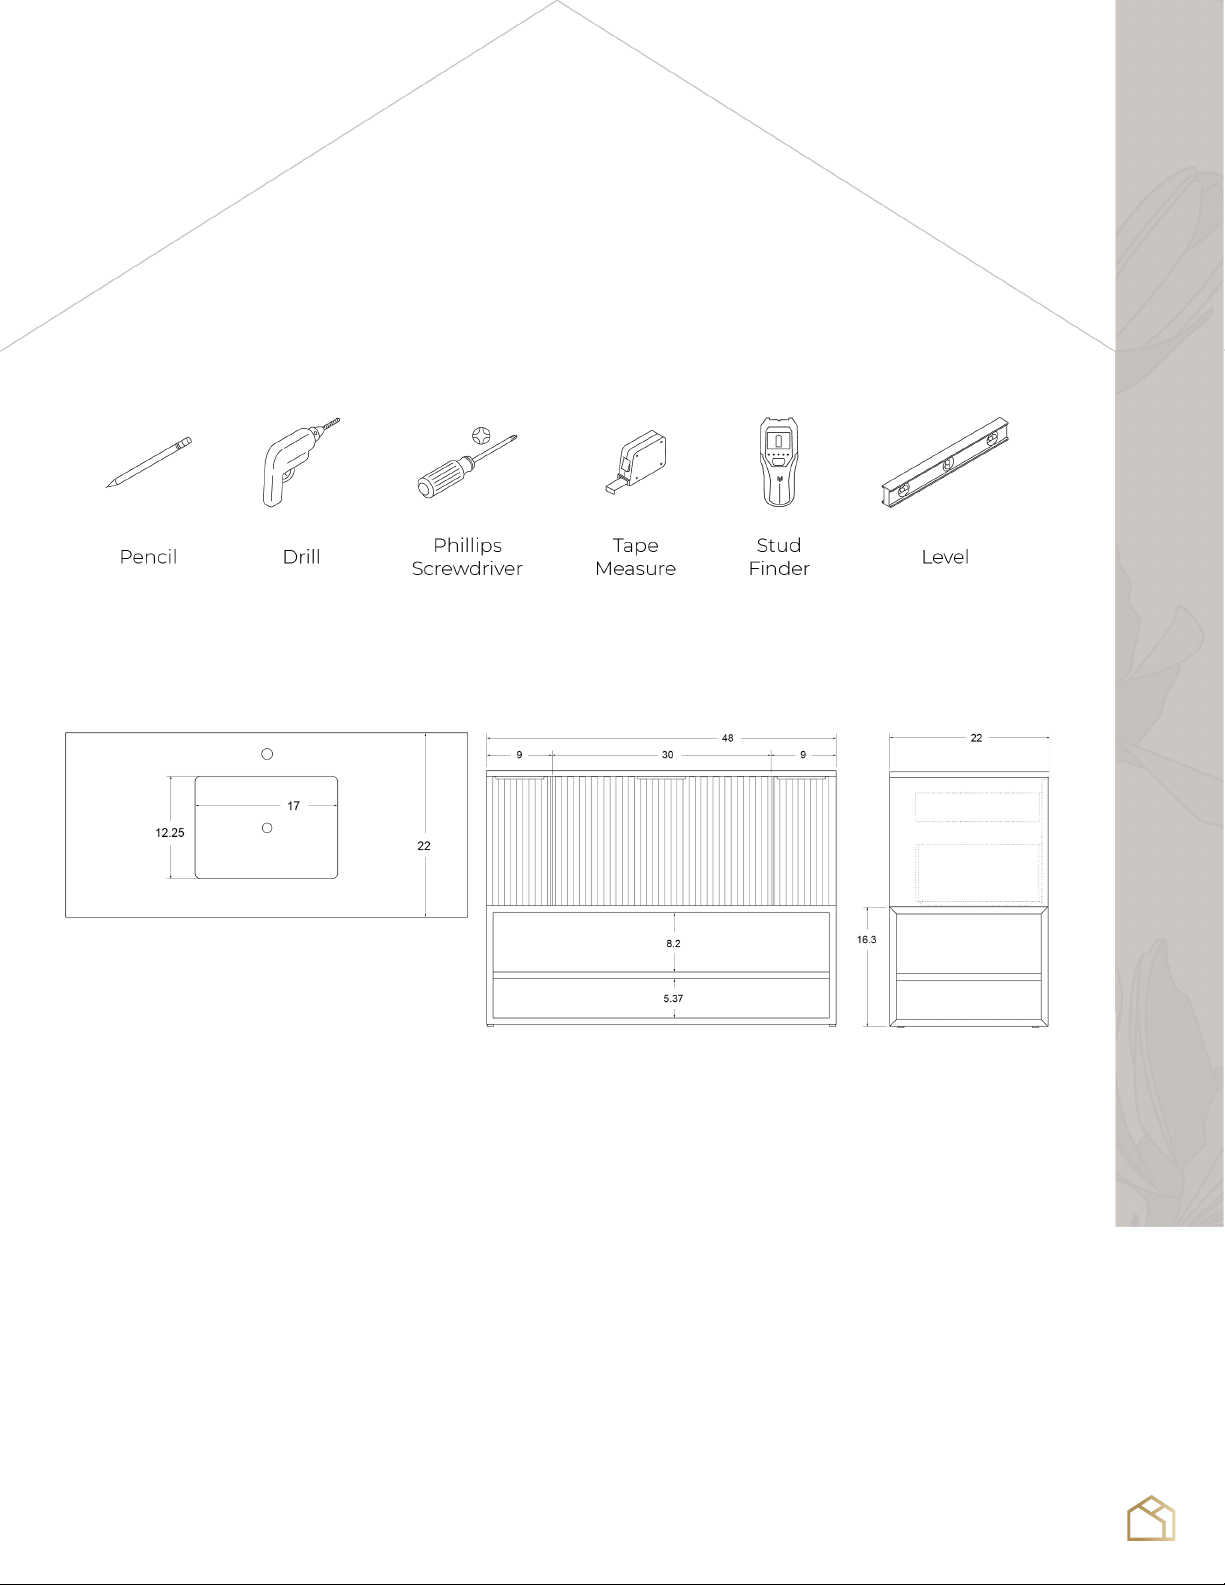
1. Tools and materials needed:
2. Product dimensions:
3. Damaged product: DO NOT USE if product and/or components
are broken
4. For installation of faucet and plumbing, we recommend the use
of a licensed plumber. Ensure all building & plumbing codes are
respected
5. Assembly should be done with two adults
Y o u B e g i n
A S S E M B L Y I N S T R U C T I O N S
Table of contents
Languages:
Other BEMMA Bathroom Fixture manuals


Popular Bathroom Fixture manuals by other brands

Kohler
Kohler Mira Sport Max J03G Installation and user guide

Moen
Moen 186117 Series installation guide

Hans Grohe
Hans Grohe Raindance Showerpipe 27235000 Instructions for use/assembly instructions

Signature Hardware
Signature Hardware ROUND SWIVEL BODY SPRAY 948942 Install

fine fixtures
fine fixtures AC3TH installation manual

LIXIL
LIXIL HP50 Series quick start guide


