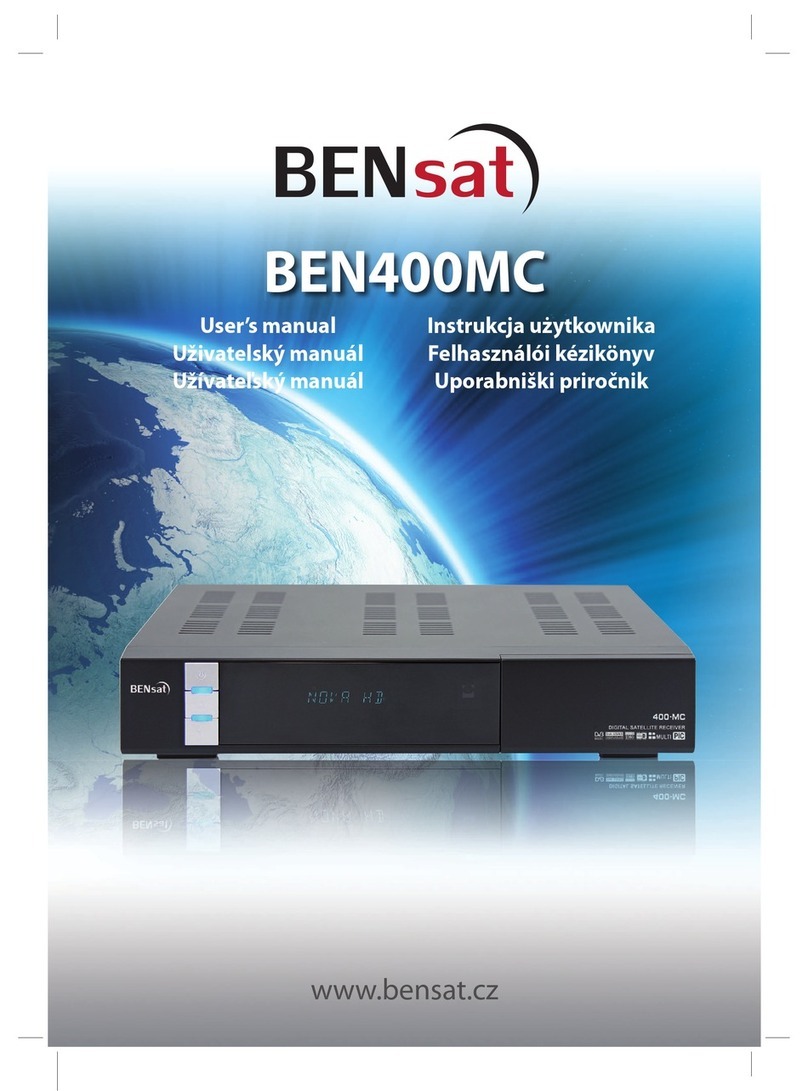
bensat BEN400MC User manual

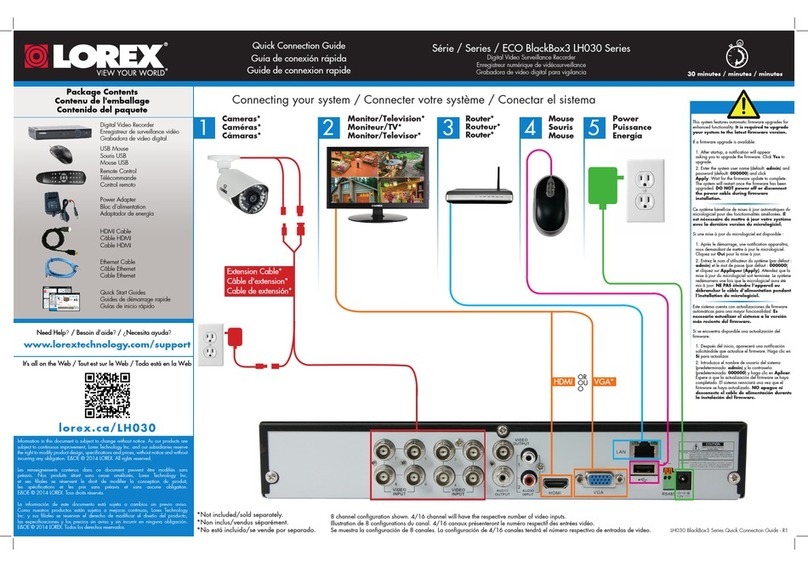
1
BEN400MC
www.bensat.cz
User’s manual
Uživatelský manuál
Užívateľský manuál
Instrukcja użytkownika
Felhasználói kézikönyv
Uporabniški priročnik

2
User’s manual - BEN400MC
GB
IMPORTANTT NOTICE
Please read this user’s manual carefully to be able to safely install, use and
maintain the product at maximum performance. Keep this user’s manual next
to your product for future reference. The information in this user’s manual is
subject to change without notice.
Warnings, Cautions and Notes
Throughout the whole manual, pay special attention to the following marks
that indicate hazardous situations.
• Warning
Indicates a hazardous situation which could result in serious injury.
• Caution
Indicates a situation which could damage the equipment or other apparatus.
• Note
Indicates additional information to make the user aware of possible problems
and information of any
importance to help understand, use and maintain the installation.
Meaning of Symbols
To reduce the risk of electric shock, do not remove cover (or back).
No user serviceable parts inside.
Refer servicing to qualied service personnel.
This symbol indicates dangerous voltage inside the product that
presents a risk of electric shock or personal injury.
This symbol indicates important instructions accompanying the
product.
Safety Warning
This product has been manufactured to comply with international safety
standards. Please read the following safety precautions carefully.
Safety Instructions and Precautions
1. MAINS SUPPLY
90-250V A.C., 50/60Hz
• Operatethisproductonlyfromthetypeof
power supply indicated on the marking label. If you are not sure of the
type of power supplied to your home, consult your local power company.
• Disconnecttheproductfromthemains
before you start any maintenance or installation procedures.
2.OVERLOADING
• Donotoverloadawalloutlet,extension
cord or adapter as this may result in electric re or shock.
3.LIQUID
•Theproductshouldnotbeexposedtoliquidofanykind.Inaddition,no
objects lled with liquid should be placed on the apparatus.
4.CLEANING
•Disconnecttheproductfromthewalloutletbeforecleaning.
•Usealightdampcloth(nosolvents)todusttheproduct.
5.VENTILATION
•Theslotsontopoftheproductmustbeleftuncoveredtoallowproper
airow into the unit.
•Donotstandtheproductonsoftfurnishingsorcarpets.
•Donotstackelectronicequipmentsontopoftheproduct.
6.ATTACHMENTS
•Donotuseanyunsupportedattachmentsasthesemaybehazardousor
cause damage to the product.
7.CONNECTIONTOTHECABLETVSIGNAL
•Connectallcomponentsbeforeplugginganypowercordsintothewall
outlet. Always turn o the product,TV and other components before you
connect or disconnect any cables.
8.CONNECTIONTOTHETV
•Disconnecttheproductfromthemainsbeforeconnectingordisconne-
cting the cable from the TV. Failure to do so can damage the TV.
9.LOCATION
•Placetheproductindoorstoavoidexposingittolightning,rainorsun.
•Donotplaceitneararadiatororheatregister.
•Werecommendthattheproducthas10cmclearancefromanyother
appliances susceptible to electromagnetic inuences, such as a TV or a
VCR.
•Donotblocktheopeningswithanyobject,anddonotplacetheproduct
on a bed, sofa, rug, or other similar surface.
•Ifyouplacetheproductona rackorabookcase,ensurethatthereis
adequate ventilation and that you have followed the manufacturer’s
instructions for mounting.
•Donotplacetheproductonanunstablecart,stand,tripod,bracket,or
table where it can fall. A falling product can cause serious injury to a child
or adult, and serious damage to the appliance.
10.LIGHTNING,STORMorNOTINUSE
•Unplug theproductfromthewalloutlet anddisconnecttheantenna
during a thunderstorm or when left unattended and unused for long
periods of time. This will prevent damage to the unit due to lightning
and power-surges.
11.EXTRANEOUSOBJECTS
•Donotinsertanythingthroughtheopeningsintheunit,wheretheycan
touch dangerous voltage points or damage parts.
12.REPLACEMENTofPARTS
•Whenreplacementofpartsisrequired,besuretheservicetechnicianuses
replacement parts specied by the manufacturer or those that have the
same characteristics as the original part. Unauthorized substitution may
result in additional damage to the unit.
Warning
1. To avoid damage of the power cord or plug;
•Donotmodifyorprocessthepowercordorplugarbitrarily.
•Donotbendortwistthepowercord.
•Makesuretodisconnectthepowercordholdingtheplug.
•Keepheatingappliancesasfaraspossiblefromthepowercordinorder
to prevent the cover vinyl from melting.
•Themainsplug,asadisconnectiondevice,shallremainreadilyaccessible
by the user.
2. To avoid electrical shock;
•Donotopenthemainbody.
•Donotinsertmetalorinammableobjectsinsidetheproduct.
•Donottouchthepowerplugwithwethands.
•Disconnectthepowercordincaseoflightning.
3. To avoid damage of product;
•Donotusetheproductwhenitisoutoforder.Ifyoucontinuetousethe
product when defective, serious damage can be caused to it. Make sure
to contact your local product distributor if the product is out of order.
•Donotinsertmetaloraliensubstanceintotheslotsforthemodulesor
Smartcards. It may cause damage to the product and reduce its life span.
4. Standby Mode;
•ItisrecommendedtoleavetheproductinStandbymodeduringlong
periodswhennotbeingusede.g.Overnight.

3
CONTENTS
1. GETTING STARTED
1.1 PACKAGE CONTENTS
1.2 FRONT PANEL
1.3 REAR PANEL
1.4 REMOTE CONTROL UNIT (RCU)
1.5 CONNECTING TV
1.6 CONNECTING AUDIO SYSTEM
1.7 POWERING ON
2. INSTALLATION
2.1 ANTENNA SETTING
2.2 SATELLITE LIST
2.3 TRANSPONDER LIST
2.4 MOTOR SETTING
2.5 LIMIT SETUP
3. SETTING
3.1 NETWORK SETTING
3.2 LANGUAGE
3.3 A/V
3.4 DATE TIME
3.5 TIMER LIST
3.6 PARENTAL LOCK
3.7 UPGRADE
3.7.1 USB Upgrade
3.7.2 Network Upgrade
3.8 VERSION
3.9 FACTORY RESET
4. CHANNEL MANAGEMENT
4.1 CHANNEL MANAGER
4.1.1 Move
4.1.2 Lock
4.1.3 Delete
4.1.4 Skip
4.1.5 Sort
4.1.6 Rename
4.1.7 Find
4.2 FAVORITE LIST
5. MEDIA CENTER
5.1 MULTIMEDIA SETUP
5.2 MULTIMEDIA PLAYER
5.2.1 Movie
5.2.2 Music
5.2.3 Native32 Games
5.2.4 Photo
5.2.5 Record Manager
5.2.6 Disk Manager
5.2.7 EBook
5.3 MULTIMEDIA APLLICATIONS
5.3.1 N32 Game
5.3.2 Web Albums
5.3.3 Google Maps
5.3.4 Weather
5.3.5 YouTube
5.4 PVR SETUP
5.5 FTP CLIENT
5.6 SAMBA
5.7 GAME
6. SPECIFICATION
1. GETTING STARTED
1.1 PACKAGE CONTENTS
Beforeusingyourproduct,pleasecheckallpackagecontentsbeforeusing
your product.
•RemoteControlUnit
•Batteries
•User’sManual
•RCACable
1.2 FRONT PANEL
1. Power
Switches between operation and standby modes
2.ChannelUp/DownButton
MovestheTV/RADIOchannelupordown
3.Display
Showschannelinformation,eitherTVorRADIO
4.USB
ConnectstoanUSBcable
5. Smart Card Reader
One(1)slotforasmartcard
6. Common Interface
One(1)slotforConditionalAccessModule
1.3 REAR PANEL
1.LNBIN
Connects to the satellite antenna cable
2.LNBOUT
Connects to another digital satellite receiver
3.ETHERNET
ConnectstothenetworkwithanEthernetcable
4.HDMI
ConnectstotheTVusingHDMIConnector
5.USB
ConnectstoanUSBcable
6.AUDIOL/R
Connects to the TV and outputs audio signals
7.VIDEO
Connects to the TV and outputs video signals. (Using RCA)
8.S/PDIF
Outputsthedigitalaudiosignals
9. TV SCART
Connects to a TV SCART cable
10. RS-232C
Connects to the PC to upgrade the software programme of the product
11.ON/OFF
TurnsOn/O

4

5
Displaysthehistorychannellists
DisplaystheMediaPlayermenu
Marks a particular place in the program
Changes the aspect ratio

6
1.5 CONNECTING TV
(1)ConnectingwithHDMIcable
TheHDMIconnectionisrecommendedforDigitalTV.IncasetheTVhasaHDMI
input connector, a special all digital interface that provides the highest picture
quality,connecttheproducttotheTVwiththeHDMIcable.
(2) Connecting with RCA Cinch cable
PlugoneendofthecableintotheVIDEO(yellow)socketontheproduct,and
plug the other end into the matching socket on TV set.
PlugoneendsofthecableintotheAUDIOL(white)andAUDIOR(red)sockets
on the product, and the other ends into the matching sockets on the product
or audio-video receiver.
(3) Connecting with SCART cable
The SCART cable connection is recommended for Analog TV. Connect the
product to the TV with the SCART.
1.6 CONNECTING AUDIO SYSTEM
If you have external audio system like home theater, you can enjoy better
and powerful audio as below
-Dolbydigital(optical):UseS/PDIFopticalcableintoDolbydigitaldecoder
-Stereo:Use2-RCAcableforAudioL/R
1.7 POWERING ON
(1) Connect the power cord of the product to a wall outlet.
(2)MakesurethattheON/OFFswitchattherearpanelisswitchedtoON.
(3)PoweronbypressingthePOWERbuttonoftheremotecontrolunitorthe
POWERbuttonatthefrontpaneloftheproduct.
2. INSTALLATION
•Thedefaultpasswordis“0000”
This chapter includes the rst time setup of the Antenna Setting, Satellite List,
Transponder List, Motor Setting and Limit Setup.
2.1 ANTENNA SETTING
AntennaSettingenablesyoutoenterthevaluessuchasSatellite,LNBType,
LNBFrequency,Transponder,22kHzTone,LNBPowerandDiSEqCModeof
each item and start channel search.
(1)Satellite:SelecttherequiredsatelliteusingtheOKort u button and
presstheOKbutton.
(2)LNBType:SelecttherequiredLNBTypeusingtheOKort u button
andpresstheOKbutton.
(3)LNBFrequency:SelecttherequiredLNBfrequencyusingtheOKort u
buttonandpresstheOKbutton.
(4)Transponder:SelecttherequiredsatelliteusingtheOKort u button
andpresstheOKbutton.
(5)22KHz:SelectOn/O/AutousingtheOKort u button and press the
OKbutton.
(6)LNBPower:SelectOn/OusingtheOKort u button and press the
OKbutton.
(7)DiSEqCMode:SelecttherequiredDiSEqCinputusingtheOKort u
buttonandpresstheOKbutton.
(8)PresstheBluebuttontostartscanmethod.
•ChannelType:SelectAll/FTAusingthet u button.
•ScanType:SelectAutoScan/BlindScan/ManualScanusingt u button.
(9)PresstheOKbuttontostartchannelsearch.
(10)Please wait while the search continues. If you want to stop the search,
presstheExitbutton.
(11)When channel search is complete, the results will appear. Select Yes and
presstheOKbuttontosavetheresults.
Note:
•IfyoucannotndtherequiredLNBfrequencyfromthelist,enterthe
frequencyusingtheNUMERIC(0-9)buttonsmanuallyandpresstheOK
button.
•WhenusinguniversalLNB,selectUniversal(9750/10600).The22kHztone
value will be disabled.
2.2 SATELLITE LIST
Satellite List enables you to check antenna setting of each satellite, and
performAdd,Edit,andDeletefunctionsforsatellites.
(1)Info:Changethevaluesofantennasettingfortheselectedsatellite
(2)Add:Addanewsatellite
(3)Edit:Changetheselectedsatellitename,positionorlongitude
(4)Delete:Deletetheselectedsatellite(s)
(5)Scan:Startchannelsearchfortheselectedsatellite(s)
Note:
•Deletingsatellite(s)willcausedeletingallthechannelsbelongedtothe
selected satellite(s).
2.3 TRANSPONDER LIST
Transponder List enables you to check antenna setting and satellite of each
transponder,andperformAdd,Edit,andDeletefunctionsfortransponders.

7
(1)Info:Changethevaluesofantennasettingfortheselectedtransponder
(2)Sat:Makealistofallthetranspondersaccordingtotheselectedsatellite
(3)Add:Addanewtransponder
(4)Edit:Changefrequency,symbolrateorpolarisation
(5)Delete:Deletetheselectedtransponder(s)
(6)Scan:Startchannelsearchfortheselectedtransponder(s)
2.4 MOTOR SETTING
MotorSettingenablesyoutosetupmotorsettingifyouhaveDiSEqCmotor
installed with your antenna.
(1)Satellite:Selectasatellitetosetup
(2)Transponder:SelectTPfrequencyyouwanttosearch
(3)Motorsetting:SelectDisable/USALS/DiSEqC1.2
(4)Movestep:Pressthet u button to move motor in each direction.
Motor moves only one step to locate satellite in a precise position
(5)Continuingmove:Pressthet u button to move motor in each direction.
MotormovescontinuouslyuntilstopitbypressingtheOKbutton
(6)GoTo:Movethemotortothestoredpositionoftheselectedsatellite
(7)Position:Selectthesatelliteposition
(8)Save:Savethevalues.
(9)Reset:Resetallstoredvalues.
2.5 LIMIT SETUP
(1)LimitSetup:SelectSetEastLimit/SetWestLimit/DisableLimitusingthe
OKorpqbuttonandpresstheOKbutton
(2)Continuingmove:Pressthet u button to move motor in each direction.
MotormovescontinuouslyuntilstopitbypressingtheOKbutton.
(3)Movestep:Pressthet u button to move motor in each direction.
Motor moves only one step to locate satellite in a precise position
3.SETTING
This chapter includes the rst time setup of Network setting, language, A/V,
DateTime,TimerList,ParentalLock,Upgrade,VersionandFactoryReset
which will show you how to start the initial installation.
3.1NETWORKSETTING
Network Setting enables you to congure the wired or wireless connection.

8
(1)LinkType:PresstheOKort u button. Select Wire Network/Wi-Fi
Network using pqbuttonandpresstheOKbutton.
(2)Cong:PresstheOKort u button.
(a)UsuallytheIPaddressisautomaticallyassignedbytherouter(DHCP)
(b) If you need to assign a static IP address to your product, please enter
theIPaddress,Netmask,GatewayandDNSServer.
(3)PingTest:PresstheOKort u button.
3.2 LANGUAGE
Language Setup allows you to select the main language from the given
language option.
(1)OSDLanguage:PresstheOKort ubuttontodisplayOSDlanguage
list. Select the language that you want by pressing pq button and press
theOKbutton.
(2)OSDTransparency:SelecttheOSDtransparencylevelthatyouwantand
presstheOKbutton.
(3)1st/2ndPreferredSubtitle:PresstheOKort u button to display the
1st and 2nd Subtitle language lists. Select the language that you want
by pressing pqbuttonandpresstheOKbutton.
(4)HardHearing:SelectOn/OusingtheOKorpq button and press the
OKbutton.
(5)1st/2ndPreferredAudio:PresstheOKort u button to display the
1st and 2nd Audio language lists. Select the language that you want by
pressing pqbuttonandpresstheOKbutton.
3.3 A/V
AV Setup allows you to adjust the output of the audio or video.
(1)Contrast:PresstheOKort u button to adjust contrast between 0 and
24andpresstheOKbutton.
(2)Brightness:PresstheOKort u button to adjust brightness between
0and24andpresstheOKbutton.
(3)Saturation:PresstheOKort u button to adjust saturation between 0
and24andpresstheOKbutton.
(4)Hue:PresstheOKort u button to adjust hue between 0 and 30 and
presstheOKbutton.
(5)SPDIF:SelectBitsream/Mute/PCMbypressingbypressingtheOKorpq
buttonandpresstheOKbutton.
(6)AspectRatio:Select16:9/FullScreen/4:3LB/4:3PSbypressingbypressing
theOKorpqbuttonandpresstheOKbutton.
(7)VideoOutput:SelectRGB/CVBSbypressingbypressingtheOKorpq
buttonandpresstheOKbutton.
(8)TVType:SelectPAL/NTSC/AutoDetectbypressingbypressingtheOKor
pqbuttonandpresstheOKbutton.
(9)Video Resolution: Select Auto Detect/576i_25/576p_50/
720p_50/1080i_25/1080p_50bypressingbypressingtheOKorpq
buttonandpresstheOKbutton.
3.4 DATE TIME
DATETIMEallowsyoutosetyourcurrenttimeaccordingtoyourlocation.
(1)Mode:SelectAuto/ManualbypressingbypressingtheOKorpq button
andpresstheOKbutton.
(2)Date:InputdirectlyYear/Month/DateusingtheNUMERIC(0-9)buttons
manuallyandpresstheOKbutton.
(3)Time:InputdirectlyHour/Minute/SecondusingtheNUMERIC(0-9)buttons
manuallyandpresstheOKbutton.
(4)TimeZone:SelectGMTtimezonebypressingbypressingtheOKorpq
buttonandpresstheOKbutton.
(5)DaylightSaving:SelectOn/ObypressingbypressingtheOKorpq
buttonandpresstheOKbutton.
3.5 TIMER LIST
Timer List enables you to reserve new programmes you wish to watch, and
modify/delete programmes reserved. You can also set the time you want to
turn/o the product.

9
PresstheOKbuttontodisplayTimerEdit.
(1)Date:Pressthet ubutton.InputdirectlyYear/Month/Dateusingthe
NUMERIC(0-9)buttonsmanuallyandpresstheOKbutton.
(2)ProgramName:Pressthet u button. Select the channel you want
using pqbuttonandpresstheOKbutton.
(3)StartTime:Pressthet u button.SetstartingtimeusingtheNUMERIC
(0-9)buttonsmanuallyandpresstheOKbutton.
(4)EndTime:Pressthet ubutton.SetendingtimeusingtheNUMERIC
(0-9)buttonsmanuallyandpresstheOKbutton.
(5)Duration:Pressthet u button. Set duration time (Hour/Minute) using
theNUMERIC(0-9)buttonsandpresstheOKbutton.
(6)Mode:Pressthet ubutton.Selectpreferences(Once/Daily/Weekly/
Monthly) using pqbuttonandpresstheOKbutton.
(7)Type:Pressthet u button. Select preferences (Recorder/Channel/
Standby/On)usingpqbuttonandpresstheOKbutton.
(8)Mode:Pressthet ubutton.Selectpreferences(Once/Daily/Weekly/
Monthly) using pqbuttonandpresstheOKbutton.
(9)SubtitleRecord:Pressthet u button.SelectOn/Ousingpq button
andpresstheOKbutton.
(10)TeletextRecord:Pressthet u button.SelectOn/Ousingpq button
andpresstheOKbutton.
3.6 PARENTAL LOCK
Parental Lock enables you to set system lock, parental rating and change
Pin Code.
•Thedefaultpasswordis“0000”
(1)SystemLock:PresstheOKort ubutton.SelectOn/Opq button
andpresstheOKbutton.
(2)ParentalRating:PresstheOKort u button. Set parental rates using
pqbuttonandpresstheOKbutton.
(3)ChangePinCode:PresstheOKort u button.EnteryournewPinCode
usingtheNUMERIC(0-9)buttonsmanuallyandpresstheOKbutton.
3.7 UPGRADE
UpgradehelpsyoutoupgradethelatestsoftwareversionviaUSB,Network
or FTP.
3.7.1.USBUpgrade
(1)PutUSBmemoryintoUSBport.
(2)SelectthesoftwarelewhichyouwanttoupgradeinUSBmemoryand
presstheOKbutton.
Note:
•PleaseneverpullouttheUSBmemoryorturnotheproductwhile
upgrading.
3.7.2. Network Upgrade
(1)Protocol:PresstheOKort u button. Select FTP/HTTP using pq
buttonandpresstheOKbutton.
(2)URL:PresstheOKort ubutton.EnterURLusingtheNUMERIC(0-9)
buttonsmanuallyandpresstheOKbutton.
(3)UserName:PresstheOKort ubutton.Enterusernameusingthe
NUMERIC(0-9)buttonsmanuallyandpresstheOKbutton.
(4)Password:PresstheOKort ubutton.Enterpasswordusingthe
NUMERIC(0-9)buttonsmanuallyandpresstheOKbutton.
(5)SelectFile:PresstheOKort u button.Entertheaddressthatthelatest
softwarelocatesusingtheNUMERIC(0-9)buttonsmanuallyandpressthe
OKbutton.
(6)Start:Pressstarttoupgradesoftware.
3.8 VERSION
This option helps you to know the current hardware, software and rmware
version and build date.

10
3.9 FACTORY RESET
Factory reset functions only when you want to return the product to the
condition of factory default. All settings and channels will be deleted.
•Thedefaultpasswordis“0000”
4 CHANNEL MANAGEMENT (MGT)
This chapter will help you to swap, lock, delete, skip, edit channels and make
lists of favorite channels.
4.1 CHANNEL MANAGER
Channel manger enables you to swap, lock, delete, skip or edit channels in
all channel lists.
4.1.1 Move
(1) Select a channel to move using pqbuttonandpresstheOKbutton.The
color of selected channel will be changed to yellow.
(2)LocatecursortothepointyouwanttoputandpresstheOKbutton.
4.1.2 Lock
(1) Select a channel to lock/unlock using pq button and press the Red
button.
(2)EnterthepasswordusingtheNUMERIC(0-9)buttonsmanually.
Thedefaultpasswordis“0000”
4.1.3 Delete

11
(1) Select a channel to delete using pq button and press theYellow button.
(2)Apop-upwillappear.SelectYESandpresstheOKbutton.
4.1.4 Skip
(1) Select a channel to skip using pqbuttonandpresstheGreenbutton.
4.1.5Sort
(1) Press F1 button to sort the channels.
(2) Select the preferences FTA/Scramble/A to Z/ Z to A/TP Frequency using
pqbuttonandpresstheOKbutton.
4.1.6 Rename
(1) Press F2 button and select a channel to rename.
(2)APop-upwillappear.Enterthenameofthechannelyouwishtorename.
4.1.7 Find
(1) Press F3 button to nd a channel.
(2) A Pop-up will appear and enter the name of the channel you wish to nd.
4.2FAVORITELIST

12
(1) Select a channel to put into the favorite channel list using pq button.
(2) Select one or more groups from the eight favorite groups pressing the
NUMERIC(0-9)buttons.
5 MEDIA CENTER
This chapter will help you to congure multimedia setup, play multimedia
players, enjoy multimedia applications, congure PVR setup and download
le from FTP server.
5.1 MULTIMEDIA SETUP
Multimedia setup enables you to multimedia functions.
(1)MovieRepeat/MusicRepeat/PhotoRepeat:PresstheOKort u button.
Select your prefer using pqbuttonandpresstheOKbutton.
(2)BGmusic:PresstheOKort ubutton.SelectOn/Oyoupreferusing
pqbuttonandpresstheOKbutton.
(3)SlideTime:PresstheOKort u button. Select 3/6/9/12/15seconds you
prefer using pqbuttonandpresstheOKbutton.
(4)Eect:PresstheOKort u button. Select your prefer using pq button
andpresstheOKbutton.
5.2 MULTIMEDIA PLAYER
Multimedia Player enables you to listen to the music, see the photos, watch
moviesorrecordedles,readelectronicbooksandplayNative32Games
fromthesourcesofLocalStorage(USBmemorystick)orNetworkStorage.
PresstheMEDIAbuttontoselectthesourcefromeitherLocalStorage(USB
memory stick) or Network Storage.
Press t u button to select a multimedia type and function.
5.2.1 Movie
(a)SelectamovieleyouwishtowatchandpresstheOKbutton.
5.2.2 Music
(a)SelectamusicleyouwishtolistenandpresstheOKbutton.
5.2.3 Native32 Games
(a)SelectagameleyouwishtoplayandpresstheOKbutton.
5.2.4 Photo
(a)SelectaphotoleyouwishtoviewandpresstheOKbutton.

13
5.2.5 Record Manager
a)SelectarecordedleyouwishtowatchandpresstheOKbutton.
b) Select a recorded le using pq button and press the Red button to delete
theleorGreenbuttontorenamethele,orBluebuttontodeleteallles.
5.2.6 Disk Manager
DiskManagerenablesyoutomove,copy,rename,anddeleteles.
a) Press a le you wish to manage using pq button.
b) Press the Red button to move/copy the selected le
c)PresstheGreenbuttontorenametheselectedle
d) Press the Yellow button to delete the selected le
e)PresstheBluebuttontodeleteallles
5.2.7 e-Book
a)Selectane-BooktxtleyouwishtoreadandpresstheOKbutton.
5.3MULTIMEDIAAPPLICATIONS(APPS)
MultimediaApplicationenablesyoutodownloadNative32Games,watchweb
albums, view maps, check weather forecast, and enjoyYouTube.
Press t u button to select a multimedia type and function.
5.3.1 N32Game
GameDownloadenablesyoutodownloadseveralkindsofgamestotheUSB
memory stick and play the game downloaded.

14
(1)SelectDownloadusingt ubuttonandpresstheOKbutton.
(2)SelectgamelesyouwishtodownloadandpressDownloadusingthe
OKbutton.
(3) Select Manager using t ubuttonandpresstheOKbutton.Youcan
see a list of les you selected.
(4)SelectthegameleyouwishtodownloadandplayintheUSBmemory
stick using pq button and press the Start button.
(5) You can delete or stop downloading the game le if you don’t wish to
downloadpressingStoporDeleteusingtheOKbutton.
5.3.2 Web Albums
Web Albums enables you to load and share photos through free online
services such as Picasa, Yupoo and Flickr.
5.3.3 GOOGLE Maps
GoogleMapsenablesyoutondaplace,viewmapsandgetdirections
and so on.
5.3.4 Weather
Weather enables you to nd weather forecasts for major cities throughout
the world.
5.3.5 YouTube
YouTube enables you to discover and watch shared videos.
5.4 PVR SETUP (by option to other models)
This section enables you how to congure PVR function.
(1)PVRFileformat:PresstheOKort u button. Select TS/PS using pq
buttonandpresstheOKbutton.
(2)FileSize:PresstheOKort ubutton.Select1G/2G/3G/4Gusingpq
buttonandpresstheOKbutton.
(3)Timeshift:PresstheOKort u button. Select Auto/Pause/o using

15
pqbuttonandpresstheOKbutton.
(4)TimeshiftLength:PresstheOKort u button. Select Auto/
30min/1hr/2hr using pqbuttonandpresstheOKbutton.
5.5 FTP CLIENT
FTP Client enables you to access a FTP server and download/upload les
via FTP.
(1) Select Connect using the Red button to access a FTP server.
(2) Select a le or les to upload or download to the FTP server and press
CopyusingtheGreenbutton.
(3)SelectaleorlestodeletefromtheFTPserverandpressDeleteusing
the Yellow button.
5.6 SAMBA
SAMBAenablesyoutoaccessandplaydirectlyonTVanymultimediacontent
storedandsharedontheHDDofPC.
(1) Select the network.
(2) Put URL, Account and Password
(3) Select a multimedia le stored and shared on your PC.
5.7 GAME
You can enjoy default games.

16
6 SPECIFICATION
MAINCHIPSET
CHIPSET . . . . . . . . . . . . . . . . . . . . . . . . . . . . . . . . . . . . . . . . . . .High-Performance667MHz32-bitMIPS24KEc
MEMORY
FLASH . . . . . . . . . . . . . . . . . . . . . . . . . . . . . . . . . . . . . . . . . . . . .16MB
DDR2SDRAM. . . . . . . . . . . . . . . . . . . . . . . . . . . . . . . . . . . . . . . .256MB
TUNER
NUMBEROFTUNERS . . . . . . . . . . . . . . . . . . . . . . . . . . . . . . . . . . .1
INPUT/OUTPUTCONNECTOR. . . . . . . . . . . . . . . . . . . . . . . . . . . . . .F-Type,IEC169-24,Female
INPUTFREQUENCYRANGE . . . . . . . . . . . . . . . . . . . . . . . . . . . . . . .950MHz ~ 2150MHz
INPUTSIGNALLEVEL . . . . . . . . . . . . . . . . . . . . . . . . . . . . . . . . . . .-65dBm ~-25dBm
CONNECTOR . . . . . . . . . . . . . . . . . . . . . . . . . . . . . . . . . . . . . . . .75Ω Unbalanced
INPUTIMPEDANCE . . . . . . . . . . . . . . . . . . . . . . . . . . . . . . . . . . . .Vertical:+13.5V(+14.5Vathighvoltage)
Horizontal:+18V(+18.5Vathighvoltage)
Current:Max.500mA(ShortCircuitProtection)
22KHzTONE . . . . . . . . . . . . . . . . . . . . . . . . . . . . . . . . . . . . . . . . .Frequency 22KHz±4KHZ
Amplitude 0.6±0.2Vpp
DiSEqCCONTROL . . . . . . . . . . . . . . . . . . . . . . . . . . . . . . . . . . . . .1.0 & 1.2 Version Compliant
CHANNELSELECTION. . . . . . . . . . . . . . . . . . . . . . . . . . . . . . . . . . .PLL Frequency Synthesizer
DEMODULATOR
TYPE . . . . . . . . . . . . . . . . . . . . . . . . . . . . . . . . . . . . . . . . . . . . . .DVB-S,DVB-S2
DEMODULATION. . . . . . . . . . . . . . . . . . . . . . . . . . . . . . . . . . . . . .QPSK, 8PSK
INPUTSYMBOLRATE . . . . . . . . . . . . . . . . . . . . . . . . . . . . . . . . . . .1~45MS/s, SCPC and MCPC Capable
FECMODE . . . . . . . . . . . . . . . . . . . . . . . . . . . . . . . . . . . . . . . . . .DVB-S:Auto,1/2,2/3,3/4,5/6,7/8
DVB-S2
-QPSK:Auto,1/2,3/5,2/3,4/5,5/6,8/9,9/10
-8PSK:Auto,3/5,2/3,3/4,5/6,8/9,9/10
VIDEODECODER
TRANSPORTSTREAM . . . . . . . . . . . . . . . . . . . . . . . . . . . . . . . . . . .MPEG-2ISO/IEC13818-2
MPEG-4Part2
PROFILELEVEL . . . . . . . . . . . . . . . . . . . . . . . . . . . . . . . . . . . . . . .MPEG-2MP@ML,MPEG-2MP@HL
MPEG-4AVC/H.264[email protected]
INPUTRATE . . . . . . . . . . . . . . . . . . . . . . . . . . . . . . . . . . . . . . . . .15Mbit/s Max
VIDEOFORMAT . . . . . . . . . . . . . . . . . . . . . . . . . . . . . . . . . . . . . . .4:3,16:9,LetterBox
VIDEORESOLUTION . . . . . . . . . . . . . . . . . . . . . . . . . . . . . . . . . . . .1080p, 1080i, 720p, 576p, 576i, 480p, 480i
AUDIODECODER
AUDIODECODING. . . . . . . . . . . . . . . . . . . . . . . . . . . . . . . . . . . . .MPEG/MusiCamLayerI&II,AC3DownMix
AUDIOMODE . . . . . . . . . . . . . . . . . . . . . . . . . . . . . . . . . . . . . . . .Mono/Dual/JointStereo/Stereo
AUDIOBITRATE . . . . . . . . . . . . . . . . . . . . . . . . . . . . . . . . . . . . . .32Kbits/s – 384Kbits/s
SAMPLINGFREQUENCY . . . . . . . . . . . . . . . . . . . . . . . . . . . . . . . . .32, 44.1, 48KHz
AUDIO/VIDEO/DATAINPUT/OUTPUT
TV SCART. . . . . . . . . . . . . . . . . . . . . . . . . . . . . . . . . . . . . . . . . . .1xSCART(CVBS,RGB,S-VIDEO)
VIDEOOUTPUT . . . . . . . . . . . . . . . . . . . . . . . . . . . . . . . . . . . . . .1 x RCA Cinch
AUDIOOUTPUT . . . . . . . . . . . . . . . . . . . . . . . . . . . . . . . . . . . . . .2 x RCA Cinch (L/R)
OPTICAL . . . . . . . . . . . . . . . . . . . . . . . . . . . . . . . . . . . . . . . . . . .1xS/PDIF/DIGITALAUDIOOUTPUT
RS-232C. . . . . . . . . . . . . . . . . . . . . . . . . . . . . . . . . . . . . . . . . . . .9PinD-SubSocketType(Max.115200bps)
HDMI . . . . . . . . . . . . . . . . . . . . . . . . . . . . . . . . . . . . . . . . . . . . .DigitalAudioandVideoOutput
USB . . . . . . . . . . . . . . . . . . . . . . . . . . . . . . . . . . . . . . . . . . . . . .2x(USB2.0Host),Front&Rear
ETHERNET . . . . . . . . . . . . . . . . . . . . . . . . . . . . . . . . . . . . . . . . . .1xRJ45Port
CONDITIONALACCESSSYSTEM
SMARTCARDINTERFACE . . . . . . . . . . . . . . . . . . . . . . . . . . . . . . . . .1Slot(ISO7816Compliant)
COMMONINTERFACE. . . . . . . . . . . . . . . . . . . . . . . . . . . . . . . . . . .1Slot(EN50221-1997)
POWERSUPPLY
INPUTVOLTAGE. . . . . . . . . . . . . . . . . . . . . . . . . . . . . . . . . . . . . . .AC 90~250V, 50/60Hz
TYPE . . . . . . . . . . . . . . . . . . . . . . . . . . . . . . . . . . . . . . . . . . . . . .SMPS (Switching Mode Power Supply)
PROTECTION . . . . . . . . . . . . . . . . . . . . . . . . . . . . . . . . . . . . . . . .Separate internal fuse
The input should be protected against lighting.
PHYSICALCHARACTERISTICS
DIMENSION(WxHxD) . . . . . . . . . . . . . . . . . . . . . . . . . . . . . . . . .280 x 48 x 205 (mm)
NETWEIGHT. . . . . . . . . . . . . . . . . . . . . . . . . . . . . . . . . . . . . . . . .0.9Kg
OPERATINGTEMPERATURE . . . . . . . . . . . . . . . . . . . . . . . . . . . . . . .00to+450
STORAGETEMPERATURE. . . . . . . . . . . . . . . . . . . . . . . . . . . . . . . . .-100to+700

17
Uživatelský manuál - BEN400MC
CZ
Důležité upozornění pro bezpečné používání pří-
stroje
Před použitím výrobku si pečlivě přečtěte celý návod. Pod pojmem přístroj
se v tomto návodu rozumí samotný přístroj, příslušenství a montážní
materiál, jako jsou síťové a signálové kabely, dálkový ovladač, baterie, a
napájecí zdroje apod.
Výrobce přístroje v žádném případě neodpovídá za jakékoliv přímé i
nepřímé škody zapříčiněné nedodržením
jak obecně platných tak v tomto návodu uvedených pokynů pro zacházení
s přístrojem.
Pokyny uvedené v následujícím textu obsahují důležité informace sou-
visející s bezpečným používáním přístroje a jsou podle rizik vznikajících
jejich nedodržením zařazeny do tří kategorií označovaných v návodu údaji
Pozor, Upozornění a Poznámka.
• Varování
Označuje situaci, která může vest k vážnému zranení a ohrožení života.
• Upozornění
Označuje situaci, která může poškodit, nebo zničit přístroj.
• Poznámka
Označuje doplňující text, nebo informace, jak se má uživatel vyhnout
možným problémům při obsluze přijímače.
Význam symbolů
K omezení rizika úrazu elektrickým proudem neotvírejte skříň přístroje. Uvnitř
nejsou díly, které by mohl opravit nebo seřídit uživatel. S požadavky na
opravy se obracejte na pracovníky s odpovídající kvalikací
Symbol upozorňující na nebezpečné napětí uvnitř přístroje a nebez-
pečí úrazu elektrickým proudem.
Tento symbol oznažujedůležité pokyny proobsluhu aúdržbu přijímače
Tento výrobek byl vyroben v souladu s mezinárodními bezpečnostními stan-
dardy. Přečtěte si prosím pečlivě následující bezpečnostní pokyny.
NAPÁJENÍ:90-260VAC50/60Hz
Provozujte tento výrobek pouze pomocí napájení uvedeného na štítku.
Nejste-li si jisti ohledně typu napájení ve vaší domácnosti, kontaktujte vašeho
místního distributora elektrické energie.
Před zahájením jakékoliv údržby nebo instalace odpojte výrobek od napájení.
Nepřetěžujte zásuvku, mohlo by dojít k požáru, nebo k zasažení elektrickým
proudem.
KAPALINA:Výrobeknesmíbýtvystavenpůsobenížádnékapaliny.Rovněžse
na přístroj nesmějí stavět žádné předměty naplněné kapalinou.
ČIŠTĚNÍ:Předzahájenímčištěníodpojtevýrobekodnapájení.Ksetření
prachu z výrobku použijte lehce navlhčenou tkaninu, nikoliv rozpouštědla.
VENTILACE:Štěrbinynahorníčástivýrobkumusízůstatnezakryté,aby
umožňovaly potřebné proudění vzduchu do přístroje. Neumísťujte výrobek
na měkká bytová zařízení nebo koberce. Nepokládejte jiné elektronické
přístroje na výrobek.
PŘÍSLUŠENSTVÍ:Nepoužívejtežádnánepodporovanápříslušenství,aby
nedošlo k poškození výrobku.
PŘIPOJENÍK ANTÉNĚ:Předpřipojovánímneboodpojovánímkabeluzantény
odpojte výrobek od napájení, aby nedošlo k poškození antény.
PŘIPOJENÍ K TV:PředpřipojovánímneboodpojovánímkabeluzTVodpojte
výrobek od napájení, aby nedošlo k poškození televizoru.
UMÍSTĚNÍ:Umístětevýrobekuvnitřbudovy,abybylozamezenopůsobení
blesku, deště nebo slunce. Neumísťujte přístroj do blízkosti radiátoru nebo
výměníku tepla. Zajistěte odstup nejméně 10 cm. Neblokujte otvory žádnými
předměty a neumísťujte výrobek na postel, pohovku, pokrývku ani jiný po-
dobný povrch. Umístíte-li výrobek na polici nebo do knihovny, ujistěte se, že je
zajištěno adekvátní odvětrávání a že jste dodrželi pokyny výrobce k montáži.
Neumísťujte výrobek na nestabilní vozík, stojan, stativ, podpěru nebo stůl,
z nichž může spadnout. Pád výrobku může způsobit vážné zranění dítěte i
dospělé osoby a vážné poškození přístroje.
ENERGETICKÉ RÁZOVÉ IMPULSY:Odpojtevýrobekzezásuvkyaodantény
za bouře, nebo pokud jej nepoužíváte dlouhou dobu, abyste předcházeli
poškození přístroje bleskem a energetickými rázovými impulsy.
CIZÍ PŘEDMĚTY:Nestrkejtežádnépředmětydopřístroje.Mohlobydojítke
styku s body nebezpečného napětí nebo k poškození součástí.
VÝMĚNA SOUČÁSTÍ:Výměnusoučástísmíprovádětpouzeservisnítechnik
určený výrobcem.
VÝSTRAHA!
Dodržujte prosím následující body, aby nedošlo k poškození kabelu
nebo zástrčky:
- Neupravujte svévolně napájecí kabel nebo zástrčku.
- Neohýbejte ani nezkrucujte napájecí kabel.
- Při odpojování držte napájecí kabel za zástrčku.
-Držtenapájecíkabelconejdáleodtepelnýchspotřebičů,abystezabránili
tavení krycího vinylu.
- Zástrčka musí zůstat snadno dostupná.
Dodržujte prosím následující body, aby nedošlo k zasažení elektrickým
proudem:
- Neotevírejte hlavní jednotku.
- Nestrkejte do vnitřní části výrobku kovové nebo vznětlivé předměty.
- Nedotýkejte se zástrčky mokrýma rukama.
- V případě výskytu blesku odpojte napájecí kabel.
Dodržujteprosímnásledujícíbody,abynedošlokpoškozenívýrobku:
- Nepoužívejte výrobek, nefunguje-li správným způsobem, aby nedošlo k
jeho vážnému poškození. Kontaktujte místního prodejce.
- Nestrkejte do slotů pro moduly nebo Smart karty kov nebo cizí materiály,
aby nedošlo k poškození výrobku a zkrácení jeho životnosti.
- Zásuvka musí být nainstalovaná blízko přístroje a musí být snadno
přístupná.

18
OBSAH
1. ÚVOD
1.1 OBSAH BALENÍ
1.2 PŘEDNÍ PANEL
1.3 ZADNÍ PANEL
1.4 DÁLKOVÉ OVLÁDÁNÍ (RCU)
1.5 PŘIPOJENÍ TV
1.6 PŘIPOJENÍ AUDIO SYSTÉMU
1.7 ZAPNUTÍ PŘÍSTROJE
1.8 HLAVNÍ MENU
2. INSTALACE
2.1 NASTAVENÍ ANTÉNY
2.2 SEZNAM DRUŽIC
2.3 SEZNAM TRANSPONDÉRU
2.4 NASTAVENÍ MOTORU
2.5 NASTAVENÍ LIMITU MOTORU
3. NASTAVENÍ
3.1 NASTAVENÍ SÍTĚ
3.2 JAZYK
3.3 A/V
3.4 DATUM A ČAS
3.5 NASTAVENÍ ČASOVAČE
3.6 RODIČOVSKÝ ZÁMEK
3.7 AKTUALIZACE SOFTWARE
3.7.1 Aktualizace přes USB
3.7.2 Aktualizace přes síť
3.8 VERZE SOFTWARE
3.9 OBNOVENÍ TOVÁRNÍHO NASTAVENÍ
4. PRÁCE SE SEZNAMEM KANÁLŮ
4.1 ÚPRAVA KANÁLŮ
4.1.1 Přesun kanálu
4.1.2 Zámek kanálu
4.1.3 Smazání kanálů
4.1.4 Přeskočení kanálu v seznamu
4.1.5 Třídění
4.1.6 Přejmenování
4.1.7 Vyhledání kanálů
4.2 SEZNAM OBLÍBENÝCH KANÁLŮ
5. MULTIMEDIÁLNÍ CENTRUM
5.1 NASTAVENÍ MULTIMÉDIÍ
5.2 PŘEHRÁVAČ MULTIMÉDIÍ
5.2.1 Filmy
5.2.2 Hudba
5.2.3 Native32 Hry
5.2.4 Fotograe
5.2.5 Správce záznamů
5.2.6 Správce disku
5.2.7 E-knihy
5.3 MULTIMEDIÁLNÍ APLIKACE
5.3.1 N32 Hry
5.3.2 Webové služby
5.3.3 Google Mapy
5.3.4 Yahoo počasí
5.3.5 YouTube přehrávač
5.4 NASTAVENÍ PVR
5.5 FTP KLIENT
5.6 SAMBA/ PŘEHRÁVÁNÍ ZE SÍTĚ
5.7 HRY
6. TECHNICKÁ SPECIFIKACE
1. ÚVOD
1.1 OBSAH BALENÍ
Předpoužívánímpřijímačeprosímpřekontrolujteobsahaúplnostbalení:
•Dálkovéovládání
•Baterie
•Uživatelskémanuál
•RCAkabel
1.2 PŘEDNÍ PANEL
1.ON/OFFtlačítko
Zapnutí / vypnutí přístroje
2.Kanál+/Kanál-
Přepínáníkanálů+/-
3.VFDdisplej
Zobrazuje informace o kanálu a připojených zařízeních.
4.USBkonektor
PřipojeníUSBkonektoru.
5. Čtečka karet
1x čtečka karet k zasunutí přístupové karty.
6. CI slot
1x CI slot pro zasunutí přístupového modulu.
1.3 ZADNÍ PANEL
1.LNBIN
Připojení konektoru od satelitní antény
2.LNBOUT
Připojeníkonektorukdalšímupřijímači(přiomezeníLOOP)
3.ETHERNET
PřipojenídosítěETHERNETpomocíkonektoruRJ45
4.HDMI
PřipojeníktelevizorupomocíkabeluHDMI
5.USB
USBportpropřipojenípaměťovéhomédia,neboWI-FIadaptéru.
6.AUDIOL/R
AnalogovýAUDIOvýstupL/P
7.VIDEO
AnalogovýVIDEOvýstup
8.S/PDIF
DigitálníAUDIOvýstup
9. TV SCART
Připojení k televizoru pomocí analogolvého kabelu SCART
10. RS-232C
Sériový port RS232 k aktualizaci software pomocí PC
11.ON/OFF
HlavnívypínačON/OFF

19
1.4 DÁLKOVÉ OVLÁDÁNÍ (RCU)

20
- dočasně ztlumí zvukový výstup
- zapnutí/vypnutí přijímače
- přepínání mezi kanály a k zadávání údajů v menu
- návrat k předchozímu menu
- zobrazí informace o kanále nebo o přehrávaném videu
- zobrazí nabídku Elektronického programového průvodce
- zobrazí nabídku Oblíbených kanálů
- zobrazí hlavní nabídku
- návrat k předchozímu menu
- pohyb v menu, přepínání kanálů
- pohyb v menu, snížení hlasitosti zvukového doprovodu
- potvrzení volby v menu, zobrazí nabídku kanálů
- pohyb v menu, přepínání kanálů
- pohyb v menu, zvýšení hlasitosti zvukového doprovodu
- zvýšení/ snížení hlasitosti zvukového doprovodu
- pohyb v seznamu kanálů o celé stránky, rychlý pohyb menu
- rychlý přístup do menu multimediálních aplikací
- nastavení času automatického uspání přijímače
- přepíná mezi sledovánímTV a nabídkou rozhlasových stanic
- přiblížení vybrané čísti obrazu (ZOOM)
- při sledování TV, nebo při přehrávání lmů zobrazí titulky
- zobrazí TELETEXT, pokud je na danném kanále dostupný
- zobrazí nabídku AUDIO, která umožní změnit jazyk zvukového doprovodu
- přepíná mezi TV/STB módem dálkového ovladače
- přehrát/pozastavit přehrávaný záznam pořadů, nebo uložený lm
- zastaví nahrávání, nebo přehrávaný lm/záznam pořadů
- přetáčení vzad, každým stiskem tlačítka zvýšíte rychlost přetáčení až do rychlosti 32x
- přetáčení vpřed, každým stiskem tlačítka zvýšíte rychlost přetáčení až do rychlosti 32x
- pomalé přehrávání záznamu, nebo lmu
- start záznamu pořadů
- rychlý skok na předchozí kapitolu ve lmu (soubor s lmem musí obsahovat kapitoly)
- rychlý skok na další kapitolu ve lmu (soubor s lmem musí obsahovat kapitoly)
- zobrazí seznam družic
- záložky
- zobrazí nastavené časovače, při přehrávání lmu umožní rychlý skok na danný čas ve lmu
- přepíná mezi možnými volbami poměru stran obrazovky
- přepíná mezi možnými volbami rozlišení obrazu
- rychlý přístup do menu přehrávání záznamů na USB zařízení
Other manuals for BEN400MC
1
Table of contents
Languages:
Other bensat DVR manuals
Popular DVR manuals by other brands
Lorex
Lorex VANTAGE LH110 ECO SERIES Frequently asked questions
Rear view safety
Rear view safety RVS-3710-DVR instruction manual
Uniden
Uniden PRO Series user manual
Samsung
Samsung SRD-850DC Technical specifications

Video Character Generator
Video Character Generator DV4 HD quick start guide
First Alert
First Alert PRO-D1610 user manual

