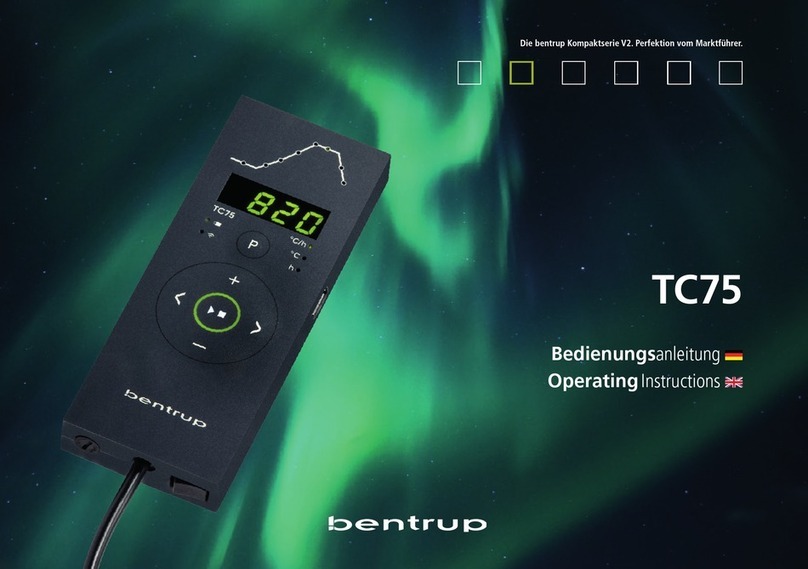
bentrup TC75 User manual

TC75
Bedienungsanleitung
Operating Instructions
Instructions d’utilisation
Istruzioni per l’uso
Instrucciones de manejo
Bedieningshandleiding
Die bentrup Kompaktserie V2. Perfektion vom Marktführer.


3
operating instructions TC75
TC75
1 - Brennprofil
2 - Ofentemperatur bzw. Programmwerte
3 - Programmtaste: Programmwahl
4 - Start/Stopp-Taste: Programmstart
5 - / Tasten: Wertänderung
6 - Pfeiltasten: Segmentanwahl
7 - Programmlaufanzeige:
grün (aktiv), rot (inaktiv), gelb (angehalten)
8 - Reglersicherung (0.5A mittelträge)
9 - Netzschalter
1 - firing profile
2 - kiln temperature resp. programme values
3 - programme key: programme selection
4 - start/stop key: programme start
5 - / keys: value change
6 - arrow keys: segment selection
7 - programme run status:
green (Run), red (Idle), yellow (Hold)
8 - controller fuse (0.5A semi lag)
9 - mains switch
9
4
3
7
1
8
6
2
5

4operating instructions TC75
Programmregler TC75
Der Programmregler TC75 ist auf die typischen
Anwendungen in der Keramik zugeschnitten. Die
Brennkurve des TC75 besteht aus folgenden Seg-
menten (Bild A):
a. Vorlaufzeit (bis 9 Stunden 59 Minuten
z.B. für Programmstart in der Nacht)
b. Aufheizen (geregelt 1 bis 999°C pro Stunde
oder ungeregelt “SKIP”) auf Zwischentem-
peratur
c. Aufheizen (geregelt 1 bis 999°C pro Stunde
oder ungeregelt “SKIP”) auf Endtemperatur
d. Haltezeit (bis 9 h 59 min)
e. Abkühlen (geregelt 1 bis 999°C pro Stunde
oder ungeregelt “SKIP”) bis 150°C
Programme Controller TC75
The programme controller TC75 is designed for the
specific needs of ceramics. The firing curve consist
of the following segments (fig A):
a. programme delay (up to 9 h 59 min e.g. to
take advantage of “off peak” electricity)
b. heating up (controlled 1 to 999°C per
hour or uncontrolled “SKIP”) to intermediate
temperature
c. heating up (controlled 1 to 999 °C per hour
or uncontrolled “SKIP”) to final temperature
d. dwell (up to 9 h 59 min)
e. cooling down (controlled 1 to 999°C per
hour or uncontrolled “SKIP”) to 150°C
a e
d
cb
Pa b c d e
# h:min °C/h °C °C/h °C h:min °C/h
10:00 30 150 SKIP 150 0:00 SKIP
20:00 100 600 SKIP 800 0:10 SKIP
30:00 100 600 SKIP 900 0:10 SKIP
40:00 180 400 SKIP 1050 0:30 SKIP
50:00 180 400 SKIP 1180 0:30 SKIP
60:00 250 820 SKIP 560 0:10 80
(A)
(B)
Programme
Der TC75 speichert bis zu 6 Brennkurven als
Programme, die Sie aufrufen können, um sie nicht
jedes Mal neu eingeben zu müssen. Sie können
diese Programme selbst verändern. Die Werte
bleiben auch nach dem Ausschalten des Reglers
erhalten.
Nebenstehende Tabelle zeigt die werksseitige
Belegung dieser Programme Nr. 1 bis 6 (Bild B).
Programmes
Up to 6 firing profiles are saved as programmes.
You can change all parameters individually and
they are retained even after the controller is
swiched off.
The programme table (fig. B) shows the ex factory
settings of the programmes no. 1 to 6 (fig. B).

5
operating instructions TC75
TC75
Brennkurve wählen und Brennvorgang starten
Wählen Sie je nach Anwendung, Ton bzw. Glasur
das richtige Brennprogramm aus. Ihr Händler wird
Sie bei Fragen gerne unterstützen. Im folgenden
Beispiel starten wir einen Schrühbrand 800°C
(Programm Nr. 2):
Schalten Sie den Regler über den Netzschalter
ein. Nach einigen Sekunden erscheint die aktuelle
Ofentemperatur. Drücken Sie nun die Programm-
taste so oft, bis auf der Anzeige P2 für Programm
Nr. 2 steht (Bild A).
Nun wird auf der Anzeige die Endtemperatur (mit
Einheit °C) des ausgewählten Programms darge-
stellt. Der entsprechende Abschnitt der Brennkur-
ve blinkt auf (Bild B).
Durch Drücken der Taste wird der Brenn-
vorgang gestartet. In der Brennkurve leuchtet der
aktuelle Brennabschnitt, in der Anzeige steht die
aktuelle Ofentemperatur. Den laufenden Brenn-
vorgang erkennen Sie am blinkenden Dezimal-
punkt und dem Leuchtring, der auf grün wechselt
(Bild C).
Selecting and Starting a Programme
Select the proper firing curve depending on your
application, clay or glaze. Your supplier is happy
to assist you. The following example demonstrates
starting a biscuit firing 800°C (programme no. 2):
Power on the controller by the mains switch. Af-
ter a few seconds the current kiln temperature is
shown. Now press the programme key several
times until the display shows P2 which stands for
programme no. 2 (fig. A).
Now the final temperature of the chosen pro-
gramme is displayed (accomplished by the unit LED
showing “°C”). The corresponding segment of the
firing curve lights up (fig. B).
Pressing the key starts the firing. From now
on the firing curve shows the current segment
while the display reads the current kiln tempera-
ture. The flashing decimal point and the ring color
changing to green indicate a programme running
(fig. C).
(A)
(B)
(C)

6operating instructions TC75
Brennkurve verändern
Die 6 Brennprogramme des TC75 können Sie auf
Ihre Anwendung anpassen. Um beispielsweise die
Endtemperatur von Programm Nr. 4 auf 1065°C
zu ändern, wählen Sie über die Programmtaste
Programm Nr. 4 aus. Nach einigen Sekunden er-
scheint die ursprüngliche Endtemperatur 1050 °C.
Über die bzw. Tasten können Sie den an-
zeigten Wert auf 1065 °C ändern. Für größere
Werteänderungen halten Sie die bzw. Taste
gedrückt (Bild A).
Adjusting a Firing Curve
The 6 firing curves can be adapted to your applica-
tions. For instance to change the final temperature
of programme no. 4 to 1065°C, select programme
no. 4 by pressing the programme key several
times. After a short moment the final temperature
of 1050 °C is shown. Use the or keys to
change the temperature to 1065 °C. Hold the
or key pressed for rapid major changes of the
value (fig. A).
(A)
(B)
Über die Pfeiltasten können Sie die weiteren
Abschnitte der Brennkurve einsehen und ggf. ver-
ändern. Mit der Taste kann das Programm
jederzeit gestartet werden (Bild B).
Die Änderungen der Programme bleiben auch
nach dem Ausschalten erhalten. Beachten Sie da-
her, dass die in dieser Anleitung abgebildete Pro-
grammtabelle nicht mehr aktuell ist, wenn Sie die
Werte auf Ihre Bedürfnisse angepaßt haben.
Use the arrow keys to navigate through the
segments of the firing curve. All displayed pro-
gramme values can be changed if needed. You can
commence the programme at any time by pressing
the key (fig. B).
All changes of the programmes are saved after
power off. Therefore note that the programme
table shown in the beginning of this chapter is no
longer current once you have adapted the firing
curve to your application.

7
operating instructions TC75
TC75
Vorlaufzeit
Über die Vorlaufzeit kann der Brennvorgang in die
Nacht verlegt werden. Wenn Sie z.B. die Werkstatt
um 17 Uhr verlassen und ab 22 Uhr Nachtstrom-
tarif gilt, stellen Sie eine Vorlaufzeit von 5:00
Stunden ein. Nach dem Start wird die verbleibende
Zeit angezeigt (Bild A).
Programme Delay
The programme delay used for a delayed start of
the firing. To start the firing e.g. at 10 PM and
leaving the workshop at 5 PM enter a programme
delay of 5:00 hours. After starting the programme
the remaining time is displayed (fig. A).
(A)
(B)
Anzeigen während des Brandes
Während des Brandes wird die aktuelle Ofen-
temperatur und der Brennabschnitt angezeigt.
Durch Drücken der Taste wird der aktuelle
Sollwert, mit Drücken der Taste die Restzeit
im Segment angezeigt. Über die Tasten kann
die aktuelle Brennkurve abgefragt werden (Bild B,
SKIP, Brennabschnitt blinkt), ohne den Brand zu
unterbrechen. Während einer Haltezeit wird die
noch verbleibende Zeit angezeigt. Nach 15 Sekun-
den wechselt die Anzeige auf die aktuelle Ofen-
temperatur und Brennabschnitt zurück.
Um einen Wert zu ändern, halten Sie den Brand
über die Taste an und starten ihn danach
wieder. Der Brand wird an der gleichen Stelle
fortgesetzt, außer wenn ein bereits durchlaufenes
Segment geändert wurde (das Programm wird
dann ab diesem Segment ausgeführt).
In der Abkühlphase ist der Brand bei einer Ofen-
temperatur von 150°C beendet.
Öffnen Sie den Ofen nicht im heißen Zustand!
Readings during the Firing
During a firing the controller shows kiln temper-
ature and current segment. Pressing the key
displays the current setpoint, pressing the key
displays the remaining time in the segment. Press-
ing the keys you can check the values of the
firing curve (corresponding segment is flashing)
without interrupting the firing. During a dwell the
remaining time is shown. After 15 seconds the dis-
play returns to current segment and kiln tempera-
ture (fig. B, SKIP).
To change a value, press the key and restart
the firing after modification. The firing continues
at the same point, if no segment is modified which
has already been processed (this causes the firing
to start at this segment).
The firing is completed when the kiln temperature
has dropped below 150°C.
Caution – do not open the kiln while it is hot !

8operating instructions TC75
Ergänzende Informationen
Nach einem Netzausfall setzt der Regler den Brand fort
(bei Rampe mit der aktuellen Ofentemperatur). Bei Abfall
>50°C wird der Brand aus Qualitätsgründen unterbrochen.
Bei warmen Ofen wird eine Rampe entsprechend verkürzt,
d.h. der Regler beginnt mit der aktuellen Ofentemperatur.
Falls in einer geregelten Rampe der Ofen dem geforderten
Anstieg nicht folgen kann, verweilt der Regler auf der Tem-
peratur (Leuchtring in der Taste wechselt von rot
zu grün). Sobald der Ofen wieder aufgeholt hat, wird die
Rampe fortgesetzt. Dieser Vorgang kann sich wiederholen,
somit verlängert sich die tatsächliche Dauer der Rampe.
Details und Optionen siehe Technische Anleitung.
Der Regler erstellt ein Unterverzeichnis auf dem USB-Stick
mit der Seriennummer ( Schreiben) bzw. sucht danach
auf dem Stick ( Lesen).
z.B. Konfiguration: „TC75 SN123456 Conf“
Additional Information
After a power breakdown the firing is continued (during
ramps at current kiln temperature). If the temperature
drops >50°C the firing is interrupted to ensure quality.
If the kiln is warmed up already a ramp time is reduced au-
tomatically causing the ramp to start at kiln temperature.
If the kiln is unable to follow in a controlled ramp the con-
troller stops increasing temperature (ring color at
key changes from red to green). Once the kiln temper-
ature has caught up the ramp continues. If this happens
again and again the actual time of a ramp will be longer
than programmed. For details and options, see the Technical
Manual.
The controller creates a subdirectory on the USB stick with
the serial number ( Write) or searches for it on the stick
(Read).
z.e.g. configuration: “TC75 SN123456 Conf”
stop
Fehlermeldungen
Thermoelement defekt, nicht angeschlossen, Messleitung
unterbrochen, Steckerkontakte verschmutzt oder defekt
(overrun = Messbereichs-Überlauf)
Thermoelement verpolt, ggf. falscher Thermoelement-Typ
bei Ofentemperatur weit unter 0°C (underrun)
Kaltpunkt-Fühler (CJC) im Anschlußkabel defekt (invalid)
Error Messages
Thermocouple broken, not connected, thermocouple circuit
interrupted, connections dirty or damaged (“overrun”)
Thermocouple polarized bad, eventually wrong type if kiln
temperature far below 0°C (“underrun”)
Cold-Junction-Compensation of the lead broken (“invalid”)
start

9
operating instructions TC75
TC75
Brand wurde wegen eines Problems bei der Temperatur-
messung (s.o.) abgebrochen (Überlauf im Regelkanal)
Firing terminated due to temperature acquisition problem
(as described above, “control loop overrun”)
Brand wurde wegen Übertemperatur (Überschreiten der
max. Programmtemperatur um mehr als 20 °C) abgebro-
chen. Ofenabschaltung über Sicherheitsschütz (falls vor-
handen). Häufigste Ursache ist ein klebender Ofenschütz.
Firing terminated due to over temperature (maximum pro-
grammed temperature exceeded more than 20 °C). kiln
has been cut off by the safety contactor (if fitted). Mostly
caused by stuck contactor contacts.
Internes Reglerproblem, technischer Service beim Hersteller
erforderlich (D1-CPU, D2-RAM, D3-I2C Bus, D4-EEPROM,
D5-Kalibrierung, D6-NVM, DA-Master Konfig.).
Internal controller problem, manufacturer service required
(D1-CPU, D2-RAM, D3-I2C bus, D4-EEPROM, D5-calibra-
tion, D6-NVM, DA-master configuration).
Internal controller problem, manufacturer service required
(C1-ADC broken, C2-ADC drift check failed, C3-COM).
Internes Reglerproblem, technischer Service beim Hersteller
erforderlich (C1 / C2 - ADC defekt / unpräzise, C3-COM).
Firing process terminated for safety reasons due to high
ambient temperature.
Der Brennvorgang wurde wegen zu hoher Umgebungs-
temperatur aus Sicherheitsgründen beendet.
Firing is continued automatically after a power breakdown
information only message displayed for 1 minute).
Der Brennvorgang wird nach einem Netzausfall automa-
tisch fortgesetzt (wird für 1 Minute nur zur Info angezeigt).
Uncontrolled ramp (SKIP) completed since the segment
temperature could not be reached (to avoid deadlock sce-
nario; information only message displayed for 1 minute).
Ungeregelte Rampe (SKIP) wurde beendet, obwohl die
Segmenttemperatur nicht erreicht werden konnte (verhin-
dert Selbstblockade; wird für 1 Minute zur Info angezeigt).
Controlled ramp continued although the programmed rise
or drop in temperature was not achieved even after adding
a dwell (information only message displayed for 1 minute).
Geregelte Rampe wurde fortgesetzt, obwohl der geforder-
te Temperaturanstieg trotz Wartezeit nicht erreicht werden
konnte (wird für 1 Minute nur zur Information angezeigt).
Firing terminated due to heating problem (slow increase in
tempeature at 100% heating). Caused by broken heating
elements, missing mains phase, broken contactor contact,
thermocouple short circuit.
Brand wurde wegen Heizproblem (zu geringem Tempera-
turanstieg trotz 100% Heizen) abgebrochen. Häufigste
Ursachen sind defekte Heizspirale, fehlende Netzphase,
defekter Schützkontakt, Thermoelement-Kurzschluß.
Firing is terminated after a power breakdown since
the quality of the load is not ensured (e.g. temperature
dropped too much).
Der Brennvorgang wurde nach einem Netzausfall unterbro-
chen, weil die Qualität des Ergebnisses nicht sichergestellt
werden kann (z.B. durch zu großen Temperaturabfall).

10 operating instructions TC75
Betriebsparameter
Hiermit kann der Regler auf spezielle
Anwendungen adaptiert werden. Eine
detaillierte Beschreibung finden Sie
in der Technischen Anleitung auf
www.bentrup.de. Zum Aufrufen Pro-
grammtaste 3 Sekunden lang drücken.
Über die und / Tasten können
die Parameter ausgewählt bzw. ggf. ver-
ändert werden.
Operating Parameters
This allows adapting the controller for
very specific applications. For a detailed
explanation refer to the Technical Man-
ual available on www.bentrup.com. To
enter operation parameters hold pro-
gramme key for 3 seconds. Use the
or / keys to navigate through or
change the parameters.
6
5
4
1
2
3
7
HAN7D
3
1
7
4
11
8
14
12
15
4
3
2
a
c
b
CPC14
HAN15D HAN7D HAN15D CPC14 PANEL
5A1 8 1 mains supply (L)
2B1 9 2 mains supply (N)
6A3 14 4control output heating (L)
7C3 12 3control output extra (L)
1B3 13 -control output (N)
3B5 1 7 thermocouple +
4S/R:C5 J/K:A5 S/R:2 J/K:3 8 thermocouple –
TC75
14 32
5876
AMP DUAC 8 POLE
PANEL
par. no. operation parameter default set range unit
S-01 thermocouple (fixed) S, R, J, K
S-02 max. temperature (fixed) 20–1600 °C
S-03 proportional range (P) 2.0 0.0–99.9 %
S-04 integral time (I) 200 10– 8000 s
S-05 derivative time (D) 10 0– 999 s
S-06 control output cycle time 30 1 –99 s
S-07 control supervisory Opt Opt, Grd, OFF
S-08 ramp units°C/h or h:min Grad Grad,time
S-09 communication ID 00–63
S-10 mode 2nd ctrl. output (fixed) 10–9
S-11 temperature units °C °C – °F
S-12 TC95e: max segm. per prog 20 3 – 99
Elektrische Details
Achtung! Der Regler darf auf keinen Fall geöffnet werden. Siche-
rung ist von außen zugänglich. Darstellung der Draufsicht des Ste-
ckers (bzw. Buchse der Reglerrückseite bei Panelversion). Einige
Ofenhersteller nutzen eine andere Belegung als dargestellt.
Electrical Details
Caution! Under no circumstances open the controller. The fuse is
accessible from the outside. Sketches show the top view of plugs
(or socket on panel model). Note that some kiln manufacturer use
pin assignments different from the ones shown below.

11
operating instructions TC75
USB-Menü
USB-Stick einstecken, es erscheint „LoG“. Nun kann mit
der bzw. Taste (Daten)-LoG, ConFiguration oder
ProGramm ausgewählt werden.
Pfeil rechts: schreibt auf den Stick
Pfeil links: liest vom Stick (nicht bei LOG)
Manuelles Anwählen und Verlassen USB-Menü
2 Sekunden Taste bzw. halten.
Fehlermeldungen:
no.Cf bzw. no.Pr
Kein Verzeichnis mit passender S/N und Datei vorhanden.
C.inv bzw. P.inv
Syntaxfehler, ungültige Variable in Konfiguration vorhan-
den (z.B. MaxHalloTemp = 1320)
L.Err, C.Err bzw. P.Err
(je nach LoG-, ConF- oder ProG-Funktion)
Schreibe- oder Lesevorgang wurde unterbrochen.
(z.B. durch Entfernen des USB-Sticks)
bAd.F
USB-Stick nicht lesbar (z.B. NTFS formatiert)
USB menu
Insert the USB stick, “LoG” appears. Now you can select
(Data)-LoG, ConFiguration or ProGramm with the or
key.
Arrow right: writes on the stick
Arrow left: reads from stick (not with LOG)
Selecting and exiting the USB menu manually
Press and hold or key for 2 seconds.
Error messages:
no.Cf or no.Pr
No directory with suitable S/N and file available.
C.inv or P.inv
Syntax error, invalid variable in configuration
(e.g. MaxHelloTemp = 1320)
L.Err, C.Err or P.Err
(depending on LoG, ConF or ProG function)
Write or read process was interrupted.
(e.g. by removing the USB stick)
bAd.F
USB stick not readable (e.g. NTFS formatted)
TC75

12 operating instructions TC75
Firmware-Update
Die Funktionen unserer Regler werden kontinuierlich ver-
bessert und erweitert. Profitieren Sie davon und bringen
Ihren TC75 wie folgt auf den neusten Stand: Laden Sie die
neuste Firmware von www.bentrup.de/service. Ent-
packen Sie diese auf einen FAT32-formatierten Stick. Es
sind dann mehrere *.upd Dateien sowie ein FWUPDATE
Ordner sichtbar (Bild A).
Beim Einschalten mit gedrückter Taste erscheint im
Display „F.uPd“ und die auf dem eingesteckten Stick
installierte Firmware wird gelesen.
Mit Drücken der Taste starten Sie die Installation
des Updates „uPd.“. Während der Installation zeigt das
Display wandernde Punkte „....“ an.
Ist das Update erfolgreich installiert, erscheint im Display
„donE.“. Der USB-Stick kann entfernt werden und die
neue Version der Firmware wird angezeigt.
Firmware update
The functions of our controllers are continuously im-
proved and expanded. Take advantage of this and update
your TC75 as follows: Download the latest firmware from
www.bentrup.de/service. Unpack it onto a FAT32
formatted stick. You will then see several *.upd files and
a FWUPDATE folder (fig. A).
When switching on with the key pressed, “F.uPd“ ap-
pears in the display and the firmware installed on the
inserted stick is read.
Press the key to start the installation of the update
“uPd.” During the installation, the display shows moving
dots „....“.
If the update has been installed successfully, “donE.“
appears in the display. The USB stick can be removed and
the new version of the firmware is displayed.
(A)

13
operating instructions TC75
(A)
WLAN-Verbindung herstellen
WPS (WiFi Protected Setup):
TC75 mit gedrückter Programmtaste einschal-
ten, es blinkt „conn“ (connect) im Wechsel mit dem
WiFi-Symbol.
Wenn innerhalb 2 Minuten kein koppelbereiter Router
festgestellt wird erfolgt der Abbruch mit „FAIL“.
Establishing a WLAN connection
WPS (WiFi Protected Setup):
S
witch on the TC75 by holding down the programme
key, “conn” (connect) flashes alternately with the
WiFi symbol.
If no router ready for pairing is detected within 2minutes,
the connection is aborted with “FAIL”.
Nicht WPS:
Legen Sie ein Textdatei an und benennen Sie
„SNxxxxxx.txt“ (xxxxxx = Seriennummer Ihres Reglers)
Der Inhalt der Textdatei enthält den Netzwerknamen
(SSID) und Ihr Passwort getrennt durch Komma (Bild A):
• für WPA /WPA2: SSID, Passwort
• für WPA Enterprise: SSID, ID, Passwort
Bei erfolgreicher Übernahme erscheint „W.Set“ und die
.txt-Datei auf dem Stick wird gelöscht.
Falls entsprechend benannte Datei gefunden wurde aber
leer ist bzw. Inhalt mit falschem Syntax enthält, erscheint
„W.Err“, Datei und WiFi-Setup bleiben erhalten.
Not WPS:
Create a text file and name it “SNxxxxxx.txt”
(xxxxxx = serial number of your controller).
The content of the text file contains network name (SSID)
and your password, separated by comma (fig.A):
• for WPA /WPA2: SSID, password
• for WPA Enterprise: SSID, ID, password
If the transfer was successful, “W.Set” appears and the
.txt file on the stick is deleted.
If the correspondingly named file was found but is empty
or contains incorrect syntax, “W.Err” appears and the file
and WiFi setup are retained.
TC75

14 operating instructions TC75
Überwachen Sie den Brennvorgang von überall!
SuperWise gibt Ihnen vollen Einblick – per App, mit dem
Tablet oder dem PC. Während die App die wichtigsten
Funktionen übersichtlich präsentiert, können über den
Browser auf alle Details bishin zur Konfiguration zugegrif-
fen werden. Email- oder WhatsApp-Benachrichtigungen
sind ebenso möglich, wie Programmstopp aus der Ferne.
Und so funktioniert es:
Zuerst verbinden Sie den TC75 mit dem Internet (siehe
Seite 13).
Im zweiten Schritt wird der TC75 in SuperWise angemel-
det. Registrieren Sie sich unter www.superwise.eu.
Gehen Sie in den Menüpunkt „Geräteverwaltung“
(Bild A) und drücken Sie den Button „Regler hinzufü-
gen“. Nach Eingabe der Regler-Seriennummer in Super-
Wise wird auf dem Display des TC75 eine PIN (Bild B)
angezeigt, mit der die Kopplung durchgeführt wird.
Monitor the firing process from anywhere! SuperWise
gives you full insight – via app, tablet or PC. While the app
presents the most important functions clearly, all details
up to the configuration can be accessed via the browser.
Email or WhatsApp notifications are also possible, as is
programme stop from a distance.
And this is how it works:
First, connect the TC75 to the internet (see page 13).
The second step is to register the TC75 in SuperWise
(www.superwise.eu). Go to the menu item „Device ma-
nagement“ (fig. A) and press the button „Add controller“.
After entering the controller serial number in SuperWise, a
PIN (fig. B) is shown on the display of the TC75 with which
the pairing is carried out.
WLAN LED (picture C)
LED flashes = WIFI connection established
LED lights up = connection to SuperWise established
WLAN-LED (Bild C)
LED blinkt = WIFI-Verbindung hergstellt
LED leuchtet = Verbindung zu SuperWise hergestellt
(A)
(B)
(C)


operating instructions TC 75 compact series V2.4
© 2023 bentrup Industriesteuerungen Germany
www.bentrup.com
Other manuals for TC75
1
Table of contents
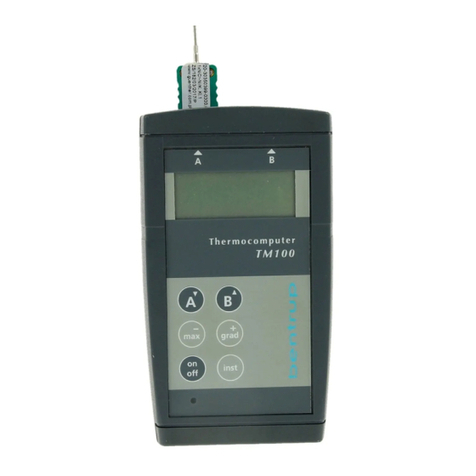
Other bentrup Measuring Instrument manuals
Popular Measuring Instrument manuals by other brands
S+S Regeltechnik
S+S Regeltechnik RHEASREG KLSW Series Operating Instructions, Mounting & Installation

Emos
Emos M0501 manual
Berkeley Varitronics Systems
Berkeley Varitronics Systems Wireless Multi-band Signal Meter System Wolf product manual
HKC
HKC APL-2 Series Installation, operation & maintenance manual
EUTECH INSTRUMENTS
EUTECH INSTRUMENTS STANDARD PHSCAN 1 PH TESTER Caractéristiques
ENCARDIO RITE
ENCARDIO RITE EDS-20V-E user manual
