Bergantino Super Pre User manual
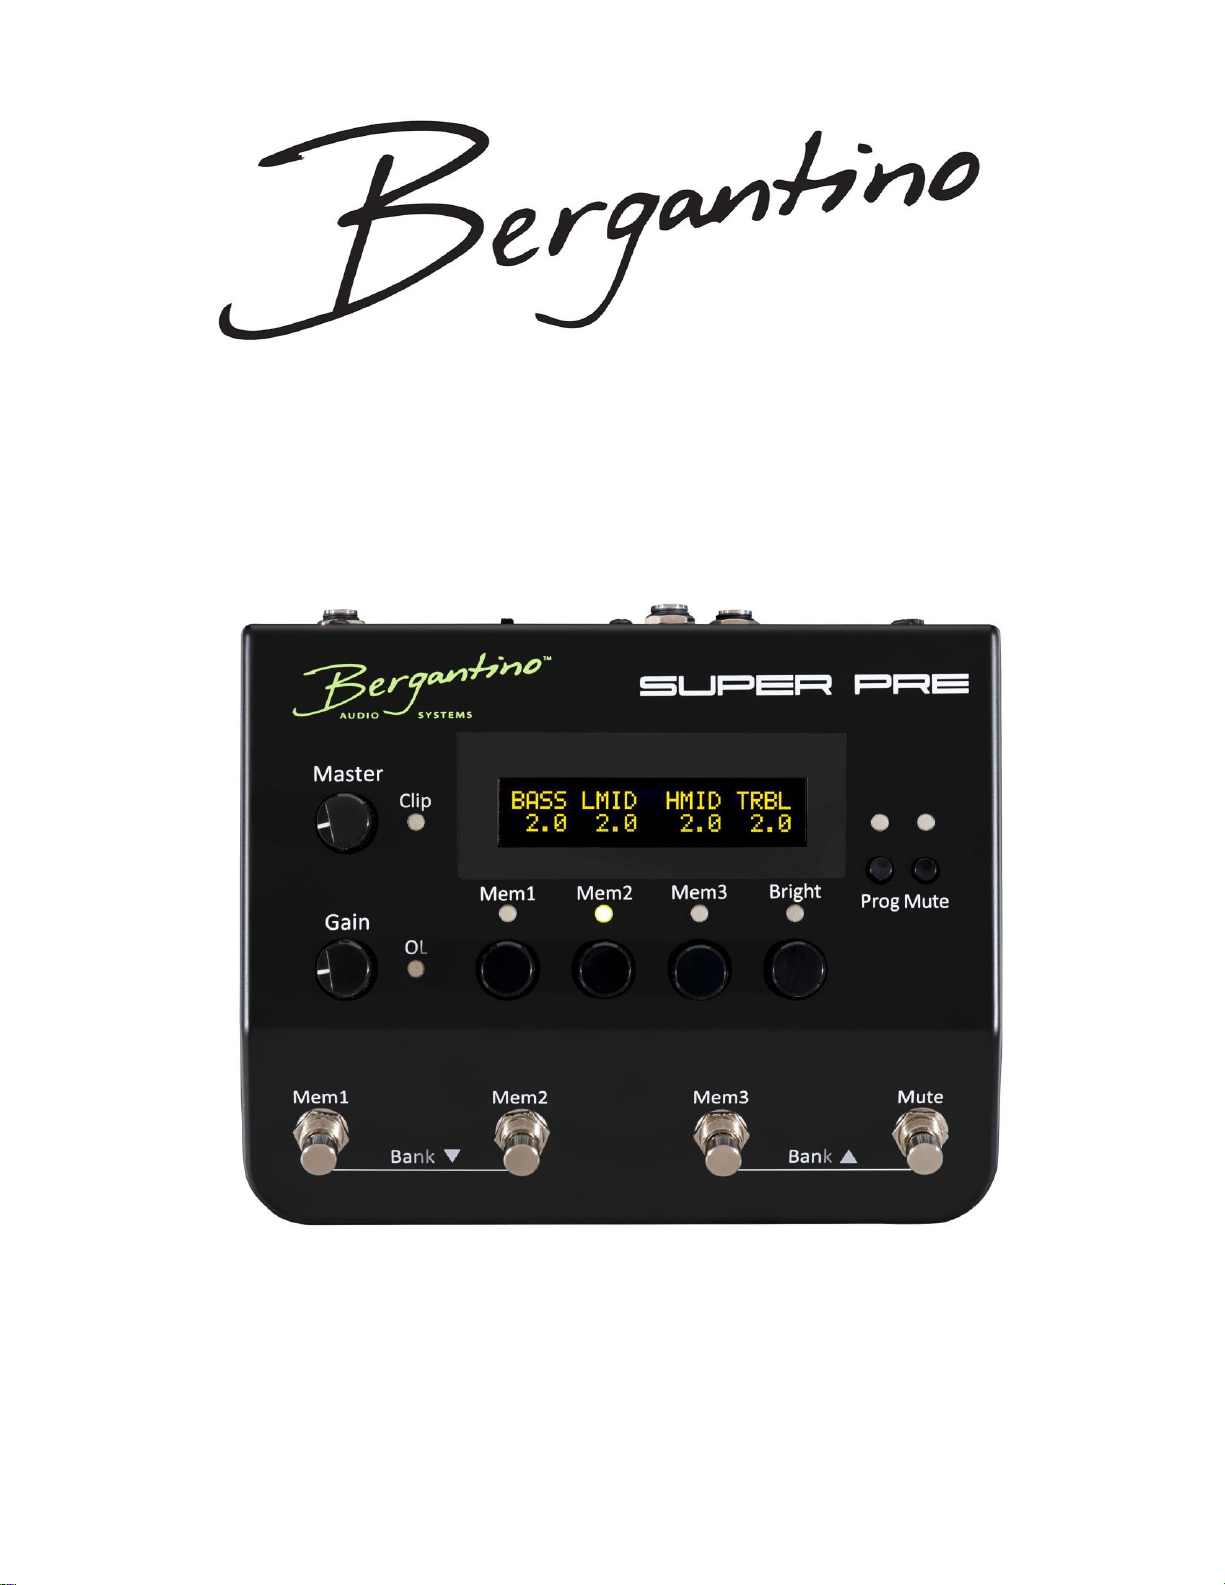
Super Pre
Owner’s Manual
`

2
Table of Contents
Important Safety Instructions................................................................................2
Introduction...........................................................................................................3
Quick Start............................................................................................................4
Top Panel Controls and Operation .......................................................................6
Rear Panel Controls and Operation......................................................................9
Extended Amplifier Features ..............................................................................10
Program Mode……………………………………………………………………….…16
Firmware Updates ..........................................................................................…23
Setting up and using Bluetooth Foot Switch.......................................................23
Specifications......................................................................................................24
Warranty Information..........................................................................................25
All Features and specifications are subject to change without notice.
This list is subject to changewithout notice.
Bergantino Audio Systems
1 Main Street, Building 12
Whitinsville, MA, 01588
508-234-4195
www.bergantino.com
Manual Version: 1.0
Do not use this apparatus near water:
Never expose the pre-amplifier to rain, moisture, dripping or splashing water. Do not place
objects filled with liquids on or nearby the pre-amplifier.
Do Not Open The Pre-Amplifier Enclosure:
There are no user-serviceable components inside this product. Opening the amplifier
enclosure may void your warranty. If liquid enters the unit, disconnect the unit from the power
source immediately and consult an authorized service station.
Unpacking:
The carton and packing materials used in shipping your new pre-amplifier were specially
designed to cushion it from the shocks and vibration that occur during transport. We suggest
that you save the carton and packing materials for use in shipping, in the event you move, or
the pre-amplifier needs repair.

3
Introduction
Congratulations on your choice of the Bergantino Audio Systems’ Super Pre and welcome to
the Bergantino family! First we would like to thank you for choosing Bergantino Audio Systems
as your amplifier company. This is something we never take for granted. We are confident that
your new pre-amp will bring you many years of trouble free use and we feel that our high
quality design and build standards will help you reach your creative goals.
The Bergantino Audio Systems’Super Pre is an incredibly flexible, state-of-the-art Bass Pre-
Amplifier, designed to deliver maximum performance, yet simple to operate and includes many
useful features as listed below:
DSP, Embedded System Controlled, Bass Pre-Amplifier
OLED Display
Selectable and Scene Savable Input Impedance (1 Meg or 10 Meg)
Multifunction Tone Controls; 4-Band EQ w/ Adjustable frequency range and “Q”
oBass: +/- 9dB Variable from 40Hz to 150Hz
oLo-Mid: +/- 9dB Variable from 100Hz to 800Hz
oHi-Mid: +/- 9dB Variable from 400Hz to 3kHz
oTreble: +/- 9dB Variable from 1.5kHz to 9kHz
Programmable Filters
oProgrammable bright switch
oVariable High-Pass Filter (VHPF)
oVariable Low-Pass Filter (VLPF)
oVariable Feedback filter (VFBF)
On-Board Programmable Chromatic Tuner
On-Board Variable Ratio Compressor (VRC). Serial or Parallel, Software selectable
On-Board Multi-Effects for Overdrive, Distortion, and Fuzz
On-Board Drive Blend % for Clean/Effects blend feature
On-Board DLPF (Drive Low Pass Filter)
On-Board Crossover filter for Drive Effects
Scene Gain Adjust –Savable and adjustable from -6dB to + 6dB
Software Adjustable output gain for optimum gain matching of connected amp.
Speaker-Files Intelligent Equalization for connected amp and speakers.
Auxiliary input and headphone jack for personal monitor and practice use
Effects Loop –Scene savable
Studio quality Direct Outputs (Pre and Post)
Software adjustable Line Out level (0dB to +6dB –0.707Vrms to 1.41Vrms) for optimum
gain matching with associated gear.
UPS –Universal power supply 9-12VAC/DC, Center Negative or Positive, 500ma min.
current requirement.
Software selectable Phase output (Normal or Reverse)
21 User Programmable and Nameable Memory Settings; 7 Banks of 3 each.
USB Port
oLoad Custom Speaker-Files
oSoftware Upgradable
oBTFS (Blue Tooth Foot Switch) Compatible

4
OLED Display
Your new Super Pre is equipped with a high quality OLED display which will give you years of
trouble free service. One of the characteristics of OLED screens of all types over time is burn
in. To help maintain and get maximum life from your OLED display, it is advised to always turn
your pre-amp off when not in use. This will help ensure many years of trouble free service.
For best viewing experience from your OLED display, remove protective
shield before using.
Quick Start
The Bergantino Audio Systems’ Super Pre is designed to be incredibly flexible, yet simple to
operate. All controls have a well-defined purpose and are designed to be as intuitive as
possible. These directions will help take you through the basics and give you a good start for
setting up your sound. However, it is highly recommended to read on to learn all the features
of the Super Pre in order to realize all its very useful features and benefits!
1. Plug the Super Pre in:
With the power switch in the OFF position, connect the 9-12VDC or9-12VAC power source to
the Input connector of your preamp.
The minimum current requirement to ensure proper operation is
500ma. More is fine.
2. Plug in your bass:
Using an instrument cable, connect your bass to the Input jack and turn the power switch on. If
you have active tone controls on your bass, turn all of the controls to the middle or flat position
and adjust the volume to the maximum point you would normally use. If you have a passive
bass, turn all tone and volume controls all the way up.
3. Top panel control settings:
When you first turn on the Super Pre the tone controls will be set flat and no Speaker-Files will
be installed. Set the Instrument Gain and Master Volumes at 0 (off).
4. Input level and Master Volume settings:
For proper operation, it is very important to adjust all gain levels properly. To adjust the Input
gain level, first turn the Master volume and Input Gain of the Super Pre all the way down
(CCW). Next, put the volume controls on your instrument at the maximum level you will be
using them at and play your bass like you normally would, including hard dynamic attacks.
Gradually increase the Input Gain control (clockwise) until the OL (overload) indicator just
begins to flash. Once flashing, reduce the Input Gain (CCW) slightly for some additional
headroom before clipping.
If the OL Led doesn’t come on at all with the Input gain turned all the way up, chances are
you’re either using a more traditional, single coil, low output, bass or enjoy playing with a
lighter touch. If this is the case, select Lo Output for Instrument Level in the Extended
Amplifier’s Feature section under Program Mode and readjust input level as explained

5
above.
Note: Some onboard preamps have internal adjustable gain controls. If you have
active/passive switching capabilities on your bass, it’s best to adjust these gains such that the
passive and active output levels are the same with the tone controls set flat. This will ensure
maximum headroom for you onboard preamp as well as best gain matching of your bass to the
Super Pre’s input stage.
Remember, the purpose of an onboard preamp is to buffer the pickups from long cable
runs and to provide active tone controls for tone shaping, not to increase your overall
output level and volume. That is what your pre amp and amplifier are for!
Once you’ve matched the maximum signal from your bass without overloading the input stage
of the pre-amplifier, increase the Master volume of the Super Pre by turning the Master
volume knob in a clockwise direction to the desired level. You should be hearing your bass
quite well at this point. You should now only use the Master volume now to achieve your
desired sound level.
For clear, undistorted sound, it’s very important not to overdrive the input stage of the
Super Pre. If you increase in level any tone or volume control on your bass after
adjusting the input gain, you should check to make sure the OL indicator isn’t flashing.

6
Top Panel Controls and Operation
1. Input Gain: Gain control for the Instrument input. Adjust this level to obtain maximum input
gain before any flashing of the OL indicator occurs.
2. OL (overload) Indicator: Indicates the input stage of the Super Pre is being overdriven
when flashing yellow. If an overload condition is indicated, turn the gain knob counterclockwise
to reduce gain until no flashing occurs and adjust Master volume to achieve desired volume.
Also learn more about properly adjusting the Input gain of the Super Pre in the Instrument
Level section of the Program Mode part of this manual.
3. Master (volume): This control adjusts the Master volume of the Super Pre.
7
4. Clip (indicator): This indicator will flash yellow when the Super Pre senses an overdriven
or clipped signal at its Line output. This is an indication that the preamplifier is being driven
beyond its ability to produce a clean, undistorted output. If you need more clean volume, go to
the Output Level Adjust menu in the program mode and adjust upward for more clean output
volume, if available (up to +6dB).
5. OLED Display: The OLED display serves many functions and displays everything from
basic tone control settings (home screen) to the many levels of software based menu screens
in the Super Pre.
6. Multi-Function Tone Controls
Mem1/BASS Control: This control has multiple functions:
As a Tone Control, turning the control Left or Right from the Home Screen will decrease or
increase the level of the Bass frequencies in 0.5dB increments, from -9dB to +9dB. The level in
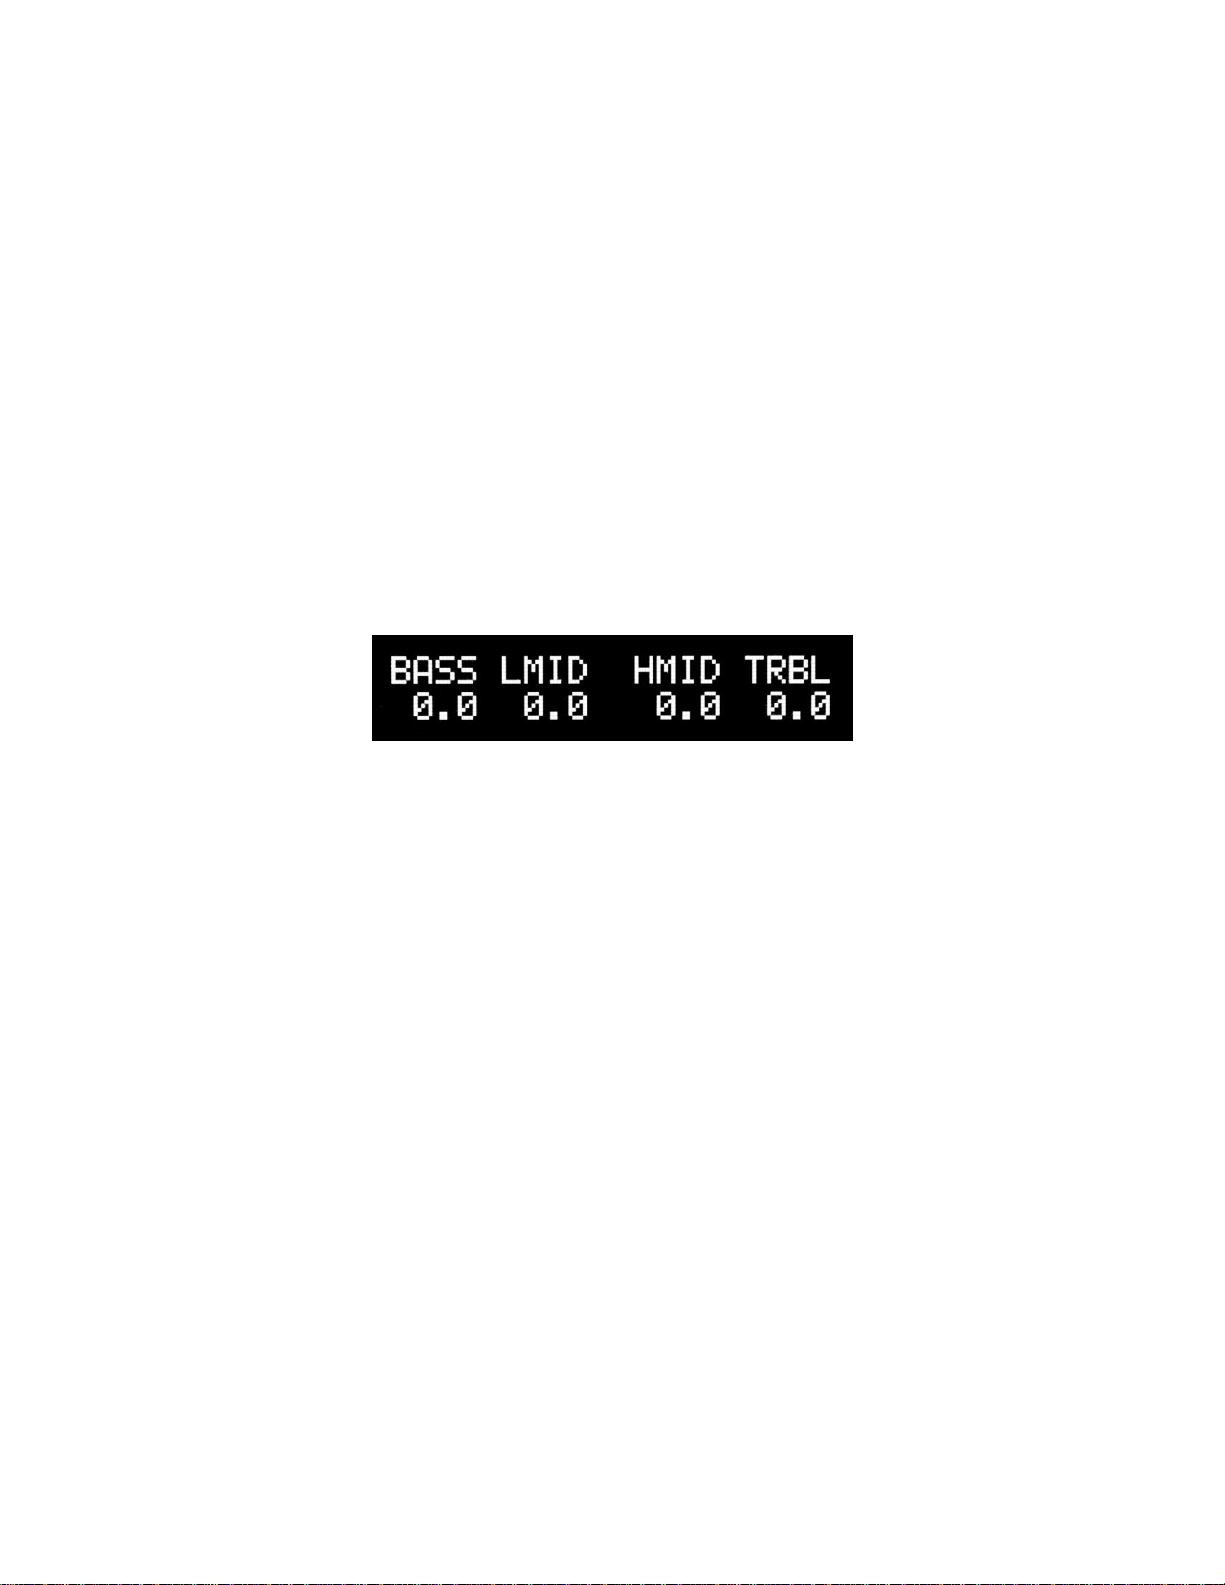
dB will be shown above on the OLED display.
The screen below shows an example of one of the Super Pre’s Home Screens.
Pressing and releasing of this knob will recall, if loaded, the scene that is currently stored in
that Mem1 location of the currently loaded Bank. If the memory scene is already loaded while
pressing and releasing this knob, it will return to the Super Pre’s Main Scene.
Mem2/LMID Control: This control has multiple functions:
As a Tone Control, turning the control Left or right from the Home Screen will decrease or
increase the level of the Lo-Mid frequencies in 0.5dB increments, from -9dB to +9dB. The level
in dB will be shown above on the OLED display.
Pressing and releasing of this knob will recall, if loaded, the scene that is currently stored in
that Mem2 location of the currently loaded Bank. If the memory scene is already loaded while
pressing and releasing this knob, it will return to the Super Pre’s Main Scene.
Mem3/HMID Control: This control has multiple functions:
As a Tone Control, turning the control Left or Right from the home screen will decrease or
increase the level of the High-Mid frequencies in 0.5dB increments, from -9dB to +9dB. The
level in dB will be shown above on the OLED display.
Pressing and releasing of this knob will recall, if loaded, the scene that is currently stored in
that Mem3 location of the currently loaded Bank. If the memory scene is already loaded while
pressing and releasing this knob, it will return to the Super Pre’s Main Scene.
The Super Pre’s Main Scene is the default screen for all the banks when a scene is
not loaded. It changes dynamically, in real time whenever a parameter is changed.

8
Bright/TRBL Control: This control has multiple functions:
As a Tone Control, turning the control Left or Right from the home screen will decrease or
increase the level of the Treble frequencies in 0.5dB increments, from -9dB to +9dB. The level
in dB will be shown above on the OLED display.
When this control is pressed and released, it activates/deactivates the Bright Control. Use this
control to add some sparkle or snap to your final tonal contour and to add or remove edge and
definition. (See Bright Adjust Menu in program mode on how to program the frequency and
gain of this filter)
7. Mute: When Mute is engaged, the red Mute LED will illuminate and the Super Pre’s DI
outputs, headphones and Line output will be muted.
If the Super Pre’s tuner is enabled (factory default), a fully digital chromatic tuner is activated
and displayed on the OLED display.
The first screen indicates no signal detected by the Super Pre’s tuner. The second screen
indicates a properly tuned A1 string.
8. Prog (Program Button): From any Home Screen, press and release the Prog button to
access and sequence thru the Banking menu, Filters menu, VRC compressor menu, Effects
menu, and Effects Blend, Xover and DLPF menu. Press and hold the Prog button for 3
seconds from any Home Screen to enter Program Mode. The green Prog LED will illuminate
(See Program Mode).
Also, to save a scene, while pressing and holding the Prog button, quickly press Mem1,
Mem2, or Mem3 to save a tone scene in that location (See Mem1/Mem2/Mem3 Save in
Extended Amplifier Features).
9. Mem and Bright LED Indicators These Green Led indicators determine if any of the
Memory scenes are engaged and also if the bright filter is engaged.
10. Multi-Function Foot Switches. Use these switches to engage/disengage Memory
Scenes, engage/disengage the Mute function, or to Bank Up or Bank Down to access one of
7 memory banks, A-G.
9
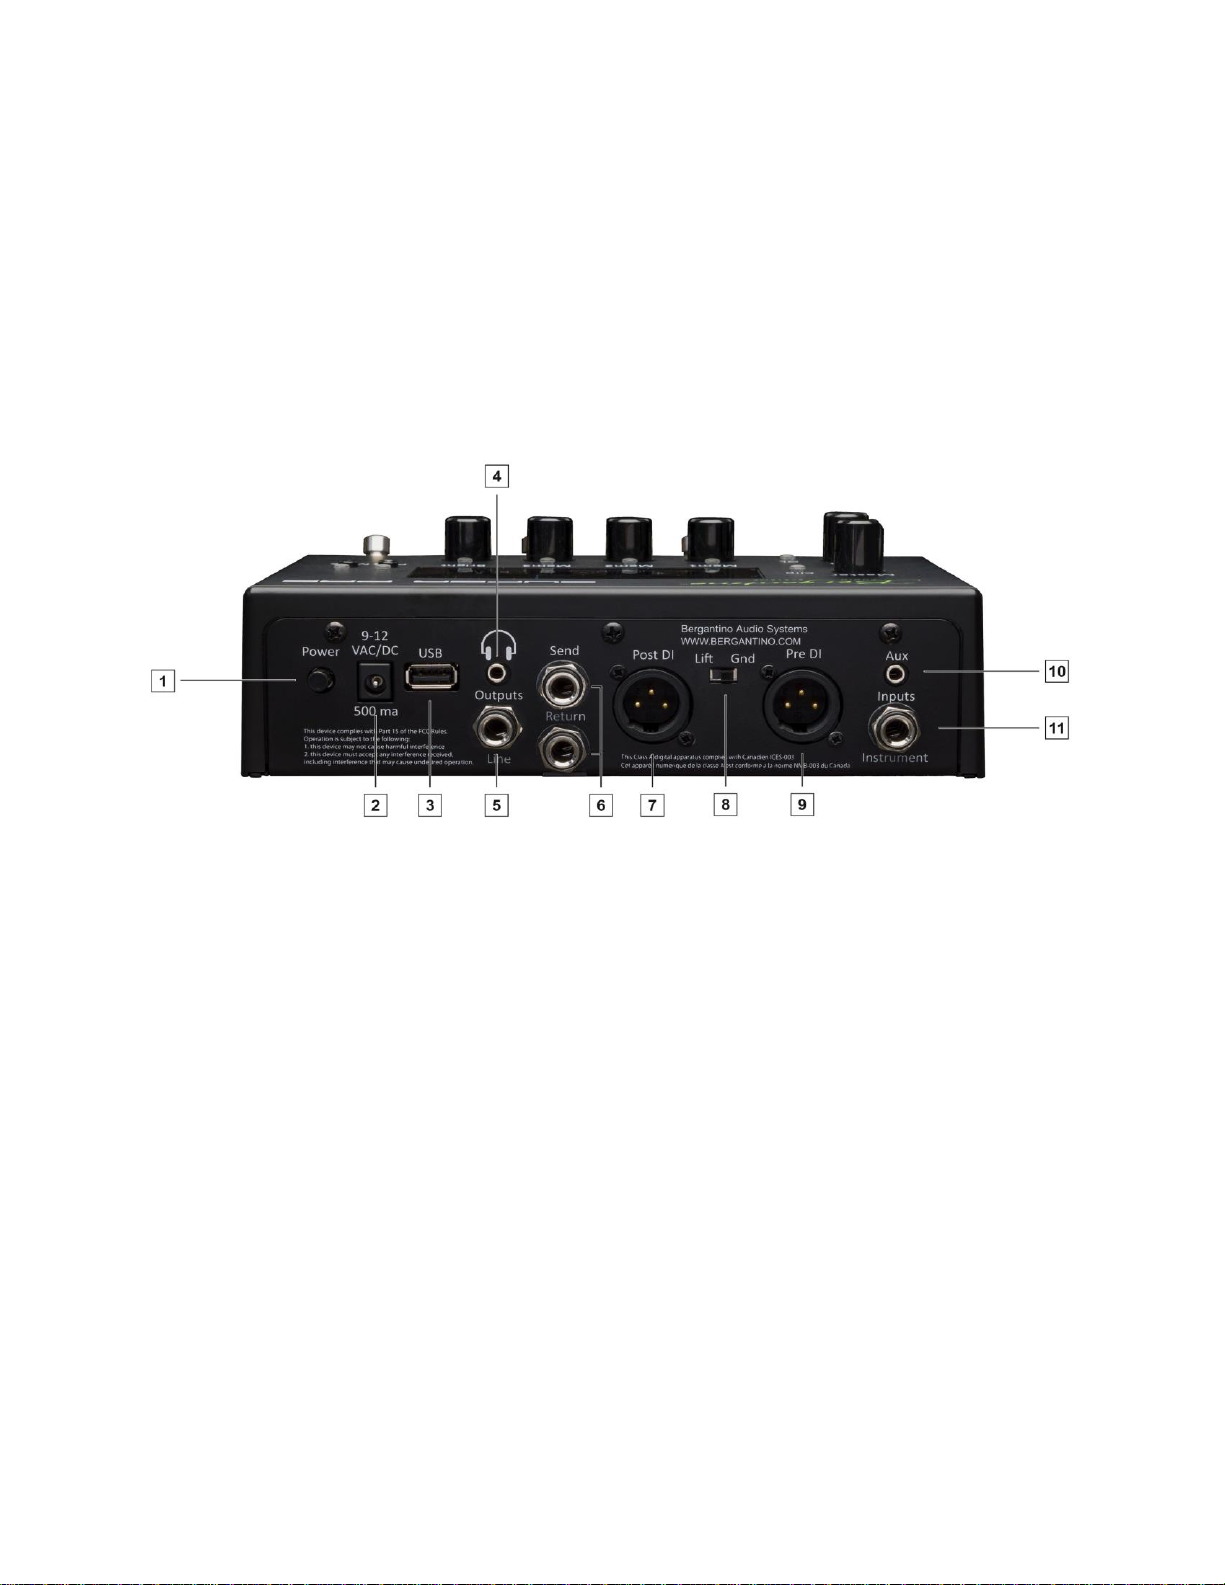
Rear Panel Controls and Operation
1. Power Switch: Turns the pre amplifier on or off.
2. Power Receptacle: Accepts a 2.1mm barrel connector 9-12VDC or VAC, Center Negative
or Positive, 500ma min.*The Super Pre will not operate if less than 500ma is supplied!
3. USB Port: This port will support a FAT32 formatted thumb drive to load speaker-files into
program memory and also perform firmware updates when or if they become available.
4: Headphone (output): 1/8” Stereo headphone jack designed to drive full-range headphones.
5. Line (output): This connecter is a ¼” unbalanced output and serves as a pre-amp out, post
Master volume.

10
6. Effects Loop: Unbalanced 1/4” connector used when sending a full range, instrument level,
to an external device. The Effects loop is software programmable
.
7. Pre Direct Out: This Studio quality DI sends an electronically balanced output signal of your
raw bass signal only. The Pre DI is 48V phantom power protected and latency compensated.
8. Ground Lift: This switch disconnects the ground on both of the balanced Direct XLR Outs,
to eliminate hum and buzz when the amplifier is connected to equipment that is running on a
different ground system.
9. Post Direct Out: This Studio quality DI sends an electronically balanced output signal of all
your Preamps selected features, including the effects loop, if engaged. It also can be selected
to include Speaker-Files if desired. The Post DI out is 48V phantom power protected.
10. Aux Input: A standard 1/8” mini stereo jack to plug in an external sound source (iPod,
MP3 player, etc.). Maximum, unclipped input level is 2Vrms.
11. Instrument Input: A 1/4” unbalanced input jack to plug in an active or passive bass into a
studio quality, high impedance, input buffer.
Extended Amplifier Features
Banking Screen
The Banking Screen displays the status of which Memory Bank you’re in along with any
recalled scene. If no saved scene is loaded, it will display “Main Scene”. It also allows you to
scroll thru the 7 Banks and name scenes.
If you desire to name a scene, do so before saving using the HMid and Trbl knobs as
explained below.
Turn the Bass/Mem1 knob to select Bank you want to load scene into
Turn the HMid/Mem3 knob to move curser for naming scene
Turn the Trbl/Bright knob to choose alpha-numeric character
Once you have selected the Bank to store the scene in, and have named it, while pressing and
holding the Prog button, quickly push and release the desired memory location within that
Bank you want to store the scene (Mem1, Mem2, or Mem3). The corresponding green LED
will illuminate once saved.
If you decide to edit or change the name of a scene, an * will appear next to the
current name until the new name is saved along with the scene.

11
Banking
The Super Pre allows several ways to Bank Up or Bank Down thru the 7 available banks (A-
G). You can change Banks by accessing the Banking Screen (mentioned above) and use the
Bass/Mem1 knob to select the desired Bank you would like to go to, or by pressing a
combination of foot switches you can either Bank Up or Bank Down. The Banks are in a
circular orientation meaning you can be in Bank G and Bank Up to get back to Bank A, or be in
Bank A and Bank Down to get to Bank G. This can help save time when wanting to get to a
desired bank as quickly as possible.
Also when banking, if a memory scene is currently loaded in the bank you’re in, and its
corresponding green LED is illuminated, it will remain active even when changing banks. The
Green Led above the recalled scene will turn off, indicating you’re no longer in that bank.
However it will still continue to be played thru your preamp until another scene is loaded,
regardless of which bank you’re in. This will prevent the user from experiencing scene changes
while Banking to the desired bank seeking out a different stored scene.
If you have a current memory location recalled and end up banking all the way back to
the bank the memory scene was stored in, the green LED above the corresponding
memory knob will re-illuminate, indicating you are back in the Bank of which the scene
that is currently playing, is part of.
Banking Up Using Foot Switches
To Bank Up using the foot switches, simply simultaneously depress the Mem3 and Mute foot
switches and you will go up to the next bank. The display will briefly display your current Bank
information for 3 seconds as well as any loaded scene, including scene name if assigned.
Banking Down Using Foot Switches
To Bank Down using the foot switches, simply simultaneously depress the Mem1 and Mem2
foot switches and you will go down to the next bank. The display will briefly display your
current Bank information for 3 seconds as well as any loaded scene, including scene name if
assigned.

12
Filters Screen
The VHPF (turn Bass/Mem1 knob to adjust frequency) allows frequencies above the displayed
frequency to pass while cutting frequencies below. Factory default is 40Hz. Turning this knob
adjusts the cut-off frequency from 30Hz –98Hz in 2Hz increments. Use this control to clean up
the very low end of the bass frequencies, which can often muddy the low-end program
information and needlessly stress your speaker system and waste amplifier headroom.
To help minimize needless stress on speakers and maximize amplifier and overall
system headroom, it is advisable to set this control at 40Hz (factory default setting) or
higher, if further low frequency attenuation is needed.
The VLPF (turn LMid/Mem2 knob to adjust frequency) cuts frequencies above the displayed
frequency while passing frequencies below. Factory default is “Off”. Turning this knob adjusts
the cut-off frequency from 500Hz –10kHz in 100Hz increments. Use this control to attenuate
any high frequency artifacts, such as fret noise, pick attack, etc. to produce a cleaner, more
musical signal to both the DI and amplifier output. This filter can also serve as a useful cabinet
simulator for both the DI and when using the headphone output for quiet listening.
The VLPF frequency is saved as part of a Mem save for future recall, allowing different
settings for different basses or musical styles.
The Variable Feedback Filter- VFBF (HMid/Mem3 knob adjusts note, Trbl/Bright knob adjusts
gain) is intuitively designed to help you identify and sweep the note frequencies from E1
(41Hz) –G3 (196Hz) in single note (1/2 step) increments, and adjust the gain, when engaged
from -6dB to -12dB in level to help eliminate or minimize problem feedback issues with electro-
acoustic instruments.
To use, try to identify the note on your instrument that is feeding back the strongest from the
location in which you will be playing (very important as feedback is affected by the
proximity of the instrument to the boundaries and sound source in which it is near). While
muting your instrument or amp, press and release the filter knob and then turn the HMID knob
to the note (i.e. A2) that is feeding back the strongest. Turn the TRBL knob CCW to set the cut
level between -6dB and -12dB, then un-mute the amp or instrument and go back to the same
location you will be playing from and see if the feedback has been eliminated or reduced. You
may need to try this a few times and adjust the amount of cut in gain accordingly.
The Variable Feedback filter’s parameters are not saved in Memory and the gain is
reset to OFF on power recycle, as it is an environment dependent adjustment.

13
Compressor Screen
To engage the Compressor Screen, from the Home Screen, tap the Prog button to the right of
the OLED display three times. You will see the screen as shown below:
Turn Bass/Mem1 Knob to turn VRC (Variable Ratio Compressor) On or
Off Off On
Turn LMid/Mem2 Knob to select compressor Type (Parallel or Serial)
Par Ser
Turn HMid/Mem3 Knob to increase or decrease the drive level into the
compressor. The higher the number, the more compression you should
hear.
1 15
Turn Trbl/Bright Knob to adjust VRC post effect Volume level to try and
make the VRC On and Off volumes the same.
1 15
The Parallel compressor compresses only 50% of your signal and keeps the other 50%
un-compressed, preserving the dynamics of your playing if that’s what you desire.
Helpful Hints:
To best use the compressor, set up your input gain to the Super Pre such that the OL light
barely flashes on your loudest peaks. Then, while on the Compressor Screen, turn the VRC
On and set the Comp level so that you get the desired amount of compression during normal
playing. Next turn the VRC off and compare the uncompressed volume with the On volume
and adjust the Gain so they match.
The VRC in the Super Precan be either a serial or parallel architecture. In Serial mode
the whole signal is compressed whereas when parallel is selected half your signal is
uncompressed and summed with the compressed signal giving a thicker, meatier tone
without losing the attack of the note. A nice starting point would be 7 and 7 on the
Comp and Gain settings. Adjust to taste from there.
All Compressor Settings are saved as part of a memory scene.
14
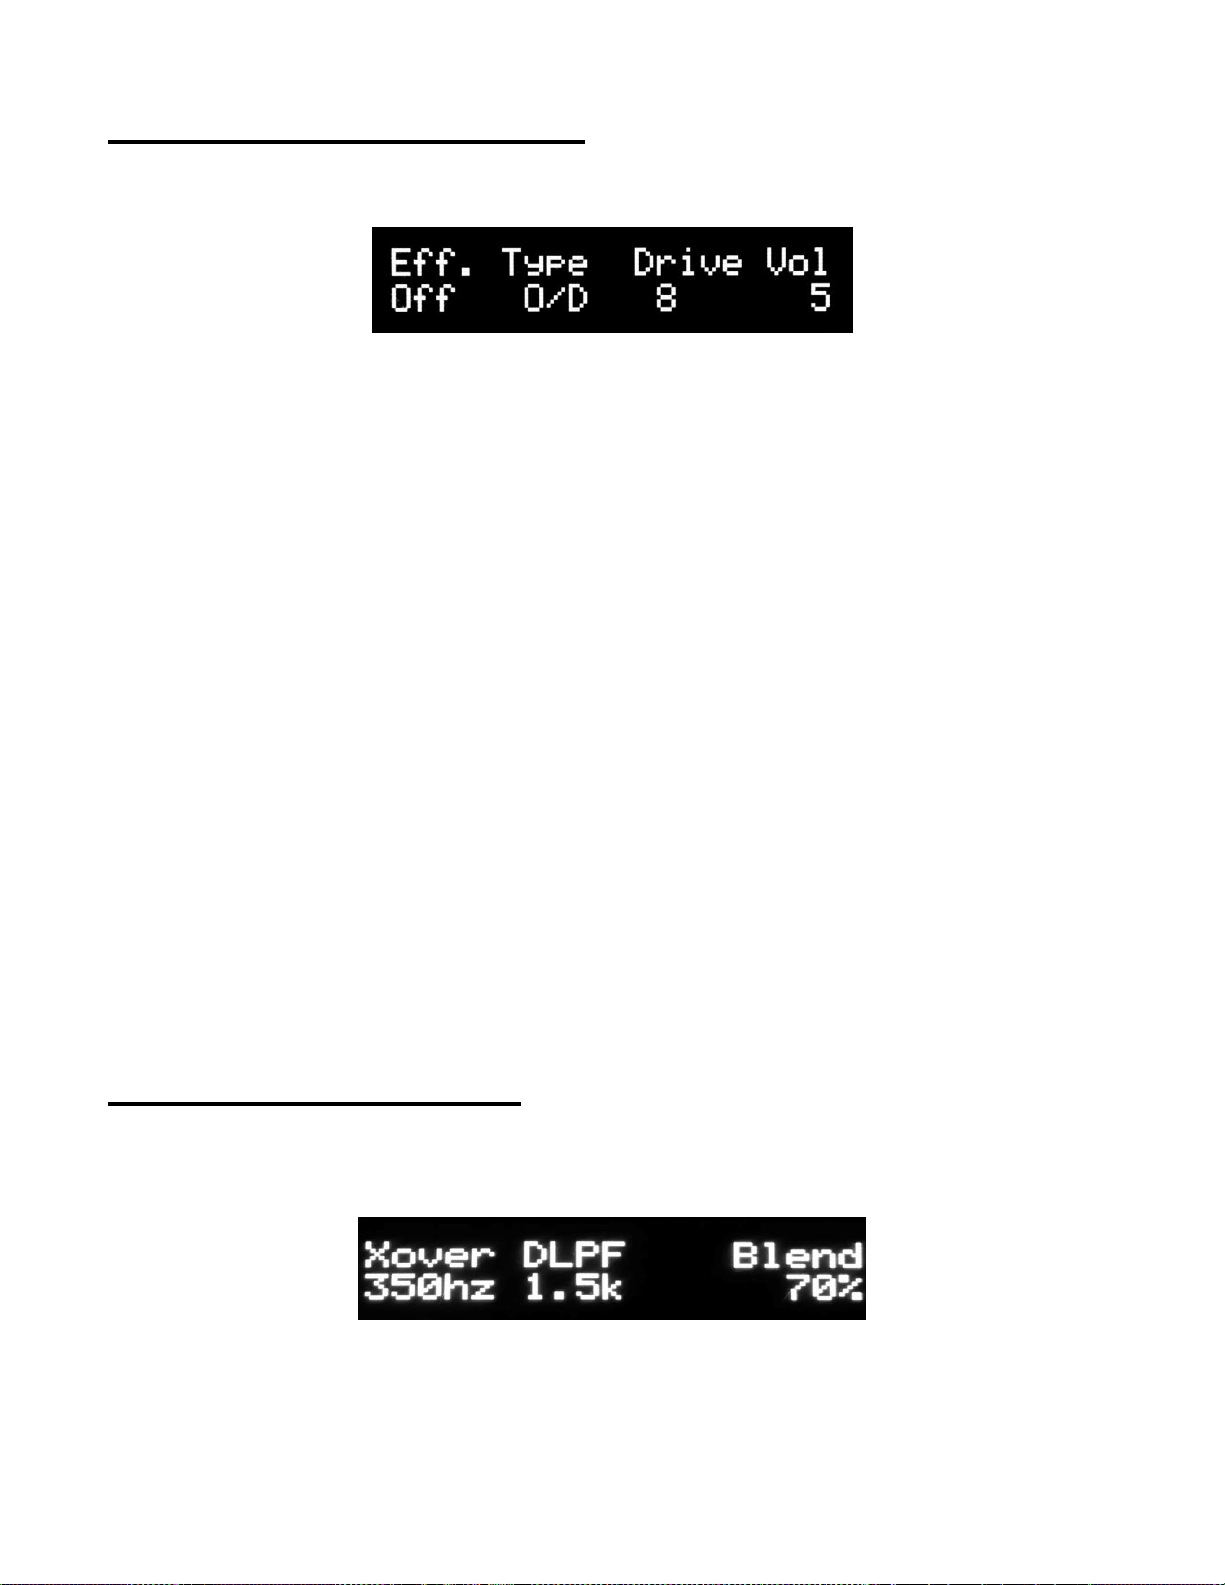
Effects Screen (O/D, Dist, Fuzz)
To engage the effects screen, from the Home Screen, tap the Prog button to the right of the
OLED display three times, (or once from the Compressor screen). You will see the screen as
shown below:
Turn Bass/Filters Knob to turn effects On or Off
Off On
Turn LMid/Mem1 Knob to select effect type
O/D Dist Fuzz
Turn HMid/Mem2 Knob to adjust Drive level into effect
1 15
Turn Trbl/Bright Knob to adjust post effect Volume
1 15
It is very important that the Super Pre’sinput gain is adjusted properly before
adjusting Effect’s Drive level
The effects are touch sensitive. The harder you play, the harder it drives the effect.
For best results, use the Drive level to first determine the desired sound from the effect.
Then, using the Eff. Off/On control, compare the volume of the processed signal (On)
with the clean signal (Off) and adjust the Vol level to get the same perceived volume.
These Effect settings are saved as part of a scene save.
To return to Home Screen, tap the Prog button twice.
Xover, DLPF, Blend Screen
The Xover adjustment determines where the clean Low Pass part of your Bass’ signal ends
and the Drive High Pass part of your Bass’ signal begins. It is scene savable and is adjustable
from 100Hz to 1kHz in 50Hz increments.
The DLPF (Drive Low Pass Filter) determines the upper frequency limit of your bass signal
going into the Drive circuits. It's scene savable and adjustable from 1kHz –3kHz in 100Hz
increments.

15
The DLPF filter along with the High Pass leg of the Xover filter forms a Band Pass filter
into the Drive circuits. So above, the Xover is set at 350hz and the DLPF is set at
1.5khz, which yields a bandwidth of 350hz to 1.5khz going into the Drive circuit.
The Blend % determines the ratio of the selected effects signal (O/D, Dist, or Fuzz) blended
into the clean signal. Above indicates a 70% Effect and 30% clean blend.
For best Drive Blend results, adjust the Drive volume using the 100% Drive Blend
setting for the selected Effect (i.e. O/D, Dist, or Fuzz) and check for it to be the same
as the clean volume using the On/Off and Vol control as explained above. This will
ensure an accurate blend % between the Drive and clean signal.
Mem1 Mem2 and Mem3 Save
You can save and store up to 7 Banks of 3 independent memory scenes, for a total of 21
scenes for future recall. The parameters that are saved are the BASS, LMID, HMID, TRBL
gain settings, center frequency, and Q, Bright settings (center frequency and gain), Effects
Loop (On or Off), Effect Type (O/D, Dist, or Fuzz), Drive level and post effect Volume, Drive
Blend %, DLPF, Xover Freq, Scene Gain, VRC compressor (On or Off), Compressor Type
(Serial or Parallel), Comp level, compressor post Gain level, and Input Impedance.
To save a scene to Mem1, Mem2, or Mem3, once you’ve determined the scene you would like
to save, go to the Banking Screen and determine which Bank you would like to store the
Scene in by turning the Bass/Mem1 knob. If you would like to name the scene, use the
HMid/Mem3 knob to move the curser and the Treble knob to select the alpha-numeric
character. Once done, while pressing and holding the Prog button, press and release the
desired Mem knob in the location where you would like to store that scene to (Mem1, Mem2,
or Mem3). The LED over that memory location will illuminate indicating the desired scene is
now saved in that Mem location and the Banking Screen will update to reflect this scene save.
To recall these settings at a later time, just push and release the appropriate Mem control knob
while in the appropriate Bank. The saved settings will now be loaded into the DSP and the
green LED for that Mem location will illuminate. To go back to the current Main Scene, just
push the same Mem control knob again.
When making any parameter adjustment while in either of the Mem locations, the
green LED will remain lit for that location indicating you are still in a Mem recall state.
However, if you exit that Mem location without saving the new settings, the next time it
is recalled it will load its previously saved state.
Recalling an empty memory location will result in no action taken by the preamp.

16
Program Mode
Many of the Super Pre’s extended and unique features are accessed in the program mode. To
enter program mode, press and hold the Prog button for 3 seconds from the Home Screen.
The green Prog LED will turn on and the first menu screen will appear on the OLED display
(Instrument Level Menu). The green Prog LED will stay on for the duration of the time you’re
in program mode. By quickly pressing and releasing the program button while in program
mode, you will be able to cycle through the various program menus until you reach the desired
menu(s). To leave program mode and go back to the previous Home Screen, press and hold
the Prog button again for 3 seconds, or the Program mode will eventually time after approx. 15
seconds of no activity. You can also press Mute 2 consecutive times to quickly return to the
previous Home Screen.
Screen 1 - Instrument Level menu
This menu allows you to select between using a Hi Output instrument and a Lo Output
instrument. When Lo Output is selected, an increase in gain is programmed into the Super
Pre to compensate.
Turn the Bass/Filters Knob to select the desired Instrument output level:
Hi Output Lo Output
Note: Some active basses may have outputs comparable to a single coil, passive bass
while some passive basses may have outputs comparable to a more traditional active
bass. Be sure to select Instrument Level accordingly.
Properly Adjusting Input Gain
Start with the Hi Output setting (Factory default setting), and with the input gain fully off, play
your bass like you normally would, including hard dynamic attacks. Gradually turn the input
gain up until you can see the OL led flash on the top panel of the Super Pre. Once the OL Led
flashes, back the gain off slightly for additional headroom before clipping. This is the optimal
input level for your bass and playing style. Keep the Instrument Level in Hi Output mode for
this instrument.
If you can’t get the OL led to flash when the input gain is turned all the way up, select Lo
Output for Instrument Level and re-adjust input gain as explained above.
It is very important to adjust the Super Pre’s input gain properly, as the DSP is
designed around a specific input level.
If the output of your active bass is very hot, you could unnecessarily and unknowingly
be clipping your onboard preamp, introducing a distorted signal to your amplification
system right out of the gate! Try to adjust your bass’ active output level to be the same
as its passive level (if you have an active/passive switch) to ensure maximum dynamic
range and headroom before clipping.

17
Screen 2 - Center Frequency adjust menu
Turn Bass/Mem1 Knob to select desired center frequency for Bass Tone
Control
Turn LMID/Mem2 Knob to select desired center frequency for Lmid Tone
Control
Turn HMid/Mem3 Knob to select desired center frequency for HMid Tone
Control
Turn Trbl/Bright Knob to select desired center frequency for Treble
tone control
Screen 3 - Tone Control Q Select menu
This menu allows you to select between Wide, Med, Narrow, or Notch (LMID and HMID only)
for each tone control’s Q. These Q’s will be saved as part of a memory scene.
Turn Bass/Mem1 Knob to select the desired Q for Bass tone control
Wide Med Narrow
Turn LMid/Mem2 Knob to select the desired Q for LMid tone control
Wide Med Narrow Notch
Turn HMid/Mem3 Knob to select the desired Q for HMid tone control
Wide Med Narrow Notch
Turn Trbl/Bright Knob to select the desired Q for Treble tone control
Wide Med Narrow
Screen 4 - Bright Filter Adjust Menu
This menu allows you to adjust the center frequency and gain parameters of the Bright filter.
When the bright function is engaged from the Home Screen by pushing the Bright control
knob, the parameters you adjust in this menu will be loaded into the DSP’s Bright filter.
Be sure to engage the Bright function while in the home screen before entering
program mode so you can hear the results of your adjustments in real time while in this
screen.
Turn the Bass/Mem1 knob to adjust frequency from 2 kHz to 10 kHz in
increments of 100Hz.
Turn the Trbl/Bright knob to adjust gain in increments of 1dB from +1dB
to +12dB.

18
Below shows the Bright filter adjusted to a center frequency of 7.0kHz and a gain of +8db.
Whenever the Bright function is engaged from the Home Screen, these parameters will be
loaded into the Super Pre’s Bright filter EQ. The currently loaded Bright Filter parameters will
also be saved as part of a scene save if the Bright function is engaged during the save.
Screen 5 - POST DI Select menu
This menu allows you to select whether the Pre-Profile or Post-Profile signal is sent to the Post
DI output.
Turn the Bass/Mem1 Knob to select DI Output:
Pre-Profile Post- Profile
Pre-Profile: This does not include the loaded Speaker-File in the Post DI signal path.
Post-Profile: This includes the loaded Speaker-Files in the Post DI signal Path.
Screen 6 - Scene Gain Adjust menu
This menu allows you to adjust and save the overall volume of a particular scene relative to
your baseline volume. It will allow you to have some scenes more forward in the mix for things
like soloing, or maybe to help compensate for an overly driven sound whose relative volume
may need to be tamed a bit. This parameter is saved as part of a scene save.
Turn the Bass/Mem1 knob to select desired output level from -6dB to
+6dB in 1dB increments
Screen 7 - Output Level Adjust menu
This menu allows you to adjust the Super Pre’s output to get maximum resolution from its
Master Volume control and best match its output to the connected amp’s input sensitivity. It’s
adjustable from 0dB to +6dB (1V to 2V peak or 0.707V to 1.41Vrms) in 1 dB increments.
Turn the Bass/Mem1 knob to select desired output level.
19
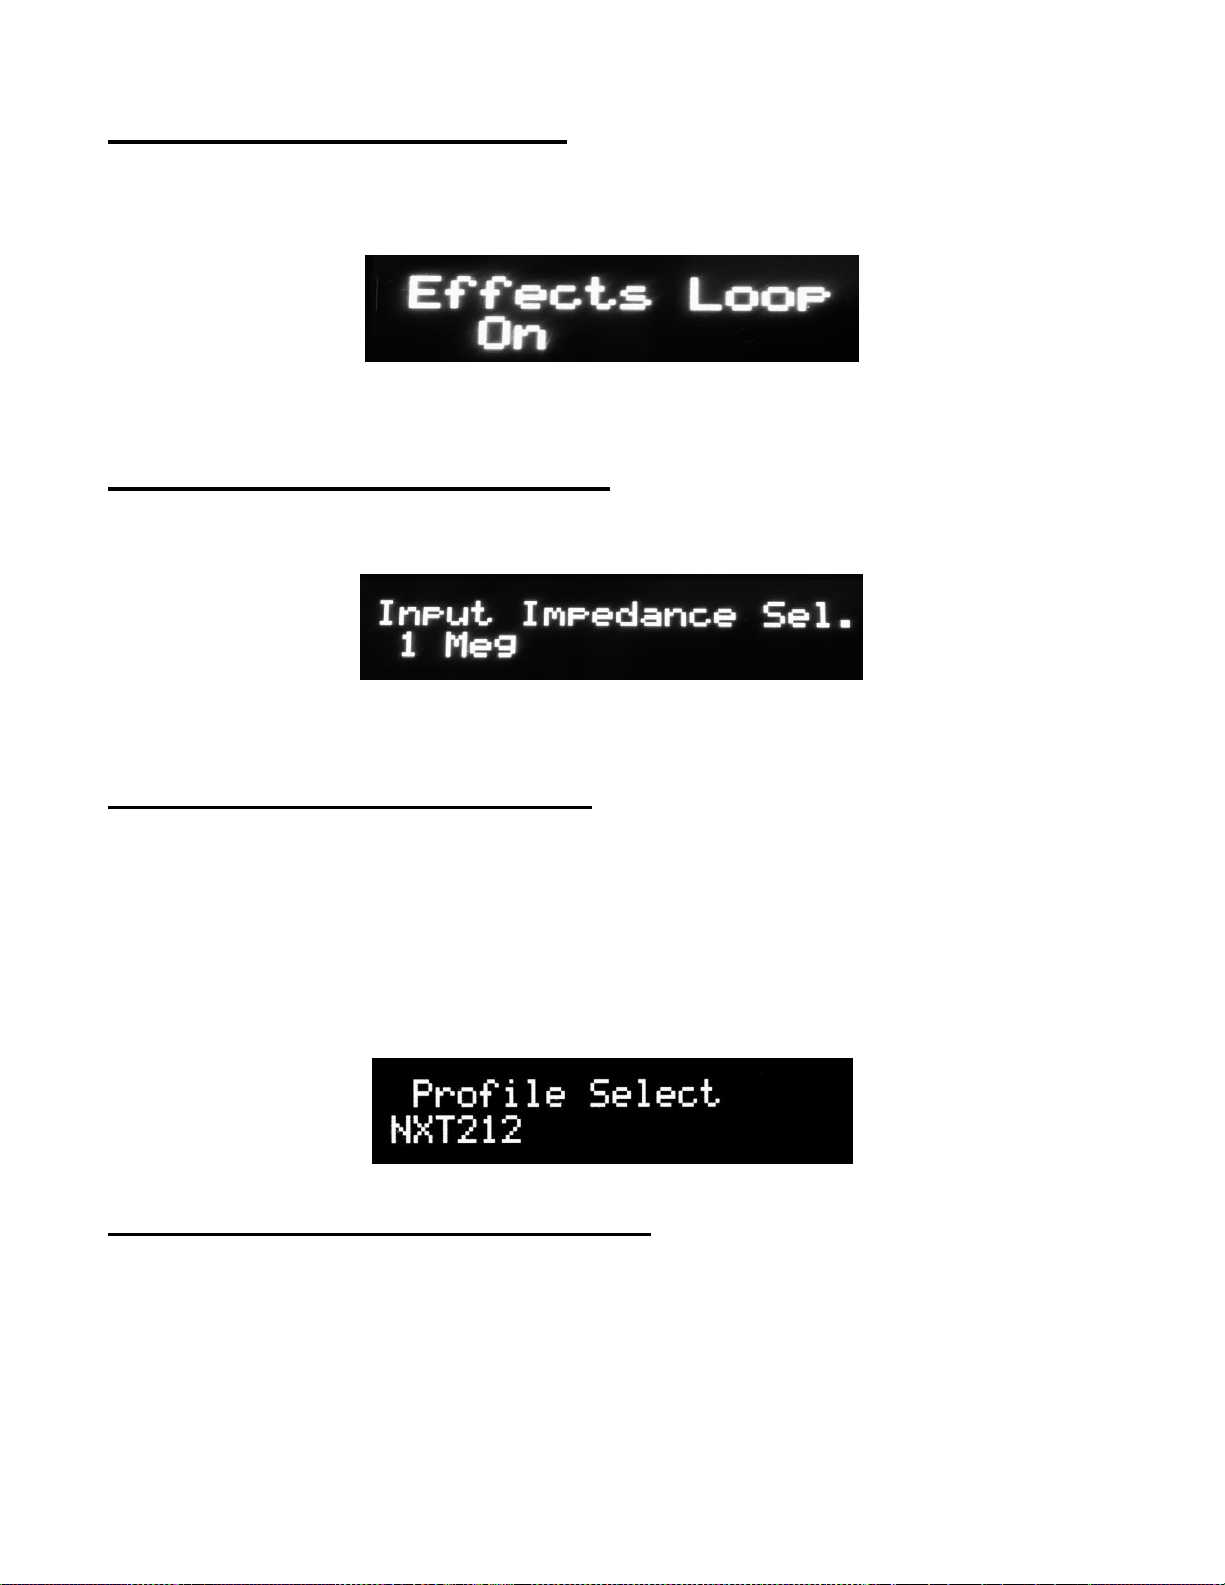
Screen 8 - Effects Loop menu
This menu determines if the effects loop is part of the signal path. Selecting “On” means it’s
included in the signal path, “Off” means it’s not in the signal path. This parameter is also part of
a scene save.
Turn the Bass/Mem1 knob to the desired setting.
Screen 9- Input Impedance menu
This menu allows you to change the Super Pre’s input impedance between 1 Meg and 10 Meg
ohms. This parameter is also part of a scene save.
Turn the Bass/Mem1 knob to select desired input impedance.
Screen 10 –Profile Select menu
This menu allows you to select one of the Super Pre’s stored Speaker-Files and load it into the
Profile EQ section of the Super Pre’s DSP processor.
Turn the Bass/Mem1 knob (Left or Right) until the desired Speaker-File appears on the OLED
display. Once displayed, the selected file will be loaded into the Speaker-File EQ section of
the Super Pre’s DSP processor.
The screen below shows the HDN212 profile being selected and loaded into the Super Pre’s
Speaker-Files EQ section.
Screen 11 –Profile USB Load menu
This menu allows you to load new Speaker-Files from a FAT32 formatted thumb drive into one
of the twelve dedicated Profile memory locations of the Super Pre. In this menu the Super Pre
will read any file off the thumb drive with a .PRF extension. You will be able to scan and select
which speaker profile you would like to import from the thumb drive and choose which
dedicated profile memory location you would like to store it in for future recall. You can
overwrite profiles already stored in the Super Pre with new ones, if desired. Once stored, you
can load the speaker-file into the DSP’s profile filters from the Profile Select menu above.
Speaker-files (formerly called profiles) are available for download at www.Bergantino.com.

20
To load Speaker-Files:
Insert thumb drive loaded with .prf files into Super Pre’S USB port
Turn the Bass/Mem1 knob to select Speaker-File on your thumb Drive
you want to store in memory
Turn the Trbl/Bright knob to select which profile memory location to
store the Speaker-File in
Press any knob to Store Speaker-Profile.
The first screen below shows the software prompting the user to insert a USB thumb drive into
the Super Pre’s USB port in order to load a new Speaker-File (*.PRF file). The second screen
shows the HDN212 profile being loaded into memory slot 3 of the Super Pre’s profile memory.
Once loaded into one of the twelve Super Pre’s Profile memory slots, the new
Speaker-File can be loaded into the Super Pre’s Profile EQ filters by cycling back
to the Profile Select menu and turning the Bass/Filters knob until the desired
profile name is indicated on the OLED display.
Screen 12 - Main Phase Menu
This menu allows you to reverse the phase of the Super Pre’s main line output to help
eliminate any possible feedback or phasing issues experienced in a live or recording
environment. It does not affect the phase of the DI out.
Turning the Bass/Mem1 knob
Normal Reverse
Table of contents
Other Bergantino Amplifier manuals


