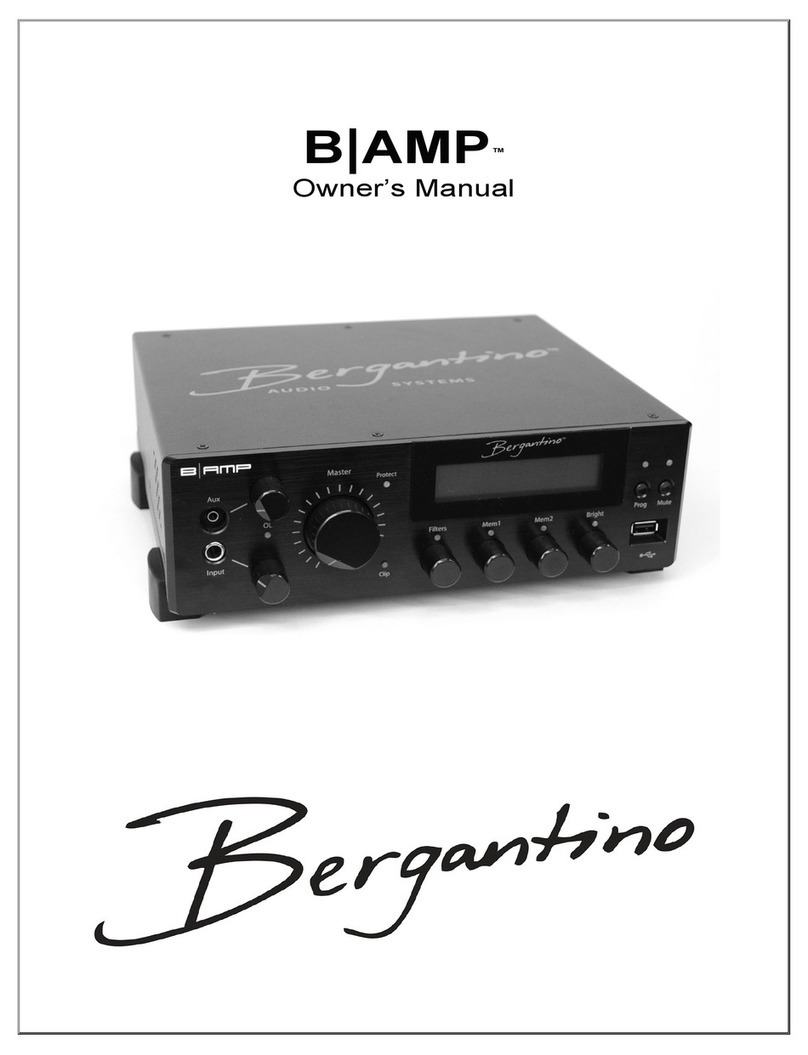
Bergantino forte HP User manual

fort
é HP
™
Owner’s Manual

2
Table of Contents
Important Safety Instructions..........................................................................................3
Introduction.....................................................................................................................4
Quick Start......................................................................................................................5
Front Panel Controls and Operation...............................................................................6
Rear Panel Controls and Operation................................................................................8
Accessories……………………………………………………………………………………..9
Installation and Maintenance……………..……………………………………………… .10
Specifications ......................................................................................................……..11
Warranty Information...............................................................................................….12
*All Features and specifications are subject to change without notice.
This list is subject to change without notice.
WARNING: This amplifier can produce sound pressure levels that may damage your hearing.
Always operate at a safe listening level or use hearing protection if operating at higher levels.
Bergantino Audio Systems
1 Main Street, Building 12
Whitinsville, MA, 01588
508-234-4195
info@bergantino.com
www.bergantino.com
Manual Version: 1.1

3
IMPORTANT SAFETY INSTRUCTIONS
READ THESE INSTRUCTIONS:
Please read all safety and operating instructions before connecting and operating this product.
This manual should be kept for future reference.
VERIFY AC CIRCUIT CAPACITY BEFORE USE:
Your new Bergantino forté HP comes equipped with a UPS (Universal Power Supply) capable
of operating from 100 –240VAC (~), 50/60Hz with no user adjustments or switching
necessary. The high-power output of your amplifier may require heavy current draw under full-
load conditions. Connecting multiple amplifiers to the same circuit, or connecting the amplifier
to the same circuit used by other heavy power devices, such as high-wattage lights, may
cause circuit breakers to trip. It is always a good idea to avoid using any audio equipment on
the same AC circuit as equipment with motors, such as air conditioners or refrigerators. This
will lessen the possibility of power variation and electrical start-up noise affecting your sound.
EARTH GROUNDING CONNECTION:
To prevent electric shock, do not remove the grounding plug on the power cord. Do not use
any plug or extension cord that does not have a grounding plug provided. Make certain that the
AC outlet is properly grounded as well. Do not use an adapter plug with this product.
PROTECT THE POWER CORD:
Do not walk on or let the cord become pinched, particularly at plugs, convenience receptacles
and the point where they exit from the apparatus. To avoid safety hazards, use only the power
cord supplied with your unit. We do not recommend using an extension cord with this product.
Damaged power cords should be replaced immediately with cords meeting factory
specifications. If a replacement cord is used, make certain that it is of consistent quality and
gauge as the original and is UL/IEC Certified. When disconnecting the power cord from an AC
outlet, always pull the plug, never pull the cord. If you do not intend to use the amplifier for a
considerable length of time, disconnect the plug from the AC outlet.
DO NOT USE THIS APPARATUS NEAR WATER:
Never expose the amplifier to rain, moisture, dripping or splashing water. Do not place objects
filled with liquids on or nearby the amplifier.
DO NOT OPEN THE AMPLIFIER ENCLOSURE:
There are no user-serviceable components inside this product. Opening the amplifier
enclosure may present a shock hazard and modification to the product will void your warranty.
If liquid enters the unit or any metal object, such as a piece of wire accidentally falls inside the
enclosure, immediately disconnect the unit from the AC power source immediately and consult
an authorized service station.
UNPACKING:
The carton and packing materials used in shipping your new amplifier were specially designed
to cushion it from the shocks and vibration that occur during transport. We suggest that you
save the carton and packing materials for use in shipping, in the event you move, or the
amplifier needs repair.

4
INTRODUCTION
Congratulations on your choice of the Bergantino Audio Systems’ forté HP as your amplifier
and welcome to the Bergantino family! First, we would like to thank you for choosing
Bergantino Audio Systems as your amplifier company. This is something we never take for
granted. We are confident that your new amplifier will bring you many years of trouble free use
and we feel that our high quality design and build standards will help you reach your creative
goals.
The Bergantino Audio Systems’forté HP is a state-of-the-art bass amplifier, designed to
deliver maximum tone and performance, yet is extremely simple to operate.
Design features include:
DSP, Embedded System Controlled, Bass Amplifier
o4 Tone Controls and Bright filter:
Bass: +/- 10db @ 65hz
LoMid::+/- 10db @ 250hz
HiMid: +/- 10db @ 1khz
Treble: +/- 10db @3.5khz
Bright: +6db @ 2khz or +8db @7khz software selectable
VHPF (Variable High Pass Filter) 30hz –120hz
VLPF (Variable Low Pass Filter) 1khz –10khz
Auxiliary input and headphone jack for personal monitor and practice use
VRC (Variable Ratio Compressor)
Drive for tube-like sound
Punch +4.5db @ 100hz
Effects send and Return loop
Studio quality Direct Output, user selectable Pre or Post EQ
UPS –Universal power supply 115VAC- 240VAC 50/60Hz
Power Section: 600W RMS at 8-ohm, 1200W RMS at 4-Ohms or 2-Ohms
oUser selectable, speaker impedance matching for optimal power transfer down to
2-Ohm minimum load.
INTELLIGENT COOLING:
The forté HP utilizes a Class D amplifier that generates less than half the heat of conventional
amplifiers. In order to maintain a cooler running amp, we’ve incorporated an intelligent cooling
system to ensure many years of trouble free service. When the amp is under light load, the
fan is off. If the amp should reach a specified operating temperature, the micro-controller in the
forté HP will turn the fan on automatically until it is cooled to a safe operating temperature. In
addition to sensing the temperature of the amp, our unique system also features an anticipated
cooling condition by monitoring the position of the Master Volume control. Beginning at 12:00,
the fan is automatically engaged to preempt hotter temperatures at higher operating levels. In
addition, to help maintain silent operation for those quieter environments when no music is
being played, the fan is automatically disengaged when the amp is muted to help maintain
silent operation. In 2-ohm mode the fan is always engaged.

5
QUICK START
!!!Warning!!!
Mute amp before powering down to avoid loud pop thru connected loudspeaker(s) or
headphones!
The Bergantino Audio Systems’ forté HP is designed to be simple to operate. These
directions will take you through the basics and give you a good start for setting up your sound.
1. PLUG IN THE forté HP:
With the power switch in the Off position, connect the supplied power cord from the amplifier
AC receptacle, to an AC power outlet of proper voltage and power rating.
2. CONNECT YOUR SPEAKER CABINETS:
Connect your speaker cabinet(s) to either of the Speak-On outputs (these are wired in parallel
so you can use either one) using a minimum of 16awg cable. Be sure not to exceed the
minimum recommended speaker load. The minimum recommended speaker loads for the
forté HP are user selectable via the Mute button for 2-Ohm and 4/8-Ohm operation. The
initial default setting is 4/8-Ohm.
3. PLUG IN YOUR BASS:
Using a quality instrument cable, connect your bass to the input jack and turn the power switch
on. If you have active tone controls on your bass, turn all of the controls to the middle or flat
position and adjust the volume to the maximum point you would normally use. If you have a
passive bass, turn all tone and volume controls all the way up.
4. INPUT LEVEL AND MASTER VOLUME SETTINGS:
When first turning on the forté HP,set the tone controls to the flat (12:00 position), and the
Instrument Gain and Master Volumes to off (fully CCW).
For proper operation, it is very important to adjust the input gain level properly. To adjust the
input gain level, turn the master volume and input gain of the forté HP all the way down
(CCW). Next, put the volume controls on your instrument at the maximum level you will be
using them at and play your bass like you normally would, including hard dynamic attacks.
Gradually increase the input gain control (clockwise) until the OL (overload) indicator just
begins to flash. Once flashing, reduce the Input Gain (CCW) slightly for some additional
headroom before clipping. It is acceptable if you have the input gain level all the way up with
lower output instruments without being able to engage the OL indicator.
Once you’ve matched the maximum signal from your bass without overloading the input stage
of the amplifier, increase the master volume of the forté HP by turning the master volume knob
in a clockwise direction to the desired level. You should be hearing your bass quite well at this
point. You should now only use the Master volume now to achieve your desired sound level.
For clear, undistorted sound, it’s very important not to overdrive the input stage of the
forté HP. If you increase in level any tone or volume control on your bass after
adjusting the input gain, check to make sure the OL indicator isn’t flashing.

6
FRONT PANEL CONTROLS AND OPERATION
1. Aux Input: A standard 1/8” mini stereo jack to plug in an external sound source (iPod, MP3
player, etc.). Maximum, unclipped input level is 2Vrms.
2. VRC (Variable Ratio Compressor): Controls the amount of compression. Turning CW will
engage compressor and increase amount and ratio of compression.
3. Input: A 1/4” unbalanced input jack to plug in an active or passive bass into a studio quality,
high impedance, input buffer.
4. Gain: Gain control for the Instrument input. Adjust this level to obtain maximum input gain
before any flashing of the OL indicator occurs.
5. OL (overload) Indicator: Indicates the input stage of the forté HP is being overdriven when
flashing yellow. If an overload condition is indicated, turn appropriate gain knob (Aux or Input)
counterclockwise to reduce gain until no flashing occurs and adjust master volume to achieve
desired volume.
6. Master (volume): This control raises and lowers the Master volume of the forté HP.
7. Protect Indicator: Should the amp experience a fault (overheat, over-current) the amp will
mute the output and this LED will turn red until the condition is corrected. Check and make
sure there are no obvious conditions causing the amp to enter protect mode such as a shorted
speaker cable or the fan or vent holes being blocked on the outside of the unit.
8. Clip Indicator: This indicator will flash yellow when the forte’ HP senses an overdriven or
clipped signal at its output. This is an indication that the amplifier is being driven beyond its
ability to produce a clean, undistorted output signal. It’s acceptable to see the occasional
flashing of this indicator on loud peaks. However, continuous, sustained illumination of this
indicator should be avoided.
9. Drive Control: This control determines the signal level into the drive effect of the forté HP.
10. Drive Engage: This button engages/disengages the Drive effect and is switchable via our
Bluetooth Footswitch (BTFS).

7
11. Drive Engage Indicator: Illuminates orange when Drive is engaged
12. VLPF: This control adjusts the Low-Pass frequency of the amp from 1khz to 10khz.
13. VHPF: This control adjusts the High-Pass frequency of the amp from 30hz to 120hz.
14. Bass Control: This control adjusts the bass frequencies +/- 10db @ 65hz
15. LoMid Control: This control adjusts the LoMid frequencies +/- 10db @ 250hz
16. HiMid Control: This Control adjusts the HiMid frequencies +/- 10db @ 1khz
17. Treble Control: This control adjusts the treble frequencies +/- 10db @ 3.5khz
18: Punch Engage Indicator: This indicator illuminates orange when Punch is engaged
19. Punch Engage: This button engages the Punch filter of the amp and is switchable via our
BTFS.
20. DI Pre/Post EQ Indicator: Illuminates green when “pre”is selected and yellow when
“post”is selected. To toggle selection, push and hold Punch Indicator for 3 seconds.
21. Bright Engage indicator: Illuminates green when Bright is engaged
22. Bright Engage: This button engages/disengages the bright filter and is switchable via our
BTFS. It also toggles the Bright frequency between +6db @ 2khz (green led) and +8db @
7khz (yellow led) when pressed and held for 3 seconds.
23. Bright Frequency Indicator: Illuminates green when 2khz is selected and yellow when
7khz is selected.
24. Mute Engage Indicator: Illuminates red when Mute is engaged.
25. Mute Engage: When Mute is engaged, the red Mute LED will illuminate and the amplifier’s
Main output and DI output will be muted. The tuner output in the back of the amp will remain
unmuted for silent tuning operation with external tuner. Pressing and holding the Mute button
for 3 seconds will toggle the forté HP between 4/8-ohm (green led) operation and 2-ohm
(yellow) operation. As a reminder, the cooling fan will continuously run in 2-ohm mode.
Remember to always mute the amp before shutdown to avoid loud pop thru
connected speaker(s)!
26. 4/8-ohm or 2-ohm Indicator: Illuminates green when 4/8-ohm operation is selected and
yellow when 2-ohm operation is selected. (Fan is automatically engaged when operating in 2-
ohm mode).
27: USB Port: Use this port to insert Dongle for BTFS operation or install new firmware
should it become available.

8
REAR PANEL CONTROLS AND OPERATION
1. Power Switch: Turns the amplifier on or off
2. AC Receptacle: The power cord is detachable and plugs in here
3. Tuner (output): This connecter is a ¼” unbalanced output and serves as the tuner out
4: Headphone (output): 1/4” Stereo headphone jack designed to drive full-range headphones
5. Effects Send: Unbalanced 1/4” connector used when sending a full range, instrument level,
mono signal to an external device (effects, processors, etc.)
6. Effects Return: Is an unbalanced 1/4” connector that accepts an instrument or line level
return from external effects that are connected in a “series loop”. It has a 1Vrms max. input
level. If the OL LED illuminates, turn down levels from previous gain stages in the signal chain.
7. Ground Lift: This switch disconnects the ground on the balanced Direct Out, XLR output to
eliminate hum and buzz when the amplifier is connected to equipment that is running on a
different ground system.
8. Direct Out: Studio quality DI sends an electronically balanced output signal eliminating the
need for an external DI. This output can be selected to be PRE- EQ or POST- EQ (user
selectable with Bright button). The DI out is 48V phantom power protected.
9. Speaker Outputs: Parallel Speak-On output connectors (Neutrik NL4 1+/1-). The minimum
recommended speaker load for the forté HP is user selectable down to a 2-ohm minimum. A
minimum of 16awg speaker cable is highly recommended.
10: Cooling Fan: The onboard microcontroller monitors the amplifier temperature and
engages the cooling fan when needed to reduce the amplifier temperature.

9
forté HP ACCESSORIES
.
Rack Ears
Optional Rack Ears are available to make your forté HP rack mountable in a standard 19” rack
mount system. When rack-mounted, the forté HP will occupy 2 full rack spaces (3.5”).
To mount the optional rack ears simply remove the bottom feet of the amp by removing the 8
screws securing them. Align the rack ears’ mounting slots with the six threaded inserts on
each side of the amp. **These rack ears offer you the convenience of adjusting how far
forward or back you want to rack you amp in its case to ensure safe transport** Use the 12,
#6-32 screws supplied to attach the Rack Ears to the sides of the amp. Rack screws are NOT
included.
Bluetooth Footswitch (BTFS)
The optional Bluetooth footswitch will allow the user to toggle On and Off the Drive, Punch,
and Bright circuits as well as Mute and Unmute the amp. It will allow wireless control of the
above functions up to approx. 30 feet from the amp.
Operation and Pairing
To operate, simply put the supplied Dongle in the USB port of the amp, turn the BTFS on and
then turn the amp on. The continuous flashing blue light on the pedal will slow considerably
(every 3 seconds), signaling the pedal is paired with the dongle.
Charging the Pedal Battery
To charge the battery, insert the supplied charging cable into the port and plug the other end
into any USB source. You can also use a center negative power supply that is 5-9 V (9V
preferred). Charging from a laptop or a computer with a sleep setting is not recommended. A
charge will last for about 200 hours.
Pedal LED Indications
LED Indication State
3 red flashes when attempting to power on Battery is too low to operate
Red flash every 3 seconds Battery is low
Red flash once a second Charging
Solid red Fully charged
Blue flashing rapidly (twice a second) Ready to connect
Blue flashing very rapidly (5 times a second) Connecting
Blue flash every 3 seconds Connected
Solid blue Footswitch pressed

10
INSTALLATION AND MAINENANCE
INSTALLATION:
To ensure proper operation and to avoid potential safety hazards, place the unit on a firm, level
surface.
Make certain that proper space is provided for ventilation. Never block the fan or the fan vent
holes on the side of the amplifier. If the amplifier will be installed in a rack or other enclosed
area, make sure that there is sufficient air movement within the enclosure to allow proper
cooling. Consult your dealer or Bergantino Audio Systems for more information if needed.
Avoid installation in extremely hot or cold locations, and areas that are exposed to direct
sunlight, or near heating equipment.
MOVING THE UNIT:
Before moving the unit, be certain to disconnect any interconnection cords with other
components, and make sure that you disconnect the unit from the AC outlet.
CLEANING:
When the unit gets dirty, clean only with a dry cloth. Never use benzene, thinner, alcohol, or
other volatile cleaning agents. Do not use abrasive cleaners, as they may damage the finish of
metal parts. Avoid spraying insecticides near the unit.
MAINTENANCE:
Your new amplifier is rugged. It was built to give you years of trouble-free operation, if it is
operated in accordance with the instructions contained in this manual. The only maintenance
required is cleaning. If you are going to move your amplifier around frequently, we recommend
a travel case to protect it from scratches and road wear. Do not use excessive force in
handling control buttons, switches and controls. Do not use solvents such as benzene or paint
thinner to clean the unit. Wipe off the exterior with soft cloth.
To avoid damaging your speakers and other playback equipment, turn off the power of all
related equipment before making any connections.
No user serviceable parts inside. Refer service to qualified personnel. Always unplug AC
power before removing chassis. EXPORT MODELS: Make certain grounding conforms to local
standards. Always insure that amplifier is properly grounded. When replacing fuse, use only
same type and rating.
READ AND FOLLOW INTRUCTIONS OF PROPER USAGE

11
forté HP SPECIFICATIONS
Output Power:(User selectable –4/8 Ohm or 2 ohm)
600Watts @ 8-ohm
1200Watts @ 4-ohm
1200Watts @ 2-ohm
Maximum Input Levels:
Main Input: 4Vrms
Aux. Input: 2Vrms
Effects Return:1Vrms
Input/Output Impedances:
Input Impedance 1M ohm
Aux. input Impedance 20k ohm
Send output Impedance 600 ohm
Return input Impedance 20k ohm
Tuner Output Impedance 1.0k ohm
DI Output Impedance 600 ohm
Tone Controls (Peaking Type):
Bass: +/- 10db @ 65Hz
LoMid: +/- 10db @ 250Hz
HiMid: +/- 10db @1kHz
Treble: +/- 10db @3.5khz
Bright Filters: +6db @ 2khz, +8db @ 7khz
Punch: +4.5db @ 100hz
Cooling: micro-controlled fan
Amplifier Protection: Full short circuit and thermal protection.
Dimensions (H x W x D): 13.75” W x 8.375” D x 3.75” H
Weight: 6.5 lbs.
Power Requirements:
90VAC-240VAC 50/60Hz
10.0 Amps (Internal T10A/250V fuse)
Power consumption: 250 Watts @ P-audio = 150 watts
PRODUCT REGISTRATION
Please take a moment to register your new product to receive any future updates.
www.Bergantino.com/warrant-registration

12
WARRANTY INFORMATION
Bergantino Audio Systems, 1 Main Street, Whitinsville, MA 01588 U.S.A. warrants to you, the ORIGINAL
PURCHASER of the Bergantino Audio Systems forté HP,for a period of two (2) years from the date of purchase
by the original purchaser (the "warranty period") that the new Bergantino Audio product is free of defects in
materials and workmanship. We further warrant the new Bergantino Audio product regardless of the reason for
failure, except as excluded in this Warranty.
ITEMS EXCLUDED FROM THIS Bergantino Audio WARRANTY
This Bergantino Audio Warranty is in effect only for failure of a new Bergantino Audio product that occurred within
the Warranty Period. It does not cover any product, which has been damaged because of any intentional misuse,
accident, negligence, or loss, which is covered under any of your insurance contracts. This Bergantino Audio
Warranty also does not extend to the new Bergantino Audio product if the serial number has been defaced,
altered, or removed.
WHAT THE WARRANTOR WILL DO
We will remedy any defect, regardless of the reason for failure (except as excluded), by repair or replacement.
Warranty work can only be performed at our authorized service centers or at the factory. Warranty work for some
products can only be performed at our factory. We will remedy the defect and ship the product from the service
center or our factory within a reasonable time after receipt of the defective product at our authorized service
center or our factory. The customer will bear the expenses of shipping the product to Bergantino Audio in
remedying the defect, including surface shipping costs in the United States, while return shipment will be borne by
Bergantino Audio. (You must bear the expense of shipping the product between any foreign country and the port
of entry in the United States including the return shipment, and all taxes, duties, and other customs fees for such
foreign shipments.)
HOW TO OBTAIN WARRANTY SERVICE
You must notify us of your need for warranty service within the warranty period. All components must be shipped
in a factory pack, which, if needed, may be obtained from us for a minimal charge. Corrective action will be taken
within a reasonable time of the date of receipt of the defective product by our authorized service center or us. If
the repairs made by us or our authorized service centers are not satisfactory, notify our authorized service center
or us immediately.
DISCLAIMER OF CONSEQUENTIAL AND INCIDENTAL DAMAGES
YOU ARE NOT ENTITLED TO RECOVER FROM US ANY INCIDENTAL DAMAGES RESULTING FROM ANY
DEFECT IN THE NEW Bergantino Audio PRODUCT. THIS INCLUDES ANY DAMAGE TO ANOTHER
PRODUCT OR PRODUCTS RESULTING FROM SUCH A DEFECT. SOME STATES DO NOT ALLOW THE
EXCLUSION OR LIMITATIONS OF INCIDENTAL OR CONSEQUENTIAL DAMAGES, SO THE ABOVE
LIMITATION OR EXCLUSION MAY NOT APPLY TO YOU.
WARRANTY ALTERATIONS
No person has the authority to enlarge, amend, or modify this Bergantino Audio Warranty. This Bergantino Audio
Warranty is not extended by the length of time that you are deprived of the use of the new Bergantino Audio
product. Repairs and replacement parts provided under the terms of this Bergantino Audio Warranty shall carry
only the unexpired portion of this Bergantino Audio Warranty.
DESIGN CHANGES
We reserve the right to change the design of any product from time to time without notice and with no obligation to
make corresponding changes in products previously manufactured.
LEGAL REMEDIES OF PURCHASER
THIS Bergantino Audio WARRANTY GIVES YOU SPECIFIC LEGAL RIGHTS; YOU MAY ALSO HAVE OTHER
RIGHTS THAT VARY FROM STATE TO STATE. No action to enforce this Bergantino Audio Warranty shall be
commenced after expiration of the warranty period.
THIS STATEMENT OF WARRANTY SUPERSEDES ANY OTHERS CONTAINED IN THIS MANUAL FOR
Bergantino Audio PRODUCTS.
This manual suits for next models
1
Table of contents
Other Bergantino Amplifier manuals
