manuals.online logo
Brands
  1. Home
  2. •
  3. Brands
  4. •
  5. Bernard
  6. •
  7. Welding System
  8. •
  9. Bernard TGX Series User manual

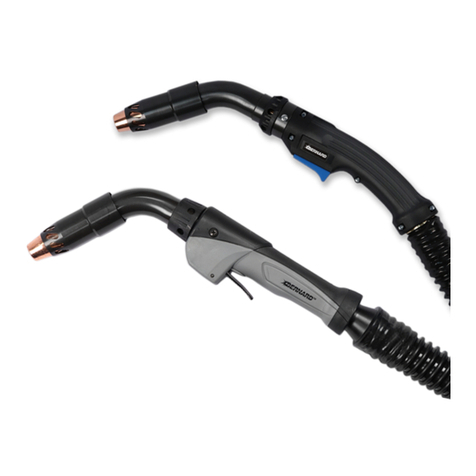
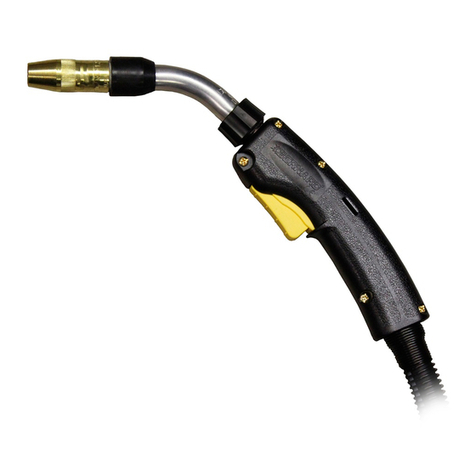
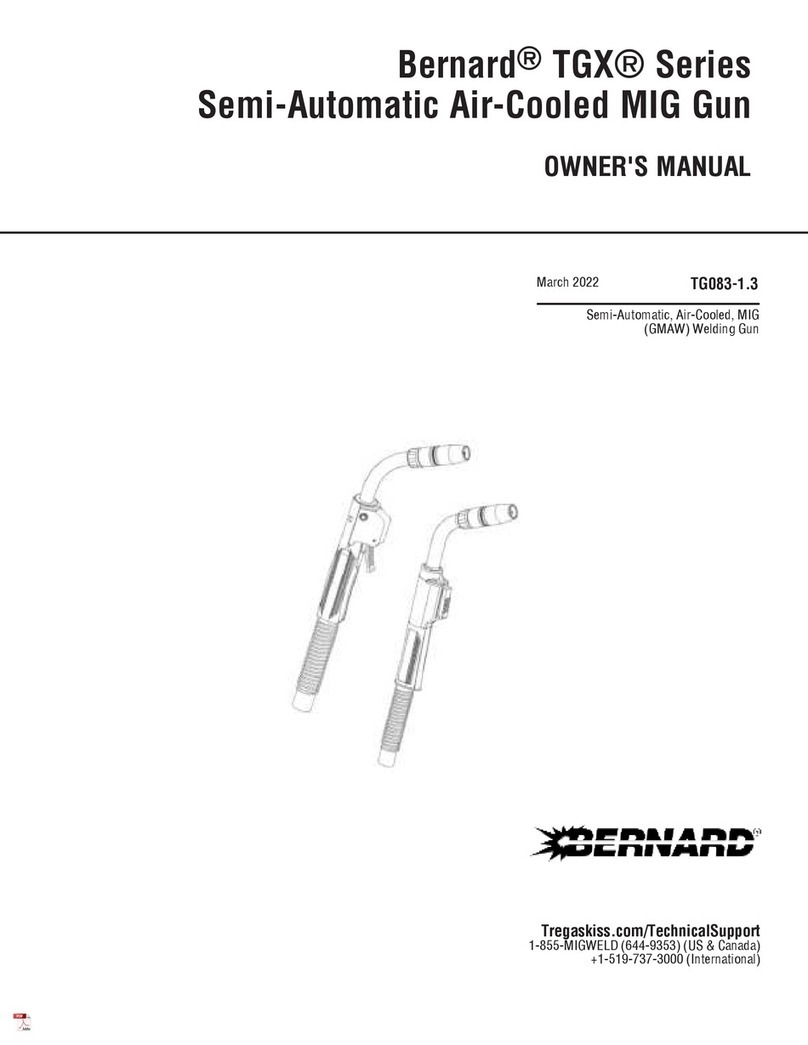
Bernard TGX Series User manual

Semi-Automatic, Air-Cooled, MIG
(GMAW) Welding Gun
Tregaskiss.com/TechnicalSupport
1-855-MIGWELD (644-9353) (US&Canada)
+1-519-737-3000 (International)
February 2022 TG083-1.2
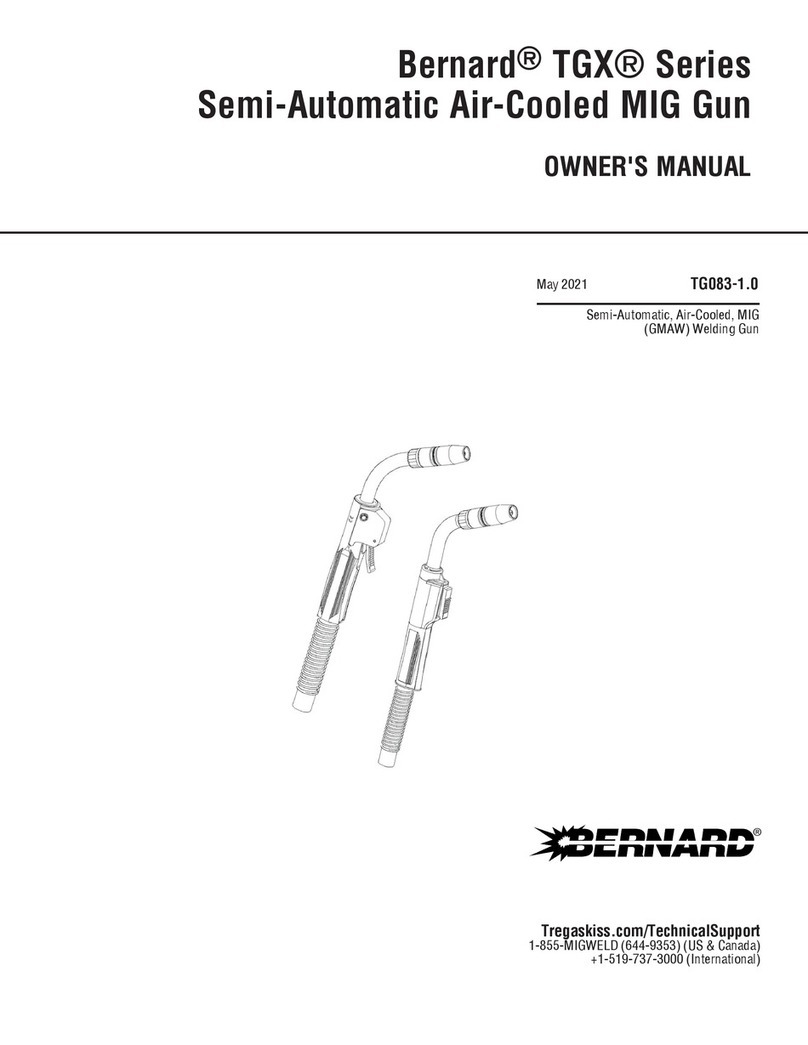
Bernard® TGX® Series
Semi-Automatic Air-Cooled MIG Gun
OWNER'S MANUAL
ThankYouforChoosingBernard
ThankyouforselectingaBernardproduct.Beforeinstalling,comparetheequipmentreceivedagainsttheinvoicetoverifythattheshipment
iscompleteandundamaged.Itistheresponsibilityofthepurchasertofileallclaimsofdamageorlossthatmayhaveoccurredduring
transitwiththecarrier.
Theowner’smanualcontainsgeneralinformation,instructionsandmaintenancetohelpbettermaintainyourMIGgunorperipheral.Please
read,understandandfollowallsafetyprecautions.
Whileeveryprecautionhasbeentakentoassuretheaccuracyofthisowner’smanual,Bernardassumesnoresponsibilityforerrorsor
omissions.Bernardassumesnoliabilityfordamagesresultingfromtheuseofinformationcontainedherein.Theinformationpresentedin
thisowner’smanualisaccuratetothebestofourknowledgeatthetimeofprinting.PleasereferenceTregaskiss.comforupdatedmaterial.
Forcustomersupportandspecialapplications,pleasecalltheBernardCustomerServiceDepartmentat1-855-MIGWELD(644-9353)(US&
Canada)or+1-519-737-3000(International),fax1-708-946-6726,oremailat[email protected].OurtrainedCustomerServiceTeamis
availablebetween8:00a.m.and5:30p.m.EST,andwillansweryourproductapplicationorrepairquestions.
Bernardmanufacturespremiumsemi-automatic(GMAW)andFCAW(flux-cored)weldingguns,consumables,accessoriesandmanualarc
products.FormoreinformationonotherBernardproducts,contactyourlocalBernarddistributororvisitusonthewebatTregaskiss.com.
2
Protect yourself and others from injury – read, follow,
and save these important safety precautions and
operating instructions.
1-1 Symbol Usage
DANGER! – Indicates a hazardous situation which, if
not avoided, will result in death or serious injury. The
possible hazards are shown in the adjoining symbols
or explained in the text.
Indicates a hazardous situation which, if not avoided,
could result in death or serious injury. The possible
hazards are shown in the adjoining symbols or
explained in the text.
NOTICE–Indicatesstatementsnotrelatedtopersonalinjury.
– Indicatesspecialinstructions.
ThisgroupofsymbolsmeansWarning!WatchOut!
ELECTRICSHOCK,MOVINGPARTS,andHOTPARTShazards.
Consultsymbolsandrelatedinstructionsbelowfornecessary
actionstoavoidthehazards.
1-2 Arc Welding Hazards
Thesymbolsshownbelowareusedthroughoutthis
manualtocallattentiontoandidentifypossiblehazards.
Whenyouseethesymbol,watchout,andfollowthe
relatedinstructionstoavoidthehazard.Thesafetyinformation
givenbelowisonlyasummaryofthemorecompletesafety
informationfoundinsection1-4PrincipalSafetyStandardson
page3,andinweldingpowersourceOwner'sManual.Readand
followallSafetyStandards.
Onlyqualifiedpersonsshouldinstall,operate,maintain,
andrepairthisequipment.Aqualifiedpersonisdefined
asonewho,bypossessionofarecognizeddegree,
certificate,orprofessionalstanding,orwhobyextensive
knowledge,trainingandexperience,hassuccessfully
demonstratedabilitytosolveorresolveproblemsrelatingtothe
subjectmatter,thework,ortheprojectandhasreceivedsafety
trainingtorecognizeandavoidthehazardsinvolved.
Duringoperation,keepeverybody,especiallychildren,
away.
ELECTRIC SHOCK can kill.
lAlwaysweardryinsulatinggloves.
lInsulateyourselffromworkandground.
lDonottouchliveelectrodeorelectricalparts.
lReplaceworn,damaged,orcrackedgunsorcables.
lTurnoffweldingpowersourcebeforechangingcontacttipor
gunparts.
lKeepallcoversandhandlesecurelyinplace.
FUMES AND GASES can be hazardous.
lKeepyourheadoutofthefumes.
lVentilatearea,orusebreathingdevice.The
recommendedwaytodetermineadequate
ventilationistosampleforthecomposition
andquantityoffumesandgasestowhichpersonnelare
exposed.
lReadandunderstandtheSafetyDataSheets(SDSs)andthe
manufacturer’sinstructionsforadhesives,coatings,cleaners,
consumables,coolants,degreasers,fluxes,andmetals.
MOVING PARTS can injure.
lKeepawayfrommovingparts.
lKeepawayfrompinchpointssuchasdrive
rolls.
WELDING can cause fire or explosion.
lDonotweldnearflammablematerial.
lDonotweldoncontainersthathaveheld
combustibles,oronclosedcontainerssuchas
tanks,drums,orpipesunlesstheyare
properlypreparedaccordingtoAWSF4.1andAWSA6.0(see
SafetyStandards).
lWatchforfire;keepextinguishernearby.
lReadandunderstandtheSafetyDataSheets(SDSs)andthe
manufacturer’sinstructionsforadhesives,coatings,cleaners,
consumables,coolants,degreasers,fluxes,andmetals.
BUILDUP OF GAS can injure or kill.
lShutoffcompressedgassupplywhennotin
use.
lAlwaysventilateconfinedspacesoruseapprovedair-
suppliedrespirator.
ARC RAYS can burn eyes and skin.
Arcraysfromtheweldingprocessproduceintense
visibleandinvisible(ultravioletandinfrared)rays
thatcanburneyesandskin.Sparksflyofffromthe
weld.
SECTION 1 — SAFETY PRECAUTIONS — READ BEFORE USING
3
lWearanapprovedweldinghelmetfittedwithapropershade
offilterlensestoprotectyourfaceandeyesfromarcraysand
sparkswhenweldingorwatching(seeANSIZ49.1andZ87.1
listedinSafetyStandards).
lWearapprovedsafetyglasseswithsideshieldsunderyour
helmet.
lUseprotectivescreensorbarrierstoprotectothersfrom
flash,glareandsparks;warnothersnottowatchthearc.
lWearbodyprotectionmadefromleatherorflame-resistant
clothing(FRC).Bodyprotectionincludesoil-freeclothing
suchasleathergloves,heavyshirt,cufflesstrousers,high
shoes,andacap.
HOT PARTS can burn.
lAllowguntocoolbeforetouching.
lDonottouchhotmetal.
lProtecthotmetalfromcontactbyothers.
NOISE can damage hearing.
Noisefromsomeprocessesor
equipmentcandamagehearing.
lCheckfornoiselevellimits
exceedingthosespecifiedby
OSHA.
lUseapprovedearplugsorearmuffsifnoiselevelishigh.
lWarnothersnearbyaboutnoisehazard.
WELDING WIRE can injure.
lKeephandsandbodyawayfromguntipwhen
triggerispressed.
READ INSTRUCTIONS.
lReadandfollowalllabelsandtheOwner's
Manualcarefullybeforeinstalling,operating,
orservicingunit.Readthesafetyinformation
atthebeginningoftheManualandineachsection.
lUseonlygenuinereplacementpartsfromthemanufacturer.
lPerforminstallation,maintenance,andserviceaccordingto
theOwner'sManuals,industrystandards,andnational,state,
andlocalcodes.
4
1-3 California Proposition 65 Warnings
WARNING:Thisproductcanexposeyoutochemicals
includinglead,whichareknowntothestateofCaliforniato
causecancerandbirthdefectsorotherreproductiveharm.
Formoreinformation,gotowww.P65Warnings.ca.gov.
1-4 Principal Safety Standards
Safety in Welding, Cutting, and Allied Processes,AmericanWelding
SocietystandardANSIStandardZ49.1.Website:www.aws.org.
Safe Practice For Occupational And Educational Eye And Face
Protection,ANSIStandardZ87.1,fromAmericanNational
StandardsInstitute.Website:www.ansi.org.
Safe Practices for the Preparation of Containers and Piping for
Welding and Cutting,AmericanWeldingSocietyStandardAWS
F4.1.Website:www.aws.org.
National Electrical Code,NFPAStandard70fromNationalFire
ProtectionAssociation.Website:www.nfpa.org.
Safe Handling of Compressed Gases in Cylinders,CGAPamphletP-
1fromCompressedGasAssociation.Website:www.cganet.com.
Safety in Welding, Cutting, and Allied Processes,CSAStandard
W117.2fromCanadianStandardsAssociation.Website:
www.csagroup.org.
Standard for Fire Prevention During Welding, Cutting, and Other
Hot Work,NFPAStandard51BfromNationalFireProtection
Association.Website:www.nfpa.org.
OSHA,OccupationalSafetyandHealthStandardsforGeneral
Industry,Title29,CodeofFederalRegulations(CFR),Part
1910.177SubpartN,Part1910SubpartQ,andPart1926,Subpart
J. Website:www.osha.gov.
SR72022-01
1-5 EMF Information
Electriccurrentflowingthroughanyconductorcauseslocalized
electricandmagneticfields(EMF).Thecurrentfromarcwelding
(andalliedprocessesincludingspotwelding,gouging,plasmaarc
cutting,andinductionheatingoperations)createsanEMFfield
aroundtheweldingcircuit.EMFfieldsmayinterferewithsome
medicalimplants,e.g.Pacemakers.Protectivemeasuresfor
personswearingmedicalimplantshavetobetaken.Forexample,
restrictaccessforpassersbyorconductindividualriskassessment
forwelders.Allweldersshouldusethefollowingproceduresin
ordertominimizeexposuretoEMFfieldsfromtheweldingcircuit:
1. Keepcablesclosetogetherbytwistingortapingthem,or
usingacablecover.
2. Donotplaceyourbodybetweenweldingcables.Arrange
cablestoonesideandawayfromtheoperator.
3. Donotcoilordrapecablesaroundyourbody.
4. Keepheadandtrunkasfarawayfromtheequipmentinthe
weldingcircuitaspossible.
5. Connectworkclamptoworkpieceasclosetotheweldas
possible.
6. Donotworknextto,sitorleanontheweldingpowersource.
7. Donotweldwhilstcarryingtheweldingpowersourcewire
feeder.
About Implanted Medical Devices:
ImplantedMedicalDevicewearersshouldconsulttheirdoctorand
thedevicemanufacturerbeforeperformingorgoingneararc
welding,spotwelding,gouging,plasmaarccutting,orinduction
heatingoperations.Ifclearedbyyourdoctor,thenfollowingthe
aboveproceduresisrecommended.
5
Pour écarter les risques de blessure pour vous-même
et pour autrui — lire, appliquer et ranger en lieu sûr
ces consignes relatives aux précautions de sécurité et
au mode opératoire.
2-1 Symboles utilisés
DANGER! – Indique une situation dangereuse qui si
on l’évite pas peut donner la mort ou des blessures
graves. Les dangers possibles sont montrés par les
symboles joints ou sont expliqués dans le texte.
Indique une situation dangereuse qui si on l’évite pas
peutdonner la mort ou des blessures graves. Les
dangers possiblessont montrés par les symboles
joints ou sont expliquésdans le texte.
AVIS – Indique des déclarations pas en relation avec des blessures
personnelles.
–Indique des instructions spécifiques.
CegroupedesymbolesveutdireAvertissement!Attention!
DANGERDECHOCELECTRIQUE,PIECESENMOUVEMENT,et
PIECESCHAUDES.Reportez-vousauxsymbolesetauxdirectives
cidessousafindeconnaîtrelesmesuresàprendrepourévitertout
danger.
2-2 Dangers relatifs au soudage à l'arc
Lessymbolesdonnésci-aprèssontutilisésdanstoutle
ma-nuelpourattirerl’attentionsurlesdangers
possiblesetpourindiquerletypededangerdontils’agit.
Quandonvoitlesymbole,prendregardeetsuivrelesdirectives
corres-pondantespouréviterledanger.Lesconsignesdesécurité
présentéesci-aprèsnefontquerésumerl’informationcontenue
danslesNormesdesécuritéprincipales,etdansleGuide
d’utilisationdelasourcedecourantdesoudage.Lireetsuivre
touteslesNormesdesécurité.
L'installation,l'utilisation,l'entretienetlesréparationsne
doiventêtreconfiésqu'àdespersonnesqualifiées.Une
personnequalifiéeestdéfiniecommecellequi,parla
possessiond'undiplômereconnu,d'uncertificatoud'unstatut
professionnel,ouqui,paruneconnaissance,uneformationetune
expérienceapprofondies,adémontréavecsuccèssacapacitéà
résoudrelesproblèmesliésàlatâche,letravailouleprojeteta
reçuuneformationensécuritéafindereconnaîtreetd'éviterles
risquesinhérents.
Aucoursdel'utilisation,tenirtoutepersonneàl'écartet
plusparticulièrementlesenfants.
UN CHOC ÉLECTRIQUE peut tuer.
lPortertoujoursdesgantssecsetisolants.
lS’isolerdelapièceetdelaterre.
lNejamaistoucheruneélectrodeoudespiècesélectriques
soustension.
lRemplacerlespistoletsoucâblesdesoudagequisont
endommagés,usésoucraquelés.
lMettrelasoudeusehorstensionavantderemplacerunbec
contactoudespiècesdepistolet.
lS’assurerquetouslescouverclesetpoignéessont
fermementassujettis.
LES FUMÉES ET LES GAZ peuvent être
dangereux.
lGarderlatêtehorsdesfumées.
lAérerlazonedetravailouporterunappareil
respiratoire.Pourdéterminerlabonne
ventilation,ilestrecommandédeprocéderàunprélèvement
pourlacompositionetlaquantitédefuméesetdegaz
auxquelsestexposélepersonnel.
lLireetcomprendrelesfichesdedonnéesdesécuritéetles
instructionsdufabricantconcernantlesadhésifs,les
revêtements,lesnettoyants,lesconsommables,lesproduits
derefroidissement,lesdégraisseurs,lesfluxetlesmétaux.
Les PIÈCES MOBILES peuvent causer des
blessures.
lNepass’approcherdesorganesmobiles.
lNepass’approcherdespointsdecoincement
telsquedesrouleauxdecommande.
Le SOUDAGE peut provoquer un incendie ou
une explosion.
lNepassouderàproximitédematériaux
inflammables
lNepaseffectuerlesoudagesurdesconteneursferméstels
quedesréservoirs,tambours,ouconduites,àmoinsqu’ils
n’aientétépréparéscorrectementconformémentàAWSF4.1
etAWSA6.0(voirlesNormesdeSécurité).
lPrendregardeauxincendiesettoujoursavoirunextincteurà
proximité.
SECTION 2 — CONSIGNES DE SÉCURITÉ — LIRE AVANT UTILISATION
6
lLireetcomprendrelesfichesdedonnéesdesécuritéetles
instructionsdufabricantconcernantlesadhésifs,les
revêtements,lesnettoyants,lesconsommables,lesproduits
derefroidissement,lesdégraisseurs,lesfluxetlesmétaux.
L'ACCUMULATION DE GAZ risquent de
provoquer des blessures ou même la mort.
lFermerl’alimentationdugazcompriméencas
denonutilisation.
lVeillertoujoursàbienaérerlesespacesconfinésouseservir
d’unrespirateurd’adductiond’airhomologué.
LE RAYONNEMENT DE L'ARC peut brûler les
yeux et la peau.
Lerayonnementdel’arcduprocédédesoudage
génèredesrayonsvisiblesetinvisiblesintenses
(ultravioletsetinfrarouges)susceptiblesde
provoquerdesbrûluresdanslesyeuxetsurlapeau.Desétincelles
sontprojetéespendantlesoudage.
lPorteruncasquedesoudageapprouvémunideverres
filtrantsappropriépourprotégervisageetyeuxpendantle
soudage(voirANSIZ49.1etZ87.1énumérédanslesnormes
desécurité).
lPorterdeslunettesdesécuritéavecécranslatérauxmême
sousvotrecasque.
lAvoirrecoursàdesécransprotecteursouàdesrideauxpour
protégerlesautrescontrelesrayonnementsles
éblouissementsetlesétincelles;prévenirtoutepersonnesur
leslieuxdenepasregarderl’arc.
lPorteruneprotectioncorporelleencuiroudesvêtements
ignifu-ges(FRC).Laprotectionducorpscomportedes
vêtementssanshuile,commedesgantsdecuir,unechemise
solide,despanta-lonssansrevers,deschaussureshauteset
unecasquette.
LES PIÈCES CHAUDES peuvent provoquer
des brûlures.
lLaisserrefroidirlepistoletavantdeletoucher.
lNepastoucherd’objetsmétalliqueschauds.
lAbriterlesobjetsmétalliquescontretoutcontactparles
personnesàproximité.
Le BRUIT peut endommager l’ouie.
Lebruitdesprocessusetdeséquipementspeut
affecterl’ouïe.
lVérifiersilesniveauxdebruitexcèdentles
limitesspécifiéesparl’OSHA.
lUtiliserdesbouche-oreillesoudesserre-têteantibruit
approuvéssileniveaudebruitestélevé.
lAvertirlespersonnesàproximitéausujetdudangerinhérent
aubruit.
.
LES FILS DE SOUDAGE peuvent provoquer
des blessures.
lÉloignerlesmainsetlecorpsdelabusedu
pistoletaprèsavoirappuyésurlagâchette.
LIRE LES INSTRUCTIONS.
lLireetappliquerlesinstructionssurles
étiquettesetleModed’emploiavant
l’installation,l’utilisationoul’entretiende
l’appareil.Lirelesinformationsdesécuritéaudébutdu
manueletdanschaquesection.
lN’utiliserquelespiècesderemplacementprovenantdu
fabricant.
lEffectuerl’installation,l’entretienettouteinterventionselon
lesmanuelsd’utilisateurs,lesnormesnationales,provinciales
etdel’industrie,ainsiquelescodesmunicipaux.
7
2-3 Proposition californienne 65 avertissements
AVERTISSEMENT–Ceproduitpeutvousexposeràdes
produitschimiquestelsqueleplomb,reconnusparl’Étatde
Californiecommecancérigènesetsourcesdemalformationsou
d’autrestroublesdelareproduction
Pourplusd’informations,consulterwww.P65Warnings.ca.gov.
2-4 Principales normes de sécurité
Safety in Welding, Cutting, and Allied Processes,AmericanWelding
SocietystandardANSIStandardZ49.1.Website:www.aws.org.
Safe Practice For Occupational And Educational Eye And Face
Protection,ANSIStandardZ87.1,fromAmericanNational
StandardsInstitute.Website:www.ansi.org.
Safe Practices for the Preparation of Containers and Piping for
Welding and Cutting,AmericanWeldingSocietyStandardAWSF4.1
fromGlobalEngineeringDocuments.Website:www.aws.org.
National Electrical Code,NFPAStandard70fromNationalFire
ProtectionAssociation.Website:www.nfpa.org.
Safe Handling of Compressed Gases in Cylinders,CGAPamphletP-
1fromCompressedGasAssociation.Website:www.cganet.com.
Safety in Welding, Cutting, and Allied Processes,CSAStandard
W117.2fromCanadianStandardsAssociation.Website:
www.csagroup.org.
Standard for Fire Prevention During Welding, Cutting, and Other Hot
Work,NFPAStandard51BfromNationalFireProtection
Association.Website:www.nfpa.org.
OSHA,OccupationalSafetyandHealthStandardsforGeneral
Industry,Title29,CodeofFederalRegulations(CFR),Part1910.177
SubpartN,Part1910SubpartQ,andPart1926,SubpartJ.Website:
www.osha.gov.
SR7_fre2022-01
2-5 Informations relatives aux CEM
Lecourantélectriquequitraversetoutconducteurgénèredes
champsélectromagnétiques(CEM)àcertainsendroits.Lecourant
issud’unsoudageàl’arc(etdeprocédésconnexes,ycomprisle
soudageparpoints,legougeage,ledécoupageplasmaetles
opérationsdechauffageparinduction)créeunchamp
électromagnétique(CEM)autourducircuitdesoudage.Leschamps
électromagnétiquesproduitspeuventcauserinterférenceàcertains
implantsmédicaux,p.ex.lesstimulateurscardiaques.Desmesures
deprotectionpourlesporteursd’implantsmédicauxdoiventêtre
prises:parexemple,desrestrictionsd’accèspourlespassantsou
uneévaluationindividuelledesrisquespourlessoudeurs.Tousles
soudeursdoiventappliquerlesprocéduressuivantespour
minimiserl’expositionauxCEMprovenantducircuitdesoudage:
1. Rassemblerlescâblesenlestorsadantouenlesattachantavec
durubanadhésifouavecunehousse.
2. Nepasseteniraumilieudescâblesdesoudage.Disposerles
câblesd’uncôtéetàdistancedel’opérateur.
3. Nepascourberetnepasentourerlescâblesautourdevotre
corps.
4. Maintenirlatêteetletorseaussiloinquepossibledumatériel
ducircuitdesoudage.
5. Connecterlapincesurlapièceaussiprèsquepossibledela
soudure.
6. Nepastravailleràproximitéd’unesourcedesoudage,ni
s’asseoirousepencherdessus.
7. Nepassoudertoutenportantlasourcedesoudageoule
dévidoir.
En ce qui concerne les implants médicaux :
Lesporteursd’implantsdoiventd’abordconsulterleurmédecin
avantdes’approcherdesopérationsdesoudageàl’arc,desoudage
parpoints,degougeage,ducoupageplasmaoudechauffagepar
induction.Silemédecinapprouve,ilestrecommandédesuivreles
procéduresprécédentes.
8
Protéjase usted mismo y a otros contra lesiones —
lea, cumpla y conserve estas importantes
precauciones de seguridad e instrucciones de
utilización.
3-1 Uso de símbolos
PELIGRO! – Indica una situación peligrosa que, si no
se la evita, resultará en muerte o lesión grave. Los
peligros posibles se muestran en los símbolos
adjuntos o se explican en el texto.
Indica una situación peligrosa que, si no se la evita,
podríaresultar en muerte o lesión grave. Los peligros
posiblesse muestran en los símbolos adjuntos, o se
explican en eltexto.
AVISO – Indica precauciones no relacionadas a lesiones
personales.
–Indica instrucciones especiales.
Estegrupodesímbolossignifica¡Advertencia!,¡Cuidado!
CHOQUEODESCARGAELÉCTRICA,PIEZASQUESEMUEVEN,y
peligrosdePARTESCALIENTES.Consultelossímbolosylas
instruccionesrelacionadasqueaparecenacontinuaciónparaver
lasaccionesnecesariasparaevitarestospeligros.
3-2 Peligros en soldadura de arco
Lossímbolosmostradosabajoseusanentodoeste
manualparallamarlaatenciónaeidentificarlosposibles
peligros.Cuandoveaelsímbolo,presteatenciónysiga
lasinstruc-cionesrelacionadasparaevitarelpeligro.La
informacióndeseguridaddadaabajoessolamenteunresumende
lain-formaciónmáscompletadeseguridadqueseencuentraen
losestandaresdeseguridad,ylafuentedealimentaciónpa-ra
soldaduradelManualdelusuario.Leaysigatodaslasnormasde
seguridad.
Solamentepersonalcualificadodebeinstalar,utilizar,
manteneryrepararesteequipo.Ladefiniciónde
personalcualificadoescualquierpersonaque,debidoa
queposeeuntítulo,uncertificadoounaposiciónprofesional
reconocida,ograciasasugranconocimiento,capacitacióny
experiencia,hayademostradoconéxitolacapacidadpara
solucionaroresolverproblemasrelacionadosconeltrabajo,el
proyectooeltemaencuestión,ademásdehaberasistidoauna
capacitaciónenseguridadparareconoceryevitarlospeligrosque
implicaelproceso.
Durantesuoperaciónmantengalejosatodos,
especialmentealosniños.
UNA DESCARGA ELÉCTRICA puede matarlo.
lSiempreuseguantesaislantessecos.
lAísleseustedmismodeltrabajoylatierra.
lNotoqueelectrodoeléctricamentevivoopartes
eléctricamentevivas.
lReemplaceantorchasocablesdesgastados,dañadosorotos.
lRepareoreemplaceaislamientodelapistolaodelcableque
estédesgastado,dañadooagrietado.
lApaguelamáquinadesoldarantesdecambiarlostubosde
contactoopiezasdelaantorcha.
lMantengatodaslastapasyasabiensegurasensitio.
HUMO y GASES pueden ser peligrosos.
lMantengasucabezafueradelhumo.
lVentileellugarouseunaparatopararespirar.
Elmétodorecomendadoparadeterminarla
ventilaciónadecuadaestomarmuestrasdela
composiciónycantidaddehumosygasesalosqueestá
expuestoelpersonal.
lLeayentiendalasHojasdedatosdelmaterial(SDS)ylas
instruccionesdelfabricanterelacionadasconlosadhesivos,
metales,consumibles,recubrimientos,limpiadores,
refrigerantes,desengrasadores,fundentesymetales.
Las PIEZAS MÓVILES pueden provocar
lesiones.
lAléjesedetodaparteenmovimiento.
lAléjesedetodopuntoquepellizque,talcomorodillos
impulsados.
EL SOLDAR puede causar fuego o explosión.
lNosueldecercadematerialinflamable
lNosueldeenrecipientesquehancontenido
combustibles,nienrecipientescerradoscomo
tanques,tamboresotuberías,amenosque
esténpreparadoscorrectamentedeacuerdoconlanorma
AWSF4.1yAWSA6.0(vealasnormasdeseguridad).
lSiempremirequenohayafuegoymantengaunextinguidor
defuegocerca.
lLeayentiendalasHojasdedatosdelmaterial(SDS)ylas
instruccionesdelfabricanterelacionadasconlosadhesivos,
metales,consumibles,recubrimientos,limpiadores,
refrigerantes,desengrasadores,fundentesymetales.
SECTION 3 — PRECAUCIONES DE SEGURIDAD — LEA ANTES DE USAR
9
EL AMONTONAMIENTO DE GAS puede
enfermarle o matarle.
lCierreelsuministrodegascomprimido
cuandonolouse.
lSiempredéventilaciónaespacioscerradosouseun
respiradoraprobadoquereemplazaelaire.
LOS RAYOS DEL ARCO pueden quemar sus
ojos y piel.
Losrayosdelarcodeunprocesodesuelda
producenuncalorintensoyrayosultravioletas
fuertesquepuedenquemarlosojosylapiel.Las
chispasseescapandelasoldadura.
lUseunacaretaparasoldaraprobadaequipadaconunfiltrode
protecciónapropiadoparaprotegersucarayojosdelos
rayosdelarcoydelaschispasmientrasestésoldandoo
mirando.(véaselosestándaresdeseguridadANSIZ49.1y
Z87.1).
lUseanteojosdeseguridadaprobadosquetenganprotección
lateral.
lUsepantallasdeprotecciónobarrerasparaprotegeraotros
deldestello,reflejosychispas,alerteaotrosquenomirenel
arco.
lUseprotecciónparaelcuerpohechadecueroodeprendas
resis-tentesalasllamas(FRC).Entrelaprotecciónparael
cuerposein-cluyelaropasinaceite,comoguantesdecuero,
unacamisagruesa,pantalonessinvuelta,calzadoaltoyuna
gorra.
PARTES CALIENTES puedan causar
quemaduras severas.
lPermitaquelaantorchaseenfríeantesde
tocarla.
lNotoquemetalcaliente.
lProtejaaotrosdelcontactoconelmetalcaliente.
EL RUIDO puede trastornar su oído.
Ruidoprovenientedealgunosprocesosoequipo
puededañareloído.
lChequeeloslímitesdelniveldelruidosi
excedenaquellosespecificadosporOSHA.
lUsetapasparalosoídosocubiertasparalosoídossielnivel
delruidoesdemasiadoalto.
lAdviertaaotrosqueesténcercaacercadelpeligrodelruido.
El ALAMBRE de SOLDAR puede causarle
heridas.
lMantengalasmanosyelcuerpolejosdeltubo
decontactodelaantorchacuandosehaya
presionadoelgatillo.
LEER INSTRUCCIONES.
lLeaysigacuidadosamentelasinstrucciones
contenidasentodaslasetiquetasyenel
Manualdelusuarioantesdeinstalar,utilizaro
realizartareasdemantenimientoenlaunidad.Leala
informacióndeseguridadincluidaenlaprimerapartedel
manualyencadasección.
lUtiliceúnicamentepiezasdereemplazolegítimasdel
fabricante.
lLostrabajosdeinstalaciónymantenimientodebenser
ejecutadosdeacuerdoconlasinstruccionesdelmanualdel
usuario,lasnormasdelsectoryloscódigosnacionales,
estatalesylocales.
10
3-3 Advertencias de la Proposición 65 del estado de California
ADVERTENCIA:Esteproductopuedeexponerloaquímicos,
inclusoplomo,queelestadodeCaliforniaconocecomo
causantesdecáncer,defectosdenacimientouotrosdaños
reproductivos.
Paraobtenermásinformación,accedaa
www.P65Warnings.ca.gov.
3-4 Estándares principales de seguridad
Safety in Welding, Cutting, and Allied Processes,AmericanWelding
SocietystandardANSIStandardZ49.1.Website:www.aws.org.
Safe Practice For Occupational And Educational Eye And Face
Protection,ANSIStandardZ87.1,fromAmericanNational
StandardsInstitute.Website:www.ansi.org.
Safe Practices for the Preparation of Containers and Piping for
Welding and Cutting,AmericanWeldingSocietyStandardAWSF4.1
fromGlobalEngineeringDocuments.Website:www.aws.org.
National Electrical Code,NFPAStandard70fromNationalFire
ProtectionAssociation.Website:www.nfpa.org.
Safe Handling of Compressed Gases in Cylinders,CGAPamphletP-
1fromCompressedGasAssociation.Website:www.cganet.com.
Safety in Welding, Cutting, and Allied Processes,CSAStandard
W117.2fromCanadianStandardsAssociation.Website:
www.csagroup.org.
Standard for Fire Prevention During Welding, Cutting, and Other
Hot Work,NFPAStandard51BfromNationalFireProtection
Association.Website:www.nfpa.org.
OSHA,OccupationalSafetyandHealthStandardsforGeneral
Industry,Title29,CodeofFederalRegulations(CFR),Part
1910.177SubpartN,Part1910SubpartQ,andPart1926,Subpart
J. Website:www.osha.gov.
SR7_spa2022–01
3-5 Información sobre los campos electromagnéticos (EMF)
Lacorrientequefluyeatravésdeunconductorgeneracampos
eléctricosymagnéticos(EMF)localizados.Lacorrientedelarcode
soldadura(yotrastécnicasafinescomolasoldaduraporpuntos,el
ranurado,elcorteporplasmayelcalentamientoporinducción)
generauncampoEMFalrededordelcircuitodesoldadura.Los
camposEMFpuedeninterferirconalgunosdispositivosmédicos
implantadoscomo,porejemplo,losmarcapasos.Porlotanto,se
debentomarmedidasdeprotecciónparalaspersonasqueutilizan
estosimplantesmédicos.Porejemplo,apliquerestriccionesal
accesodepersonasquepasanporlascercaníasorealice
evaluacionesderiesgoindividualesparalossoldadores.Todoslos
soldadoresdebenseguirlosprocedimientosqueseindicana
continuaciónconelobjetodeminimizarlaexposiciónaloscampos
EMFgeneradosporelcircuitodesoldadura:
1. Mantengaloscablesjuntosretorciéndolosentresío
uniéndolosmediantecintasounacubiertaparacables.
2. Noubiquesucuerpoentreloscablesdesoldadura.Disponga
loscablesaunladoyapártelosdeloperario.
3. Noenrollenicuelgueloscablessobresucuerpo.
4. Mantengalacabezayeltroncotanapartadosdelequipodel
circuitodesoldaduracomoleseaposible.
5. Conectelapinzademasaenlapiezalomáscercaposibledela
soldadura.
6. Notrabajecercadelafuentedealimentaciónparasoldadura,
nisesienteorecuestesobreella.
7. Nosueldemientrastransportalafuentedealimentaciónoel
alimentadordealambre.
Acerca de los aparatos médicos implantados:
Laspersonasqueusenaparatosmédicoimplantadosdeben
consultarconsumédicoyelfabricantedelaparatoantesdellevara
cabooacercarseasoldaduradearco,soldaduradepunto,ranurar,
hacercorteporplasma,uoperacionesdecalentamientopor
inducción.Sisudoctorlopermite,entoncessigalos
procedimientosdearriba.
11
SECTION 4 — PRODUCT WARRANTY
4-1 Product Warranty
Limited Warranty
Tregaskiss’Productsshall,fromthedateoforiginalpurchase(or,
solelywithrespecttoLowStressRoboticUnicablespackagedwith
anyTregaskiss®RoboticMIGGun,fromthedatetheproductgoes
intoproductionforitsintendeduse)andfortheperiodsetforth
below,befreefromdefectsinmaterialandworkmanship.Toobtain
repairorreplacementofanyProduct,thecoveredProductmustbe
delivered,transportationpre-paidbyPurchaser,totheaddress
specifiedbyTregaskissonitsReturnedMaterialsAuthorization,
with:(i)writtenproofofwarrantycoverage(e.g.,Purchaserdated
purchaseorder);(ii)serialnumberonproduct(ifany);(iii)the
Product’sinstalledlocationwithinPurchaser’sfacilityandusageof
theProduct;and(iv)writtenspecificationofanyallegeddefect(s).
Intheeventtheforegoingmaterialsarenottimelyprovidedto
Tregaskissbyclaimant,warrantycoveragewillbedeterminedby
Tregaskiss,initssolediscretion.Fortheavoidanceofdoubt,the
warrantyperiodforanyProductorpart/componentofanyProduct
thatisreplacedorrepairedbyTregaskissundertheforegoing
warrantyisnotextendedorrenewedatthetimeofsuch
replacementorrepair.The Warranty against defects does not
apply to: (1) consumable components or ordinary wear items;
(2) products which are improperly altered, modified, stored,
installed, operated, handled, used or neglected or use of the
Products with equipment, components or parts not specified or
supplied by Tregaskiss or contemplated under the Product
documentation; or (3) Products which have not been operated,
maintained, and repaired pursuant to Product documentation
provided by Tregaskiss. Purchaser shall pay Tregaskiss for all
warranty claim costs incurred by Tregaskiss (including
inspection, labor, parts, testing, scrap and freight) due to
warranty claims submitted by Purchaser which are not covered
by Tregaskiss’ warranty.
lBernard®BTBSemi-AutomaticAir-CooledMIGGuns:1 year;
Lifetime warranty on straight handles, straight handle
switches, and rear strain relief
lBernard®W-Gun™andT-Gun™Semi-AutomaticWater-
CooledMIGGuns:180 days
lBernard®TGX®ChassisandBernardTGXReadyToWeld
MIGGuns:90 days
lTregaskiss®RoboticMIGGunsandComponents:1 year
lTregaskiss®AutomaticMIGGuns:1 year
lTregaskiss®TOUGHGUN®Reamer:1 year
lWhenfactory-equippedwithlubricator:2 yearswhen
factory-equippedwithlubricator
lWhen(i)factory-equippedwithlubricatorand(ii)used
exclusivelywithTregaskiss®TOUGHGARD®Anti-Spatter
Liquid:3 yearswhenboth(i)and(ii)
lTregaskiss®TOUGHGUN®RoboticPeripheral(Clutch,
Sprayer,WireCutter,Arms):1 year
lTregaskiss®Low-StressRoboticUnicables(LSRUnicables):
6 months
Service Warranty
TregaskisswarrantstheServicesshallconformtoanymutually
agreeduponspecificationsorstatementsofwork.Purchaser’ssole
remedy,andTregaskiss’ssoleliability,forabreachoftheforegoing
warrantyisforTregaskiss,atitsoption,tore-performtheServices
orcreditPurchaser’saccountforsuchServices.
Limitation of Liability and Remedies
TREGASKISSWILLNOTBELIABLE,ANDPURCHASERWAIVES
ALLCLAIMSAGAINSTTREGASKISSFORINDIRECT,INCIDENTAL,
SPECIAL,PUNITIVEORCONSEQUENTIALDAMAGES,DOWNTIME,
LOSTPROFITSORCOMMERCIALLOSSES,WHETHERORNOT
BASEDUPONTREGASKISS’NEGLIGENCEORBREACHOF
WARRANTYORSTRICTLIABILITYINTORTORANYOTHER
CAUSEOFACTION.INNOEVENTWILLTREGASKISS’LIABILITYIN
CONNECTIONWITHTHEAGREEMENTORSALEOFTREGASKISS’
PRODUCTSORSERVICESEXCEEDTHEPURCHASEPRICEOFTHE
SPECIFICPRODUCTSORSERVICESASTOWHICHTHECLAIMIS
MADE.
12
1.0 –ASSEMBLY
1.1 ASSEMBLY INSTRUCTIONS –EASY AS 1-2-3! MIG GUNS ONLY
STEP #1
NOTE: Applies to all TGX XS and XL gun models
Remove gun from box and extend to full
length.
Slide nozzle off of front end of gun.
Thread retaining head off of front end of
gun.
Remove power pin from package and
thread on to rear of gun using a 3/4” (19
mm) wrench on the rear block and a 5/8”
(16 mm) or 3/4” (19 mm) wrench on power
pin. Torque to 18 ft.-lbs. (24.4 Nm). Install
power pin/block insulator.
STEP #2
Remove liner from package end extend to full length. Feed liner into the back end of the gun using short
strokes to avoid kinking. Twist liner counter clockwise if necessary, to ease insertion.
Seat liner retainer to end of power pin and using a 10 mm wrench, turn retainer in a clockwise direction and
tighten into power pin.
Measure the proper liner stick-out at the front end of the gun using liner gauge (provided). Before cutting,
push liner into gun to compress liner then cut the liner and remove any burrs that may obstruct wire feed.
STEP #3
Thread Tregaskiss™TOUGH LOCK™ Retaining
Head onto neck and securely tighten using a wrench.
Remove Tregaskiss TOUGH LOCK Contact Tip from
package and thread securely into head.
Slip nozzle fully onto head.
13
2.0 –INSTALLATION
2.1 INSERTING MIG GUN INTO A WIRE FEEDER
For most power pins
1. Insert power pin to shoulder and secure.
2. Insert control plug to control housing of MIG
gun.
3. Insert control plug into feeder.
4. Feed welding wire into power pin by hand and
tighten drive rolls.
NOTE: On Lincoln® feeders it is necessary to connect the gas hose to the barbed fitting on the power pin.
2.2INSTALLING QUICK CONNECT BLOCK TO FEEDER
STEP #1
Insert the correct feeder adaptor liner for desired wire
diameter (2 provided) flush with the threaded end of
the feeder adaptor.
Tighten set screw.
Thread feeder adaptor into Quick Connect Block and
tighten.
STEP #2
Position assembly into feeder adaptor and trim liner within 1/16”(1.6 mm)
of the drive rolls and remove burrs if necessary.
Secure assembly into feeder.
Connect gas hose to gas fitting on feeder.
Connect power cable to 1/2”(13 mm) power bolt with appropriate lug.
Tighten all connections.
Feed welding wire through assembly by hand and tighten drive rolls.
SET SCREW
FEEDER ADAPTOR
FEEDER ADAPTOR LINER
QUICK CONNECT
BLOCK
DRIVE
ROLLS
14
2.3INSTALLING GUN TO QUICK CONNECT BLOCK
Ensure correct liner and contact tip are utilized. Examine and replace power pin o-rings if necessary.
STEP #1
Guide welding wire into power pin.
Insert power pin to shoulder.
Tighten thumbscrew securely.
Connect control plug leads to leads on rear of gun.
NOTE: If installing the Euro version of the Quick Connect Block, connect leads from the Quick Connect
Block directly to the leads on the gun.
Insert control plug into feeder.
STEP #2
With gun lying straightened, pull trigger and feed wire through gun. It may be necessary to remove contact
tip when feeding small wire sizes.
Recheck: - proper gas flow
- drive roll pressure
- voltage and wire feed speed
2.4INSTALLING / REPLACING POWER PIN ON GUN
NOTE: The rear handle and screws do not have to be removed when installing the
two-piece power pins. T-Gun™Model Shown.
Thread power pin into rear housing.
Tighten the power pin into the rear housing using a 3/4” (19 mm) wrench on the
rear block and a 5/8” (16 mm) or 3/4” (19 mm) wrench on power pin. Torque to
18 ft.-lbs. (24.4 Nm).
IMPORTANT: The thread-in two-piece power pin has a taper to seat and lock
the power pin in the rear handle block. Tighten the power pin in the block with a
wrench to ensure that pin remains in place.
Install liner. See Section 3.2 CONVENTIONAL LINER REPLACEMENT or Section 3.3 TREGASKISS
QUICK LOAD™ LINER REPLACEMENT.
POWER PIN
WELDING WIRE
THUMB SCREW
REAR HANDLE
TO GAS
15
3.0 –MAINTENANCE
3.1 TREGASKISS™ NOZZLE AND TOUGH LOCK™ CONSUMABLES
IMPORTANT:
Neck insulator MUST be in place before welding to properly insulate neck armor.
Check all parts to ensure that connections are tight before welding.
The retaining head MUST be tightened with a 5/8” (16 mm) wrench to prevent the contact tip from
overheating.
DO NOT use pliers to remove or tighten the retaining head or scoring may result.
Removal and Replacement
Nozzle
Pull slip-on nozzles off with a twisting motion.
When installing the nozzle, ensure that it is fully seated.
Contact Tip
Thread the contact tip into the retaining head.
Torque to 30 in.-lbs. (3.5 Nm).
The Tregaskiss Tip Tool (Part # 450-18 –for heavy-duty tips) or a pair of weld pliers are the optimal
tools for contact tip installation.
Retaining Head
Thread retaining head onto neck with a 5/8” (16 mm) wrench.
Torque to 80 in.-lbs. (9 Nm).
DO NOT use pliers to remove or tighten the heavy duty retaining head or scoring may result.
Neck Insulator
The neck insulator is pressed onto the neck by hand.
3.2 CONVENTIONAL LINER REPLACEMENT
NOTE: For guns equipped with thread-in power pins, Bernard, or Euro-connector, follow the procedure
below. On Miller® style guns, liner is held captive by a guide cap, which must be removed and replaced
when changing liner.
STEP #1 (T-Gun™Model Shown)
CONDUIT LINER
STANDARD DUTY NOZZLE
VARIOUS SIZES AVAILABLE
NECK
INSULATOR
STANDARD DUTY
TREGASKISS TOUGH
LOCK RETAINING HEAD
STANDARD DUTY
TREGASKISS TOUGH
LOCK CONTACT TIP
16
NOTE: Ensure power supply is off and gun is removed from feeder before proceeding.
Remove nozzle, tip and retaining head.
If power pin is thread-in liner type, using a 10 mm wrench, turn thread-in liner retainer counterclockwise until
liner is free from the power pin.
With gun straightened, grip conduit liner with pliers and remove.
STEP #2
STEP #3
Feed replacement liner through gun using short
strokes to avoid kinking. Twist liner clockwise if
necessary.
Using a 10 mm wrench, turn thread-in liner
retainer in a clockwise direction and tighten in
power pin.
Push liner back into gun and hold in place.
Using liner gauge, trim conduit liner with 3/4” (19
mm) stick out.
Remove any burr that may obstruct wire feed,
especially on flat wire type conduit liner.
Replace nozzle, tip and retaining head onto
gooseneck.
3.3 TREGASKISS QUICK LOAD™LINER REPLACEMENT
STEP 1
Remove consumables (nozzle, contact tip and
retaining head).
Pull existing Tregaskiss QUICK LOAD Liner
from neck using pliers.
STEP 2
Remove the protective cap from the new
Tregaskiss QUICK LOAD Liner.
STEP 3
Insert the liner through the neck using the wire
as a guide. Push the liner in using short
strokes to prevent the wire from kinking.
LINER
GAUGE
3/4" (19 mm)
LINER GAUGE
LINER
NECK
PROTECTIVE CAP
TREGASKISS
QUICK LOAD LINER
17
STEP 4
Once the liner stops feeding, give it an extra
push to ensure it is inserted completely.
IMPORTANT! Push liner back into gun and
hold in place. Using the liner gauge, trim liner
with 3/4” (19 mm) stick out.
Reinstall consumables.
IMPORTANT NOTE: Liners trimmed too long or too short can cause serious wire feeding problems. Be sure to
use your liner gauge as instructed to trim the liner to the correct stick out.
3.4 SWITCH REPLACEMENT –XL GUN MODELS
STEP #1
Remove both mounting screws with a 5/16” nut driver.
Ease switch out of switch housing by gently pulling up on leads.
Remove switch from switch lead connectors with needle nose pliers.
STEP #2
Push switch lead connectors firmly onto switch terminals
with needle nose pliers.
Depress switch plunger and nest back into housing.
Fit switch housing into nest on handle (switch leads must
lie parallel).
Align housing holes with threaded holes in body and
insert mounting screws.
Start both screws first before tightening with 5/16” nut
driver to even alignment.
IMPORTANT:
Use manufacturer’s screws (Part # 411-3M) to ensure
proper length, hardness and tolerance.
STEP #2
SWITCH
SWITCH HOUSING
LEADS
SWITCH LEAD CONNECTORS
MOUNTING SCREWS
SWITCH
LEADS (2)
SWITCH HOUSING
LINER GAUGE
TRIM HERE
18
3.5 SWITCH REPLACEMENT –XS GUN MODELS
3.6NECK REPLACEMENT –XL GUN MODELS
STEP #1
Place neck in vise.
Remove both switch housing mounting
screws.
Slide handle back exposing the cable
connection.
Loosen the cable / neck connection using an
11/16” (17 mm) wrench.
Remove from vise and unthread neck by
hand.
NOTE: The body is an integral part of the neck
and the handle mounting holes are metric (M5).
Use the screws supplied with the new neck to
avoid stripping of threads.
STEP #2
Thread the neck into the cable connection (hand
tighten).
Place neck in vise and tighten with a wrench to within
1/8” (3.2 mm) spacing between the cable connection
and neck body. Torque to 18 ft.-lbs.
Install the switch and reposition handle and switch
housing.
Reinstall switch housing mounting screws.
STEP #1
Twist handle lock nut in direction of arrow.
Pull handle lock away from handle.
Remove switch from nest in handle.
Remove switch from switch lead connectors
with needle nose pliers.
Push switch lead connectors firmly onto
switch terminals with needle nose pliers.
Fit switch into nest on handle, switch leads
must lie parallel to switch.
Reinstall handle lock nut on handle.
HANDLE
SWITCH
SWITCH HOUSING
MOUNTING SCREWS
NECK
1/8” (3.2mm)
SWITCH
SWITCH LEAD
CONNECTORS
LEADS
19
3.7 NECK REPLACEMENT –XS GUN MODELS
STEP #1
Place neck in vise.
Twist handle nut and pull away from handle.
Slide handle back exposing jam nut and front of unicable.
Loosen jam nut using two 3/4” (19 mm) wrenches and unthread neck.
Remove from vise and unthread neck by hand.
Install handle lock nut on neck.
Thread jam nut onto new neck.
Thread neck into unicable (hand tighten) to desired orientation.
Place neck in vise and tighten unicable and jam nut.
Reposition handle and switch.
Reinstall handle lock nut.
3.8 UNICABLE REPLACEMENT
The unicable in this gun can only be replaced by ordering a replacement gun chassis. Please refer to the
Standard Parts Chart on the last page of this Technical Guide.
STEP #2
UNICABLE
NECK
JAM NUT
HANDLE
LOCK NUT
NECK
UNICABLE
SWITCH
JAM
NUT
HANDLE
LOCK NUT
20

Other manuals for TGX Series

1

This manual suits for next models

32

Other Bernard Welding System manuals

Bernard TGX Series User manual

Bernard

Bernard TGX Series User manual

Bernard Clean Air CL30 User manual

Bernard

Bernard Clean Air CL30 User manual

Bernard Clean Air MIG Gun Series User manual

Bernard

Bernard Clean Air MIG Gun Series User manual

Bernard S-Gun Series User manual

Bernard

Bernard S-Gun Series User manual

Bernard Q and S Series QS234X-1.1 User manual

Bernard

Bernard Q and S Series QS234X-1.1 User manual

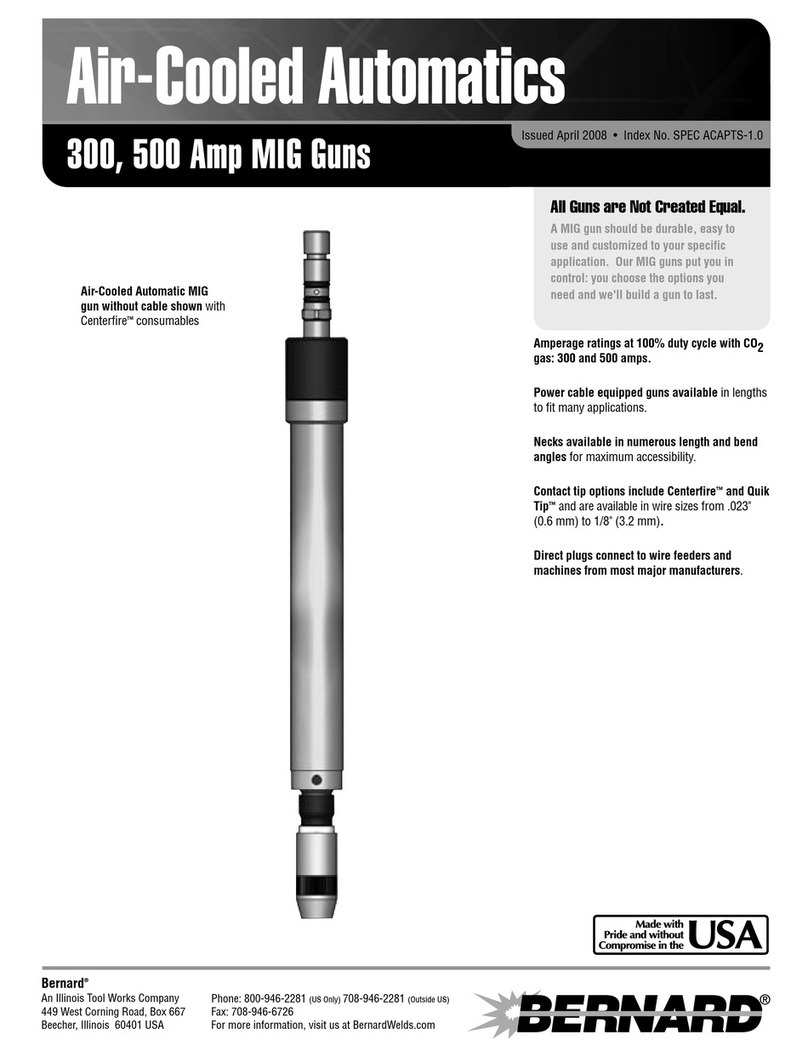
Bernard Air-Cooled Automatics ACAPTS-1.0 User manual

Bernard

Bernard Air-Cooled Automatics ACAPTS-1.0 User manual

Bernard Shortstub 40B User manual

Bernard

Bernard Shortstub 40B User manual

Bernard S300 Application guide

Bernard

Bernard S300 Application guide

Bernard T-Gun 450 User manual

Bernard

Bernard T-Gun 450 User manual

Bernard Q150X-1 Application guide

Bernard

Bernard Q150X-1 Application guide

Bernard Clean Air Gun CA-1.5 User manual

Bernard

Bernard Clean Air Gun CA-1.5 User manual

Bernard CLEAN AIR SERIES User manual

Bernard

Bernard CLEAN AIR SERIES User manual

Bernard W-Gun Series User manual

Bernard

Bernard W-Gun Series User manual

Bernard Q200 Application guide

Bernard

Bernard Q200 Application guide

Bernard Q500 Application guide

Bernard

Bernard Q500 Application guide

Bernard 195399 User manual

Bernard

Bernard 195399 User manual

Bernard Q20 Series User manual

Bernard

Bernard Q20 Series User manual

Bernard T-Gun 445-45 User manual

Bernard

Bernard T-Gun 445-45 User manual

Bernard Q Series User manual

Bernard

Bernard Q Series User manual

Bernard Q20 Series User manual

Bernard

Bernard Q20 Series User manual

Bernard Q-Gun Q150-1.4 User manual

Bernard

Bernard Q-Gun Q150-1.4 User manual

Bernard 600 Amp W-Gun User manual

Bernard

Bernard 600 Amp W-Gun User manual

Bernard MIG Gun Configurator User manual

Bernard

Bernard MIG Gun Configurator User manual

Bernard CLEAN AIR SERIES User manual

Bernard

Bernard CLEAN AIR SERIES User manual

Popular Welding System manuals by other brands

ESAB ES 300i instruction manual

ESAB

ESAB ES 300i instruction manual

Sherman digitec DIGITIG 200AC / DC MULTIPRO user manual

Sherman digitec

Sherman digitec DIGITIG 200AC / DC MULTIPRO user manual

Lincoln Electric Magnum PRO Curve HDE 250 Operator's manual

Lincoln Electric

Lincoln Electric Magnum PRO Curve HDE 250 Operator's manual

Thermal Dynamics A80 CUTMASTER operating manual

Thermal Dynamics

Thermal Dynamics A80 CUTMASTER operating manual

Everlast PowerArc 200STi Operator's manual

Everlast

Everlast PowerArc 200STi Operator's manual

Schweissen Schneiden Inverspotter 13500 Aqua instruction manual

Schweissen Schneiden

Schweissen Schneiden Inverspotter 13500 Aqua instruction manual

EINHELL BT-GW 190 D Original operating instructions

EINHELL

EINHELL BT-GW 190 D Original operating instructions

WilTec 61492 Operation manual

WilTec

WilTec 61492 Operation manual

Thermal Dynamics cutmaster A60 operating manual

Thermal Dynamics

Thermal Dynamics cutmaster A60 operating manual

Cebora EVO 160 M COMBI instruction manual

Cebora

Cebora EVO 160 M COMBI instruction manual

Solter aerotig 4330 AC/DC instruction manual

Solter

Solter aerotig 4330 AC/DC instruction manual

Miller S-44GL owner's manual

Miller

Miller S-44GL owner's manual

NewArc R7000 instruction manual

NewArc

NewArc R7000 instruction manual

STAMOS S-MMA 200P.IGBT user manual

STAMOS

STAMOS S-MMA 200P.IGBT user manual

Lincoln Electric Compact 220 operating manual

Lincoln Electric

Lincoln Electric Compact 220 operating manual

MAXPhotonics MA1 Series user guide

MAXPhotonics

MAXPhotonics MA1 Series user guide

Lincoln Electric AIR VANTAGE IM985 Operator's manual

Lincoln Electric

Lincoln Electric AIR VANTAGE IM985 Operator's manual

iWeld CUT 50 COM PILOT user manual

iWeld

iWeld CUT 50 COM PILOT user manual

manuals.online logo
manuals.online logoBrands
  • About & Mission
  • Contact us
  • Privacy Policy
  • Terms and Conditions

Copyright 2025 Manuals.Online. All Rights Reserved.