Bessemeter S300 User manual
MANUAL
TABLE OF CONTENTS
1 Introduction
2 Parts
3 Quick 1-2-3 Start Guide
4 Summary of Features
5 How to Use Your Bessemeter Pinless Moisture Meter
6 Using the Meter’s Buttons
10 Calibration Verification
10 Battery
11 Storing Your Meter
12 Specifications
13 Species Settings Table
1
INTRODUCTION
The Bessemeter Brand
Accuracy, Reliability, & Ease of Use
All Bessemeter pinless moisture meters (S300, D300, DS500) offer
advanced technology for accuracy, reliability, and ease of use when
measuring the moisture content of wood. Each of the three models
utilizes an electromagnetic field that covers a relatively large cross-
sectional area.
The depth at which your meter is designed to take measurements is its
primary difference relative to the other pinless meters in the Bessemeter
line.
• S300: Utilizes ¼” (6mm) depth mode
• S500: Utilizes ¾” (19mm) depth mode
• DS500: Dual-depth, which utilizes either ¼” (6.4mm) or ¾”
(19mm) depth mode
The sensor field of your Bessemeter pinless meter approximates the
full-thickness cross-section method per the ASTM-D4442 oven-dry
method. This ASTM standard (along with its international counterparts)
is the standard for comparison of all wood moisture meters for accuracy.
With proper use of your meter each time you take a measurement, you
are assured of getting an excellent representation of the true moisture
content of your wood sample.
Your Bessemeter pinless meter is capable of measuring moisture
content in a range from 6% to 32%. Measurement range may vary
slightly, depending on the species setting that you are using for your
wood sample. Your meter provides an easy-to-read digital display with
readings in 0.1% increments.

2
The moisture measurement technology of your pinless meter is
virtually unaffected by wood temperature.
PARTS
On/Hold
button
Species
button
Depth
button
(NOTE: not
applicable to
D300, S300)
LCD
Up
button
Down
button
Audio
button
2
Battery
Compart-
ment
Sensor
Plate
3
QUICK 1-2-3 START GUIDE
Your Bessemeter pinless meter is designed to be extremely easy and
intuitive to use. In fact, using your meter is truly as simple as 1-2-3.
1. With the meter turned off, press and release the On/
Hold button to power on your meter. After a brief display
of the model number/firmware revision number, your
meter will quickly go to Standard Measurement mode,
showing 0.0% on the display when held in the air.
2. Next, press the Species button, which you use to
program your meter with the specific gravity (SG) setting
for the wood species that you are testing. Use the species
settings table on pages 13-23 to find the correct setting
for your wood (or if you cannot find the setting, contact our customer
support team at info@bessemeter.com). Use the Up and Down
buttons to toggle to the correct setting. Once you have the SG setting
programmed, press the Species button
again or the On/Hold button to return
to Standard Measurement mode. For
additional details about programming
for species, refer to the Species button
section on page 7-8.
3. Take measurements by pressing
the meter down firmly on the face of
the wood sample, making sure the
rectangular sensor plate on the back
of the meter is completely covered
by the wood. The dimensions of the
wood sample should be at least 2.0”
(51mm) wide by 2.5” (64mm long).
Refer to the usage guidelines on page 5

4
for information regarding depth dimensions. When you are done
taking measurements, press the On/Hold button for 2 seconds to
power off your meter. If not in use for at least 60 seconds, your meter
will shut down automatically.
SUMMARY OF FEATURES
• Easy-to-read LCD display
• Digital display resolution of 0.1% (Standard Measurement
mode)
• MC measurement range for wood: 6.0% to 32.0%
• Programmable species settings for a range of softwoods/
hardwoods
• Large sensor area for moisture measurement
• HOLD capability to freeze the current reading on the LCD
display
• Low battery alert indicator
• Audio confirmation that can be enabled/disabled
• Dual-depth readings (DS500 model only)
• Field calibration verification when using the verification
reference
accessory (sold separately)
• Storage case and 9-volt battery included
• 2-year warranty
• Automatic shutoff when not in use

5
HOW TO USE YOUR BESSEMETER
PINLESS MOISTURE METER
Usage Guidelines (for accurate readings, it is important
to pay attention to the following guidelines):
1. Make sure that you have at least a 1-inch air gap underneath the
wood you are testing and that your other hand is not positioned
directly under the wood sample near the point of measurement.
2. Consider that each of the three pinless models are best suited for
a specific range of wood thicknesses. For the D300 (or ¾” mode
for the DS500), wood samples should be between ¾” (19mm) and
1 ½” (38mm). With thinner boards, if your meter is being used in
¾” mode, it will underestimate the moisture content, though not
substantially if the board is at least 0.625 inches (16mm) thick.
The hinner the board, the greater will be the underestimation.
3. If the wood thickness is greater than 1½” (38mm) and you are
seeking a “full thickness” measurement and not a shallow
measurement, then take readings (in ¾” mode) on both sides
and average your readings.
4. If you need to measure wood that is less than ½” (13mm) thick,
then use either the S300 or the DS500 (in ¼” mode).
5. Make sure the sensor plate on the backside of the meter is
completely covered by the wood or other material that you are
measuring. If the sensor plate is not covered completely, your
reading will be inaccurate.
6. If any surface moisture or water is visible on the material being
tested, be sure to wipe it off and allow the surface to dry for at
least two minutes before taking readings. If possible, turn the

6
material over and measure the other side.
7. Press down firmly to obtain good contact between the sensor
plate and the surface of the material that you are testing. When
the material is somewhat uneven, such as rough-sawn lumber,
this step becomes especially important.
8. Avoid taking readings in locations with a defect or knot in the
lumber.
9. If measuring lumber that is frozen, permeated with salt water,
treated with CCA, ACQ, or any other treatment with metallic or
other components that might bias the moisture readings, then
you may need to make additional measurement corrections.
Contact us at info@bessemeter.com if you need further guidance
about making corrections.
10. When taking a reading, ensure your meter is parallel to the
direction of the grain.
USING THE METER’S BUTTONS
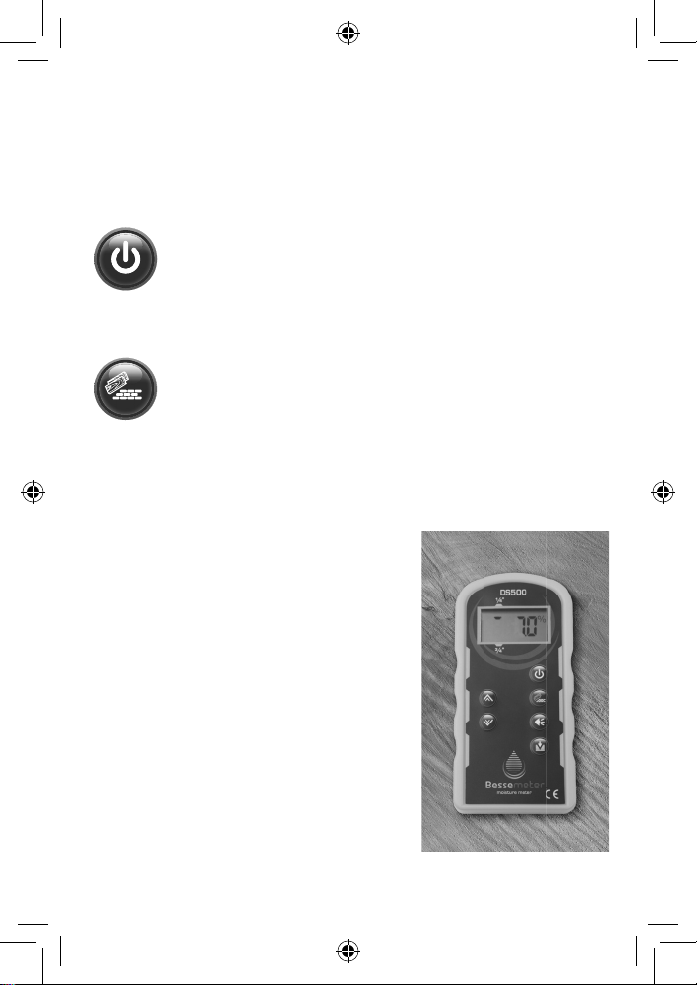
ON/HOLD BUTTON
Press the power button to turn the meter on. The meter will briefly
display the model number and then the firmware revision number.
Following the brief model number/firmware display, the meter
immediately goes to Standard Measurement mode and is ready to take
moisture readings. Any settings that you have previously programmed
or selected will still be active, meaning that you do not lose any of your
settings by turning the meter off.

7
Using the Hold function: When you briefly press and release the
Power/Hold button, this will hold or freeze the current reading on the
display. You will see the word HOLD in the upper righthand corner of
the display.
If the Audio function of the meter is turned on (see description about
the Audio button), the meter will beep every 4 seconds while the Hold
function is being used.
Until the On/Hold button is briefly pressed again, the display will re-
main in Hold mode. But after pressing the On/Hold button again, the
display immediately returns to Standard Measurement mode so that
you can take additional readings.
Turning your meter off: Press the On/Hold button for about two seconds
to power it off. Alternatively, the meter will shut down automatically if
left in Hold Mode for 60 seconds with no further activity.
UP and DOWN BUTTONS
These buttons are used in conjunction with the Species mode (and
Depth mode if using the DS500 meter). How you use the Up and and
Down buttons will be determined by the specific mode that you are in.
Please refer to the instructions outlined below for Species and Depth
for additional guidance.
SPECIES BUTTON
The Species button is used to adjust for the specific gravity (SG)
corresponding to the wood species that you are testing. When in this

8
mode, the meter displays values from 0.30 up to 1.00. The factory
default setting is 0.50.
How to Program the Species Setting:
1. Use the species settings table on pages 13-23 to find the specific
gravity setting that corresponds to the type/species of wood that
you wish to measure.
2. When the meter is turned on, press and release the Species but-
ton. The display will show the current SG setting (e.g., 0.60). If
the meter is being programmed for the first time, the default
setting of 0.50 will be displayed.
3. PressingandreleasingeithertheUporDownbuttonswillincrease
or decrease the SG setting of the meter by .01 each time. If you
press and hold either the Up or Down button, this will allow the SG
setting to increase or decrease by multiples of .10, and until you
release the Up or Down button, the display will continue to adjust
by multiples of 0.10, allowing you to quickly get to the SG setting
you need.
4. Once the SG setting you need is displayed, press either the
Species button or the On/Hold button to return to Standard
Measurement mode and begin taking measurements.
5. The programmed SG setting will be stored in the meter’s
memory even if the meter is turned off or the battery has been
changed. You can verify this each time you use your meter
simply by pressing the Species button when the meter is turned
on. The last programmed setting will be displayed.

9
AUDIO BUTTON
How to enable Audio: Turn on your meter and then press the Audio
button to enable audio indication. A short tone will play, and “ON” will
display momentarily on the screen. When audio indication is enabled,
the short tone will also play when you press other buttons. Exceptions:
when the Up or Down buttons are held down for SG scrolling, or when a
button does not register a specific result (e.g., pressing an Up or Down
button in Standard Measurement mode).
How to disable Audio: Press the audio button a second time to disable
all audio tones. No tone will play this time, and the word “OFF’ will be
displayed momentarily on the screen.
DEPTH BUTTON
NOTE: The D300 and S300 are single-depth models that do not include the
Depth button and the option to select the depth. The D300 takes readings in
¾” mode only, and the S300 takes measurements in ¼” mode only. If you
are using the DS500, you have the capability of selecting the measurement
depth (either ¾” or ¼”).
How to Select Depth When Using the DS500:
1. After the meter is turned on,
press the Depth button. In
Standard Measurement mode, you
will see a small trapezoidal bar
( ) indicating the Depth mode
currently selected. If the bar is
displayed in the upper left-hand

10
corner, you are currently in ¼” mode. If the bar is displayed in
the lower left-hand corner, you are currently in ¾” mode.
2. To switch from one depth mode to the other, simply press and
release the Depth button to toggle between ¼” and ¾” mode.
When you do, you will see either “3-4” or “1-4” displayed on the
screen as well as the corresponding bar.
3. You also have the option to toggle between ¼” and ¾” mode by
using the Up and Down buttons after you press the Depth button.
4. Once you have selected the Depth you want for taking measure-
ments, simply press the On/Hold button to return to Standard
Measurement mode to begin taking readings at that depth.
CALIBRATION VERIFICATION
Your Bessemeter pinless meter comes factory calibrated and is
designed to provide years of reliable service. Keep in mind, however,
that a sharp impact or undue exposure to the elements (moisture,
dust, wide temperature swings, etc.) may potentially affect the meter’s
electronics and its calibration setting. If at any time you wish to verify
that your meter is still calibrated per factory specifications, use the
Calibration Verification Reference (CVR) device that is included with
your meter. Simply follow the instructions found on the label of the
CVR. If the readings you obtain exceed the tolerances listed on the CVR
label, please contact customer support at www.Bessemeter.com.
BATTERY
If BAT appears in your meter’s display, the battery should be replaced
immediately, as further measurements will likely be inaccurate.

11
How to Replace the Battery: No special tools are needed. Replace with
9-volt, non-rechargeable Alkaline or Lithium, or rechargeable NiMH
batteries. Carefully open the battery compartment door on the rear
and remove the old battery. Insert the new battery in the compartment,
being sure to observe proper battery polarity (+, -). The battery fits
snugly and will not dislodge while taking measurements. Re-attach
the battery compartment door carefully until it snaps back in place.
STORING YOUR METER
When you are not using your Bessemeter pinless meter, it is
recommended that you store it in the case provided with your meter
under the storage temperature and humidity conditions specified on
page 21. If your meter is to be stored without using it for longer than
30 days, remove the 9-volt battery.
2-YEAR WARRANTY
All Bessemeter pinless meters include a 2-year warranty. View
warranty information at www.bessemeter.com/warranty
Customer Support/Technical Support
www.bessemeter.com/contactus
Register your meter online at
www.Bessemeter.com

12
SPECIFICATIONS
Dimensions:
• Length: 5.60 inches (142mm)
• Width: 2.80 inches (71mm)
• Thickness: 0.86 inches (22mm)
Weight:
• 5.44 ounces (154.2 g) with the battery,
3.92 ounces (111.1 g) without battery
Scanning Area:
• 2.0 inches (51mm) x 2.5 inches (64mm)
Measurement Depth:
• S300: ¼” (6mm) Depth
• D300: ¾” (19mm) Depth
• DS500: ¼” (6mm) Depth and ¾” (19mm) Depth
Specific Gravity Range:
• 0.3 to 1.0
Moisture Content Range:
• 6.0% to 32.0% MC range for wood
Precision:
• 0.1%
Auto Power Shutdown:
• 60 seconds
Power:
• 9V Battery (Bessemeter recommends using non-rechargeable
Alkaline or Lithium, or rechargeable NiMH batteries)
Operating Temperature:
• +32 deg F to +110 deg F (+0 deg C to +43 deg C)
Storage Temperature and Humidity:
• +50 deg F to +90 deg F (+10 deg C to +32 deg C)
• Maximum relative humidity of 95%, non-condensing

13
SPECIES SET TINGS TABLE
Species Setting
Afrormosia 0.65
Alder, Red 0.41
American Red Oak 0.63
Andiroba 0.57
Ash, Black 0.49
Ash, Blue 0.58
Ash, Green 0.56
Ash, Oregon 0.55
Ash, Red 0.55
Ash, White 0.60
Aspen, Bigtooth 0.39
Aspen, Quaking 0.38
Avodire 0.51
Baldcypress 0.46
Balsamo (Myroxylon
balsamum) 0.83
Balsamo (Protium
spp.) 0.55
Banak (Virola spp.) 0.45
Basswood, American 0.37
Beech, American 0.64

14
Beech, Euro 0.67
Benge (Guibourtia
arnoldiana) 0.70
Birch, Paper 0.55
Birch, Sweet 0.65
Birch, White 0.53
Birch, Yellow 0.62
Box 0.83
Brazilian Cherry 0.83
Brazilian Mahogany 0.47
British Elm 0.53
Bubinga (Guibourtia
spp.) 0.75
Butternut 0.38
Cativo 0.42
Cedar of Lebanon 0.53
Cedar, Alaska 0.44
Cedar, Atlantic White 0.32
Cedar, Eastern Red 0.47
Cedar, Incense 0.37
Cedar, Northern
White 0.31
Cedar, Port Orford 0.43
Cedar, Western Red 0.32
Cedar, Yellow 0.44

15
Ebony 0.94
Elliotis Pine 0.59
Elm, American 0.50
Elm, Rock 0.63
Elm, Slippery 0.53
English Cherry 0.58
English Oak 0.57
European Ash 0.58
European Walnut 0.56
Fir, Balsam 0.35
Fir, California Red 0.38
Cedrella 0.39
Cherry, Black 0.50
Chestnut, American 0.43
Cocobolo 0.85
Cottonwood, Balsam
Poplar 0.34
Cottonwood, Black 0.35
Cottonwood, Eastern 0.40
Degame 0.72
Determa 0.55
Dogwood, Flowering 0.72
Douglas Fir 0.48

16
Hemlock, Eastern 0.40
Hemlock, Mountain 0.45
Hemlock, Western 0.45
Hickory (Pecan),
Bitternut 0.66
Hickory (Pecan),
Nutmeg 0.60
Hickory (Pecan),
Water 0.62
Hickory (True),
Mockernut 0.72
Hickory (True), Pignut 0.75
Hickory (True),
Shagbark 0.72
Hickory (True),
Shellbark 0.69
Hickory, Pecan 0.66
Fir, Grand 0.37
Fir, Noble 0.39
Fir, Pacific Silver 0.43
Fir, Subalpine 0.32
Fir, White 0.39
Gombeira 1.00
Guatambu
(Argentinean) 0.70
Guatambu (Brazil) 0.79
Gum, Black 0.50
Gum, Red 0.52
Hackberry 0.53

17
Keruing
(Dipterocarpus spp.) 0.76
KOA (Acacia Koa) 0.63
Larch, Euro 0.48
Larch, Western 0.52
Laurel, California 0.55
Limba 0.40
Locust, Black 0.69
Macassar Ebony 0.90
Madrone, Pacific 0.64
Magnolia, Southern 0.50
Mahogany, African 0.44
Holly, American 0.55
Hophornbeam,
Eastern 0.70
Hura 0.40
Indian laurel 0.79
Ipe 0.99
Iroko 0.57
Jacaranda 0.34
Jarrah 0.75
Jelutong 0.38
Kapur 0.70
Karri 0.79

18
Mesquite 0.86
Monkeypod 0.50
Mountain Ash
(Eucalyptus spp.) 0.62
Muninga 0.59
Myrtle, Oregon 0.55
Myrtle, Tasmanian 0.64
Oak (Red), Black 0.61
Oak (Red),
Cherrybark 0.68
Oak (Red), Laurel 0.63
Oak (Red), Northern 0.63
Oak (Red), Pin 0.63
Mahogany, True 0.47
Manni 0.63
Maple, Bigleaf 0.48
Maple, Black 0.57
Maple, Hard 0.60
Maple, Red 0.54
Maple, Silver 0.47
Maple, Soft 0.49
Maple, Sugar 0.63
Merbau 0.67
Mersawa 0.54
This manual suits for next models
2
Table of contents


