betteries betterLink User manual

betterLink
User Manual
Vehicle and charging hub EN
Gebrauchsanleitung
Fahrzeug- und Lade-Plattform DE
Manuel d’utilisation
Plateforme de transport
etdecharge
FR
Manual do utilizador
Veículo e estação de carregamento
PT
Manual de usuario
Plataforma de conexión a
vehículoy cargador
ES
(Connect EM)
C

2

3
EN
Table of contents
1 Overview . . . . . . . . . . . . . . . . . . . . . . . . . . . . . . . . . . . . . . . . . . . . . . . . . . . . . . . . . . . .4
1.1 Overview of the betterLink . . . . . . . . . . . . . . . . . . . . . . . . . . . . . . . . . . . . . . . . . . . 4
1.2 Scope of delivery . . . . . . . . . . . . . . . . . . . . . . . . . . . . . . . . . . . . . . . . . . . . . . . . . . 4
1.3 Product line . . . . . . . . . . . . . . . . . . . . . . . . . . . . . . . . . . . . . . . . . . . . . . . . . . . . . 4
1.4 Spare parts . . . . . . . . . . . . . . . . . . . . . . . . . . . . . . . . . . . . . . . . . . . . . . . . . . . . .4
2 better be safe . . . . . . . . . . . . . . . . . . . . . . . . . . . . . . . . . . . . . . . . . . . . . . . . . . . . . . . . .5
2.1 Intended use. . . . . . . . . . . . . . . . . . . . . . . . . . . . . . . . . . . . . . . . . . . . . . . . . . . . . 5
2.2 Disclaimer . . . . . . . . . . . . . . . . . . . . . . . . . . . . . . . . . . . . . . . . . . . . . . . . . . . . . . 5
2.3 Safety instructions . . . . . . . . . . . . . . . . . . . . . . . . . . . . . . . . . . . . . . . . . . . . . . . .5
2.4 If a product is broken . . . . . . . . . . . . . . . . . . . . . . . . . . . . . . . . . . . . . . . . . . . . . . . 5
3 Setting up . . . . . . . . . . . . . . . . . . . . . . . . . . . . . . . . . . . . . . . . . . . . . . . . . . . . . . . . . . . . 6
3.1 Unpacking the betterLink . . . . . . . . . . . . . . . . . . . . . . . . . . . . . . . . . . . . . . . . . . . .6
3.2 Conditions for the installation site . . . . . . . . . . . . . . . . . . . . . . . . . . . . . . . . . . . . . .6
4 Using . . . . . . . . . . . . . . . . . . . . . . . . . . . . . . . . . . . . . . . . . . . . . . . . . . . . . . . . . . . . . . . 6
4.1 Checking the betterLink . . . . . . . . . . . . . . . . . . . . . . . . . . . . . . . . . . . . . . . . . . . . . 6
4.2 Connecting the betterLink to the betterUI and appliances . . . . . . . . . . . . . . . . . . . . . . .6
4.3 Stacking betterPacks . . . . . . . . . . . . . . . . . . . . . . . . . . . . . . . . . . . . . . . . . . . . . . . 7
4.4 Charging betterPacks with the betterLink . . . . . . . . . . . . . . . . . . . . . . . . . . . . . . . . . . 9
4.5 Using appliances . . . . . . . . . . . . . . . . . . . . . . . . . . . . . . . . . . . . . . . . . . . . . . . . . . 9
5 Cleaning . . . . . . . . . . . . . . . . . . . . . . . . . . . . . . . . . . . . . . . . . . . . . . . . . . . . . . . . . . . . . 9
6 Transporting . . . . . . . . . . . . . . . . . . . . . . . . . . . . . . . . . . . . . . . . . . . . . . . . . . . . . . . . . 10
7 Storing . . . . . . . . . . . . . . . . . . . . . . . . . . . . . . . . . . . . . . . . . . . . . . . . . . . . . . . . . . . . . 10
8 Troubleshooting . . . . . . . . . . . . . . . . . . . . . . . . . . . . . . . . . . . . . . . . . . . . . . . . . . . . . . . 10
9 Technical Data . . . . . . . . . . . . . . . . . . . . . . . . . . . . . . . . . . . . . . . . . . . . . . . . . . . . . . . . 11
9.1 Dimensions and weight . . . . . . . . . . . . . . . . . . . . . . . . . . . . . . . . . . . . . . . . . . . . . 11
9.2 Electrical values . . . . . . . . . . . . . . . . . . . . . . . . . . . . . . . . . . . . . . . . . . . . . . . . . 11
9.3 Operating conditions . . . . . . . . . . . . . . . . . . . . . . . . . . . . . . . . . . . . . . . . . . . . . . 11
9.4 Nameplate . . . . . . . . . . . . . . . . . . . . . . . . . . . . . . . . . . . . . . . . . . . . . . . . . . . . . 11
10 Disposing . . . . . . . . . . . . . . . . . . . . . . . . . . . . . . . . . . . . . . . . . . . . . . . . . . . . . . . . . . . 12
Read this user manual carefully before use.
This user manual is part of the product and must be kept for later use or to be passed on to a future owner.

4
Overview
EN
1 Overview
1.1 Overview of the betterLink
3
4
1
5
6
1
7
8
2
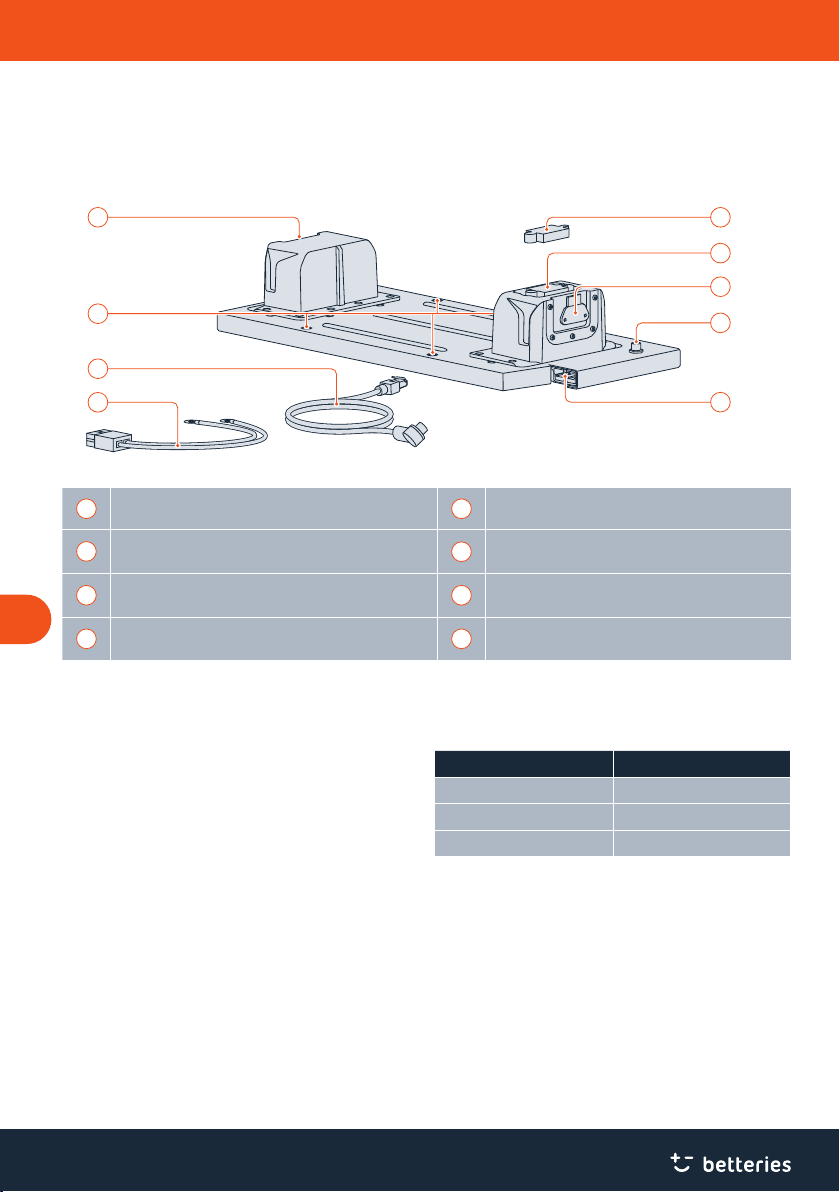
Fig. 1 Overview of the betterLink.
1Upper part of the locking device to secure betterPacks
on the betterLink 5Connection for data cable
2
Slot for securing the betterLink to surface via screws
6
Connection for power cable
3
Dust cap
7
Data cable
4Connection for betterPacks 8Power cable
1.2 Scope of delivery
• betterLink
• Dust caps for the connections of betterPacks
• Power cable
• Data cable
• This user manual
1.3 Product line
To use the betterLink, you need betterPacks and the betterUI
designed by betteries. To view the complete list of compati-
ble devices, go to https://betteries.com.
1.4 Spare parts
Only use original spare parts which can be purchased from
the manufacturer or distributor.
Article number Designation
P/N 06-00095 Dust caps
P/N 04-00092 Power cable
P/N 04-00091 Data cable
5
better be safe
EN
2 better be safe
2.1 Intended use
The betterLink is a docking platform for using electrical
power from up to three betterPacks indoors and outdoors.
betterPacks can also be charged using the betterLink.
The betterLink needs to be combined with the betterUI,
the control and monitoring unit, and one or multiple
betterPacks, the mobile power solution. Never use batteries
other than betterPacks with the betterLink.
The betterLink is intended for professional use only and may
be used under the specific operating and environmental
conditions defined in this user manual see “3.2 Conditions
for the installation site” on page 6 and see “9 Technical
Data” on page 11.
Any further use that deviates from these conditions de-
scribed in this user manual is considered improper use and is
prohibited. Note in particular the following specification:
• Never step on the betterLink and never use it as a step-
ping aid.
2.2 Disclaimer
Failure to follow the instructions in this user manual may re-
sult in serious injury or damage to the betterLink. No liability
is accepted for damage to the betterLink that occurs because
the instructions in this user manual have not been observed.
2.3 Safety instructions
DANGER
Danger to life due to electric current!
The betterLink is operated with electric current.
Contact with live parts and damage to individual
components pose an immediate danger to life.
• Always check that the betterLink is not
damaged before using it. Never use the
betterLink if it is damaged.
• Never open, repair or modify the betterLink.
Always contact the manufacturer to have it
repaired.
• Never touch the plug of an appliance with
wet hands.
• Never put external conductors into the
plugs.
• Never immerse the betterLink in water.
CAUTION
Physical injuries due to the betterLink tipping
over!
If the betterLink is not standing securely and
level or betterPacks are not stacked or removed
correctly, the betterLink may tip over and cause
bruises to hands, feet or legs.
• Always handle the betterLink with care.
• Always follow the instructions for setting up
the betterLink and changing the betterPacks
correctly.
NOTICE
Damage to equipment due to dirty or wet
connections and plugs!
If connections and plugs get dirty or wet, the
betterLink may no longer function correctly.
• Always keep the connections and plugs
clean and dry by using dust caps and keep-
ing plugs away from dust and water.
• Check connections regularly and clean
them if necessary see “5 Cleaning” on
page 9.
2.4 If a product is broken
Never open, repair or modify the betterLink yourself. Always
contact the manufacturer to have it repaired.
Phone: +49 152-05735306
E-Mail: info@betteries.com

6
EN
Setting up / Using
3 Setting up
3.1 Unpacking the betterLink
1. Carefully open the shipping box and take the betterLink
out of the shipping box. It is ready to use in the shipping
box.
2. Keep the packaging for future transport, return or long-
term storage.
3. Check that the scope of delivery is complete. The
shipping box must contain the betterLink, dust caps for
all connections, the power cable, the data cable and the
user manual.
4. Check that the betterLink, the power cable and the data
cable are undamaged.
5. If you notice any missing or damaged parts, contact
the manufacturer see “2.4 If a product is broken” on
page 5.
3.2 Conditions for the installation site
• Always place the betterLink on a firm and even surface. If
necessary, screw the betterLink to the surface. To do so,
only use screws (M6) or bolts which are strong enough
to hold the forces which can occur when using the
betterLink. Please check screws and bolts regularly for
signs of damage or loosening.
• The maximum terrain slope without any risk of tilt is 10%.
• Avoid rain and direct sun to extend the life of the better-
Link. If you use the betterLink indoors, always check that
the relative humidity (non-condensing) in the room is
below 95%.
• Check that you can meet the requirements for ambient
temperature see “9 Technical Data” on page 11.
• Never use the betterLink in explosive atmosphere.
• Avoid dusty areas.
• Never use the betterLink for a long period in areas with
high salt concentration in ambient air or water, such as
the seaside or in winter on streets where de-icing salt is
used, or in other highly corrosive environments.
• Never position the betterLink in close proximity to any
heat source, such as heaters or appliances with high
thermal irradiation. Always keep a distance to such heat
sources so that you can meet the requirements for ambi-
ent temperature see “9 Technical Data” on page 11.
• Never use the betterLink in close proximity to any explo-
sive or dangerous substances, such as petrol.
• Check that the power cable and the data cable are not
under tension.
4 Using
4.1 Checking the betterLink
1. Check the betterLink, including connections, power cable
and data cable, before using them.
2. If you notice any damage, such as cracks, brittleness,
smell, smoke, fading of the original colour or ejected
liquids, do not use the betterLink and contact the manu-
facturer see “2.4 If a product is broken” on page 5.
4.2 Connecting the betterLink to the
betterUI and appliances
✓ The betterUI is not connected yet.
✓ Appliances are turned o and not connected yet.
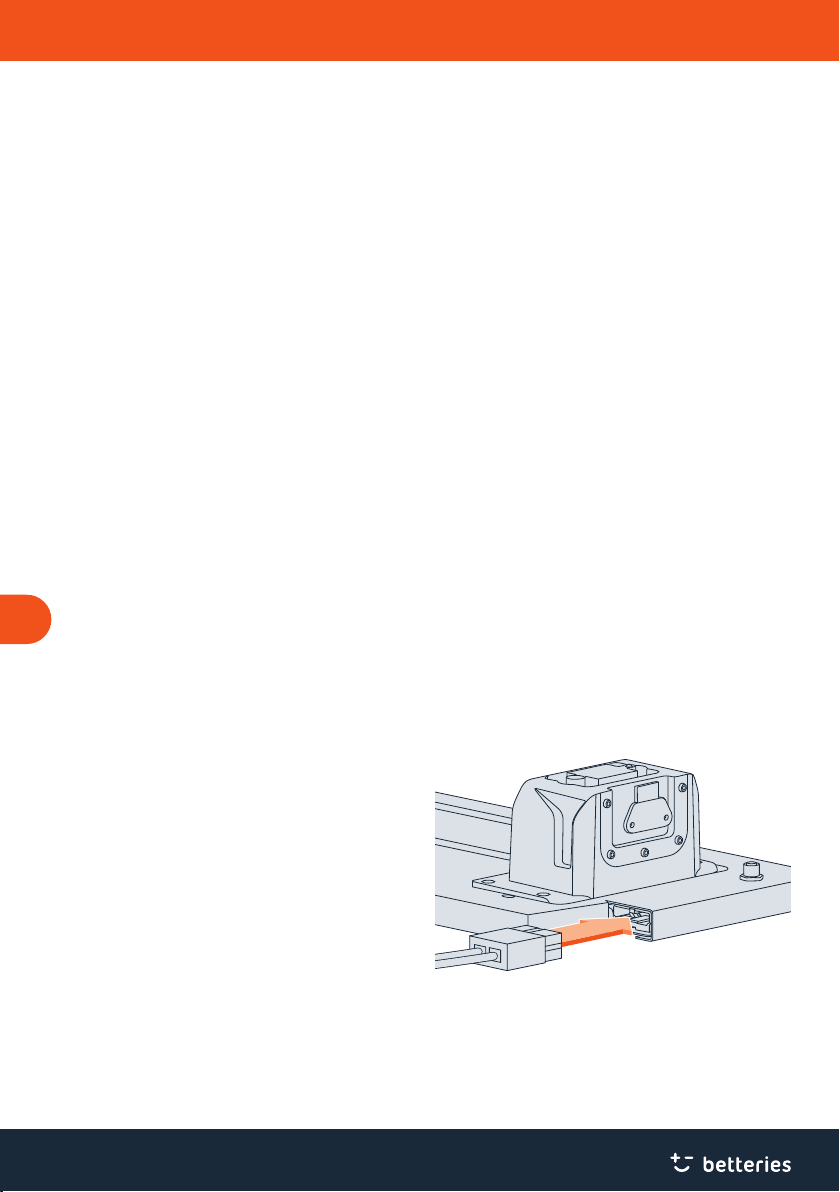
Fig. 2 Plugging power cable into the betterLink.
1. Plug the power cable into the betterLink.
2. Plug the power cable into the appliance. Always follow
the instructions provided by the manufacturer of the
appliance.

7
Using
EN
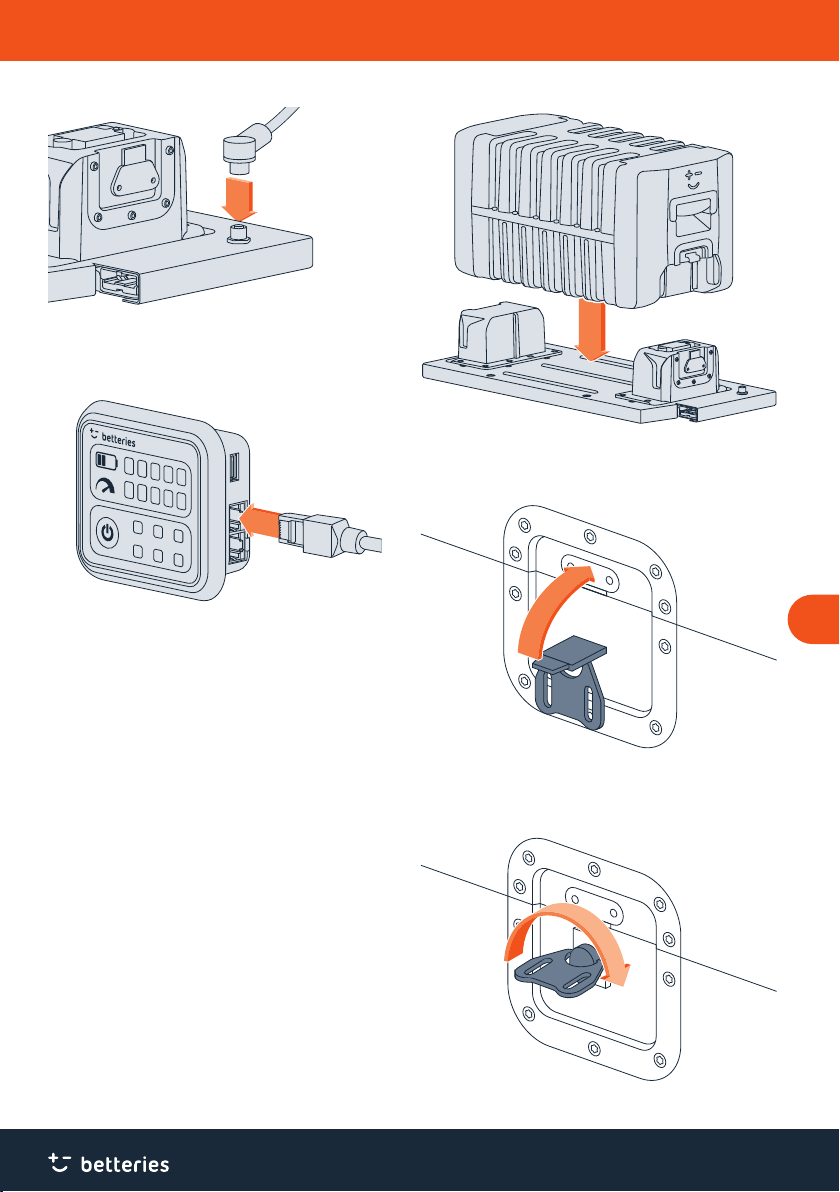
Fig. 3 Plugging data cable into the betterLink.
3. Connect the betterUI to the betterLink. To do so, plug the
data cable into the betterLink and screw tight.
Fig. 4 Plugging data cable into the betterUI.
4. Plug the data cable into one of the two connections on
the betterUI.
4.3 Stacking betterPacks
1. Remove the dust caps from the connections and put
them aside for later use.
2. Li and carry betterPacks with another person.
3. Align the connection of the betterLink and the connection
of the betterPack vertically, one above the other.
Fig. 5 Stacking the betterPack onto the betterLink.
4. Carefully stack the first betterPack onto the betterLink
without any force.
Fig. 6 Liing the wing screw.
5. Lock the first betterPack on the betterLink. To do so, li
the wing screw and hook the curved top on the upper
part of the betterPack.

8
Using
EN
Fig. 7 Turning the wing screw.
6. Then turn the wing screw 180° in a clockwise direction.
Fig. 8 Folding the wing screw back down.
7. Fold the wing screw back down.
Fig. 9 Locked betterPack.
8. If needed, secure the position of the locking device with
a padlock.
9. To stack and lock additional betterPacks in the same
way, start by stacking a betterPack type “multi” and then
follow the given instructions for stacking betterPacks.
Fig. 10 Stacking betterPacks on the betterLink.
10. Before using, always check that betterPacks are properly
locked.
11. To remove the betterPack, first unlock the betterPack
again. To do so, li the wing screw, turn the wing screw
180° in a counter-clockwise direction and fold it back
down.
12. Carefully li the betterPack vertically upwards with
another person.
13. Set aside the betterPack in a safe place.
14. To protect the connections, put the dust caps back on the
connections.

9
EN
Using / Cleaning
4.4 Charging betterPacks with the
betterLink
✓ betterPacks are securely stacked on the betterLink.
To charge betterPacks on the betterLink, you need an
additional adapter that you connect to a charging device
via the power cable. Only use a charging device provided by
betteries. Always follow the instructions of the manufacturer
of the adapter and follow the information given in the user
manual of the charging device.
4.5 Using appliances
✓ The appliance is turned o.
✓ Data cable, power cable and the plug of the appliance are
securely connected.
✓ One or multiple betterPacks are charged and securely
stacked on the betterLink.
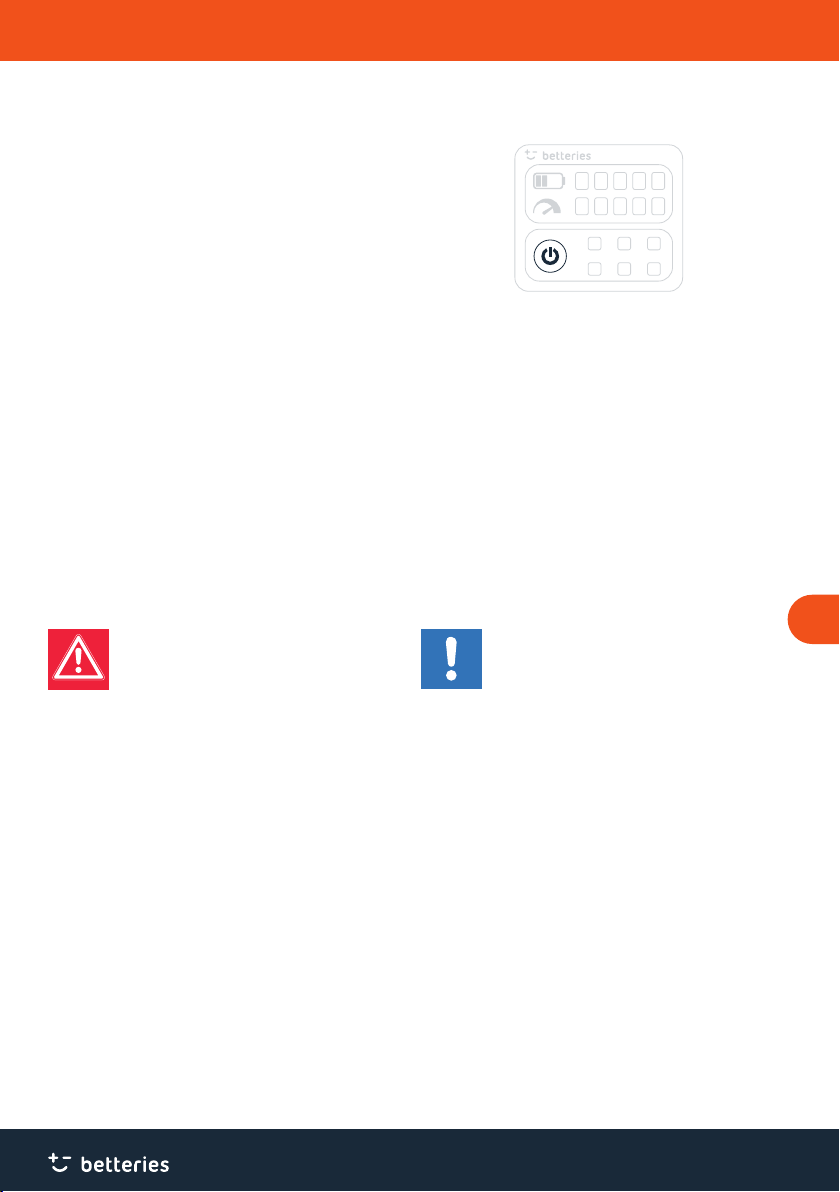
Fig. 11 On/O button on the betterUI.
1. Turn on the betterUI by pressing the On/O button.
2. Turn on the appliance. Always follow the instructions
provided by the manufacturer of the appliance.
3. If you notice a problem with the appliance, switch o
the appliance immediately and disconnect it from the
betterLink.
4. Contact the manufacturer of the appliance for informa-
tion on how to have the appliance repaired.
5 Cleaning
DANGER
Danger to life due to electric current!
The betterLink is operated with electric current.
Contact with live parts poses an immediate
danger to life.
• Always disconnect the betterLink from the
betterUI, all stacked betterPacks and all
appliances before cleaning the betterLink.
• Never immerse the betterLink in water.
• Never use a high-pressure water jet to clean
the betterLink and never spray water direct-
ly on the betterLink.
NOTICE
Equipment damage due to improper cleaning
agents!
Using unsuitable cleaning agents, solvents or
other chemicals for cleaning the betterLink may
damage it.
• Only use a dry so brush or cloth to clean
the betterLink.
• Only use canned air or compressed air that
is specifically approved for cleaning or
dusting electronic equipment to clean plugs
and connections.
1. Clean the outer surfaces of the betterLink regularly with a
dry so brush or cloth.
2. Check if plugs or connections are dirty and, if necessary,
clean them with approved canned air or compressed air.
3. While cleaning, check for visible damage. If you notice
any damage, do not use the betterLink and contact
the manufacturer see “2.4 If a product is broken” on
page 5.

10
EN
Transporting / Storing / Troubleshooting
6 Transporting
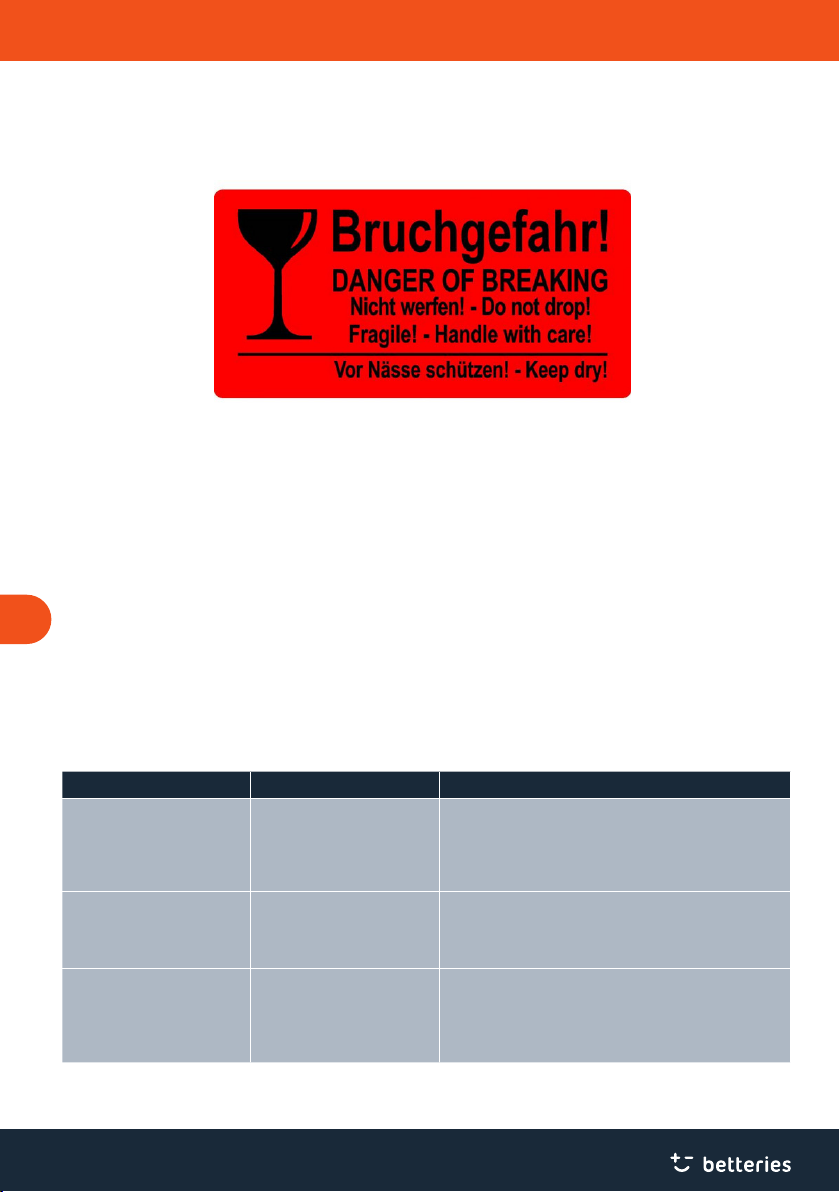
Fig. 12 Label on the shipping box.
There is a danger of breaking when transporting the betterLink. Do not drop the betterUI, always handle the betterLink with
care and always keep the betterLink dry.
7 Storing
• Always handle the betterLink with care.
• Store the betterLink in a dry room with a relative humidi-
ty (non-condensing) below 50%.
• Never store the betterLink in areas with high salt concen-
tration in ambient air or water, such as on the seaside.
8 Troubleshooting
Issue Potential cause Solution
The connected appliance
suddenly turns o.
The operational limit of
betterPacks has been reached
and betterPacks shut down
automatically.
1. Use another appliance that does not exceed the
operational limits of betterPacks (see user manual of
betterPacks).
There are visible cracks or oth-
er damage to the betterLink.
The betterLink was dropped
or damaged in another way.
1. Never use a damaged betterLink.
2. Send the damaged betterLink to the manufacturer for
repair see “2.4 If a product is broken” on page 5.
There is a noticeable change
to the betterLink, such as an
unexpected smell or a defor-
mation of parts.
The betterLink was dropped
or damaged in another way.
1. Turn o appliances and disconnect the betterUI
immediately.
2. Send the damaged betterLink to the manufacturer for
repair see “2.4 If a product is broken” on page 5.

11
EN
Troubleshooting / Technical Data
Issue Potential cause Solution
The appliance does not turn
on.
One or more betterPacks have
been deeply discharged.
1. If you have stacked multiple betterPacks, check which
betterPack is deeply discharged by stacking only one
of them at a time.
2. Observe with which betterPack the appliance cannot
be started.
3. Send the aected betterPack back to the manufac-
turer see “10 Disposing” on page 12 and see
“6 Transporting” on page 10.
The charging level of the
betterPacks is too low.
1. Charge betterPacks as soon as possible.
The betterUI is damaged. 1. Send the betterUI back to the manufacturer for repair
see “2.4 If a product is broken” on page 5.
The appliance is damaged. 1. Disconnect the appliance from the betterLink.
2. Contact the manufacturer of the appliance for informa-
tion on how to have the appliance repaired.
The power cable or the data
cable is damaged.
1. Order a new power cable or data cable as a spare.
9 Technical Data
9.1 Dimensions and weight
Height 118 mm
Width 635 mm
Depth 290 mm
Weight 4,5 kg
9.2 Electrical values
Nom./max. power 5 kW
9.3 Operating conditions
Min./max. operating temperature -10/60 °C
Min./max. storage temperature -20/60 °C
Max. allowable relative humidity
(non-condensing) for operating
95 %
Max. allowable relative humidity
(non-condensing) for storing
95 %
Max. altitude 2000 m
Protection class IP20 -
9.4 Nameplate
Content nameplate
Fig. 13 Nameplate.
The nameplate is located on the bottom of the betterLink
and contains the following information:
• Contact information of the manufacturer
• Description of the product
• Electrical values
• Required ambient temperature
• Weight
• Informative labels and warning labels
• Safety-relevant instructions
12
EN
Technical Data / Disposing
Informative labels
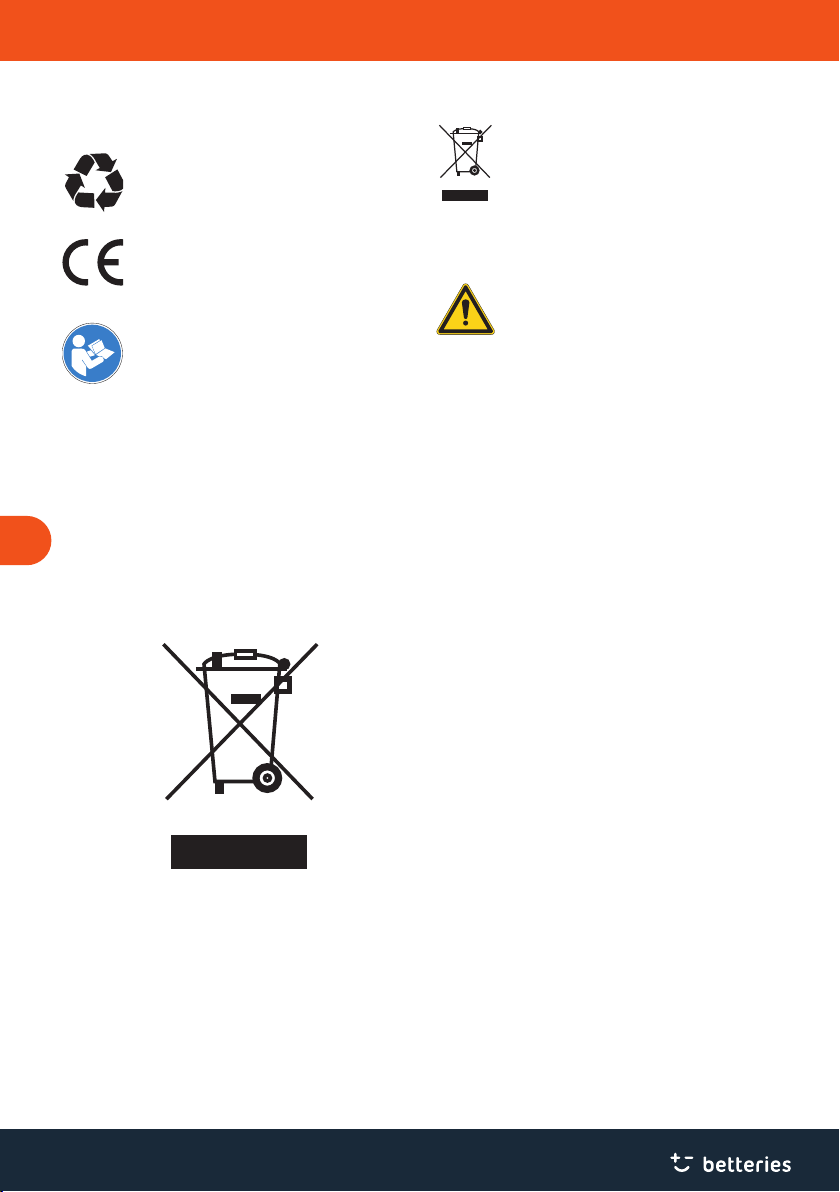
Recycle the product and its individual materials.
The manufacturer takes responsibility for recy-
cling the betterLink and its individual materials.
The CE marking indicates that the manufacturer
or his authorised representative is aware of
the special requirements for the product they
distribute and that the product conforms to these
special requirements.
Read this user manual carefully before use.
Do not dispose of the betterLink in household
waste.
Warning labels
General warning sign. Always consult the user
manual when you see this sign.
10 Disposing
The betterLink contains toxic materials. If the betterLink is
disposed of incorrectly, hazards to the environment may
result.
It is important to promote reuse and environmentally-appro-
priate recycling of waste. Therefore, recycle the betterLink
according to the regulations of your region or country.
Fig. 14 Do not dispose of the betterLink in household waste.

13
DE
Inhaltsverzeichnis
1 Überblick . . . . . . . . . . . . . . . . . . . . . . . . . . . . . . . . . . . . . . . . . . . . . . . . . . . . . . . . . . . 14
1.1 Gesamtansicht des betterLink . . . . . . . . . . . . . . . . . . . . . . . . . . . . . . . . . . . . . . . . 14
1.2 Lieferumfang . . . . . . . . . . . . . . . . . . . . . . . . . . . . . . . . . . . . . . . . . . . . . . . . . . . 14
1.3 Produktlinie . . . . . . . . . . . . . . . . . . . . . . . . . . . . . . . . . . . . . . . . . . . . . . . . . . . . 14
1.4 Ersatzteile . . . . . . . . . . . . . . . . . . . . . . . . . . . . . . . . . . . . . . . . . . . . . . . . . . . . . 14
2 Sicherheit . . . . . . . . . . . . . . . . . . . . . . . . . . . . . . . . . . . . . . . . . . . . . . . . . . . . . . . . . . . 15
2.1 Bestimmungsgemäße Verwendung . . . . . . . . . . . . . . . . . . . . . . . . . . . . . . . . . . . . . 15
2.2 Haftungsausschluss . . . . . . . . . . . . . . . . . . . . . . . . . . . . . . . . . . . . . . . . . . . . . . . 15
2.3 Sicherheitshinweise . . . . . . . . . . . . . . . . . . . . . . . . . . . . . . . . . . . . . . . . . . . . . . . 15
2.4 Im Störungsfall . . . . . . . . . . . . . . . . . . . . . . . . . . . . . . . . . . . . . . . . . . . . . . . . . . 15
3 Einrichtung . . . . . . . . . . . . . . . . . . . . . . . . . . . . . . . . . . . . . . . . . . . . . . . . . . . . . . . . . . 16
3.1 betterLink auspacken . . . . . . . . . . . . . . . . . . . . . . . . . . . . . . . . . . . . . . . . . . . . . . 16
3.2 Bedingungen am Aufstellort . . . . . . . . . . . . . . . . . . . . . . . . . . . . . . . . . . . . . . . . . 16
4 Nutzung . . . . . . . . . . . . . . . . . . . . . . . . . . . . . . . . . . . . . . . . . . . . . . . . . . . . . . . . . . . . 16
4.1 betterLink prüfen . . . . . . . . . . . . . . . . . . . . . . . . . . . . . . . . . . . . . . . . . . . . . . . . 16
4.2 betterLink an betterUI und Elektrogeräte anschließen. . . . . . . . . . . . . . . . . . . . . . . . . 16
4.3 betterPacks stapeln . . . . . . . . . . . . . . . . . . . . . . . . . . . . . . . . . . . . . . . . . . . . . . . 17
4.4 betterPacks mit betterLinks laden. . . . . . . . . . . . . . . . . . . . . . . . . . . . . . . . . . . . . . 19
4.5 Elektrogeräte verwenden . . . . . . . . . . . . . . . . . . . . . . . . . . . . . . . . . . . . . . . . . . . 19
5 Reinigung . . . . . . . . . . . . . . . . . . . . . . . . . . . . . . . . . . . . . . . . . . . . . . . . . . . . . . . . . . . 19
6 Transport . . . . . . . . . . . . . . . . . . . . . . . . . . . . . . . . . . . . . . . . . . . . . . . . . . . . . . . . . . . 20
7 Lagerung . . . . . . . . . . . . . . . . . . . . . . . . . . . . . . . . . . . . . . . . . . . . . . . . . . . . . . . . . . . 20
8 Fehlerbehebung . . . . . . . . . . . . . . . . . . . . . . . . . . . . . . . . . . . . . . . . . . . . . . . . . . . . . . . 20
9 Technische Daten . . . . . . . . . . . . . . . . . . . . . . . . . . . . . . . . . . . . . . . . . . . . . . . . . . . . . . 21
9.1 Maße und Gewicht . . . . . . . . . . . . . . . . . . . . . . . . . . . . . . . . . . . . . . . . . . . . . . . . 21
9.2 Elektrische Anschlusswerte . . . . . . . . . . . . . . . . . . . . . . . . . . . . . . . . . . . . . . . . . . 21
9.3 Betriebsbedingungen . . . . . . . . . . . . . . . . . . . . . . . . . . . . . . . . . . . . . . . . . . . . . . 21
9.4 Typenschild . . . . . . . . . . . . . . . . . . . . . . . . . . . . . . . . . . . . . . . . . . . . . . . . . . . . 21
10 Entsorgung . . . . . . . . . . . . . . . . . . . . . . . . . . . . . . . . . . . . . . . . . . . . . . . . . . . . . . . . . . 22
Lesen Sie diese Gebrauchsanleitung vor Gebrauch sorgfältig durch.
Diese Gebrauchsanleitung ist Bestandteil des Produkts und daher zur späteren Verwendung aufzubewahren
bzw. im Fall eines Eigentümerwechsels weiterzugeben.
14
Überblick
DE
1 Überblick
1.1 Gesamtansicht des betterLink
3
4
1
5
6
1
7
8
2
Abb. 1 Gesamtansicht des betterLink.
1Oberer Teil der Verriegelung zum Sichern der
betterPacks auf dem betterLink 5Anschluss für das Datenkabel
2
Bohrung, um das betterLink über Schrauben an der
Fläche zu befestigen
6
Anschluss für das Stromkabel
3
Staubschutzkappe
7
Datenkabel
4betterPacks-Anschluss 8Stromkabel
1.2 Lieferumfang
• betterLink
• Staubschutzkappen für die betterPacks-Anschlüsse
• Stromkabel
• Datenkabel
• Die vorliegende Gebrauchsanleitung
1.3 Produktlinie
Um betterLink zu nutzen, benötigen Sie betterPacks und die
betterUI von betteries. Die vollständige Liste kompatibler
Geräte finden Sie unter: https://betteries.com.
1.4 Ersatzteile
Verwenden Sie ausschließlich Originalersatzteile. Sie erhal-
ten diese beim Hersteller oder Vertriebshändler.
Artikelnummer Bezeichnung
Art-Nr. 06-00095 Staubschutzkappen
Art-Nr. 04-00092 Stromkabel
Art-Nr. 04-00091 Datenkabel
15
Sicherheit
DE
2 Sicherheit
2.1 Bestimmungsgemäße Verwendung
betterLink ist eine Docking-Plattform zur Verwendung des
Stroms von bis zu drei betterPacks in Innenräumen und im
Freien. Die betterPacks können mit betterLink zudem ge-
laden werden.
Das betterLink muss mit betterUI, der Steuer- und Über-
wachungseinheit, und einem oder mehreren betterPacks,
der mobilen Energielösung, kombiniert werden. Verwenden
Sie mit dem betterLink keinesfalls andere Batterien als
betterPacks.
betterLink ist ausschließlich für den professionellen
Einsatz bestimmt und unter bestimmten Betriebs- und
Umweltbedingungen zu verwenden, die in dieser Gebrauchs-
anleitung siehe „3.2 Bedingungen am Aufstellort“ auf
Seite 16 und siehe „9 Technische Daten“ auf Seite 21
festgelegt sind.
Jede andere Nutzung unter Bedingungen, die von den
Angaben in dieser Gebrauchsanleitung abweichen, gilt als
unsachgemäß und ist somit unzulässig. Beachten Sie ins-
besondere folgende Hinweise:
• Stellen Sie sich unter keinen Umständen auf das
betterLink und nutzen Sie es keinesfalls als Tritthilfe.
2.2 Haftungsausschluss
Bei Missachtung der Anweisungen in dieser Gebrauchs-
anleitung können schwere Verletzungen oder erhebliche
Sachschäden am betterLink die Folge sein. Der Hersteller
übernimmt keine Haung für Schäden am betterLink, wenn
diese auf die Nichtbeachtung der Anweisungen in dieser
Gebrauchsanleitung zurückzuführen sind.
2.3 Sicherheitshinweise
GEFAHR
Lebensgefahr durch elektrischen Strom!
Der Betrieb des betterLink erfolgt mit elektri-
schem Strom. Beim Berühren spannungsfüh-
render Teile und bei Beschädigung einzelner
Komponenten besteht akute Lebensgefahr.
• Überprüfen Sie das betterLink vor dem
Gebrauch immer auf Schäden. Verwenden
Sie das betterLink keinesfalls, wenn es be-
schädigt ist.
• Önen, reparieren oder verändern Sie das
betterLink nicht. Wenden Sie sich für eine
Reparatur immer an den Hersteller.
• Fassen Sie den Stecker eines Elektrogeräts nie
mit feuchten Händen an.
• Führen Sie keinesfalls leitende Gegenstände
in die Steckverbinder ein.
• Tauchen Sie das betterLink keinesfalls in
Wasser.
VORSICHT
Verletzungsgefahr durch Umkippen des
betterLink!
Wenn das betterLink nicht sicher und eben steht
oder die betterPacks nicht ordnungsgemäß
gestapelt oder abgenommen werden, kann
das betterLink umkippen und Verletzungen an
Händen, Füßen oder Beinen verursachen.
• Gehen Sie stets sorgsam mit dem betterLink
um.
• Befolgen Sie stets die Anweisungen zum
Einrichten des betterLink und Wechseln der
betterPacks.
HINWEIS
Technische Schäden durch Schmutz oder
Nässe an Anschlüssen und Steckern!
Werden Anschlüsse oder Stecker schmutzig oder
nass, kann die Folge sein, dass das betterLink
nicht mehr ordnungsgemäß funktioniert.
• Halten Sie die Anschlüsse und Stecker
stets sauber und trocken: Verwenden Sie
Staubschutzkappen und halten Sie die
Stecker von Staub und Wasser fern.
• Kontrollieren Sie die Anschlüsse regelmäßig
und reinigen Sie sie bei Bedarf siehe „5
Reinigung“ auf Seite 19.
2.4 Im Störungsfall
Önen, reparieren oder verändern Sie das betterLink keines-
falls selbst. Wenden Sie sich für eine Reparatur immer an den
Hersteller.
Telefon: +49 152-05735306
E-Mail: info@betteries.com
16
DE
Einrichtung / Nutzung
3 Einrichtung
3.1 betterLink auspacken
1. Önen Sie vorsichtig das Versandpaket und entnehmen
Sie das betterLink aus dem Karton. Es ist nach dem
Auspacken sofort einsatzbereit.
2. Bewahren Sie die Verpackung für zukünige Transporte,
die Rückgabe oder eine längerfristige Lagerung auf.
3. Prüfen Sie, ob die Lieferung vollständig erfolgt ist. Das
Paket muss das betterLink, Staubschutzkappen für alle
Anschlüsse, das Stromkabel, das Datenkabel und die
Gebrauchsanleitung enthalten.
4. Stellen Sie sicher, dass das betterLink, das Stromkabel
und das Datenkabel unbeschädigt sind.
5. Wenn Sie feststellen, dass Teile fehlen oder beschädigt
sind, kontaktieren Sie den Hersteller siehe „2.4 Im
Störungsfall“ auf Seite 15.
3.2 Bedingungen am Aufstellort
• Stellen Sie das betterLink immer auf eine ebene und feste
Fläche. Schrauben Sie das betterLink ggf. auf der Fläche
fest. Verwenden Sie dazu ausschließlich Schrauben
(M6) oder Bolzen, die für die Kräe, die bei Nutzung des
betterLink aureten können, ausgelegt sind. Prüfen Sie
die Schrauben und Bolzen regelmäßig auf Anzeichen
einer Beschädigung oder Lockerung.
• Bis zu einer Schrägstellung von maximal 10 % besteht
noch kein Kipprisiko.
• Sorgen Sie für Schutz vor Regen und direkter
Sonneneinstrahlung. Das erhöht die Lebensdauer des
betterLink. Wenn Sie das betterLink in Innenräumen
verwenden, achten Sie stets darauf, dass die relative
Lufeuchtigkeit (nicht kondensierend) im Raum unter
95 % liegt.
• Prüfen Sie, ob die Vorgaben bezüglich der
Umgebungstemperatur erfüllt sind siehe „9 Technische
Daten“ auf Seite 21.
• Verwenden Sie das betterLink keinesfalls in explosions-
fähiger Atmosphäre.
• Vermeiden Sie den Einsatz in staubiger Umgebung.
• Verwenden Sie das betterLink nicht über einen langen
Zeitraum an Orten mit einem hohen Salzgehalt in der Lu
oder im Wasser, etwa am Meer oder im Winter an Straßen,
die mit Salz abgestreut oder enteist werden, oder in
hochkorrosiven Umgebungen.
• Platzieren Sie das betterLink nicht in der Nähe von
Wärmequellen, etwa Heizkörpern oder Elektrogeräten mit
hoher Wärmestrahlung. Sorgen Sie immer für Abstand
zu derartigen Wärmequellen, damit die Bedingungen
bezüglich der Umgebungstemperatur erfüllt sind siehe
„9 Technische Daten“ auf Seite 21.
• Stellen Sie das betterLink keinesfalls in der Nähe explosi-
ver oder gefährlicher Stoe wie Benzin auf.
• Achten Sie darauf, dass das Stromkabel und das
Datenkabel nicht unter Zug stehen.
4 Nutzung
4.1 betterLink prüfen
1. Prüfen Sie das betterLink, einschließlich Anschlüssen,
Stromkabel und Datenkabel, vor dem Gebrauch.
2. Wenn Sie eine Beschädigung feststellen, etwa Risse,
spröde Stellen, Gerüche, Rauch, verblassende Farbe oder
Flüssigkeitsaustritt, verwenden Sie das betterLink nicht
und setzen Sie sich mit dem Hersteller in Verbindung
siehe „2.4 Im Störungsfall“ auf Seite 15.
4.2 betterLink an betterUI und
Elektrogeräte anschließen
✓ Die betterUI ist noch nicht angeschlossen.
✓ Die Elektrogeräte sind ausgeschaltet und noch nicht
angeschlossen.
Abb. 2 Einstecken des Stromkabels am betterLink.
1. Stecken Sie das Stromkabel in das betterLink ein.
2. Stecken Sie das Stromkabel in das Elektrogerät ein.
Folgen Sie stets den Anweisungen des Herstellers des
Elektrogeräts.
17
Nutzung
DE
Abb. 3 Einstecken des Datenkabels am betterLink.
3. Schließen Sie die betterUI an das betterLink an. Stecken
Sie dazu das Datenkabel in das betterLink ein und schrau-
ben Sie es fest.
Abb. 4 Einstecken des Datenkabels an der betterUI.
4. Stecken Sie das Datenkabel in einen der zwei Anschlüsse
an der betterUI ein.
4.3 betterPacks stapeln
1. Entfernen Sie die Staubschutzkappen von den
Anschlüssen und legen Sie sie für die spätere erneute
Verwendung beiseite.
2. Heben Sie die betterPacks zu zweit an.
3. Richten Sie die Anschlüsse des betterLink und die
betterPacks-Anschlüsse senkrecht übereinander aus.
Abb. 5 Stapeln des betterPack auf dem betterLink.
4. Setzen Sie das erste betterPack vorsichtig und ohne
Kraeinwirkung auf das betterLink auf.
Abb. 6 Ausklappen der Flügelschraube.
5. Verriegeln Sie das erste betterPack auf dem betterLink.
Dazu klappen Sie die Flügelschraube aus und haken das
gebogene obere Ende am oberen Teil des betterPack ein.
Abb. 7 Drehen der Flügelschraube.

18
Nutzung
DE
6. Drehen Sie dann die Flügelschraube um 180 ° im
Uhrzeigersinn.
Abb. 8 Einklappen der Flügelschraube.
7. Klappen Sie die Flügelschraube wieder ein.
Abb. 9 betterPack im verriegelten Zustand.
8. Sichern Sie die Verriegelung ggf. mit einem
Vorhängeschloss in ihrer Position.
9. Stapeln Sie weitere betterPacks in gleicher Weise und ver-
riegeln Sie sie. Beginnen Sie mit einem betterPack vom
Typ „Multi“ und folgen Sie dann den Anweisungen für das
Stapeln von betterPacks.
Abb. 10 Stapeln der betterPacks auf dem betterLink.
10. Kontrollieren Sie vor dem Gebrauch immer, ob die
betterPacks richtig verriegelt sind.
11. Zum Entfernen eines betterPack entriegeln Sie es zu-
nächst. Dazu klappen Sie die Flügelschraube aus, drehen
sie um 180 ° gegen den Uhrzeigersinn und klappen Sie
wieder ein.
12. Heben Sie das betterPack zu zweit senkrecht nach oben
an.
13. Stellen Sie das betterPack an einem sicheren Ort ab.
14. Setzen Sie zum Schutz der Anschlüsse die
Staubschutzkappen wieder auf.
19
DE
Nutzung / Reinigung
4.4 betterPacks mit betterLinks laden
✓ Die betterPacks sind sicher auf dem betterLink gestapelt.
Um die betterPacks auf dem betterLink zu laden, benötigen
Sie einen zusätzlichen Adapter, den Sie über das Stromkabel
an ein Ladegerät anschließen. Verwenden Sie ausschließ-
lich ein Ladegerät von betteries. Folgen Sie stets den
Anweisungen des Herstellers des Adapters und beachten Sie
die Angaben in der Gebrauchsanleitung des Ladegeräts.
4.5 Elektrogeräte verwenden
✓ Das Elektrogerät ist abgeschaltet.
✓ Datenkabel, Stromkabel und Stecker des Elektrogeräts
sind sicher angeschlossen.
✓ Ein oder mehrere betterPacks werden geladen und sind
sicher auf dem betterLink gestapelt.
Abb. 11 Ein/Aus-Taste an der betterUI.
1. Schalten Sie die betterUI ein, indem Sie auf die Ein/Aus-
Taste drücken.
2. Schalten Sie das Elektrogerät ein. Folgen Sie stets den
Anweisungen des Herstellers des Elektrogeräts.
3. Wenn Sie ein Problem mit dem Elektrogerät feststellen,
schalten Sie es unverzüglich ab und trennen Sie es vom
betterLink.
4. Fragen Sie beim Hersteller des Elektrogeräts nach, wie zur
Reparatur des Elektrogeräts vorzugehen ist.
5 Reinigung
GEFAHR
Lebensgefahr durch elektrischen Strom!
Der Betrieb des betterLink erfolgt mit elektri-
schem Strom. Bei Berühren spannungsführender
Teile besteht Lebensgefahr.
• Bevor Sie das betterLink reinigen, trennen
Sie das betterLink stets von der betterUI,
allen gestapelten betterPacks und allen
Elektrogeräten.
• Tauchen Sie das betterLink keinesfalls in
Wasser.
• Reinigen Sie das betterLink nicht mit einem
Hochdruckreiniger und sprühen Sie keines-
falls Wasser direkt auf das betterLink.
HINWEIS
Schäden durch ungeeignete Reinigungsmittel!
Der Einsatz ungeeigneter Reinigungsmittel,
Lösungsmittel oder anderer Chemikalien beim
Reinigen des betterLink kann Schäden an diesem
verursachen.
• Reinigen Sie das betterLink ausschließlich mit
einer trockenen weichen Bürste oder einem
solchen Tuch.
• Verwenden Sie zur Reinigung von Steckern
und Anschlüssen nur dann ein Druckluspray
oder einen Drucklureiniger, wenn das be-
treende Produkt speziell für die Reinigung
oder das Freiblasen elektronischer Bauteile
zugelassen ist.
1. Reinigen Sie die Außenflächen des betterLink regelmäßig
mit einer trockenen weichen Bürste oder einem solchen
Tuch.
2. Kontrollieren Sie Stecker und Anschlüsse auf
Verunreinigung und reinigen Sie sie ggf. mit einem zu-
gelassenen Druckluspray oder -reiniger.
3. Achten Sie beim Reinigen auf mögliche Beschädigungen.
Wenn Sie eine Beschädigung feststellen, verwenden
Sie das betterLink nicht und setzen Sie sich mit dem
Hersteller in Verbindung siehe „2.4 Im Störungsfall“
auf Seite 15.
20
DE
Transport / Lagerung / Fehlerbehebung
6 Transport
Abb. 12 Aufkleber auf dem Versandkarton.
Beim Transport des betterLink besteht Bruchgefahr. Lassen Sie das betterLink nicht fallen, gehen Sie mit dem betterLink stets
sorgsam um und halten Sie das betterLink stets trocken.
7 Lagerung
• Gehen Sie stets sorgsam mit dem betterLink um.
• Lagern Sie das betterLink in einem trockenen Raum mit
einer relativen Lufeuchtigkeit (nicht kondensierend) von
unter 50 %.
• Lagern Sie das betterLink nicht an Orten mit einem hohen
Salzgehalt in der Lu oder im Wasser, etwa am Meer.
8 Fehlerbehebung
Problem Mögliche Ursache Lösung
Das angeschlossene
Elektrogerät schaltet sich
plötzlich ab.
Die Betriebsgrenze der
betterPacks wurde er-
reicht und die betterPacks
haben sich automatisch
abgeschaltet.
1. Setzen Sie ein anderes Elektrogerät ein, das innerhalb
der Betriebsgrenzen der betterPacks liegt (siehe die
Gebrauchsanleitung der betterPacks).
Es sind sichtbare Risse
oder andere Schäden am
betterLink vorhanden.
Das betterLink wurde fallen
gelassen oder auf andere
Weise beschädigt.
1. Verwenden Sie keinesfalls ein beschädigtes betterLink.
2. Schicken Sie das beschädigte betterLink zur Reparatur
an den Hersteller siehe „2.4 Im Störungsfall“ auf
Seite 15.
Es ist eine deutliche
Veränderung am betterLink,
etwa ein ungewöhnlicher
Geruch oder eine Verformung,
wahrnehmbar.
Das betterLink wurde fallen
gelassen oder auf andere
Weise beschädigt.
1. Schalten Sie sofort die Elektrogeräte und die betterUI
ab.
2. Schicken Sie das beschädigte betterLink zur Reparatur
an den Hersteller siehe „2.4 Im Störungsfall“ auf
Seite 15.
Table of contents
Languages:


