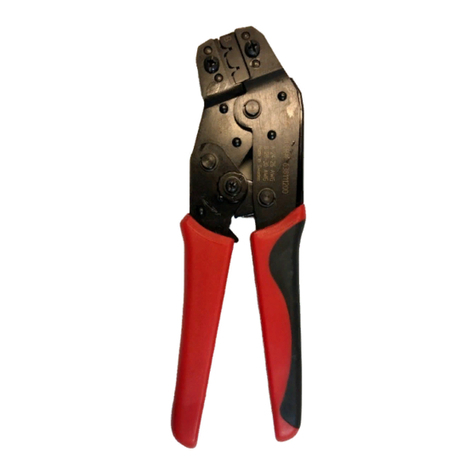
BEX ProBEX PBO User manual

MULTIBEX CRIMP TOOL WITH ROTATIONAL DIES
Country of origin: Croatia (EU)
Manufacturer: BEX d.o.o., Mučići 37b, 51213 Jurdani
Instruction Sheet
ProBEX PBO
06 SEP 22 REV 00
-1-
INSTRUCTION MANUAL
1. INTRODUCTION AND TOOL FEATURES
2. CONFIGURATION OF THE TOOL
3. DIE SET CHART
4. STRIPPING OF WIRE OUTER INSULATION
5. WORKING WITH DIE SET
6. CRIMPING PROCEDURE
7. UNBLOCKING THE TOOL
8. TOOL REGULATION PROCEDURE
9. MAINTENANCE AND INSPECTION
10. WARRANTY
1. INTRODUCTION AND TOOL FEATURES
1.1. Instruction sheet provides application and maintenance procedures for Probex hand tool with die sets. The hand tool consists of
the die assembly and hand tool frame assembly. Die assembly can be purchased separately or with the hand tool.
❑With this tool only plugs of appropriate type have to be used. Crimping plugs of unsuitable type may result with unsatisfactory
characteristics of crimped connections and eventually with damaging of the tools and is to be strictly avoided.
1.2. FEATURES
❑Each insert can crimp 4 crossections
❑Crimp nests are fully machined in high carbon steel, heat treated and nickel coated
❑Quality crimp due to parallel crimping performance
❑Precise eccentric adjustment
❑Safety ratchet relief
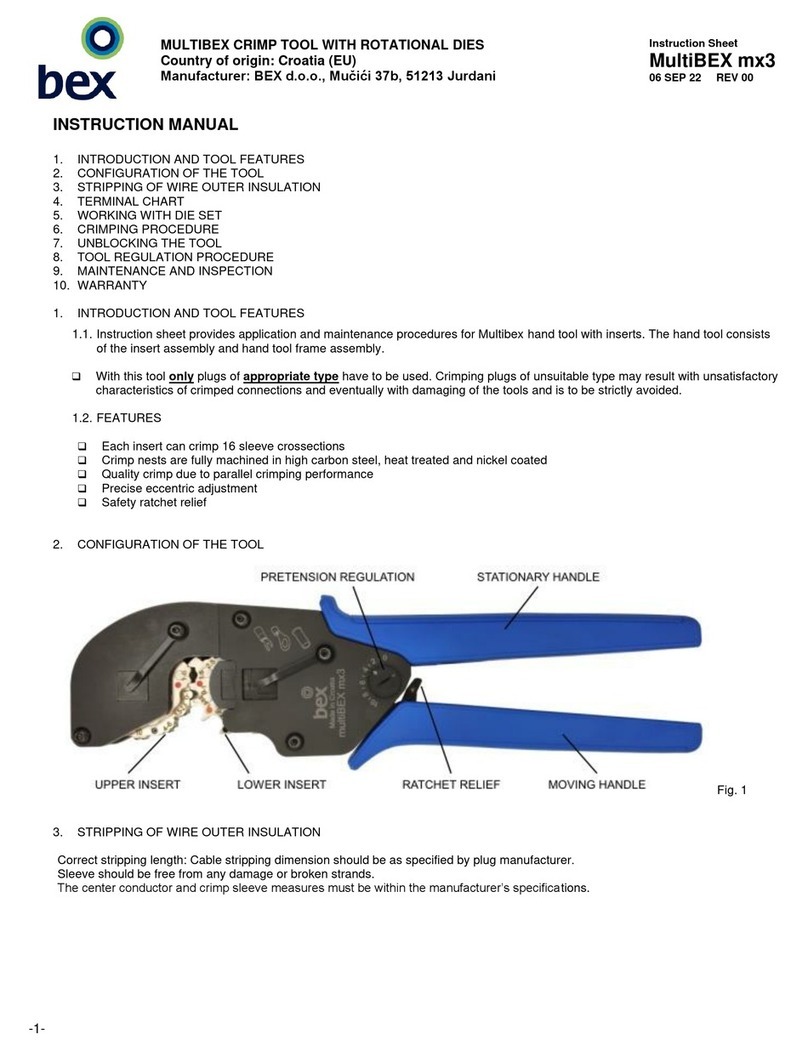
2. CONFIGURATION OF THE TOOL
Fig. 1 Fig. 2
B
A

MULTIBEX CRIMP TOOL WITH ROTATIONAL DIES
Country of origin: Croatia (EU)
Manufacturer: BEX d.o.o., Mučići 37b, 51213 Jurdani
Instruction Sheet
ProBEX PBO
06 SEP 22 REV 00
-2-
3. DIE SET CHART
DIE SET
CONNECTOR
TYPE
INSERT SIZE
MARKING DOT COLOR
PB1
UNINSULATED
0.5; 1; 1.5
2.5; 4
PB2
UNINSULATED
6; 10; 16
PB3
INSULATED
0.5-1
1.5-2.5
4-6
RED
BLUE
YELLOW
PB4
TAB
0.5-1
1.5-2.5
4-6
PB5
END SLEEVE
0.25; 0.5
1; 1.5; 2.5
4; 6; 10; 16
PB6
TURNED
0.14-1
1.5; 2.5; 4
PB7
TURNED
6; 10
PB8
COAXIAL
2.67; 3.25; 4.52
PB9
FIBER
3.25; 3.80; 4.95
PB10
FIBER
3.0; 4.95; 6.5
4. STRIPPING OF WIRE OUTER INSULATION
Correct stripping length: Cable stripping dimension should be as specified by plug manufacturer.
Sleeve should be free from any damage or broken strands.
The center conductor and crimp sleeve measures must be within the manufacturer’s specifications.
5. WORKING WITH DIE SET
ProBEX die set consist of upper and lower inserts. Inserts should be installed by following procedure:
•Before insert installation toolframe handle should be in open position.
•Lower insert has to be placed into toolframe and secured by lightly tightening M4 hex screw “A”. (Fig.1)
•Upper insert can be placed into toolframe and secured by lightly tightening M5 round head screw “B” . (Fig.1)
•Close the handles slowly until handles are fully closed
•While holding handles in closed position fully tighten screws holding upper and lower insert
6. CRIMPING PROCEDURE
Prepare plug and cable according to the instructions packaged with the plug.
Ensure that appropriate contact is inserted into right crimping section. Follow instructions shown in Fig. 3 –Fig. 5
In case the tool becomes block for any reason, please follow unblocking procedure described in section 7.
After the full crimping cycle is done, let the tool open fully by itself in order to remove crimped plug.
Pull out the plug assembly. The tool is ready for next crimping cycle.

MULTIBEX CRIMP TOOL WITH ROTATIONAL DIES
Country of origin: Croatia (EU)
Manufacturer: BEX d.o.o., Mučići 37b, 51213 Jurdani
Instruction Sheet
ProBEX PBO
06 SEP 22 REV 00
-3-
Fig.3 Fig.4 Fig.5
7. UNBLOCKING THE TOOL
❑IMPORTANT: Apply working force on the tool handles while unblocking. It will prevent hurting yourself and possible
damages on the tool.
❑In case of improper crimp, push the ratchet relief (Fig.9) in direction shown to unblock the tool and remove obstruction before
continuing with the work.
8. TOOL REGULATION PROCEDURE
❑After prolonged work period, tool crimping performance can change slightly due to final self-adjustment of the tools’ components.
This handtool is equipped with eccentric axle which allows periodical adjustment of crimping force and tool recalibration to
maintain correct crimp performance.
1. Loosen knurled nut (C) by turning it counter clockwise (Fig.7)
2. Press the nut until toothed adjustment wheel (B) is lifted so it can be rotated freely (Fig.6)
3. Insert screwdriver into adjustment wheel groove and rotate it to achieve desired pretension.
4. Marking dot at “0“ sets lowest pretension, while dot at “10“ sets highest pretension
5. Once pretension is set push adjustment wheel back into its position and tighten knurled nut
1. INSERT CONNECTOR INTO
CORRESPONDING CRIMPING NEST.
WHILE HOLDING THE TOOL AT THE
UPPER PART OF THE GRIPS CLOSE
HANDLES UNTIL CONNECTOR IS HELD
2. INSERT THE CABLE
3. HOLD THE GRIPS AT THE
LOWER END FOR HIGHER
CRIMPING FORCE AND FULLY
CLOSE THE HANDLES

MULTIBEX CRIMP TOOL WITH ROTATIONAL DIES
Country of origin: Croatia (EU)
Manufacturer: BEX d.o.o., Mučići 37b, 51213 Jurdani
Instruction Sheet
ProBEX PBO
06 SEP 22 REV 00
-4-
Fig.6 Fig.7
9. MAINTENANCE AND INSPECTION
❑Crimping handtool ProBEX is intended to be used for crimping end sleeves, insulated and uninsulated terminals. Using this handtool for
any other purpose, or for crimping of any other objects, can result in damaging the tool and the objects being crimped and prevention of
its normal further functioning, for what manufacturer cannot be held responsible.
❑Handtool is equipped with full cycle ratchet mechanism which with optimized leverage system within the tools makes working with these
tools easy and simple. In case of improper crimp, ratchet release mechanism allows you to easily open the handtool and remove
obstruction before work is continued. Check unblocking procedure (section 9.).
❑Tool itself also incorporates possibility of periodical adjustment of the crimping force and tool recalibration via eccentric axle to maintain
correct crimp performance. Check regulation procedure (section 10.)
❑For removal of dust, moisture and other contaminants usage of clean brush or soft, lint-free cloth is recommended. Do not use
agressive agents (thinner, alcohol,...) or hard objects that could damage the tool.
❑Make sure that during the work bearing surfaces, shafts and pivot points are protected with thin coat of quality machine or motor oil. Do
not oil excessively.
❑When the tool is not in use, store it in a closed position –with handles closed. That will keep other objects from becoming stuck
between crimping dies and damaging them. Keep the tool in a dry and clean area.
❑Use only original spare parts.
10. WARRANTY
This tool is made of the best quality materials. All vital components are long life tested. All tools are warranted to be free of manufacturing
defects for a period of 30 days. Should such a defect occur, we would exchange the tool free of charge. This will not be applicable to
altered, misused, or damaged tools. This tool is designed for hand use only. Any clamping, fixturing, or use of handle extensions voids this
warranty.
A
B
C
Table of contents
Other BEX Crimping Tools manuals
Popular Crimping Tools manuals by other brands

TE Connectivity
TE Connectivity ERGOCRIMP 1-1579001-3 instruction sheet
TE Connectivity
TE Connectivity 2390075-1 instruction sheet
TE Connectivity
TE Connectivity 2381454-1 Guidelines
Staubli
Staubli CTD-M-CZ Assembly instructions
molex
molex 200218-4500 Application Tooling Specification Sheet
molex
molex 63823-7570 Specification sheet
Cembre
Cembre TC025 Operation and maintenance manual

Greenlee
Greenlee K425BG instruction manual
TE Connectivity
TE Connectivity HDP-400 Customer's manual

TE Connectivity
TE Connectivity 2386892-1 instruction sheet

Cable Bullet
Cable Bullet YYQ-300 instructions
Tyco Electronics
Tyco Electronics PRO-CRIMPER III instruction sheet
