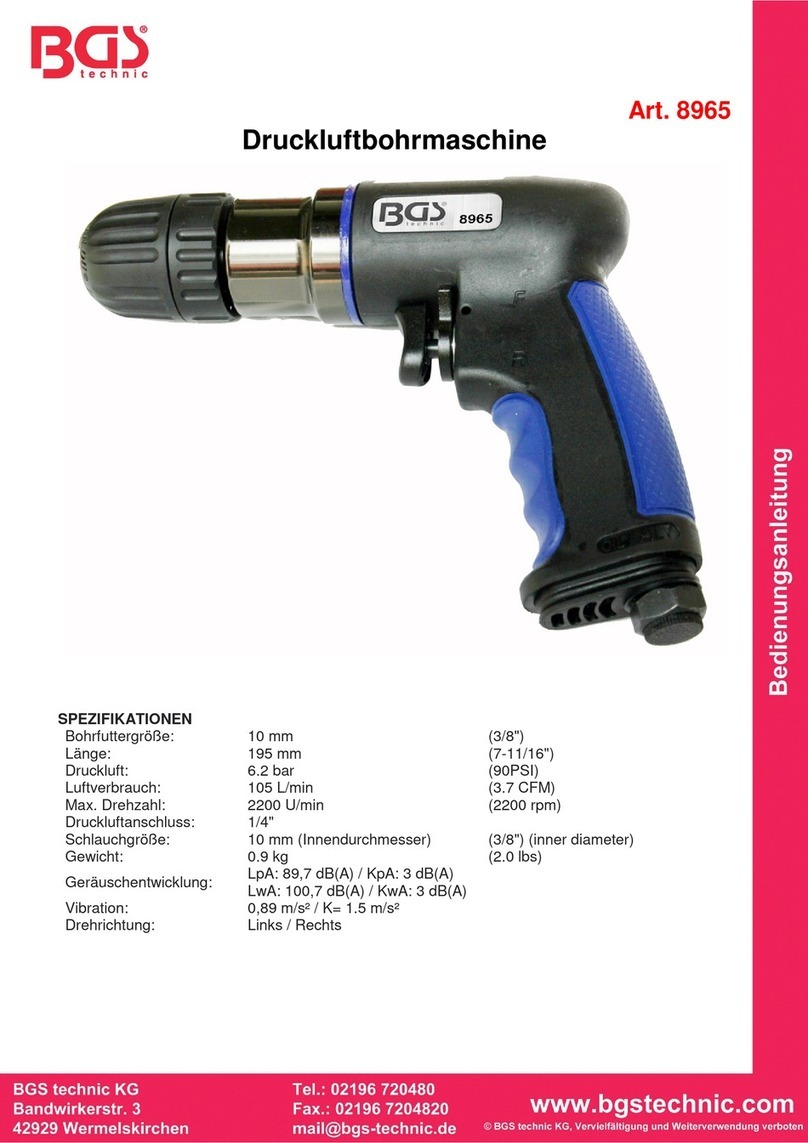
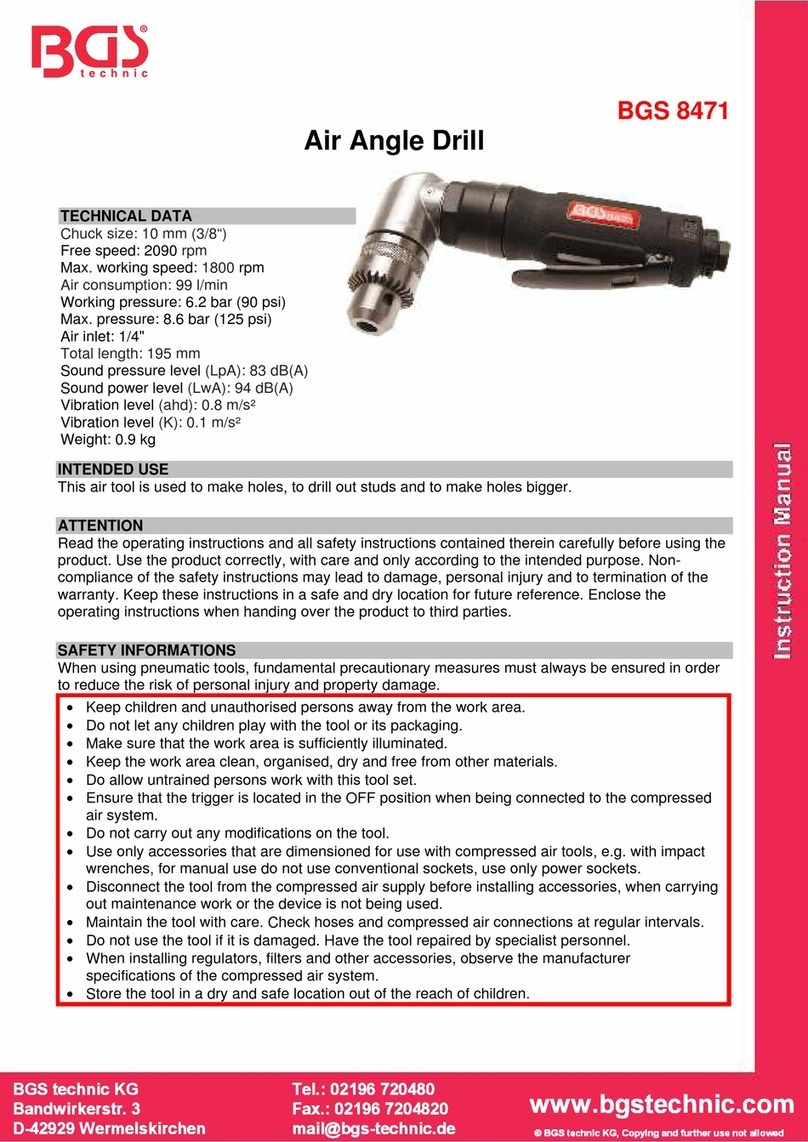
BGS technic 8852 User manual

Art. 8852
Druckluft-Bohrmaschine
SPEZIFIKATIONEN
Bohrfuttergröße: 0,8 - 10 mm
Max. Drehzahl: 1800 U/min
Luftverbrauch: 170 L/min (6 cfm)
Arbeitsdruck: 6,3 Bar (90 psi)
Luftanschluss: 1/4"
Luftschlauch (empfohlen): 9,5 mm (3/8”) (Innen-Ø)
Länge: 197 mm (7,75”)
Gewicht: 1,13 kg (2,49 lbs)
Geräuschentwicklung: LpA = 98 dB(A)
LwA = 101,2 dB(A)
Vibration: ahd = 4,8 m/s
K = 1,5 m/s
ACHTUNG!
Lesen, verstehen und befolgen Sie alle Anweisungen und Warnungen vor und bei der
Inbetriebnahme dieses Druckluftgerätes. Falsche Handhabung und Missachtung der
Sicherheitshinweise können Verletzungen und Sachschäden verursachen und zum Erlöschen der
Garantie führen.
Vor dem ersten Gebrauch das Druckluftgerät mit 4 bis 5 Tropfen Druckluftgeräte-Öl schmieren.
Nur mit Druckluftsystemen betreiben, die über einen korrekten Luftdruck und ausreichend
Luftvolumen (L/min) für dieses Werkzeug verfügen.
WICHTIGE SICHERHEITSINFORMATIONEN
1. Stellen Sie sicher, dass das Werkzeug sich in der Position OFF befindet, wenn es mit dem
Druckluftsystem verbunden wird.
2. Vermeiden Sie unbeabsichtigtes Anlaufen des Werkzeugs. Tragen Sie das Werkzeug nicht mit
dem Finger am Abzug.
3. Tragen Sie bei Verwendung von Druckluft-Werkzeugen immer eine seitlich geschlossene,
zugelassene Schutzbrille, Sicherheitshandschuhe und verwenden Sie eine geeignete
Atemschutzmaske wenn Staub aufgewirbelt wird.
4. Verwenden Sie ausschließlich Zubehör, das für den Einsatz mit Druckluftferäten ausgelegt ist.
5. Trennen Sie das Werkzeug von der Druckluftversorgung, bevor Sie Zubehör installieren,
Wartungen durchgeführen oder das Gerät nicht in Gebrauch ist.
6. Betreiben Sie das Werkzeug immer mit gesundem Menschenverstand.
7. Tragen Sie keine weite Kleidung oder Schmuck die von beweglichen Teilen erfasst werden und
zu Verletzungen führen können.
8. Betreiben Sie das Werkzeug nur in sicherer Entfernung von sich selbst und anderen.
9. Verwenden Sie dieses Druckluftgerät nur an Druckluftanlagen die über eine Wartungs- / Öler-
Einheit verfügen.

LUFTVERSORGUNG
Saubere Luft und korrekter Luftdruck ist für die Versorgung dieses Werkzeugs unumgänglich. Der
maximale Druck für dieses Werkzeug liegt bei 6,3 bar und ist für die meisten Druckluft-Werkzeuge
dieser Klasse empfohlen. Dem Abschnitt Spezifikationen können alle Daten entnommen werden. Eine
Erhöhung des Luftdrucks ist erforderlich, wenn Länge des Luftschlauchs oder andere Umstände zu
einer Minderung des Luftdrucks führen. So muss der Luftdruck von 6,3 eventuell auf 7,2 bar erhöht
werden um einen Druck von 6,3 bar bei laufendem Werkzeug zu gewährleisten. Wasser im Schlauch
und Kompressor führt zur Reduzierung der Leistungsfähigkeit und Beschädigung der Druckluft-
Geräte. Entwässern Sie das Druckluft-System vor jedem Gebrauch.
Verwenden Sie einen Druckregler mit Manometer, wenn der Druck zu hoch ist.
Darstellung einer empfohlener Druckluftanlage
1 Werkzeug 6 Absperrventil 11 Lufttrockner
2 Druckluftschlauch 7 Flexibler Schlauch 12 Leitung 1“ oder größer
3 Öler (erforderlich) 8 Anschluss 13 Kompressor
4 Druckregler 9 Entwässerungsventil 14 Autom. Entwässerung
5 Filter 10 Leitung 1/2“ oder größer 15 Entwässerungsventil
SCHMIERUNG & WARTUNG
Druckluftgerät nur an Druckluftsystem betreiben die über einen automatischen Öler verfügen
Den im Abschnitt „Spezifikationen“ angegebnen maximalen Druck nicht übersteigt.
Vor dem ersten Gebrauch 4 bis 5 Tropfen Druckluftgeräte-Öl in den Lufteinlass geben.
Entwässern Sie das Druckluft-System vor jedem Gebrauch.
Wasser in der Druckluftleitung führt zu Zerstörung des Werkzeugs und zu Leistungsverlust.
Reinigen bzw. tauschen Sie Luftfilter im vorgeschriebenen Intervallen aus.
Öl für
Druckluftgeräte

BEDIENUNGSANLEITUNG
1. Schmieren Sie das Werkzeug vor dem Betrieb. Siehe "Pflege und Wartung".
2. Öffnen Sie das Bohrfutter durch Drehen von Hand gegen den
Uhrzeigersinn. (Abb.1)
Abb.
1
3. Stecken Sie den Bohrer in das Bohrfutter und Befestigen Sie
diesen durch Drehen des Bohrfutters von Hand im
Uhrzeigersinn. Stellen Sie sicher, dass der Bohrer mittig und
feste im Bohrfutter sitz, bevor Sie die Bohrmaschine
verwenden (Abb.2) ACHTUNG: Verwenden Sie nur Bohrer
deren Drehzahlfestigkeit gleich oder höher der
Bohrmaschinen-Drehzahl ist.
Abb.
2
4. Entfernen Sie die Verschlusskappe vom Lufteinlass und
verbinden das Druckluftwerkzeug mit dem Druckluftschlauch.
Justieren Sie die Druckluft auf einen Druckwert von 6,3 Bar.
(Abb.3)
Abb.
3
5. Stellen Sie das F/R Ventil nach oben auf die Position “F”
(Abb.4) und betätigen Sie den Auslöser. Die Maschine
beginnt zu Arbeiten (rechtsdrehend).
Abb.
4
6. Stellen Sie das F/R Ventil nach unten auf die Position “R”
(Abb.5) und betätigen Sie den Auslöser. Die Maschine
beginnt zu Arbeiten (linksdrehend). Wenn notwendig, können
Sie in dieser Stellung den Bohrer im Werkstück Freidrehen.
Abb.
5

PFLEGE UND WARTUNG
Das Werkzeug sollte täglich oder vor jedem Einsatz mit Öl für Druckluftwerkzeug (nicht enthalten)
geschmiert werden. Öl für Druckluftwerkzeug ist erhältlich bei großen Werkzeugmärkten.
Verwenden können Sie ein SAE10 Öl, Nähmaschinenöl oder ein anderes hochwertiges,
feuchtigkeitsabsorbierendes Turbinenöl. Verwenden Sie keine Reinigungsmittel zur Schmierung.
Im Dauerbetrieb sollte das Werkzeug alle 1 bis 2 Stunden geölt werden.
Dies kann manuell oder unter Verwendung eines Ölers erfolgen. Bei manueller Schmierung gehen Sie
bitte wie folgt vor:
Abb.
6
1. Trennen Sie das Werkzeug von der Druckluft. (Abb.6)
2. Geben Sie ein paar Tropfen Druckluftwerkzeug-Öl in den
Lufteinlass. (Abb.7) Verwenden Sie keine dickeren Öle, dies
kann zu verminderter Leistung oder Fehlfunktionen führen.
3. Verbinden Sie das Werkzeug mit der Druckluft, lassen Sie das
Werkzeug ohne Last für ein paar Sekunden laufen. Dadurch wird
das Öl im Werkzeug verteilt. Überschüssiges Öl kann im Bereich
des Bohrfutters austreten. Richten Sie das Werkzeug niemals
auf sich oder anderen Personen.
4. Geben Sie nach Verwendung bzw. vor dem Lagern 4 bis 5
Tropfen Druckluftwerkzeug-Öl in den Lufteinlass, verbinden Sie
das Gerät mit der Druckluft und lassen Sie das Werkzeug ohne
Last für ein paar Sekunden laufen, das Öl wird im Werkzeug
verteilt und die Standzeit dadurch verlängert.
5. Lagern Sie das Werkzeug niemals in einer feuchten Umgebung,
die dadurch entstehende Rostbildung im Gerät kann zu
irreparablen Schäden führen. Ölen Sie das Gerät vor dem
Lagern.
6. Ist das Werkzeug stark beschädigt oder verschlissen und kann
nicht mehr verwendet werden, führen Sie es dem Recycling zu.
Entsorgen Sie es nicht mit dem "normalen" Hausmüll und legen
Sie es nie ins Feuer.
Abb.
7
FEHLERBEHEBUNG
Problem Mögliche Ursache Abhilfe
Verschmutzung im
Werkzeug Spülen Sie das Werkzeug mit Öl
Kein Öl im Werkzeug Ölen Sie das Werkzeug (siehe Wartung).
Stellen Sie den Regler am Werkzeug auf Maximum.
Zu niedriger Druck Justieren Sie den Kompressordruck auf 6,3 Bar
Druckluft-Leckage Abdichtung mit Dichtband vornehmen und alle
Verbindungen befestigen.
Zu geringer Schlauch-Innendurchmesser.
Lange Schläuche erfordern einen Innendurchmesser von
12,5 mm (1/2") oder größer.
Druckverlust
Mehrerer Schläuche mit Kupplungen verbunden.
Verwenden Sie einen duchgehenden Schlauch.
Defekte Rotorblätter Rotorblätter erneuern.
Werkzeug dreht
langsam oder
garnicht
Wasser tritt am Auslass aus
Wasser aus dem Kompressorkessel ablassen. (Siehe
Handbuch Kompressor). Werkzeug ölen, 1-2 Sekunden
laufen lassen. Diese Prozedur mehrere male wiederholen,
bis kein Wasser mehr austritt.
Starke
Vibration
oder Wärme
Falsche Schmierung Folgen Sie den Anweisungen unter Wartung.
HINWEIS: Für alle anderen Probleme, die in der Tabelle nicht aufgeführt sind, wenden Sie sich bitte
an den Händler, bei dem Sie das Werkzeug erworben haben.

SW-Stahl und Werkzeugvertriebs GmbH Tel. +49 (0) 2191 / 46438-0
F56essartSresukreveL ax +49 (0) 2191 / 46438-40
ed.lhatsws@ofni:liaM-EdiehcsmeR79824-D
Instruction Manual
BGS technic KG
Bandwirkerstr. 3
42929 Wermelskirchen
Tel.: 02196 720480
Fax.: 02196 7204820
www.bgstechnic.com
© BGS technic KG, Copying and further use not allowed
Art. 8852
Air Power Drill
SPECIFICATIONS
Drill Chuck Size: 0.8 – 10 mm
Max. Speed: 1800 rpm
Average Air Consumption: 6 cfm (170 L/min)
Working Pressure: 90 psi (6.3 bar)
Air Inlet: 1/4”
Air Hose (recommended): 3/8” (inside diameter)
Length: 7.75” (197 mm)
Weight: 1.13 kg (2.49 lbs)
Noise Level: LpA = 98 dB(A)
LwA = 101.2 dB(A)
Vibration Level: ahd = 4.8 m/s
K = 1.5 m/s
IMPORTANT SAFETY INFORMATION
WARNING!
Read and understand and follow all instructions and warnings before operating this tool.
Failure to do so may result in personal injury and/or property damage and will void warranty.
Before first use, lubricate the air tool with 4 to 5 drops of pneumatic equipment oil.
Use proper air pressure and CFM rating listed for this tool.
1. Be sure air tool is in OFF position when connecting tool to air supply.
2. Avoid unintentional starting of the tool. Do not carry the tool with a finger on the trigger.
3. Always wear approved eye protection when using tools. If raising dust, wear a suitable mask.
4. Use only those accessories that are designed for use with tools.
5. Be sure to disconnect tool from air supply before changing accessories, performing service on
tool, and when not in use.
6. As with any tool, use common sense when operating.
7. Do not wear loose clothing or jewelry that could become caught by moving parts, causing injury.
8. Operate tool a safe distance from yourself and others in the work area.
9. Device may only be operated with air maintenance unit incl. oiler

SW-Stahl und Werkzeugvertriebs GmbH Tel. +49 (0) 2191 / 46438-0
F56essartSresukreveL ax +49 (0) 2191 / 46438-40
ed.lhatsws@ofni:liaM-EdiehcsmeR79824-D
Instruction Manual
BGS technic KG
Bandwirkerstr. 3
42929 Wermelskirchen
Tel.: 02196 720480
Fax.: 02196 7204820
www.bgstechnic.com
© BGS technic KG, Copying and further use not allowed
AIR SOURCE
Clean air of correct air pressure is recommended for the power supply for this tool. A maximum of 90
PSI at the tool is recommended for most air tools of this class. Check specifications section for
recommended pressure. Depending on length of air hose and other circumstances, air pressure at
compressor may need to be increased to 100 PSI to ensure 90 PSI at the tool. Water in the air hose
and compressor tank contributes to reduced performance and damage of the air tool. Drain the air
tank and filters before each use and as necessary to keep the air supply dry. Hose length over 25”
causes loss in line pressure. Increase hose ID or increase compressor pressure to compensate
for the pressure loss. Use an in-line pressure regulator with gauge if air inlet pressure is critical.
Recommended air compressor unit
1 Tool 6 Shut Off Valve 11 Air Dryer
2 Air Hose 7 Whip Hose 12 1“ Or Larger Pipe
3 Oiler 8 Connector 13 Air Compressor
4 Pressure Regulator 9 Drain Valve (Drain Daily) 14 Auto Drain
5 Filter 10 ½“ or Larger Pipe 15 Drain Valve (Drain Daily)
LUBRICATION & MAINTENACE
Only operate unit on compressed air system that equipped an automatic oiler.
Do not exceed maximum pressure which is described under "Specifications" section.
Before first use give 4-5 drops of pneumatic equipment oil into the air inlet.
Drain the water from the compressed air system before each use.
Water in air line or compressor can be lead to destruction of the air tool and power loss.
Clean or replace air filters in the prescribed intervals.
Oil for
Air tools

SW-Stahl und Werkzeugvertriebs GmbH Tel. +49 (0) 2191 / 46438-0
F56essartSresukreveL ax +49 (0) 2191 / 46438-40
ed.lhatsws@ofni:liaM-EdiehcsmeR79824-D
Instruction Manual
BGS technic KG
Bandwirkerstr. 3
42929 Wermelskirchen
Tel.: 02196 720480
Fax.: 02196 7204820
www.bgstechnic.com
© BGS technic KG, Copying and further use not allowed
OPERATION INSTRUCTIONS
1. Lubricate the tool before operating. See “CARE AND MAINTENANCE” section for oiling
instructions.
2. Have the keyless chuck open by screwing at
counterclockwise direction by hand. (Fig.1)
Fig.
1
3. Insert a drill into the chuck and then tighten the keyless chuck
at clockwise direction by hand. Make sure that the drill is
installed securely and tightened enough before operating the
tool. (Fig.2) WARNINGS: Only use drills that have an RPM
rating equal to or greater than the tool itself.
Fig.
2
4. Remove the air cap from the tool air inlet and connect the air
supply hose to the tool. Set the working pressure at 90 PSI.
(Fig.3)
Fig.
3
5. Push F/R valve (Part #8) downwards (to “F” position) and
press on the trigger. The tool starts to work. (Fig.4)
Fig.
4
6. Push F/R valve upwards (to “R” position) and press on the
trigger whenever you feel it necessary to release the drill out
of the workpiece. (Fig.5)
Fig.
5

SW-Stahl und Werkzeugvertriebs GmbH Tel. +49 (0) 2191 / 46438-0
F56essartSresukreveL ax +49 (0) 2191 / 46438-40
ed.lhatsws@ofni:liaM-EdiehcsmeR79824-D
Instruction Manual
BGS technic KG
Bandwirkerstr. 3
42929 Wermelskirchen
Tel.: 02196 720480
Fax.: 02196 7204820
www.bgstechnic.com
© BGS technic KG, Copying and further use not allowed
CARE AND MAINTENANCE
The tool should be lubricated daily (or before each use) with air tool oil (not included).
Air tool oil is available at major tool hardware stores.
SAE #10 weight oil or sewing machine lubricant or any other high grade turbine oil containing
moisture absorbent, rust inhibitors, metal wetting agents and an EP (extreme pressure) additive may
be used as a substitute. Do not use detergent oil.
During continuous operation, the tool should be oiled every 1 to 2 hours.
This may be done using an in-line oiler, or manually. If done manually, proceed as follows:
Fig.
6
1. Disconnect the tool from air supply. (Fig.6)
2. Place a few drops of air tool oil into the air inlet. (Fig.7) Avoid the
misuse of thicker oil which may lead to the reduced performance
or malfunction.
3. Connect the tool to the air supply. Run the tool without load for a
few seconds to distribute the oil through the tool. Any excess oil
may be propelled from the chuck area. So keep the tool away in
a safe direction.
4. After operating the tool and before storing the tool, disconnect
the air hose and place 4 or 5 drops of air tool oil into the air inlet,
then re-connect the air hose and run the tool to evenly distribute
the oil throughout the tool for 30 seconds approximately. This will
prolong the tool life.
5. Avoid storing the tool in a humid environment which promotes
rusting of internal mechanisms. Always oil the tool before
storage.
6. When the tool is seriously damaged or out of life, it should be left
in a resource recycling can. Never drop it into fire.
Fig.
7
TROUBLESHOOTING
Problem Possible Cause Corrective Action
Grit in tool Flush the tool with air-tool oil.
No oil in tool Lubricate the tool according to the lubrication
instructions in this manual.
Adjust the regulator on the tool to maximum setting.
Low air pressure Adjust the compressor regulator to 90 PSI
Air hose leaks Tighten and seal hose fittings if leaks are found.
Use sealing tape.
Be sure the hose is the proper size. Long hose or tools
using large volumes of air may require a hose with an
I.D. of 1/2 in. or larger depending on the total length of
the hoses.
Pressure drops Do not use a multiple number of hoses connected
together with quick-connect fittings. This causes
additional pressure drops and reduces the tool power.
Directly connect the hoses together.
Worn rotor blade Replace rotor blade.
Tool runs slowly or will
not operate
Moisture blowing
out of tool
exhaust
Water in tank: drain tank. (See air compressor manual).
Oil tool and run until no water is evident. Oil tool again
and run 1-2 seconds.
Abnormal vibration
and/or excessive heat
develops in the tool
Improper
lubrication Follow proper lubrication procedures in this manual.
NOTE: For any special troubles which cannot be settled down by the operator, contact the distributor
or sales agent from whom you purchase the tool.

SW-Stahl und Werkzeugvertriebs GmbH Tel. +49 (0) 2191 / 46438-0
F56essartSresukreveL ax +49 (0) 2191 / 46438-40
ed.lhatsws@ofni:liaM-EdiehcsmeR79824-D
CE-Erklärung
BGS technic KG
Bandwirkerstr. 3
42929 Wermelskirchen
Tel.: 02196 720480
Fax.: 02196 7204820
www.bgstechnic.com
EU-Konformitätserklärung
EC DECLARATION OF CONFORMITY
DÉCLARATION „CE“ DE CONFORMITE
DECLARATION DE CONFORMIDAD UE
Wir erklären in alleiniger Verantwortung, dass die Bauart der:
We declare that the following designated product:
Nous déclarons sous propre responsabilité que ce produit:
Declaramos bajo nuestra sola responsabilidad que este producto:
Druckluft-Bohrmaschine ( BGS Art. 8852 )
Air drill
Perceuse pneumatique
Amoladora neumática
folgenden einschlägigen Bestimmungen entspricht:
complies with the requirements of the:
est en conformité avec les réglementations ci-dessous:
esta conforme a las normas:
Machinery Directive 2006/42/EC
Angewandte Normen:
Identification of regulations/standards:
Norme appliquée:
Normas aplicadas:
EN ISO 11148-3:2012
Verification-No: 130600338SHA-V1/AT-4031
Test Report: SH11080399-009+A1+A2
Wermelskirchen, den 24.10.2014
ppa.
Frank Schottke, Prokurist
BGS technic KG, Bandwirkerstrasse 3, D-42929 Wermelskirchen
Table of contents
Languages:
Other BGS technic Drill manuals
