SK2500L SK
LINE
sportkoncept
Si en el tiempo que trascurre la información de los valores medios, no se toca ninguna tecla, no se hace
ejercicio y se pulsa la tecla STOP pasara al programa manual.
MODO PROGRAMAS
.-
El monitor dispone de: 1 programa de perfil MANUAL; 8 PROGRAMAS con perfiles preprogramados; de un
perfil programable por el usuario (USER); programas TEST masculino, y TEST femenino; y programa de
ritmo cardiaco constante (H.R.C.).
P1 - P8 PROGRAMAS PREPROGRAMADOS.-
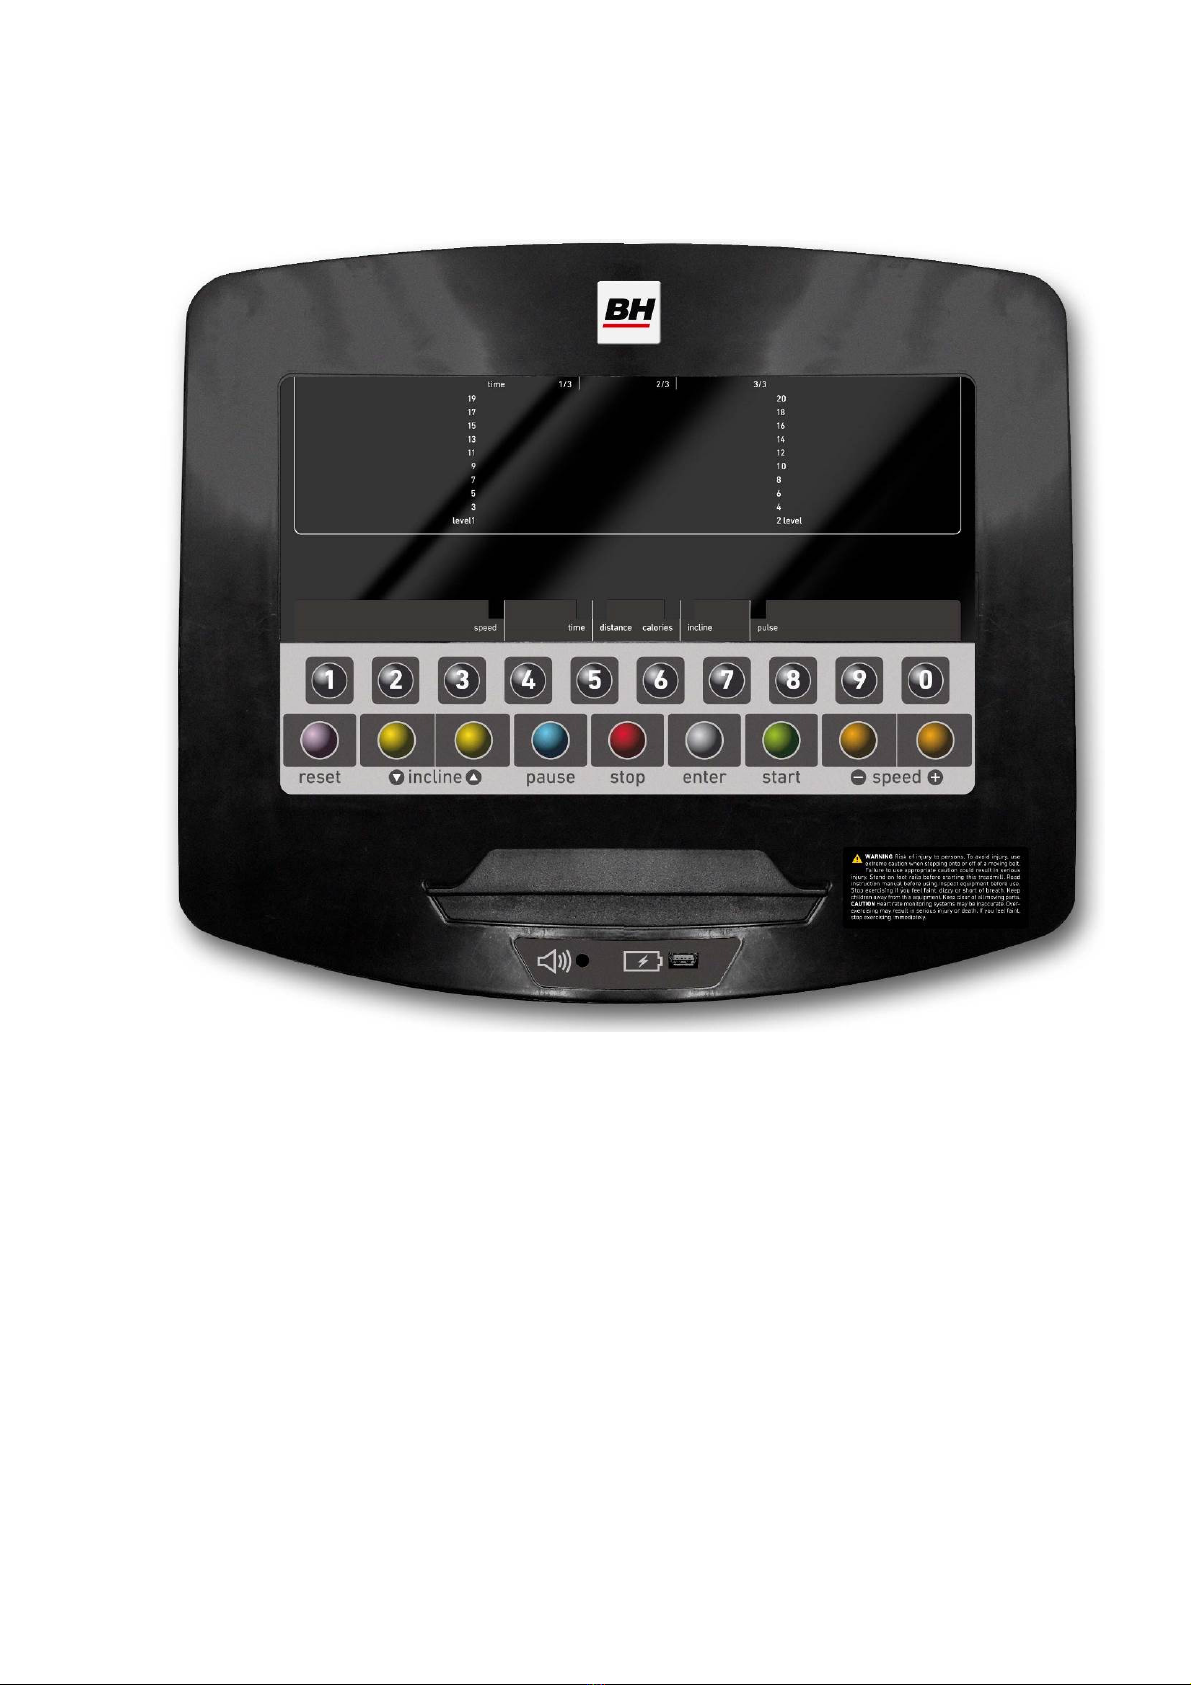
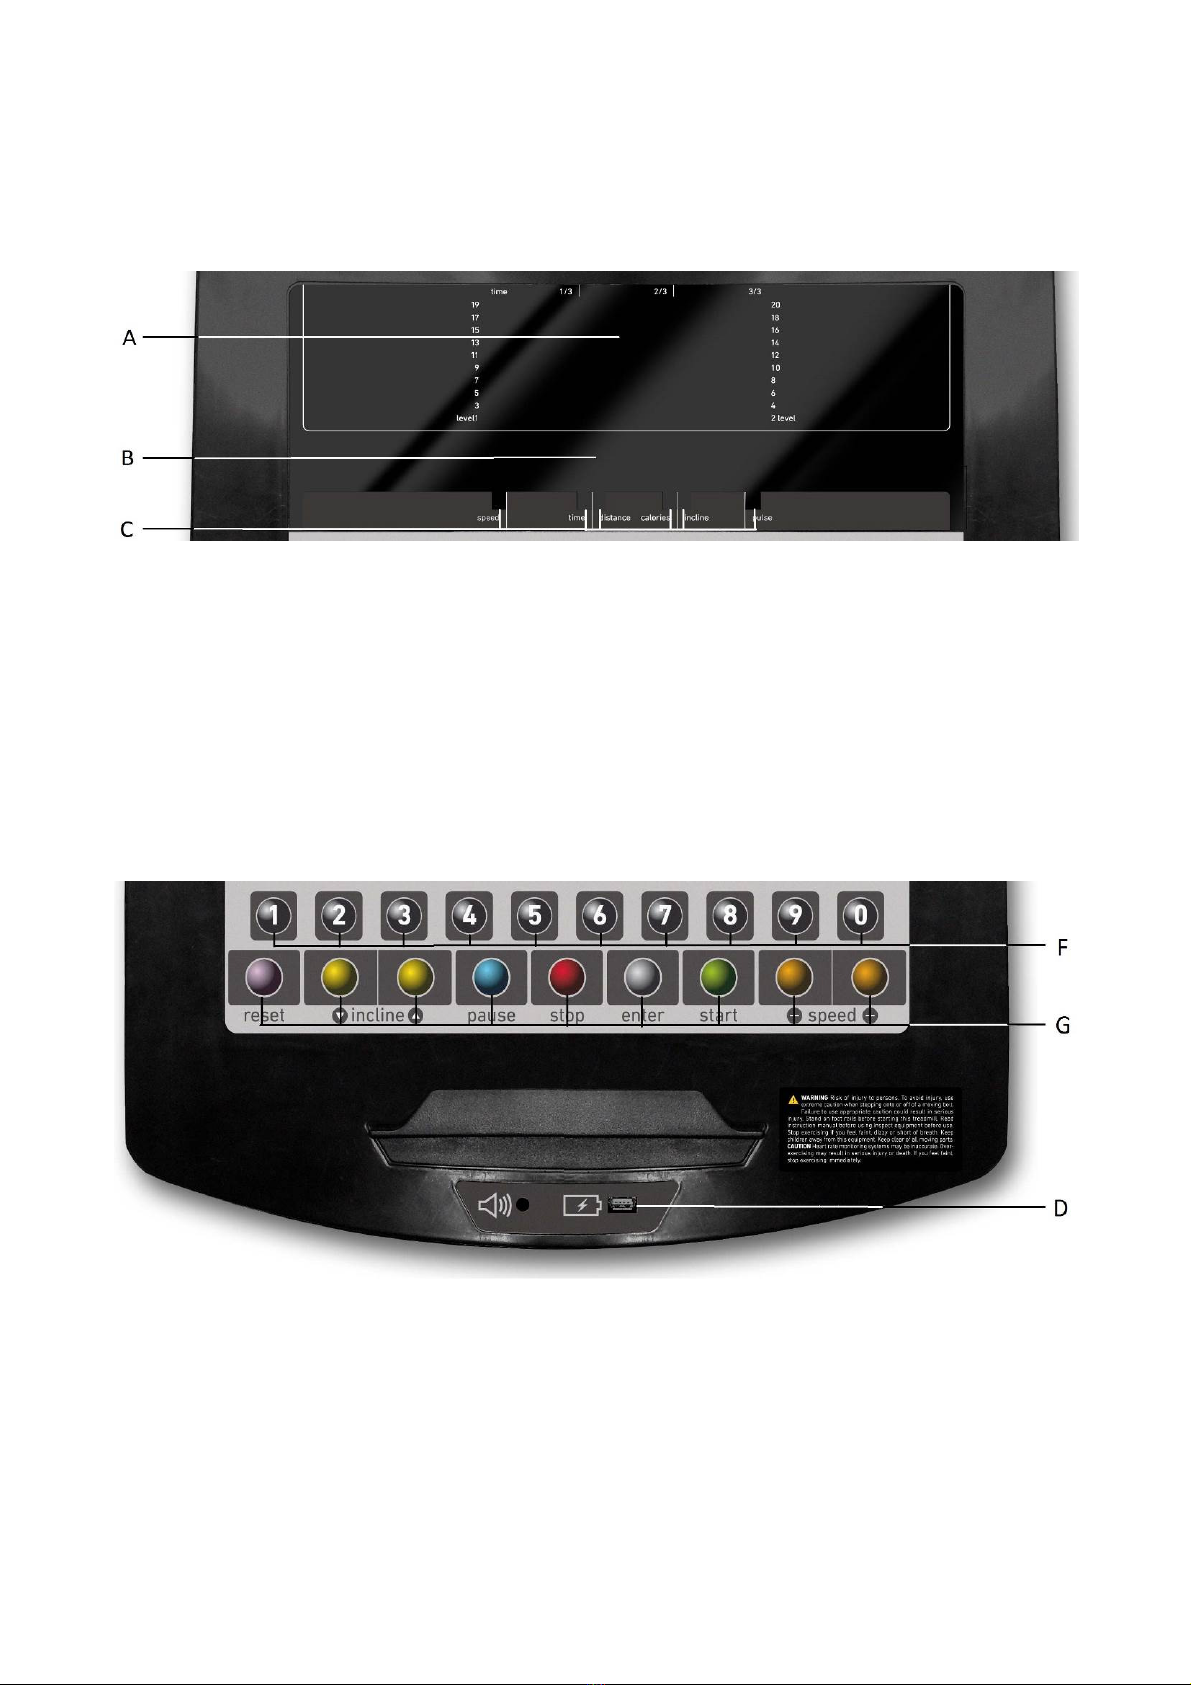
Estando el monitor encendido le mostrara el display de matriz de LEDs superior (A) Fig.2 el perfil y la letra
“M” de manual. Para visualizar lo diferentes perfiles preprogramados se utilizan las teclas SPEED▼y
SPEED▲. Una vez se haya seleccionado un perfil en concreto pulse la tecla ENTER.
En el display de matriz de LEDs superior (A) le pedirá la edad entre (10 y 99años) seleccione su edad con
las teclas numéricas (F) Fig.3, pulse ENTER. A continuación le pedirá el peso entre (30 y 199Kg), seleccione
su peso con las teclas numéricas (F) Fig.3, pulse ENTER. A continuación le pedirá el tiempo de duración del
ejercicio entre (10 y 60 minutos), seleccione el tiempo con las teclas numéricas (F) Fig.3, pulse ENTER, le
mostrara en la pantalla alfanumérica (B) INICIO DE EJERCICIO y dará comienzo a su ejercicio
transcurridos 3
segundos, indicados en forma descendente con una velocidad de 2Km/h
.
Dentro de cada perfil preprogramado el usuario dispone de niveles de dificultad diferentes, para seleccionar
cualquiera de ellos es suficiente con utilizar las teclas SPEED▼y SPEED▲durante la realización del
ejercicio.
Una vez haya terminado el programa que ha estado realizando el ejercicio el monitor le habrá calculado la
media de los valores en el cual ha realizado el ejercicio y se los mostrará el la pantalla alfanumérica inferior
(B) Fig.2.
Pulsando la tecla STOP se interrumpe el programa y en el display de pantalla alfanumérica inferior (B) Fig.2,
le informara de la media de los valores TIEMPO DE EJERCICIO; DISTANCIA RECORRIDA; VELOCIDAD
MEDIA; CALORIAS CONSUMIDAS;
que ha realizado durante el ejercicio, mostrándoselos dos veces cada
cinco segundos
.
Si en el tiempo que trascurre la información de los valores medios, no se toca ninguna tecla, y se pulsa la
tecla STOP pasará al programa manual.
P9 - PROGRAMA USUARIO (USER).-
Estando el monitor encendido le mostrara el display de matriz de LEDs superior (A) Fig.2 el perfil y la letra
“M” de manual, para visualizar lo diferentes perfiles preprogramados se utilizan las teclas Speed▼y
Speed▲. Una vez se haya seleccionado el programa 9 (USER), pulse la tecla ENTER.
En el display de matriz de Leds (A) Fig.2 le pedirá la edad entre (10 y 99 años) seleccione su edad con las
teclas numéricas (F) Fig.3, (si se introduce el valor, fuera de los dos dígitos le mostrara el valor mas
cercano). Pulse ENTER.
A continuación le pedirá el peso entre (30 y 199Kg.), seleccione su peso con las teclas numéricas (F) Fig.3,
pulse ENTER. A continuación le pedirá el tiempo de duración del ejercicio entre (10 y 60 minutos),
seleccione el tiempo con las teclas numéricas (F) y pulse ENTER a continuación pulse la tecla RESET y
pulsando las teclas SPEED▼y SPEED▲, puede comenzar a diseñar el perfil de velocidad que usted desee
en el display de matriz de LEDs (A). A continuación pulse la tecla ENTER, y así sucesivamente hasta
completar el gráfico del programa que usted desee. El perfil a diseñar esta subdividido en 21 pasos.
Si se ha equivocado al grabar algún paso, pulse la tecla RESET y volverá al paso anterior.
A continuación pulse tecla ENTER y le mostrará en la pantalla alfanumérica (B) INICIO DE EJERCICIO y
dará comienzo a su ejercicio
transcurridos 3 segundos, indicados en forma descendente.
Una vez haya terminado el programa que ha estado realizando el ejercicio el monitor le habrá calculado la
media de los valores en el cual ha realizado el ejercicio y se los mostrara el la pantalla alfanumérica (B)
Fig.2.
Pulsando la tecla STOP se interrumpe el programa y en el display de pantalla alfanumérica inferior (B) Fig.2,
le informara de la media de los valores TIEMPO DE EJERCICIO; DISTANCIA RECORRIDA; VELOCIDAD
MEDIA; CALORIAS CONSUMIDAS; que ha realizado durante el ejercicio, mostrándoselos dos veces cada
cinco segundos .