BH Hipower SF1500T User manual

SF1500T
sportkoncept
UNIDAD ELECTRÓNICA
ELECTRONIC MONITOR
MONITEUR ELECTRONIQUE
ELEKTRONIKEINHEIT

sportkoncept
2
ESPAÑOL
INDICACIONES GENERALES.-
Este monitor electrónico está diseñado para ser utilizado de forma sencilla e intuitiva. Los textos que
aparecen en la pantalla del televisor guiarán al usuario durante la realización del ejercicio.
Sin embargo, recomendamos que el preparador físico lea atentamente esta sección con el fin de conocer a
fondo el monitor electrónico y mostrar al usuario su funcionamiento de forma efectiva.
CONEXIONADO DE MAQUINA.-
En primer lugar, conexione el cable del trasformador a la red eléctrica a un enchufe de 100V-240V con toma
de tierra según le muestra la Fig.1.
A continuación enchufe el terminal del transformador a la maquina Fig.2.
Fig.1 Fig.2
ELEMENTOS DE AUDIO.- Fig.5
M.-Conector para conectar un dispositivo mediante MTP.
N.-Conector de escucha por auriculares.
Fig.3
PUESTA EN MARCHA.-
Pantalla 1
Una vez conexionada la máquina, se visualiza en el monitor la
Pantalla 1.

sportkoncept
3
CONFIGURACION DEL MONITOR.-
CAMBIO DE IDIOMA.
Pantalla 1 Pantalla 2
1º.- Estando en la Pantalla 1:
Pulse el Lenguaje que este activo en
la parte superior izquierda.
2º.- Seguido le aparecerá en la
Pantalla 1 una lista desplegada de
idiomas como se puede ver en la pantalla 2:
Seleccione el idioma que desee.
ENTRADA/SALIDA AL BACKOFFICE.
Pantalla 1 Pantalla 3
ENTRADA:
Estando visualizando la Pantalla 1,
pulse la tecla QUICK START y
seguido la tecla parar, y le aparecerá
la Pantalla 3. En la pantalla 3,
mantenga pulsada la esquina superior
derecha para entrar al menú oculto o
backoffice (Pantalla 4).
Pantalla 4
SALIDA:
Estando dentro del backoffice, pulse la esquina superior izquierda, donde
pone Configuration, para volver al menú principal.
NOTA: Por favor, no mofique ningún parámetro del menu oculto a menos
que se detalle en este manual, ya que puede provocar el mal
funcionamiento de la maquina.
CAMBIO DE Km. A MILLAS.
Pantalla 5
Una vez dentro del backoffice, vaya a la pestaña Gym Custom,
introduzca la contraseña taipei101 y pulse ok. Cambie la opción Unit
System a Imperial como se puede ver en la pantalla 5.

sportkoncept
4
INSTRUCCIONES DE FUNCIONAMIENTO.-
MODO PROGRAMAS.
Pantalla 1
Este monitor dispone de los siguientes programas: 8 programas en
SESIONES DE ENTRENAMIENTO; 3 programas OBJETIVO; 1
programas de CONTROL DE FRECUENCIA CARDIACA y 1 programas
en PRUEBA FISICA. Se acceden a todos ellos desde la Pantalla 1.
SESIONES DE ENTRENAMIENTO.-
En estas sesiones de entrenamiento se pueden diferenciar en dos categorías:
A).- Programa MANUAL
B).- Resto de sesiones de entrenamiento
MANUAL.
En este programa MANUAL se pueden seleccionar:
A).- Peso del usuario
B).- Tiempo a realizar en el ejercicio.
Pantalla 1 Pantalla 6
Para elegir el programa MANUAL
basta con entrar dentro de los
programas en SESION DE
ENTRENAMIENTO dentro de la
pantalla 1 y elegir el programa
MANUAL. Tras elegirlo, aparece la
pantalla 6 en la que se configuran
los parámetros peso y tiempo y
pulsando el botón de start comienza comienza el programa MANUAL. Cuando se está realizando el
programa se puede variar el parámetro nivel con su respectivas teclas de +/-.
Pantalla 3
Una vez se pulse la tecla Stop, pasará a la Pantalla 3, en la que se
muestra un resumen de los valores más importantes del ejercicio.
Pulse la tecla Anterior o espere unos segundos y pasará a la Pantalla 1.
RESTO SESIONES DE ENTRENAMIENTO.
En estos programas se pueden seleccionar:
A).- Peso del usuario
B).- Tiempo a realizar en el ejercicio.
C).- Nivel de experiencia del usuario.

sportkoncept
5
Pantalla 1 Pantalla 7
Para elegir estos programas basta
con entrar dentro de los programas
en SESION DE ENTRENAMIENTO
dentro de la pantalla 1 y elegir el
programa deseado. Tras elegirlo,
aparece una pantalla similar a la
pantalla 7 en la que se configuran
los parámetros y pulsando el botón
de start comienza el programa elegido. La inclinación se irá ajustando en función del perfil del programa
deseado. Cuando se está realizando el programa se puede variar el parámetro nivel, aunque al elegir un
programa ya te la cambia el monitor automáticamente, con su respectivas teclas de +/-.
Pantalla 3
Una vez concluya el programa o se pulse la tecla Stop, pasará a la
Pantalla 3, en la que se muestra un resumen de los valores más
importantes del ejercicio.
Pulse la tecla Anterior o espere unos segundos y pasará a la Pantalla 1.
OBJETIVO.-
En este programa de OBJETIVO se puede seleccionar:
A).- Peso del usuario
B).- Tiempo a realizar en el ejercicio.
C).- Distancia a recorrer durante el ejercicio.
D).- Calorías a consumir durante la realización del ejercicio.
-Peso- Pantalla 1 Pantalla 8
Introduzca el peso del usuario final.
Estando visualizando la Pantalla 1
pulse el programa Objetivo, a
continuación le aparecerá la Pantalla
8. Configure el peso y después una
de las siguientes opciones: tiempo,
distancia o calorías.
-Tiempo.-
Pantalla 8
Regula el tiempo que ha programado para la realización del ejercicio,
contando en forma descendente.
Estando visualizando la Pantalla 1, pulse el programa objetivo, a
continuación le aparecerá la Pantalla 8.

sportkoncept
6
Seleccione el tiempo introduciéndolo con los números que aparecen en la parte inferior y pulse el para
confirmar el tiempo. Pulse el botón de start para comenzar el programa. Cuando se está realizando el
programa se puede variar el parámetro nivel con su respectivas teclas de +/-.
Pantalla 3
Una vez concluya el tiempo que se ha programado o se pulse la tecla
Stop, pasará a la Pantalla 3, en la que se muestra un resumen de los
valores más importantes del ejercicio.
Pulse la tecla Anterior o espere unos segundos y pasará a la Pantalla 1.
-Distancia.-
Pantalla 8
Regula la distancia que ha programado para la realización del ejercicio,
contando en forma descendente.
Estando visualizando la Pantalla 1, pulse el programa objetivo, a
continuación le aparecerá la Pantalla 8.
Seleccione la distancia introduciéndolo con los números que aparecen en
la parte inferior y pulse el para confirmar la distancia. Pulse el botón de
start para comenzar el programa. Cuando se está realizando el programa
se puede variar el parámetro nivel con su respectivas teclas de +/-.
Pantalla 3
Una vez concluya la distancia que se ha programado o se pulse la tecla
Stop, pasará a la Pantalla 3, en la que se muestra un resumen de los
valores más importantes del ejercicio.
Pulse la tecla Anterior o espere unos segundos y pasará a la Pantalla 1.
-Calorías.-
Pantalla 8
Regula las Calorías que ha programado para la realización del ejercicio,
contando en forma descendente.
Estando visualizando la Pantalla 1, pulse el programa objetivo, a
continuación le aparecerá la Pantalla 8.
Seleccione el peso y las calorías introduciéndolo con los números que
aparecen en la parte inferior y pulse el para confirmar las calorías.
Pulse el botón de start para comenzar el programa. Cuando se está
realizando el programa se puede variar el parámetro nivel con su respectivas teclas de +/-.
Pantalla 3
Una vez concluya las Calorías que se ha programado o se pulse la tecla
Stop, pasara a la Pantalla 3, en la que se muestra un resumen de los
valores más importantes del ejercicio.
Pulse la tecla Anterior o espere unos segundos y pasará a la Pantalla 1.

sportkoncept
7
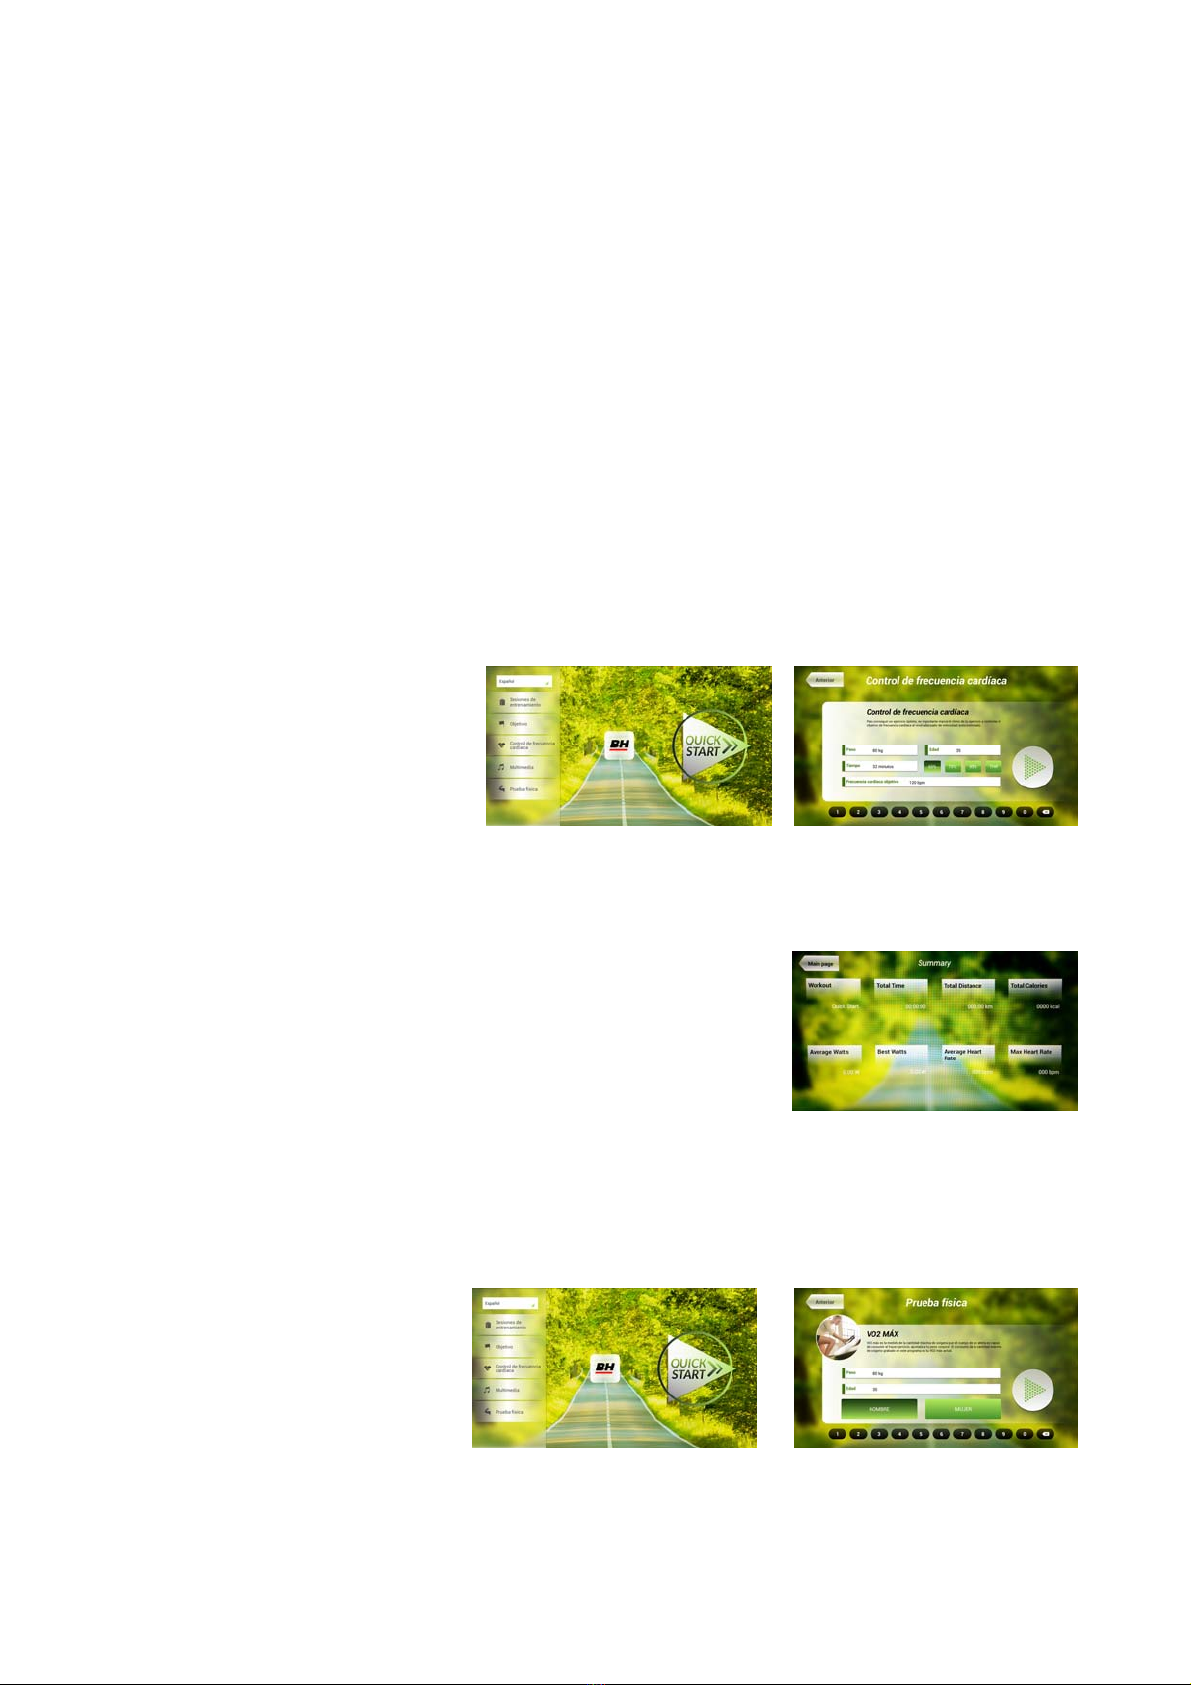
CONTROL DE FRECUENCIA CARDIACA.-
Es conveniente hacer un pequeño calentamiento antes de realizar el programa. Esto evitará posibles
lesiones.
Este programa permite hacer el ejercicio a un ritmo cardiaco (entre el 65% y el 85% del ritmo cardiaco
máximo) y la máquina le ajustara el nivel de resistencia para lograr que en todo momento el usuario
mantenga el ritmo cardiaco al nivel seleccionado. Es obligatorio utilizar la medición del ritmo cardiaco,
usando para ello los sensores manuales (hand-grip) o la banda de pulso telemétrico de pecho.
El máximo número de pulsaciones que una persona nunca debe sobrepasar se le denomina ritmo máximo y
éste disminuye con la edad. Una sencilla fórmula para calcular es restar a 220 la edad en años. El ejercicio,
para que sea correcto, debe mantenerse entre el 65% y el 85 % del ritmo cardíaco máximo y se recomienda
no sobrepasar el 85%.
Dentro de éste podemos encontrar 4 programas, tres que vienen con el porcentaje predefinido (65%, 75% y
85%) y el cuarto (THR) que permite al usuario elegir las BPM que desee dentro del rango entre el 65%-85%.
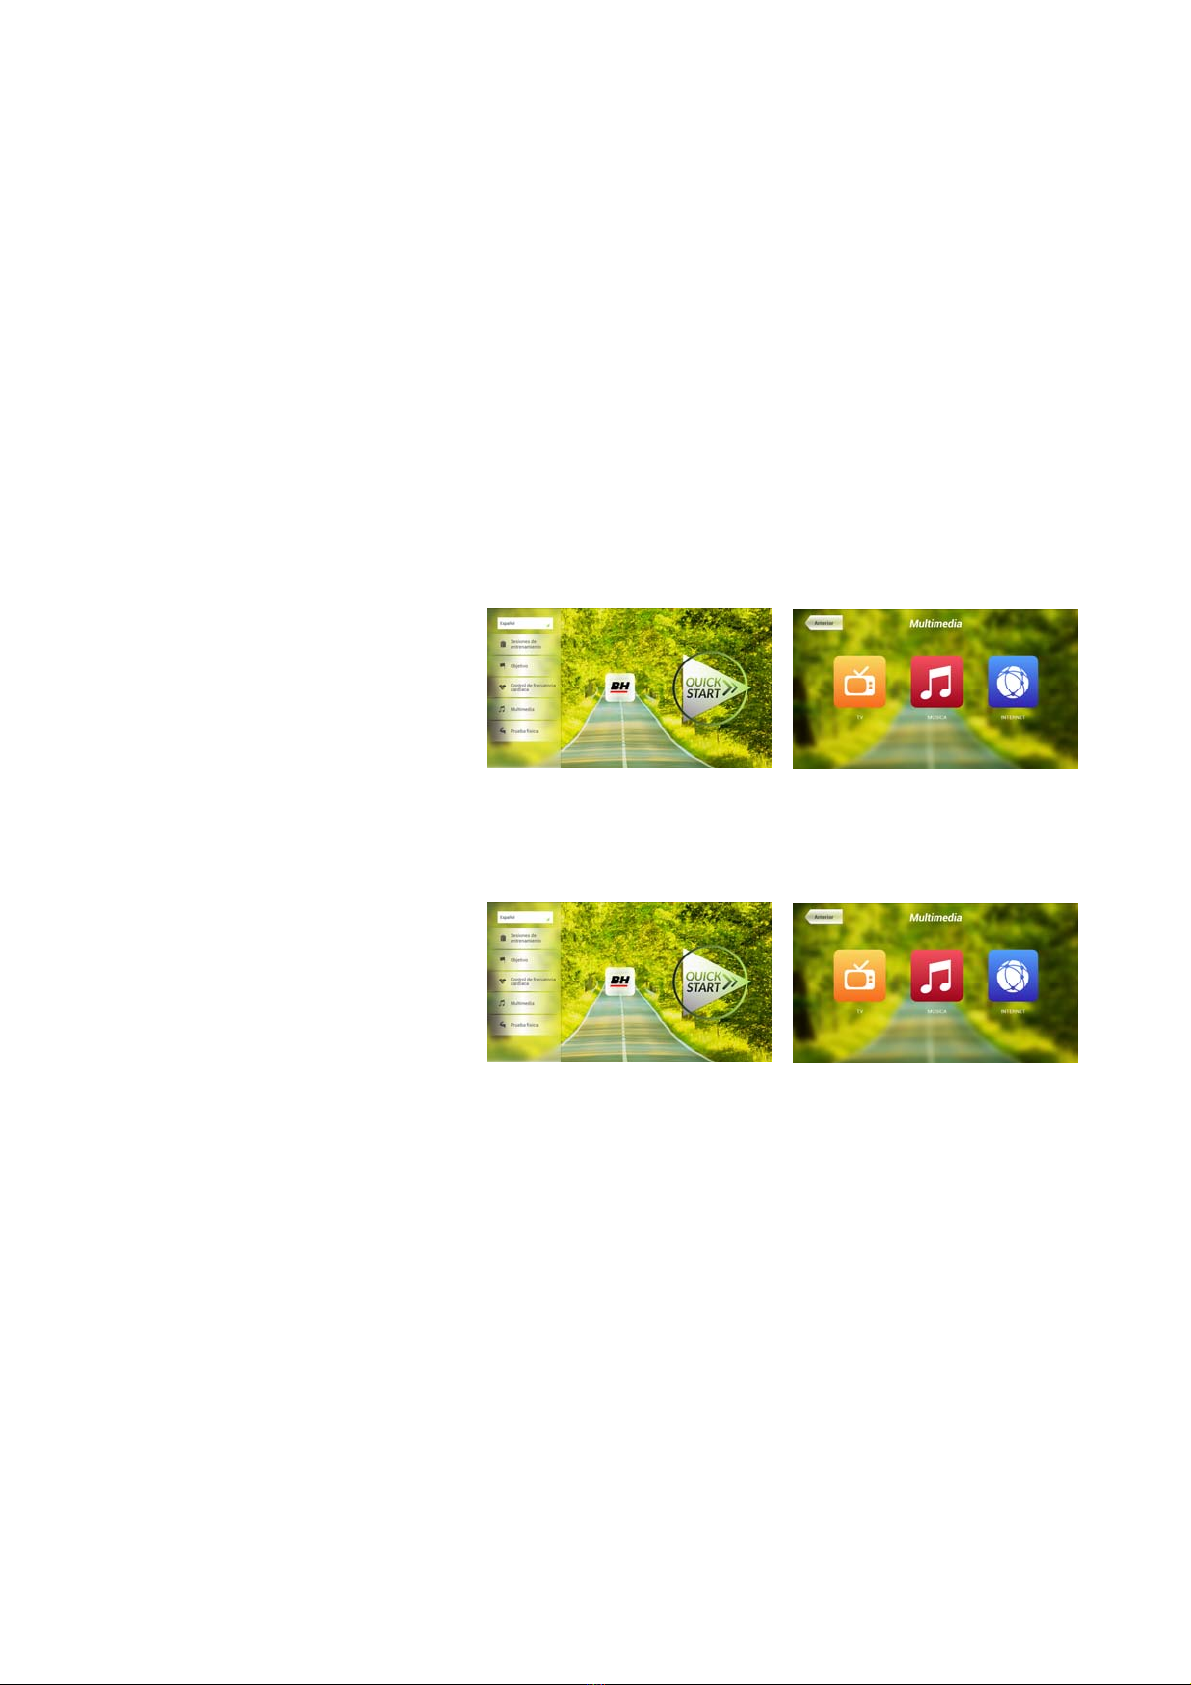
Pantalla 1 Pantalla 9
Estando el monitor en la Pantalla
Principal, Pantalla 1, pulse el programa
control de frecuencia cardíaca y le
aparecerá la Pantalla 9. Rellene los
campos necesarios para realizar la
prueba y elija el ritmo cardíaco al que
quiera ejercitarse. Tras hacer esto,
pulse la tecla start para comenzar el
ejercicio. Cuando se está realizando el programa se puede variar el parámetro nivel con su respectivas
teclas de +/-. Además es necesario mantener las manos en el hand-grip para monitorizar el ritmo cardíaco.
Pantalla 3
Una vez concluya el programa o se pulse la tecla Stop, pasará a la
Pantalla 3, en la que se muestra un resumen de los valores más
importantes del ejercicio.
Pulse la tecla Anterior o espere unos segundos y pasará a la Pantalla 1.
PRUEBA FISICA.-
Este monitor tiene siete programas en PRUEBA FISICA. Estas pruebas son las que realizan grupos de
personas para comprobar su estado de forma es el adecuado para la actividad que realicen o vayan a
realizar.
Pantalla 1 Pantalla 10
Estando el monitor en la pantalla
principal, Pantalla 1, pulse la opción
Prueba física y le aparecerán todas
las pruebas físicas disponibles. Elija
la prueba que desee realizar y rellene
los campos que se presentan en una
pantalla similar a la pantalla 10, para
confirmar algunos de ellos pulse el . Tras hacer esto, pulse la tecla start para comenzar el ejercicio.
Cuando se está realizando el programa se puede variar el parámetro nivel con su respectivas teclas de +/-.

sportkoncept
8
Pantalla 11
Una vez concluya el programa o se pulse la tecla Stop, pasará a la
Pantalla 11, en la que se muestra un resumen de los valores más
importantes del ejercicio.
Pulse la tecla Anterior o espere unos segundos y pasará a la Pantalla 1.
MULTIMEDIA.-
Pantalla 1 Pantalla 12
Este monitor dispone de tres funciones
multimedia: TV, MUSICA e INTERNET.
Desde la pantalla 1 se pueden acceder
a ellas llegando a la pantalla 12 o una
vez escogido el programa a realizar,
mientras se está haciendo el ejercicio.
TV.-
Pantalla 1 Pantalla 12
Estando visualizando la Pantalla 1,
pulse la tecla Multimedia y le
aparecerá la Pantalla 12. En la pantalla
12, elija la opción TV.
Mientras se está haciendo el ejercicio
también se puede acceder a la TV,
pulsando la opción TV.
Una vez dentro de la TV, puede
escoger el canal y cambiar el volumen. Además si se encuentra realizando un ejercicio físico puede poner la
pantalla completa en la que hay una pestaña para ver información sobre el ejercicio. Para poner y quitar la
pantalla completa pulse dos veces sobre la pantalla de la televisión.
SINTONIZACIÓN DE CANALES.-
La sintonización de canales automática se hace partiendo del menú principal, siga las instrucciones para
entrar en el backoffice como se puede ver en el apartado CONFIGURACION DEL MONITOR
ENTRADA/SALIDA AL BACKOFFICE.
Una vez dentro pulse la pestaña TV. En a la derecha de esta pestaña del menú oculto, sale un teclado con
números y opciones. En ese teclado pulse la opción Menu lo que hace que salga otro submenú. Pulse OK
en el teclado para elegir la primera opción Auto Sintonizado. Al elegir esta opción, el submenú cambia y
muestra los países de auto sintonización. Con las flechas del teclado Ch ↑ / Ch ↓ muévase hasta elegir su
país. Pulse OK para que se inicie la Auto sintonización. Espere varios minutos hasta que se sintonicen
todos los canales.
Una vez realizada la sintonización, siga las instrucciones del apartado CONFIGURACION DEL MONITOR
ENTRADA/SALIDA AL BACKOFFICE para salir del backoffice.
Para ver los canales sintonizados, pulse dentro del menú principal, la opción Media y seguidamente TV.
Pulse las teclas CH +/- para cambiar de canal.
NOTA: al elegir la opción de Auto Sintonizado, se borran todos los canales que había.

sportkoncept
9
BORRAR CANALES NO DESEADOS.-
Partiendo del menú principal ya con los canales sintonizados, siga las instrucciones para entrar en el
backoffice como se puede ver en el apartado CONFIGURACION DEL MONITOR ENTRADA/SALIDA AL
BACKOFFICE.
Una vez dentro pulse la pestaña TV. En a la derecha de esta pestaña del menú oculto, sale un teclado con
números y opciones. En ese teclado pulse la opción Menu lo que hace que salga otro submenú. Con las
flechas del teclado Ch ↑ / Ch ↓ muévase hasta elegir Programme Edit. Al elegir esta opción, el submenú
cambia mostrando todos los canales sintonizados. Usando las flechas del teclado Ch ↑ / Ch ↓ elija el canal a
borrar y pulse la tecla 2 para borrar. Usa las flechas del teclado Ch ↑ / Ch ↓ para moverse a otro canal para
borrarlo si lo desea.
Una vez que termine de borrar los canales que desee, siga las instrucciones del apartado
CONFIGURACION DEL MONITOR ENTRADA/SALIDA AL BACKOFFICE para salir del backoffice.
MUSIC.-
Pantalla 1 Pantalla 12
Estando visualizando la Pantalla 1,
pulse la tecla Multimedia y le
aparecerá la Pantalla 12. En la pantalla
18, elija la opción MUSICA.
Mientras se está haciendo el ejercicio
también se puede acceder a la
MUSICA, pulsando la opción MUSICA.
Una vez dentro de la MUSICA, inserte
su disposivo en el puerto USB y elija su canción a escuchar
INTERNET.-
Pantalla 1 Pantalla 12
Estando visualizando la Pantalla 1,
pulse la tecla Multimedia y le
aparecerá la Pantalla 12. En la pantalla
18, elija la opción INTERNET.
Mientras se está haciendo el ejercicio
también se puede acceder a la
INTERNET, pulsando la opción
INTERNET.
Una vez dentro de la INTERNET, elija la opción que desee ver.

sportkoncept
10
Para cualquier consulta, no dude en ponerse en contacto con el (S.A.T).Servicio de Asistencia Técnica,
llamando al teléfono de atención al cliente (ver página final del presente manual).
BH SE RESERVA EL DERECHO A MODIFICAR LAS ESPECIFICACIONES DE SUS
PRODUCTOS SIN PREVIO AVISO.

sportkoncept
11
ENGLISH
GENERAL INSTRUCTIONS.-
This electronic monitor is designed to be easy and intuitive to use. The messages that appear on the
television screen will guide the user throughout the whole exercise.
It is recommended that a gym instructor read through this section carefully to become fully familiar with
operating the electronic monitor so that he/she can show the user correctly.
CONNECTING THE MACHINE.-
First plug the main power cable on the transformer into a 100-240 V grounded electrical socket, as shown in
Fig. 1.
Next, plug the jack on the transformer into the machine, Fig.2
Fig.1 Fig.2
AUDIO ELEMENTS.-
M.- Used to connect a device using MTP.
N.- Head/earphone connector.
Fig.3
SWITCHING ON.-
Screen 1
Once the machine is plugged in the monitor the Screen 1will be
displayed.

sportkoncept
12
MONITOR CONFIGURATION.-
CHANGING LANGUAGE
Screen 1 Screen 2
1.-From Screen 1:
Click the appropriate language in
the top left drop down menu.
2.-Select the desired language.
ENTRANCE/EXIT OF BACKOFFICE MENU
Screen 1 Screen 3
ENTRANCE:
When viewing Screen 1, press QUICK
START followed STOP, and you will be
shown Screen 3. On the 3 screen, hold
the upper right corner of the screen for
5 seconds to enter the hidden menu or
backoffice menu (Screen 4).
Screen 4
EXIT:
While in the backoffice menu, press the top left, where it says
Configuration, to return to the main menu.
Note: Please do not change any parameter of the backoffice menu unless
it is detailed in this manual, it may cause a malfunction or cause the
machine to operate improperly.
Change from km to miles.
Screen 5
Once inside the backoffice menu, go to the Gym Custom, insert the
passcode taipei101 and press ok. Change the option Unit System from
Metric to Imperial as shown on screen 5.

sportkoncept
13
OPERATING INSTRUCTIONS
PROGRAM MODE.
Screen 1
This monitor offers the following programs: 8 programs in TRAINING
COURSES, 3 OBJECTIVE based programs, 1 HEART RATE CONTROL
program and 1 PHYSICAL TEST. All can be accessed from Screen 1.
TRAINING COURSES.-
There are two categories of Training Courses:
A) Manual program
B) Pre-programmed Training Courses
MANUAL.
In the MANUAL program you can select:
A) User weight.
B) Time setting for the exercise.
Screen 1 Screen 6
To choose the MANUAL program
just press TRAINING COURSES on
screen 1 and then choose the
MANUAL program. After choosing it,
you will see Screen 6, which will
display the configurable parameters
of the workout that can be set. To
begin the workout, press START.
When the program is underway you can adjust the level of intensity with +/- keys.
Screen 3
Once you press the Stop key, you will see Screen 7, which shows a
summary of the workout.
Press the previous button or wait a 2 minutes and it will go back to
Screen 1.
OTHER TRAINING COURSES:
In these programs you can select:
A) User weight.
B) Time setting for the exercise.
C).- Fitness level of the user.

sportkoncept
14
Screen 1 Screen 7
To choose these programs simply
press Training Courses on screen 1
and choose the desired program.
After selecting one, you will see
screen 8 (or something similar) in
which the parameters can be
selected and the start button will
begin the workout. Intensity will
adjust itself according to the profile of the desired program. When the workout is in process, parameters can
be adjusted using the +/- keys, but the program will revert to its normal settings as each new segment is
completed.
Screen 3
Once the workout is completed or the Stop key is pressed, you will see
Screen 9, which shows a summary of the workout.
Press the previous button or wait a 2 minutes and the display will return
to Screen 1.
OBJECTIVE.-
This program allows the user to set goals based upon:
A) User weight
B) Workout duration
C) Distance covered during the workout
D) Calories to be consumed during the workout
- Weight - Screen 1 Screen 8
Enter the weight of the user. When
viewing the Screen 1 press the
Objective button, then Screen 10 will
appear. Set the weight and then one
of the following options: time,
distance, or calories.
- Time.-
Screen 8
Adjusts the time that is scheduled for the workout (during the workout this
will be displayed as a countdown.)
When viewing Screen 1, press the Objective button, and you will see
Screen 10 appear.
Select the time by using the number buttons at the bottom of the screen and press the to confirm the time.
Press the start button to start the program. When the program is underway you can adjust the parameters
with the +/- keys.

sportkoncept
15
Screen 3
Once the alloted time has been completed or the Stop key is pressed, you
will see Screen 11, which shows a summary workout.
Press the previous button or wait a few seconds and the screen will
return to Screen 1.
- Distance-
Screen 8
This regulates the distance planned for the workout. (During the workout
this will be displayed as a countdown.)
When viewing Screen 1, press the Objective button, and you will see
Screen 10 appear.
Select the distance by using the number buttons at the bottom of the
screen and press the to confirm the distance. Press the start button to
start the program. When the program is underway you can adjust the
parameters with the +/- keys.
Screen 3
Once the programmed distance has been achieved or the Stop key is
pressed, you will see Screen 11, which shows a summary workout.
Press the previous button or wait a 2 minutes and the screen will return to
Screen 1
- Calories-
Screen 8
This regulates the desired caloric consumption of the workout. (During the
workout this will be displayed as a countdown.)
When viewing Screen 1, press the Objective button, and you will see
Screen 10 appear.
Select the desired number of calories to be consumed by using the
number buttons at the bottom of the screen and press the to confirm the
total calories desired to be consumed during the workout. Press the start
button to start the program. When the program is underway you can adjust the parameters with the +/- keys.
Screen 3
Once the programmed caloric burn has been achieved or the Stop key is
pressed, you will see Screen 11, which shows a summary workout.
Press the previous button or wait a 2 minutes and the screen will return to
Screen 1

sportkoncept
16
HEART RATE CONTROL.-
It is highly recommended that a short warm up program be completed prior to beginning the Heart Rate
Control program. This will prevent possible injury.
This program allows the user to workout to a target heart rate (between 65% and 85% of maximum heart
rate) by the machine adjusting the resistance level to achieve that targeted heart rate level at all times. Heart
Rate measurement is required during this workout, either by using hand sensors (hand-grip) or an optional
telemetric pulse of chest band. (Please Note: Heart Rate monitoring systems may be inaccurate and should
be used as guidelines only. Over-exercising may result in serious injury or death. If you feel faint, stop
exercising immediately.)
The heart rate that a person should never exceed is called maximum rate and this decreases with age. A
simple formula to calculate is 220 beats per minutes minus the User’s Age (220-age). The target should be
kept between 65% and 85% of maximum heart rate and it is recommended not to exceed 85%.
There are four programs within Heart Rate Control: three that come with a predefined percentage (65%, 75%
and 85%) and the fourth Target Heart Rate (THR) that allows the user to choose the BPM you want within
the range of 65% - 85%.
Screen 1 Screen 9
From Screen 1, press the Heart Rate
Control button and you will then see
Screen 14. Fill in the required fields for
the test and choose the heart rate you
wish to target. After doing this, press
the Green Arrow key to begin the
workout. When the program is
underway you can vary the parameter
levels with the +/- keys. It is also necessary to keep your hands in the hand-grip to monitor heart rate or to
use an optional telemetric wireless chest strap.
Screen 3
Once the workout has been completed or the Stop key is pressed, you will
see Screen 15, which shows a summary of the workout.
Press the previous button or wait a 2 minutes to return to Screen 1.
PHYSICAL TEST.-
The Physical Test is a fitness test based upon VO2 MAX. VO2 Max, or maximal oxygen uptake, is one
factor that can determine an athlete's capability to perform an endurance based workout.
Screen 1 Screen 10
From Screen 1, press the PHYSICAL
TEST button and you will next see
screen 16. Set the parameters using
the numbers at the bottom of the
screen then click the to confirm.
Once everything is set, press the
Green Arrow key to begin the
exercise. When the workout is underway you can vary the parameter levels using the +/- keys.

sportkoncept
17
Screen 11
Once the workout is completed or the STOP key is pressed, you will see
Screen 17, which shows a summary of the most important values of the
exercise.
Press the previous button or wait a few seconds and will go to the Screen
1.
MULTIMEDIA.-
Screen 1 Screen 12
This monitor has three multimedia
features: TV, MUSIC and the
INTERNET. You can access the
multimedia from screen 1. When you
select Multimedia from screen 1 it will
take you to screen 18 and from there
you can choose which media you would
like to access.
TV.-
Screen 1 Screen 12
When viewing Screen 1, press the
Multimedia key and you will be shown
Screen 18. When on Screen 18 choose
the TV option by touching the TV icon.
While exercising to access the TV
option, touch the TV tab on the bottom
right hand portion of the screen.
The TV will pop up in the middle of the screen and you can select a channel and change the volume. When
exercising, to make the TV full screen tap twice on the television screen and the TV will go to full screen. Tap
twice while in full screen mode to go back to regular TV mode.
.
CHANNEL TUNING.-
Automatic channel tuning is located in the BACKOFFICE program section. Follow the instructions on how to
access BACKOFFICE on the MONITOR CONFIGURATION section ENTRANCE/EXIT OF BACKOFFICE
MENU.
*Note – you may need a box from your cable company to view their channels. The signal may be coded and
requires a box to decode the signal.
Once Back Office is accessed press the TV tab. On the right of the screen the hidden menu keyboard will
appear. On the keyboard press the Menu option which takes you to a submenu. Use the ↑ Ch / Ch ↓ to
select Auto Tune, then press OK to choose. The submenu will change and will show the countries for which
the auto tuning can be selected. Using the arrow keys ↑ Ch / Ch ↓ choose your country and press OK. The
machine will start Auto tuning. This will take several minutes.
Once the channel tunning finishes, follow the instructions on how to exit BACKOFFICE on the MONITOR
CONFIGURATION section ENTRANCE/EXIT OF BACKOFFICE MENU.
To access the TV function go to the Multimedia tab, press it then go to the TV tab and press.
Note: by choosing the option of Auto Tune, all previous channels will be deleted.

sportkoncept
18
DELETING UNWANTED CHANNELS.-
Starting from the main menu with channels tuned, follow the instructions on how to access BACKOFFICE on
the MONITOR CONFIGURATION section ENTRANCE/EXIT OF BACKOFFICE MENU.
Once inside click the TV tab. In a right of this tab from the hidden menu, exits a keyboard with numbers and
options. On the keyboard press Menu option which makes to leave another submenu. With the arrow keys ↑
Ch / Ch ↓ scroll to choose Edit Programme. When you choose this option, the submenu changes showing
all channels tuned. Using the arrow keys ↑ Ch / Ch ↓ select the channel to delete and press 2 to delete. Use
the arrow keys ↑ Ch / Ch ↓ to move to another channel to delete it if you wish.
Once you finish erasing the channels you want, follow the instructions on how to exit BACKOFFICE on the
MONITOR CONFIGURATION section ENTRANCE/EXIT OF BACKOFFICE MENU.
MUSIC.-
Screen 1 Screen 12
When viewing Screen 1, press the
Multimedia icon, this take you to Screen
18. Press the Music option to select.
While exercising MUSIC is accessed on
the menu bar at the bottom of the
screen. Once MUSIC is selected
connect your (Android) device into the
USB port and choose your song to
listen to.
INTERNET.-
Screen 1 Screen 12
When viewing Screen 1, press the
Multimedia icon, this take you to Screen
18. On Screen 18 choose the
INTERNET option to access the
INTERNET. While exercising you can
access the INTERNET by touching the
INTERNET tab on menu at the bottom
of the screen. Once inside the
INTERNET, choose the option that you want to access.

sportkoncept
19
Do not hesitate to get in touch with the Technical Assistance Service if you have any queries by phoning
customer services (see last page in manual).
BH RESERVES THE RIGHT TO MODIFY THE SPECIFICATIONS OF ITS PRODUCTS WITHOUT PRIOR
NOTICE.

sportkoncept
20
FRANÇAIS
INDICACIONS GENERALES.-
Ce moniteur électronique a été conçu pour une utilisation simple et intuitive. Les textes qui apparaissent sur
l’écran TV guideront l’utilisateur pendant tout l’exercice.
Nous recommandons cependant que le coach ou préparateur physique de votre salle de sport lise
atentivement cette notice afin de connaître parfaitement ce moniteur électronique et ainsi expliquer aux
utilisateurs son fonctionnement complet.
RACCORDEMENT DE L’APPAREIL-
Tout d’abord raccordez le câble du transformateur à une prise 100V-240V avec prise de terre du réseau
électrique tel que le montre la Fig.1.
Ensuite raccordez le terminal du transformateur à l’appareil tel qu’indiqué en Fig.2.
Fig.1 9 Fig.2
ELEMENTS AUDIO.- Fig.5
M.- Entrée pour connecter un dispositif via MTP.
N.- Entrée audio pour écouteurs.
Fig.3
MISE EN MARCHE.-
Ecran 1
Une fois connecté l’appareil, apparaît l’écran 1.
Table of contents
Languages:
Other BH Hipower Fitness Electronic manuals

BH Hipower
BH Hipower SF2500T User manual

BH Hipower
BH Hipower SF2000T User manual

BH Hipower
BH Hipower SF3050T User manual

BH Hipower
BH Hipower 3266029 User manual

BH Hipower
BH Hipower SK2500T User manual

BH Hipower
BH Hipower SF2500TR User manual

BH Hipower
BH Hipower SK2500L User manual

BH Hipower
BH Hipower G660 User manual
Popular Fitness Electronic manuals by other brands

Polar Electro
Polar Electro TriFIT 700 Setup guide

New Balance
New Balance EX2 900 user manual

LeMond Fitness
LeMond Fitness Wireless Cadence Meter Pilot II instruction manual

Technaxx
Technaxx TX-37 user manual

Johnson
Johnson Horizon Fitness T202 troubleshooting guide

Polar Electro
Polar Electro FT40 user manual