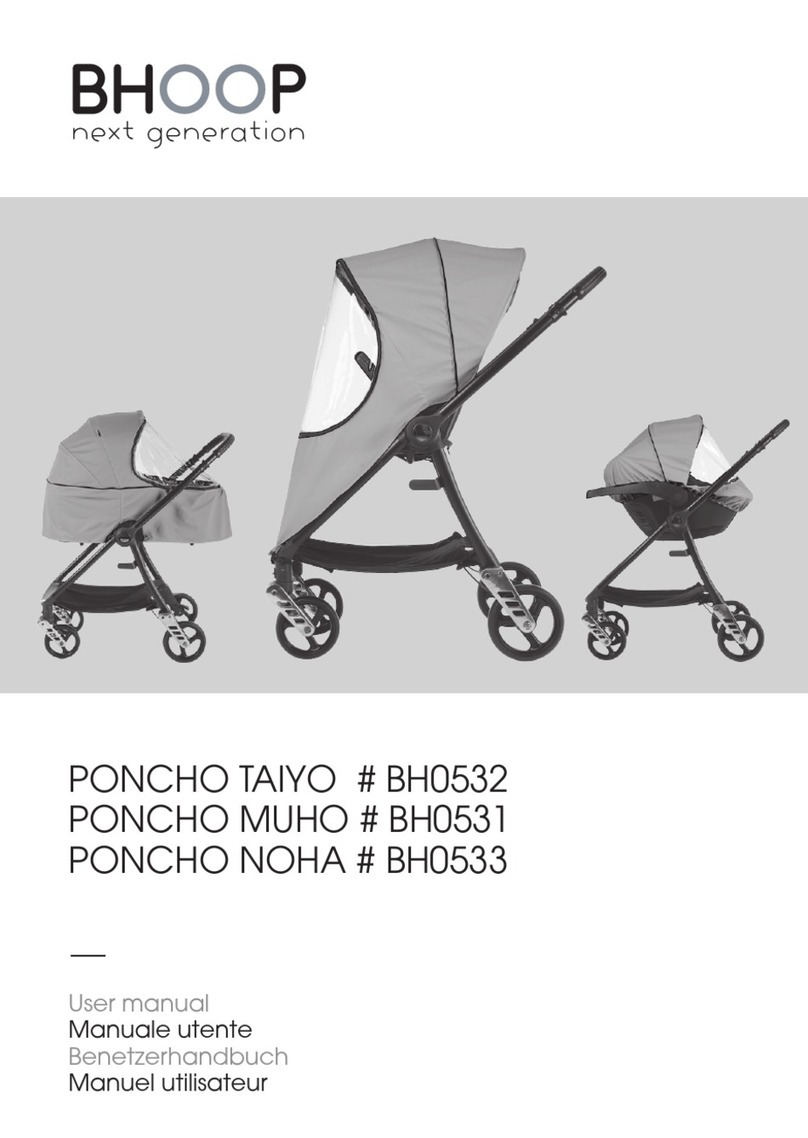
BHOOP NOHA User manual

NOHA #0534
carrycot, carrozzina,
Carrycot, carrycot
User manual
Manuale utente
Benetzerhandbuch
Manuel utilisateur


55
4
1
2
1
3

1110
9
6
7 7
6a 6a
8

11 12 13
1514 17
18 19 20 21
22


7
UK- Instructions for use
READ ISTRUCTIONS CAREFULLY BEFORE USE AND KEEP FOR
FUTURE INFORMATION
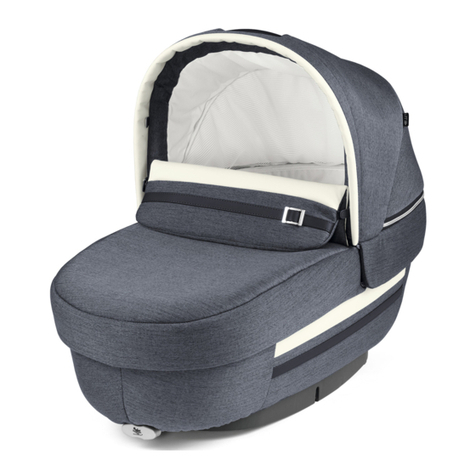
NOHA CARRYCOT
ASSEMBLING THE LINING
The carrycot is composed of a frame and a textile part
Proceed as follows for assembly:
1 Take the bottom of the carrycot and add it into the fabric paying attention to
the passage of the support feet in the slots. The back is rounder and should be in-
serted from pocket side. ATTENTION: keep the textile part centered
laterally with the joints
2Position the upper part of the frame on the bottom ensuring that the metal
structure is perpendicular to the bottom
3 The metal structure must stay on the inside of the plastic guides
4Hook the ribbons to the buttons on the bottom of the carrycot to prevent the
metal frame from moving
5Raise the cover up to the metal tube and make sure the side joints are outside
the cover
6Start attaching the cover to the frame with the Velcro fastening it over the pipe.
6a To properly fix the carrycot to the frame you need to hook 6 Velcros (4 on
sides, one in front and one in back)
ATTENTION: make sure the Velcro straps are securely atta-
ched and the cover is tight.
7Fold the padded lining inside and make it adhere to the sides of the structure
8Hook the buttons (3 on each side)
9Insert the mattress and make it adhere to the bottom WARNING: Never
use additional mattresses in the carrycot
10 Take the canopy and place it on the handle
11 Hook the side zip and close it to secure the canopy laterally
12 Hook the zip on the handle and close it to fix the canopy to the handle.
ATTENTION: the zip can be hard to close to make it adhere
well to the handle. Help yourself with your hands and pro-
ceed gently.
13 The canopy is mounted. Stretch the fabric well with your hands around the
handle
14 Pull the side fabric to have a correct look and the textile side well stretched
15 Attach the leg cover with the zip to the carrycot
16 To remove the cover, the canopy and the leg cover, repeat steps 1 to 15 in
reverse.
CLOSURE OF THE CARRYCOT
The carrycot can be closed to take up minimal space.
17 Remove the mattress
18 Lower the canopy
19 Unhook the two buttons on the bottom of the carrycot

8
20 Pull the ribbons and fold the structure inside
21 Raise the bottom and compact the carrycot
22 Fold the side joints under the bottom
The carrycot is compatible with the Taiyo stroller frame. Consult the instructions for
the Taiyo stroller to secure it correctly and safely
WARNINGS
Never leave your child unattended Before use, make sure
that all locking mechanisms are correctly engaged
To avoid injuries, make sure the child is at a safe distance
during product opening and closing operations
Don’t let your child play with this product.
Before use, check that the coupling mechanisms of the
seat, carrycot or car seat are correctly attached
This product is not suitable for running or skating
Use only manufacturer-approved accessories.
Periodically check the handle and the bottom of the car-
rycot and make sure they are not damaged
In the event that footboards are used for the second child,
make sure that they do not compromise the stability of the
stroller and do not carry children weighing more than 20 kg
Don’t leave the child unattended in the carrycot! Always
keep the child under surveillance.
Never overload the carrycot with additional children or
objects.
The carrycot is suitable for children from birth and up around
9 months.
Never use additional mattresses in the carrycot
The carrycot is suitable for a child who is not in able to sit
independently, to turn around and to pull yourself up by le-
aning on your hands and knees.
Maximum child weight: 9 kg.
Always use only on stable, horizontal and dry surfaces
Do not let other children play near the carrycot
The child’s head must never be lower than the body
Never use the carrycot in the car. Use the approved MUHO
car seat
Make sure the carrycot can be securely attached to the
stroller
Do not store or use the carrycot in damp environments,
cold and at high temperatures, keep away from fire or from
heat sources.
Always carry the carrycot with the handle upright and cor-
rectly locked
The Taiyo stroller, the Noha pram and the Muho car seat

9
allow use with only one child
We recommend replacing the accessories or damaged
components.
Do not use if parts of the carrycot are missing, broken or torn
Contact the neaPosition dealer in case of problems or que-
stions about the use of the product.
CARE AND MAINTENANCE
This product can be cleaned with a damp cloth and detergents normally avai-
lable in trade. Do not use abrasive cleaners. The lining it can be removed and
cleaned, but it must be dry first to be reused.
The carrycot complies with the standard
EN 1888 - 1: 2018, EN 1466 : 2014

10
I - Istruzioni per l’uso
IMPORTANTE: LEGGERE ATTENTAMENTE LE ISTRUZIONI PRIMA
DELL’USO E CONSERVARE LE INFORMAZIONI FUTURE
CARROZZINA NOHA
MONTAGGIO DELLA FODERA
La carrozzina e’ composta da telaio e parte tessile
Procedere come segue per il montaggio:
1Prendere il fondo della carrozzina e inserirlo nel tessuto facendo attenzione al
passaggio dei piedini di appoggio nelle asole. La parte posteriore e’ piu’ rotonda
e va inserita dalla parte della tasca portaoggetti sulla fodera. ATTENZIONE:
tenere la parte tessile centrata lateralmente con i giunti
2Appoggiare la parte superiore del telaio sul fondo assicurandosi che a struttura
in metallo sia perpendicolare al fondo
3La struttura in metallo deve essere appoggiata all’ interno delle guide in pla-
stica
4Agganciare i nastri ai bottoni sul fondo della carrozzina per evitare che la
struttura in metallo si muova
5Alzarre la fodera fino al tubo in metallo e assicurarsi che i giunti laterali siano
esterni alla fodera
6Iniziare ad agganciare la fodera al telaio con il velcro facendolo passare sopra
al tubo.
6a Per fissare correttamente la carrozzina al telaio bisogna agganciare 6 velcro
(4 laterali, uno davanti e uno dietro)
ATTENZIONE: assicurarsi che i velcro siano ben agganciati e
la fodera in tensione.
7Piegare all’interno la fodera imbottita e farla aderire ai lati della struttura
8Agganciare i bottoni (3 su ogni lato)
9Inserire il materassino e farlo aderire al fondo ATTENZIONE: Non utilizza-
re mai materassini aggiuntivi nella carrozzina
10 Prendere la capotta e posizionarla sul manico
11 Agganciare la zip laterale e chiuderla per fissare la capotta lateralmente
12 Agganciare la zip sul manico e chiuderla per fissare la capotta al manico
ATTENZIONE: la zip puo’ risultare dura da chiudere per farla
aderire bene al manico. Aiutarsi con le mani e procedere
delicatamente.
13 La capotta e’ montata. Tendere bene il tessuto con le mani intorno al manico
14 Tirare il tessuto laterale per avere un look corretto e la parte tessile ben tesa
15 Agganciare il coprigambe con la zip alla carrozzina
16 Per rimuovere la fodera, la capotta e il coprigambe ripetere le operazioni da
1 a 15 in senso inverso.
CHIUSURA DELLA CARROZZINA
La carrozzina puo’ essere chiusa per occupare il minimio spazio.
17 Togliere il materassino
18 Abbassare la capotta

11
19 Sganciare i due bottoni sul fondo della carrozzina
20 Tirare i nastri e piegare la struttura in metallo all’interno
21 Alzare il fondo e compattare la carrozzina
22 Piegare i giunti laterali sotto il fondo
La carrozzina e’ compatibile con il telaio passeggino Taiyo. Consultare le istruzioni
della passeggino Taiyo per fissarla correttamente e in sicurezza
AVVERTENZE
Non lasciare mai il bambino incustodito
Prima dell’ uso assicurarsi che tutti i meccanismi di bloccag-
gio siano correttamente agganciati
Per evitare lesioni o ferimenti assicurarsi che il bambino sia
a debita distanza durante le operazioni di apertura e chiu-
sura del prodotto
Non lasciare che il bambino giochi con questo prodotto.
Prima dell’ uso controllare che i meccanismi di aggancio
della seduta, della navicella o del seggiolino auto siano
correttamente agganciati
Questo prodotto non è adatto per correre o pattinare
Utilizzare solo accessori approvati dal produttore.
Controllare periodicamente il manico e il fondo della car-
rozzina e assicurarsi non siano danneggiati
Nel caso venissero utilizzate pedane per il secondo bambi-
no assicurarsi che non compromettano la stabilita’ del pas-
seggino e non trasportare bambini che pesino piu’ di 20 kg
Il bambino non deve mai essere lasciato incustodito nella
navicella! Tenere il bambino sempre sotto sorveglianza.
Non sovraccaricare mai la navicella con ulteriori bambini
o oggetti.
La navicella è adatta a bambini dalla nascita e fino ai 9
mesi circa.
Non utilizzare mai materassini aggiuntivi nella carrozzina
Questo prodotto e’ adatto a un bambino che non è in gra-
do di stare seduto autonomamente, di girarsi e di tirarsi su
appoggiandosi alle mani e alle ginocchia.
Peso massimo del bambino: 9 kg.
Utilizzare sempre e solo su superifici stabili, orizzontali piane
e asciutte
Non lasciare che altri bambini giochino nelle vicinanze del-
la carrozzina senza sorveglianza
La testa del bambino non deve essere mai piu’ in basso del
corpo
Non utilizzare mai la navicella in auto. Utilizzare il seggiolino
auto MUHO omologato
Assicurarsi che la navicella possa essere fissata saldamente

12
al passeggino
Non riporre o utilizzare la navicella in ambienti umidi, freddi
e ad alte temperature, tenere lontano dal fuoco o da fonti
di calore.
Trasportare sempre la navicella con il maniglione in posizio-
ne verticale e correttamente bloccato
Il passeggino Taiyo, la carrozzina Noha e il seggiolino auto
Muho consentono l’utilizzo con un solo bambino
Raccomandiamo di sostituire gli accessori o componenti
danneggiati.
Non utilizzare se parti della carrozzina sono mancanti, rotte
o strappate
Contattare il rivenditore più vicino in caso di problemi o di
domande circa l’utilizzo del prodotto.
CURA E MANUTENZIONE
Questo prodotto può essere pulito con un panno umido e detergenti normal-
mente reperibili in commercio. Non usare detergenti abrasivi. La fodera può es-
sere rimossa e pulita, ma deve essere asciutta prima di essere riutilizzata.
La carrozzina è conforme alla norma
EN 1888 - 1: 2018, IN 1466:2014

13
D - Gebrauchsanweisung
WICHTIG: ANLEITUNGEN FUR SPATERE RUCKFRAGEN AUF-
BEWAHREN
NOHA CARRYCOT
MONTAGE DER VERKLEIDUNG
Die Babywanne besteht aus einem Gestell und einem Textilteil
Zur Montage gehen Sie wie folgt vor:
1Nehmen Sie den Boden der Babywanne und fügen Sie ihn in den Sto ein
Unterstützung Füße in den Schlitzen. Der Rücken ist runder und sollte von der Sei-
te der Tasche auf dem Deckel eingeführt werden. ACHTUNG: Halten Sie
das Textilteil mit den Fugen seitlich zentriert
2Positionieren Sie den oberen Teil des Rahmens so auf der Unterseite, dass die
Metallstruktur senkrecht zur Unterseite steht
3Die Metallstruktur ist auf der Innenseite der Kunststoführungen bleiben
4Haken Sie die Bänder an den Knöpfen am Boden der Tragetasche ein, um zu
verhindern, dass sich der Metallrahmen bewegt
5Heben Sie die Abdeckung an das Metallrohr an und stellen Sie sicher, dass sich
die Seitenstöße außerhalb der Abdeckung befinden
6Befestigen Sie die Abdeckung mit dem Klettverschluss über dem Rohr am Rah-
men.
6a Um dies zu beheben richtig die carrycot an den Rahmen benötigen Sie 6
Velcro Haken s (4 auf Seite s, einer vor und einer hinten)
BEACHTUNG: Stellen Sie sicher, dass die Klettbänder fest sit-
zen und die Abdeckung fest sitzt.
7Falten Sie das gepolsterte Futter nach innen und lassen Sie es an den Seiten
der Struktur haen
8Haken Sie die Knöpfe ein (3 auf jeder Seite)
9Legen Sie die Matratze ein und lassen Sie sie am Boden haen. WARNUNG:
Verwenden Sie niemals zusätzliche Matratzen in der Trage-
tasche
10 Nehmen Sie den Baldachin und setzen Sie ihn auf den Gri
11 Haken Sie den seitlichen Reißverschluss ein und schließen Sie ihn, um den
Baldachin seitlich zu sichern
12 Haken Sie den Reißverschluss am Gri ein und schließen Sie ihn, um den Bal-
dachin am Gri zu befestigen. ACHTUNG: Der Reißverschluss kann
schwer zu schließen sein damit es gut am Gri haet. Bedie-
nen Sie sich mit den Händen und gehen Sie behutsam vor.
13 Der Baldachin ist montiert. Dehnen Sie den Sto gut mit den Händen um den
Gri
14 Ziehen Sie am Seitensto, um ein korrektes Aussehen zu erzielen und die textile
Seite gut zu dehnen
fünfzehn.
15 Befestigen Sie die Beinabdeckung mit dem Reißverschluss an der Tragetasche
16 Um die Abdeckung, den Baldachin und die Beinabdeckung zu entfernen ,

14
wiederholen Sie die Schritte 1 bis 15 in umgekehrter Reihenfolge.
VERSCHLUSS DER KARRIERWANNE
Die Tragetasche kann auf kleinstem Raum geschlossen werden.
17 Entfernen Sie die Matratze
18 Den Baldachin absenken
19 Lösen Sie die beiden Knöpfe an der Unterseite der Tragetasche
20 Ziehen Sie die Bänder und falten Sie die Struktur hinein
21 Heben Sie den Boden an und verdichten Sie die Tragetasche
22 Falten Sie die Seitenfugen unter den Boden
Die Tragetasche ist mit dem Taiyo Kinderwagenrahmen kompatibel. Lesen Sie
die Anweisungen für den Taiyo-Kinderwagen, um ihn richtig und sicher zu befe-
stigen
WARNUNGEN
Lassen Sie Ihr Kind niemals unbeaufsichtigt
Stellen Sie vor dem Gebrauch sicher, dass alle Verriegelung-
smechanismen richtig eingerastet sind
Stellen Sie sicher, dass sich das Kind während des Önens
und Schließens des Produkts in sicherem Abstand befindet,
um Verletzungen zu vermeiden
Lassen Sie Ihr Kind nicht mit diesem Produkt spielen.
Überprüfen Sie vor dem Gebrauch, ob die Kupplungsme-
chanismen des Sitzes, der Tragetasche oder des Autositzes
korrekt angebracht sind
Dieses Produkt ist nicht zum Laufen oder Skaten geeignet
Benutzen nur Vom Hersteller zugelassenes Zubehör .
Überprüfen Sie regelmäßig den Gri und den Boden der Tra-
getasche und stellen Sie sicher, dass sie nicht beschädigt
sind
Wenn für das zweite Kind Trittbretter verwendet werden,
stellen Sie sicher, dass diese die Stabilität des Kinderwagens
nicht beeinträchtigen und tragen Sie keine Kinder mit ei-
nem Gewicht von mehr als 20 kg
Lassen Sie das Kind nicht unbeaufsichtigt in der Trageta-
sche! Halten Sie das Kind immer unter Beobachtung.
Überladen Sie die Babywanne niemals mit zusätzlichen Kin-
dern oder Gegenstände.
Die Babywanne ist für Kinder ab Geburt geeignet ungefähr
9 Monate.
Verwenden Sie niemals zusätzliche Matratzen in der Trage-
tasche
Die Babywanne ist für ein Kind geeignet, das nicht in der
Wanne ist in der Lage, selbstständig zu sitzen, sich um-
zudrehen und zu Ziehen Sie sich hoch, indem Sie sich auf
Hände und Knie stützen.

15
Maximales Kindergewicht: 9 kg.
Verwenden Sie es immer nur auf stabilen, horizontalen und
trockenen Oberflächen
Lassen Sie keine anderen Kinder in der Nähe der Babywan-
ne spielen
Der Kopf des Kindes darf niemals tiefer als der Körper sein
Benutzen Sie die Babywanne niemals im Auto. Verwenden
Sie den zugelassenen MUHO-Autositz
Stellen Sie sicher, dass die Tragetasche sicher am Kinderwa-
gen befestigt werden kann
Bewahren Sie die Babywanne nicht in feuchten Umgebun-
gen auf.
Kalt und bei hohen Temperaturen von Feuer fernhalten
oder von Wärmequellen.
Tragen Sie die Babywanne immer aufrecht am Gri und kor-
rekt gesperrt
Der Taiyo-Kinderwagen, der Noha- Kinderwagen und der
Muho- Autositz ermöglichen die Verwendung mit nur einem
Kind
Wir empfehlen, das Zubehör auszutauschen oder beschäd-
igte Komponenten.
Nicht verwenden, wenn Teile der Babywanne fehlen, zer-
brochen oder zerrissen sind
Kontaktieren Sie die nea Position Händler bei Problemen
oder Fragen zur Verwendung des Produkts.
PFLEGE UND WARTUNG
Dieses Produkt kann mit einem feuchten Tuch und Reinigungsmitteln gereinigt
werden, die normalerweise in erhältlich sind Handel. Verwenden Sie keine Scheu-
ermittel. Das Futter es kann entfernt und gereinigt werden, aber es muss zuerst
trocken sein wiederverwendet werden.
Die Tragetasche entspricht der Norm
EN 1888 - 1: 2018, EN 1466 : 2014

16
F - Mode d’emploi
IMPORTANT: LIRE LES ISTRUCTIONS SUIVANTES ATTENTIVEMENT
AVANT UTILISATION ETE LES CONSERVER POUR LES BESOINS
ULTERIEURS DE REFERENCE
NOHA CARRYCOT
ASSEMBLER LA DOUBLURE
La nacelle est composée d’un cadre et d’une partie textile
Procédez comme suit pour le montage:
1Prenez le bas de la nacelle et ajoutez-le dans le tissu en faisant attention au
passage de la nacelle. Soutien pieds dans les fentes. Le dos est plus rond et doit
être inséré du côté de la poche sur la couverture. ATTENTION: maintenir
la partie textile centrée latéralement avec les joints
2Positionnez la partie supérieure du cadre sur le bas en vous assurant que la
structure métallique est perpendiculaire au bas
3La structure métallique doit rester à l’intérieur des guides en plastique
4Accrochez les rubans aux boutons situés au bas de la nacelle pour empêcher
le cadre en métal de bouger
5Soulever le couvercle jusqu’au tube métallique et s’assurer que les joints la-
téraux sont à l’extérieur du couvercle
6Commencez à fixer le couvercle sur le cadre à l’aide du velcro qui le fixe sur
le tuyau.
6a Pour bien fixer la nacelle sur le châssis, vous devez raccorder 6 s Velcro (4 sur
s côté, un à l’ avant et un à l’arrière)
ATTENTION: assurez-vous que les sangles velcro sont bien at-
tachées et que la couverture est bien serrée.
7Pliez la doublure rembourrée à l’intérieur et faites-la adhérer aux côtés de la
structure
8Accrocher les boutons (3 de chaque côté)
9Insérez le matelas et faites-le adhérer au fond. AVERTISSEMENT: N’utili-
sez jamais de matelas supplémentaire dans la nacelle.
10 Prenez le baldaquin et placez-le sur la poignée
11 Accrochez le zip latéral et fermez-le pour sécuriser le baldaquin latéralement
12 Accrochez le zip sur la poignée et fermez-le pour fixer le baldaquin à la poi-
gnée. ATTENTION: le zip peut être dicile à fermer bien faire
adhérer au manche. Aidez-vous avec vos mains et procéd-
ez doucement.
13 La verrière est montée. Étirez bien le tissu avec vos mains autour de la poignée
14 Tirez le tissu latéral pour avoir un look correct et le côté textile bien tendu
15 Fixez le protège-jambe avec le zip à la nacelle
16 Pour retirer le couvercle, le baldaquin et le couvre-jambes, répétez les étapes
1 à 15 en sens inverse.
FERMETURE DU CHARIOT
La nacelle peut être fermée pour occuper un minimum de place.
17 Enlever le matelas

17
18 Abaisser la verrière
19 Décrocher les deux boutons au bas de la nacelle
20 Tirez les rubans et pliez la structure pour la mettre à l’intérieur
21 Soulever le bas et compacter la nacelle
22 Pliez les joints latéraux sous le fond
La nacelle est compatible avec le cadre de la poussette Taiyo. Consultez les
instructions de la poussette Taiyo pour la fixer correctement et en toute sécurité.
AVERTISSEMENTS
Ne laissez jamais votre enfant sans surveillance
Avant utilisation, assurez-vous que tous les mécanismes de
verrouillage sont correctement engagés
Pour éviter les blessures, assurez-vous que l’enfant est à une
distance de sécurité pendant les opérations d’ouverture et
de fermeture du produit.
Ne laissez pas votre enfant jouer avec ce produit.
Avant utilisation, vérifiez que les mécanismes d’attelage du
siège, de la nacelle ou du siège auto sont correctement
fixés
Ce produit n’est pas adapté pour la course ou le patinage
Utilisation seulement accessoires approuvés par le fabricant
.
Vérifiez périodiquement la poignée et le bas de la nacelle
et assurez-vous qu’ils ne sont pas endommagés
Si des plate-forme sont utilisés pour le deuxième enfant, veil-
lez à ce qu’ils ne compromettent pas la stabilité de la pous-
sette et ne transportez pas d’enfants pesant plus de 20 kg.
Ne laissez pas l’enfant sans surveillance dans la nacelle!
Gardez toujours l’enfant sous surveillance.
Ne jamais surcharger la nacelle avec des enfants supplém-
entaires ou des objets.
La nacelle convient aux enfants dès la naissance et plus
environ 9 mois.
Ne jamais utiliser de matelas supplémentaire dans la nacel-
le
La nacelle est adapté pour un enfant qui n’est pas dans
capable de s’asseoir de manière autonome, de faire de-
mi-tour et de
Soulevez-vous en vous appuyant sur vos mains et vos ge-
noux.
Poids maximum de l’enfant: 9 kg.
Toujours utiliser uniquement sur des surfaces stables, horizon-
tales et sèches
Ne laissez pas d’autres enfants jouer près de la nacelle
La tête de l’enfant ne doit jamais être plus basse que le

18
corps
Ne jamais utiliser la nacelle dans la voiture. Utilisez le siège
auto approuvé MUHO
Assurez-vous que la nacelle peut être solidement fixée à la
poussette
Ne rangez pas et n’utilisez pas la nacelle dans des environ-
nements humides.
froid et à haute température, tenir à l’écart du feu ou de
sources de chaleur.
Portez toujours la nacelle avec la poignée bien droite et
correctement verrouillé
La poussette Taiyo, le landau Noha et le siège auto Muho
permettent une utilisation avec un seul enfant.
Nous recommandons de remplacer les accessoires ou des
composants endommagés.
Ne pas utiliser si des parties de la nacelle sont manquantes,
cassées ou déchirées
Contactez le revendeur nea Position en cas de problème
ou des questions sur l’utilisation du produit.
SOIN ET ENTRETIEN
Ce produit peut être nettoyé avec un chion humide et les détergents norma-
lement disponibles
Commerce. Ne pas utiliser de nettoyants abrasifs. le Doublure il peut être enlevé
et nettoyé, mais il doit d’abord être sec être réutilisé.
La nacelle conforme à la norme
EN 1888 - 1: 2018, EN 1466 : 2014
Conforme aux exigences de sécurité


BHOOP AG
Via S. Franscini 1
6833 VACALLO
Switzerland
Made in China
BH4/2019
This manual suits for next models
1
Table of contents
Languages:
Other BHOOP Stroller manuals
