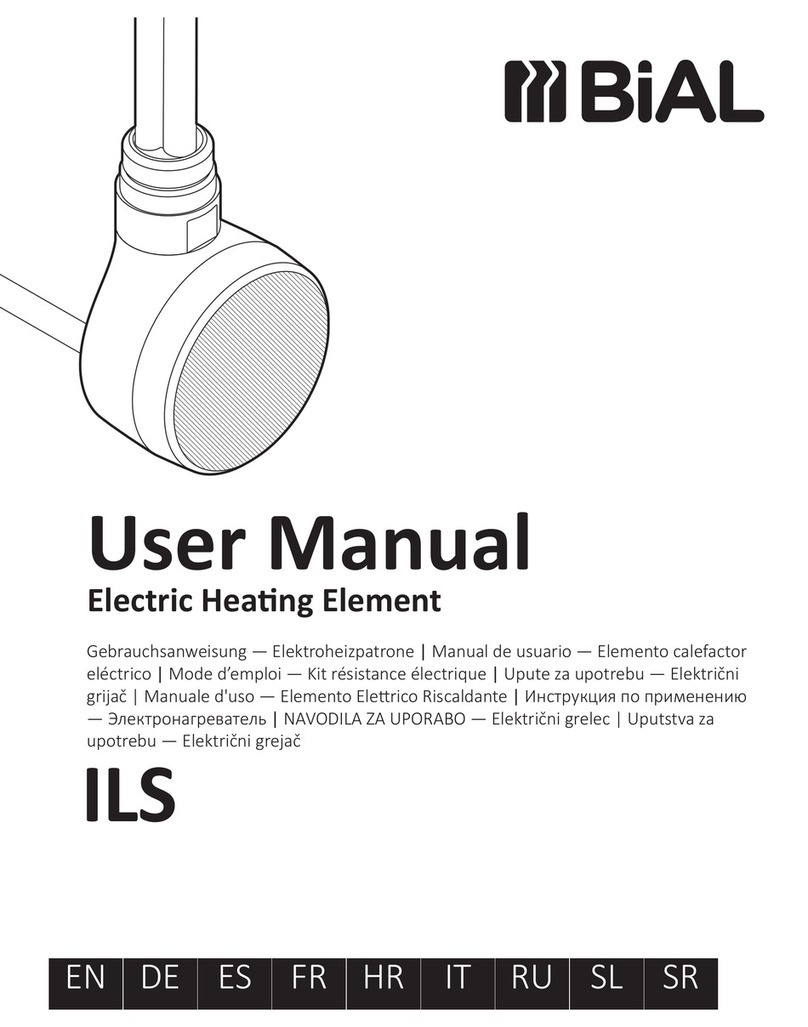
BiAL ILS User manual

ITEN ES FR HRDE SL SRRU
User Manual
Electric Heang Element
Gebrauchsanweisung — Elektroheizpatrone | Manual de usuario — Elemento calefactor
eléctrico | Mode d’emploi — Kit résistance électrique | Upute za upotrebu — Električni
grijač | Manuale d'uso — Elemento Elerico Riscaldante | Инструкция по применению
— Электронагреватель | Navodila za uporabo — Električni grelec | Uputstva za upotrebu
— Električni grejač
— Električni grejač
ILS


3
EN
User Manual
Our products have been designed and manufactured in such a way to ensure
that all quality, functionality and aesthetic requirements are met. We would
like to congratulate you on the purchase of this great product and wish you
a pleasant experience with it.
Electric radiator
Guide to safe installation anduse.
1. Do not install the heater under an electrical socket point.
2. Your electric heater should be lled with a carefully measured amount of
liquid. In the case of loss of heating medium, or in any other case which
demands its supplementation, contact your supplier.
3. The device is not equipped with an external temperature controller.
Do not use the device in a small room if unsupervised disabled or inca-
pacitated individuals are inside it. Only use the device if those individu-
als are under constant supervision.

4
4. Electric heater is not a toy. Children under the age of 3 should not be al-
lowed within close proximity of the device without the supervision of an
adult.
Children aged 3 to 8 should only be allowed to operate the heater when
it has been properly installed and connected. The child must be under
adult supervision or have been trained to safely operate the device while
understanding the risks.
5. Note: Some parts of the radiator can be very hot and can cause burns. Pay
special attention to the presence of children or people with disabilities.
6. If the device is used as a clothes and towel dryer, ensure that the fabrics
drying on it have only been washed in water, avoiding contact with any
harsh chemicals.
7. To ensure the safety of very small children, install the electric dryer so
that the lowest tube is at least 600mm above the oor.
8. The device should only be installed by a qualied installer in accordance
with the applicable regulations regarding safety and all other regulations.
9. All installations to which the device is connected should comply with reg-
ulations applicable in the country of installation and use.
10. Extension leads or electric plug adapters should not be used in order to
supply power to the heater.

5
EN
11. While connecting the radiator to electric installation ensure that the cur-
cuit has a 30 mA residual-current circuit breaker and an appropriate over-
current circuit breaker. With the permanent installation (cable connec-
tion without plug) it is also mandatory to have an omni-pole cut-out for
disconnecting the device on all poles, by points of contact with the clear-
ance of 3 mm.
12. The device version labelled PB can be installed in bathrooms in zone 1,
as dened by applicable law, subject to any additional regulations con-
cerning electrical installations in wet areas.
Other versions of the device can be installed in Zone 2 or beyond.
13. The device is recommended for use solely as described in the manual.
14. Ensure that the heater has been installed on a wall in accordance with
its installation manual.
15. Please forward this instruction manual to the end user.

6
Zone 1
Zone 2

7
EN
Electric Heating Element
Safety requirements — installation
1. Fitting and connection of the heating element should only be performed
by a qualied installer.
2. Connect the unit to a sound electrical installation (see the ratings on the
heater).
3. Ensure that the power cord does not touch the hot parts of the heating
element or radiator.
4. Before installing or removing the device, make sure it is disconnected
from the power source.
5. Do not open the device — any interference with internal components
will invalidate the warranty.
6. The heating element’s power output must not exceed the radiators pow-
er output for the parameters 75/65/20° C.
7. The pressure in the radiator should not exceed 10atm. Ensure that an
air cushion is preserved in electric radiators. In central heating systems,
leave one valve open to prevent pressure build up due to the thermal
expansion of the liquid.

8
8. The device is intended for home use only.
9. Fitting and Installation of the device must be carried out in accordance
with all local regulations for electrical safety, including installation within
permissible locations only. Observe bathroom electrical zone regulations.
Safety requirements — use
1. The heating element must be fully submerged in the heating liquid dur-
ing its operation.
2. Regularly check the device for damage to ensure it is safe to use.
3. If the power cord is damaged the device should not be used. Unplug the
device and contact the manufacturer or distributor.
4. Do not allow ooding into the heating element casing.
5. The heating element and radiator can heat up to high temperatures. Please
be cautious — avoid direct contact with the hot parts of the equipment.
6. Do not open the heating element casing.
7. In the central heating system, always make sure that one valve of the ra-
diator remains open.

9
EN
8. Ensure that minors aged 8 and above or those with a physical or mental
disability are supervised if operating the device.
9. The device is not a toy. Keep it out of the reach of children.
10. The device must be disconnected from the mains during cleaning and
maintenance.
11. Cleaning of the equipment by children under 8years of age is only per-
mitted under appropriate supervision.

10
Intended use of device
The heang element is an electric device
intended solely for installaon in radiators
(standalone or connected to the central
heang system).
Heang element power output should be
matched with radiator output for parame-
ters of 75/65/20° C
Technical informaon
Model markings
(power cable type):
PB (Straight cable without plug) *
Type of electrical connecon: Y
Power supply: 230 V / 50 Hz
Insulaon class: Class II
Towel rail connecon thread: G 1/2"
Casing protecon class [IP]: IPx5
The maximum pressure allowed
in the radiator:
1.0 MPa
Length of heang element: 400 600 800 1000 [W]
350 465 600 670 [mm]
* Device intended to be connected permanently to the system

11
EN
Installaon or removal
Detailed informaon demonstrang the dif-
ferent ways of installing or removing a radi-
ator heang element is available from the
manufacturer or importer (see footnotes at
the end of the manual). Below we list some
basic requirements and principles which
must be followed to ensure long term, re-
liable operaon of the product.
Before installaon or rst use:
1. Read the chapter Safety requirements
—Installaon.
2. Fit the heang element using the cor-
rect spanner (size 22).
3. The heang element must be installed
at the boom of the radiator, perpen-
dicular to the radiator pipes, while pre-
serving space for the proper circulaon
of the heang medium.
4. Use a suitable heang medium for ll-
ing the electric radiator, i.e. (water, spe-
cial products based on water and glycol
for use in central heang systems, or oil
which complies with the requirements
of the manufacturer of the radiator and
heang element).
5. Do not switch the heang element on if
it is not fully immersed in radiator heat-
ing medium.
6. Make sure an adequate air cushion is pre-
sent to protect against excessive pressure
build up within the heater (always leave
one of the radiator valves open).

12
7. Follow the subsequent guidelines when
connecng the electrical installaon:
a. Brown wire — live connecon to the
circuit (L).
b. Blue wire — connect to neutral (N)
8. Before lling the radiator with heang
medium, ensure that the heang ele-
ment is ed properly and that it is wa-
ter ght.
9. In central heang system radiator must
be ed with the valves enabling discon-
necon of the radiator from the rest of
the system.
Notes prior to removal:
1. Before dismantling permanently, discon-
nect the heang element from the mains
and ensure that the radiator is not hot.
2. Be aware. A radiator lled with liquid can
be very heavy. When moving the radia-
tor, ensure that you take the necessary
safety precauons.
3. Before disassembly, close the appropri-
ate valves and drain the radiator com-
pletely to avoid causing any damage.
Product disposal
This product should not be disposed of as
general waste but should be brought to the
appropriate collecon point for re- cycling of
electric and electronic devices. This informa-
on is provided by the sign on the product,
user manual and packaging. Informaon on
the appropriate point for used devices can
be provided by your local authority, prod-
uct distributor or the store from where the
product was purchased. Thank you for your
eort towards protecng the environment.
Maintenance
• Before performing maintenance, always
unplug the unit from the mains system.
• Periodically check the uid level in the
radiator and ensure the heang element
is completely submerged.
• Clean the product with a dry or damp
cloth. If necessary, use a very small
amount of detergent, ensuring that it
contains no solvents or abrasives.

13
EN
ILS
2h dryer mode
Power on/o
Heang power regulaon
Pressing the buon switches on the de-
vice, aer which, the element will begin to
heat. By turning itself on and o regularly,
the device regulates the heang output of
the radiator to an average output, as set by
the user within 30-100% of nominal heang
output of the device.
The design of the device (PTC heang ele-
ment) protects the user from harm via burn-
ing, by automacally liming radiator tem-
perature to 60° C, regardless of the current
seng (provided that the heat output of the
element has been correctly matched with the
heat output of the radiator).
The design of the device as well as physical
characteriscs of heang medium inside the
radiator inuence the way in which heat is
distributed throughout radiator — temper-
ature of the pipes at the boom of the radi-
ator (especially the two located at the very
boom of it), may be lower than the temper-
ature of the remaining parts of the radiator
— this is a normal phenomenon.
Seng of required heang output:
In order to obtain the required room tem-
perature, please set the right heang level
of the device (buons / ). It is possible to
set 1 of 5 heang levels: 30-40-60-80-100%
of the nominal heang output.
Selecon of every subsequent level is indi-
cated by switching on subsequent diodes.
TIMER Funcon
TIMER funcon allows programming of the
device to heat for 2 hours with a dierent
heat output, for instance in order to dry
a towel. Aer this period of me the device
automacally returns to the seng from be-
fore the 2-hour dryer acvaon.
TIMER is turned on by pressing the buon
(also when the device is o). The device will
start working with the heat output

14
currently set. Sengs can be modied as
required while the device is working (but-
tons and ).
If the device was o before the mer mode
was acvated, it will turn o automacally
on terminaon of t he mer.
If the device was set to i.e. seng 2 before
the mer mode was acvated, and is then
modied to i.e. seng 4, the device will re-
turn to seng 2 aer 2 hours.
Aenon: if the device is on and sengs are
not modied on acvaon of TIMER, sengs
will not change aer 2 hours. It will sll op-
erate on the same seng.
Press buon at any me to stop the TIMER
mode. Turning the device o and back on
with the buon will also deacvate the
funcon.
ANTI-FREEZE FUNCTION
(An-freeze protecon)
When the device is o and the temperature
around temperature sensor drops to below
6° C, the device will switch on automacally.
This is to prevent the heang medium inside
the radiator from freezing. Acvang An-
freeze mode is indicated by ashing of the
centre diode.
TROUBLESHOOTING
Problem Possible cause Problem soluon
Device is connected to
electricity, no diodes are
on
Connecon problem
Check the mains connec-
on, check if the power
supply is correct
Device heats despite hav-
ing been turned o with
{on/o} buon
Electronics problem
Disconnect the device
completely from electricity
and wait unl the radiator
cools down. Turn the de-
vice back on
If the problem persists, please contact your local distributor.

15
EN
Warranty terms & condions
1. The subject of this warranty is a BIAL
d.o.o. electric heang element with con-
trol head. The product name and charac-
teriscs are specied on the packaging.
2. By accepng the device on purchase, the
Client conrms that the product is of full
value. The Client should immediately in-
form the Seller of any discovered faults —
otherwise it will be understood that the
Product was faultless at the me of pur-
chase. This refers especially to any faults
or damages of the control panel case.
3. The Warranty for period for the Product
is 24 months from the date of purchase,
but no longer than 36 months from the
date of producon.
4. Any claims made will be processed on
producon of the warranty card and the
evidence of purchase. The manufacturer
has the right to reject any claim on the
grounds of failure to present any of the
above documents.
5. This warranty does not cover any faults
that are due to:
— incorrect (not in accordance with
the manual) installation, use or
disassembly,
— incorrect use of the heating ele-
ment (i.e. for any purpose that is not
specied by the Manufacturer as in-
tended for this type of product),
— Product being handled by unauthor-
ized persons,
— Fault’s or damages caused by the
Client after having purchased and
accepted the product.
6. The Central Heang system should be
ed with lock-shield valves, enabling
disassembly of the radiator or the heat-
ing element and its control head with-
out the necessity of emptying the whole
system of the heang agent. Any prob-
lems or expenses arising from the ab-
sence of lock-shield valves in your instal-
laon cannot be used as grounds for any
claims against BIAL.
7. The aached Product Manual is an in-
tegral element of the Warranty. Please
read it carefully prior to the installaon
and use of the Product.
8. The Manufacturer is obliged to remove
any producon fault within 14 working
days of receipt of the faulty device at the
Manufacturer’s premises.
9. Should the repair be impossible, then
the manufacturer is obliged to replace
the faulty Product with a new, full-value
unit of idencal parameters.

16
Gebrauchsanweisung
Unsere Produkte wurden mit dem Gedanken entworfen die Bedürfnisse
unserer Kunden nach den höchsten Qualitäts-, Funktionalitäts- und Sicher-
heitsstandards zu erfüllen. Wir danken für Ihr Vertrauen und wünschen Ihnen
viel Freude mit Ihrem neuen Gerät.
Elektroheizkörper
Sichere Montage und Verwendung
1. Der Heizkörper darf nicht über die Steckdose montiert werden.
2. Der Heizkörper muss mit einer genau abgemessenen Menge Flüssigkeit
befüllt werden. (Siehe Kapitel „Montage und Demontage“ Bei Leckage
oder zu niedrigem Stand des Heizmediums im Heizkörper setzen Sie sich
bitte mit Ihrem Händler in Verbindung.
3. Dieses Gerätist nicht mit Raumtemperaturreglerausgestattet. Daherist die
Benutzung in kleinen Räumen, in denen sich Menschen mit eingeschränk-
ter Fähigkeit zum selbständigen Verlassen des Raumes benden, nicht zu-
lässig. (Ausnahme: Ständige Aufsicht durch einen Erwachsenen).

17
DE
4. Der Elektroheizkörper ist kein Spielzeug. Kinder unter 3 Jahren sollten
sich nicht in der Nähe des Heizkörpers aufhalten. Kinder im Alter von 3
bis 8 Jahren dürfen den Heizkörper nur unter Aufsicht von Erwachsenen
selbständig bedienen oder nach einer Einweisung über den sicheren
Gebrauch sowie alle damit verbundenen Gefahren. Dies gilt jedoch nur,
wenn das Gerät vorher fachgerecht installiert und angeschlossen wurde.
5. Achtung:EinigeHeizkörperelementekönnenrelativheißwerden.BittebeachtenSie
dies besonders bei der Anwesenheit von Kindern oder behinderten Menschen.
6. Wenn das Gerät als Wäsche — oder Handtuchtrockner eingesetzt wird,
verwenden Sie nur Stoe die zuvor ausschließlich in Wasser gereinigt
wurden.
7. Aus Sicherheitsgründen (Rücksicht auf Kleinkinder) sollte das unterste
Rohr des Wäsche- oder Handtuchtrockners mindestens 60 cm über dem
Boden sein.
8. Das Gerät sollte nur durch einen qualizierten Fachmann installiert wer-
den, unter Beachtung aller gültigen Sicherheitsnormen und Vorschriften.
9. Alle Anlagen an denen das Gerät angeschlossen wird muss den aktuell
gültigen Normen und Vorschriften des Landes entsprechen.
10. Zum Anschluss der Heizpatrone dürfen keine Verlängerungskabel oder
Adapter verwendet werden.

18
11. Stellen Sie sicher, dass der Stromkreis der elektrischen Anlage, an der
die Heizpatrone angeschlossen werden soll, über einen passenden Über-
stromschutzschalter und eine Fehlerstromschutzeinrichtung (R.C.D.) mit
einer Empndlichkeit von 30 mA verfügt.
Bei einem festen Stromanschluss ist ebenso obligatorisch ein Schalter,
der die Trennung des Gerätes auf allen Polen mit Kontakten um je 3 mm
ermöglicht.
12. Die mit dem Symbol PB markierte Geräteversion kann im Badezimmer
in der durch die angemessenen Vorschriften denierten Zone 1 instal-
liert werden, jedoch unter einhalten der gesonderten Vorschriften über
elektrische Anlagen im Nassbereich.
Alle anderen Geräteversionen können in Zone 2 oder außerhalb instal-
liert werden.
13. Verwenden Sie das Gerät zweckgemäß und übereinstimmend mit der
Betriebsanleitung.
14. Versichern Sie sich, ob der Heizkörper gemäß Betriebsanleitung richtig
auf der Wand montiert wurde.
15. Bitte leiten Sie dieses Informationsmaterial an den Endbenutzer weiter.

19
DE
Zone 1
Zone 2

20
Elektroheizpatrone
Sicherheitsanforderungen — Montage.
1. Die Montage des Heizkörpers darf nur von einen qualizierten Fachmann
durchgeführt werden.
2. Schließen Sie das Gerät nur an eine ordnungsgemäß ausgeführte elekt-
rische Installation an (Beachten Sie die Kennzeichnung auf der Heizpat-
rone).
3. Stellen Sie sicher, dass das Versorgungskabel keine heißen Elemente des
Heizkörpers oder der Heizpatrone berührt.
4. Bei der Montage oder Demontage darf sich das Gerät nicht unter Span-
nung benden.
5. Önen Sie auf keinen Fall das Gehäuse des Gerätes.
6. Bei den Parameter 75/65/20° C darf die Nennleistung der Heizpatrone
nicht größer als die Heizleistung des Heizkörpers sein.
7. Der Druck im Heizkörper darf 10 atm nicht überschreiten. Sorgen Sie un-
bedingt dafür, dass bei einem Elektroheizkörper ein Luftkissen im Heiz-
körper verbleibt. Ist der Heizkörper an eine Zentralheizung angeschlos-
sen muss bei Betrieb der Heizpatrone immer ein Ventil geönet sein.
Other manuals for ILS
1
Table of contents
Languages:
Other BiAL Heater manuals
Popular Heater manuals by other brands

Detroit Radiant Products
Detroit Radiant Products PH Series Installation, operation, maintenance and parts manual

Goldair
Goldair Platinum GPPH610 operating instructions

Bliss
Bliss THD160 user manual

ARDES
ARDES AR451E Instructions for use

HEATSTRIP
HEATSTRIP Indoor THS-A Product installation manual

Sealey
Sealey AB2050 quick start guide