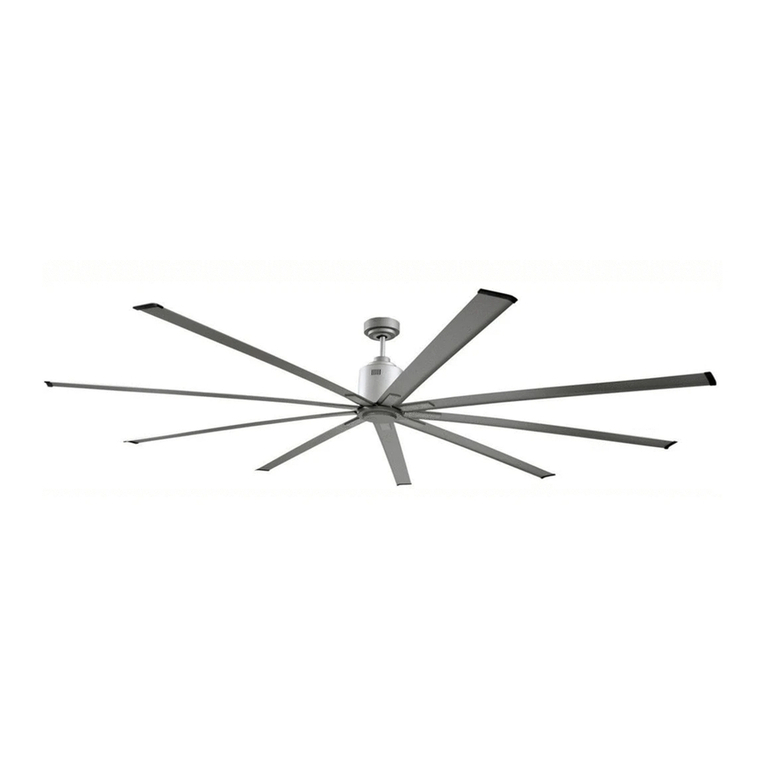
Big Air HVLS 108 User manual

HVLS 108
BLDC HVLS CEILING FAN
Installation Guide
v.1.0 (US) | Jan 2019 For help, call 1-800-433-1626
or visit www.bvc.com
WARRANTY
Ventamatic, Ltd . extends this warranty to the original retail purchase of this model
or, if this unit is purchased and installed by a building contractor, then to the original
owner of the home. No subsequent purchaser of the unit or of a home in which it is
installed is entitled to any of the benefits of this warranty.
This product is warranted against defects in materials and workmanship for a period
of one (1 ) year from the date of original retail purchase. No other parts or
components are warranted. There is no warranty for defects caused by abuse, faulty
installation, or the like.
Repairs or replacement parts supplied under this warranty are warranted only for the
period of this warranty; that is, one (1) year from the date of the original retail
purchase of the unit.
In the event of a defect or malfunction, we will replace or repair the defective part or
component only and return the new or repaired part to you freight prepaid.
You must bear all other expenses incurred in obtaining repairs, including labor
required for field repair or replacement.
The company reserves the right to demand and receive written evidence of the date
of purchase before undertaking its obligations under this warranty. The right to
demand and receive written evidence of date of purchase extends to all licensed
dealers of Ventamatic, Ltd. products.
You should, therefore, retain your sales slip and attach a copy of it to the warranty
claim.
In order to start a warranty claim it is suggested that you first contact the dealer to
ascertain if they will honor the warranty. Products purchased through authorized
Ventamatic, Ltd. dealers will have warranty claims assessed and handled by the
authorized dealer. Any and all implied warranties which may exist terminate upon
the expiration of this warranty one (1) year from the date of the original retail
purchase. Some states do not allow limitations on how long an implied warranty
lasts, so this limitation may not apply to you. Ventamatic, Ltd. is not liable to you for
incidental or consequential damages arising out of defect or malfunction of a unit or
its installation or out of any alleged breach of this warranty. Some states do not allow
the exclusion or limitation of incidental or consequential damages, so this limitation
may not apply to you. This warranty gives you specific legal rights and you may also
have other rights which may vary from state to state.
v.1.1 (US) | Aug 2019

READ THE ENTIRE MANUAL
AND SAVE THE INSTRUCTIONS
THE FAN IS TO BE INSTALLED SO THAT THE BLADES ARE MORE THAN 10 FEET ABOVE
THE FLOOR
THE MINIMUM CLEARANCE OF THE TIP OF BLADES FROM ANY OBSTRUCTIONS
INCLUDING LIGHTS, WALLS OR STRUCTURES SHALL BE A MINIMUM OF 20 INCHES.
WARNING - TO REDUCE THE RISK OF FIRE, ELECTRIC SHOCK, OR PERSONAL INJURY,
MOUNT DIRECTLY TO A STRUCTURAL FRAMING MEMBER.
WARNING - TO REDUCE THE RISK OF PERSONAL INJURY, DO NOT BEND THE BLADE
BRACKETS WHEN INSTALLING THE BRACKETS, BALANCING THE BLADES, OR CLEANING
THE FAN. DO NOT INSERT FOREIGN OBJECTS IN BETWEEN ROTATING FAN BLADES.
WARNING - TO REDUCE THE RISK OF FIRE, ELECTRIC SHOCK, OR PERSONAL INJURY,
DO NOT ATTEMPT TO OPEN OR REPAIR ANY PARTS OR COMPONENTS OF THE FAN.
WARNING - TO REDUCE THE RISK OF FIRE, ELECTRIC SHOCK, OR PERSONAL INJURY,
DO NOT OPERATE THE FAN IF ANY PARTS OF IT IS DAMAGED OR APPEARS TO BE
DAMAGED.
WARNING - TO REDUCE THE RISK OF FIRE, ELECTRIC SHOCK, OR PERSONAL INJURY,
ALL WIRING MUST BE IN ACCORDANCE WITH THE NATIONAL ELECTRICAL CODE,
ANSI/NFPA 70.
WARNING - TO REDUCE THE RISK OF FIRE, ELECTRIC SHOCK, OR PERSONAL INJURY,
DO NOT ATTEMPT TO OPEN OR TOUCH ANY OF THE ELECTRONICS INSIDE THE
CONTROL BOX AS MANY OF THE PARTS OPERATE AT LIVE VOLTAGE.
WARNING - TO REDUCE THE RISK OF FIRE, ELECTRIC SHOCK, AND INJURY TO
PERSONS, THE FAN MUST BE INSTALLED WITH THE BLADES THAT ARE MARKED (ON
THEIR CARTONS) TO INDICATE THE SUITABILITY WITH THIS MODEL. OTHER BLADES
CANNOT BE SUBSTITUTED.
WARNING - TO REDUCE THE RISK OF FIRE, ELECTRIC SHOCK, OR PERSONAL INJURY,
THE FAN SUSPENSION SYSTEM SHALL BE INSPECTED REGULARLY OR AT LEAST ONCE
EVERY TWO YEARS.
1
6
Parts List
Ceiling Bracket Hardware
(4) 3/8” LAG SCREW
(4) 3/8” FLAT WASHER
Safety Cable Hardware
(1) 3/8” EYE LAG SCREW
(1) 3/8” FLAT WASHER
(1) SAFETY CABLE SHACKLE
Tube Bracket Hardware
(2) M6-1 X 85MM
(2) M6 SPLIT WASHER
(4) M6 FENDER WASHER
(2) M6 NYLOCK NUT
(2) COTTER PIN
Motor Mount Hardware
(2) M6-1 X 75MM
(2) M6 SPLIT WASHER
(4) M6 FLAT WASHER
(2) M6 NYLOCK NUT
(2) COTTER PIN
Wiring Cover Hardware
(2) M4-0.7 X 20MM
Earth Wire Mount
(Controller)
(1) M4-0.7 X 5MM
(2) M4 EXT TOOTH
Earth Wire Mount
(Incoming)
(1) M4-0.7 X 5MM
(2) M4 EXT TOOTH
(1) Ceiling Bracket (1) Mounting Bracket (1) Controller Box
(1) Motor (1) Canopy Cover (6) Blades
(1) Hanger Tube
*Remote, batteries and safety cable included but not shown.
FOR HELP, CALL 1-800-433-1626
OR VISIT WWW.BVC.COM

Light Switch
Speed Increase
FAN REMOTE CONTROLLER
Fan OFF
Fan ON
Timer
Rotation Winter/
Summer Mode
Speed Decrease
WIRING DIAGRAM
5
2
WARNING - MAKE SURE THE POWER SUPPLY IS OFF BEFORE ATTEMPTING INSTALLATION
WARNING - TO REDUCE THE RISK OF FIRE, ELECTRIC SHOCK OR IJNURY TO PERSONS,
UNPLUG OR DISCONNECT THE APPLIANCE FROM THE POWER SUPPLY BEFORETHEFAN
INSTALLATION, CLEANING OR SERVICING.
WARNING - TO REDUCE THE RISK OF ELECTRIC SHOCK, THIS FAN MUST BE INSTALLED WITH A
GENERAL-USE, ISOLATING WALL CONTROL/SWITCH.
ALL SET SCREWS MUST BE CHECKED AND RE-TIGHTENED WHERE NECESSA RY, B E F O R E
INSTALLATION.
AFTER MAKING THE WIRE CONNECTIONS, THE WIRES SHOULD BE SPREAD APART WITH THE
GROUNDED CONDUCTOR AND THE EQUIPMENT-GROUNDING CONDUCTOR ON ONE SIDE OF
THE OUTLET BOX AND THE UNGROUNDED CONDUCTOR ON THE OTHER SIDE OF THE
OUTLET BOX.
THE SPLICES AFTER BEING MADE SHOULD BE TURNED UPWARD AND PUSHED CAREFULLY UP
INTO THE CANOPY.
CONDUCTOR OF A FAN IDENTIFIED AS GROUNDED CONDUCTOR TO BE CONNECTED TO A
GROUNDED CONDUCTOR OF POWER SUPPLY, CONDUCTOR OF FAN IDENTIFIED AS
UNGROUNDED CONDUCTOR TO BE CONNECTED TO AN UNGROUNDED CONDUCTOR OF
POWER SUPPLY, CONDUCTOR OF FAN IDENTIFIED FOR EQUIPMENT GROUNDING TO BE
CONNECTED TO AN EQUIPMENT-GROUNDING CONDUCTOR.
SUITABLE FOR USE WITH SOLID-STATE SPEED CONTROLS
FAN MODEL NO.: HVLS 108
WEIGHT OF FAN: 60 LBS
Wires installed by the factory Wires installed by fan installer
White Wire to
EMI Filter
Yellow/Green Wire
to Ring Terminal
Black Wire to
EMI Filter
Neutral (White) Wire
to Power Supply
Ground (Copper) Wire
to Ground
Live (Black)Wire to
Power Supply
Model Diameter Input Power Rated Current
HVLS 108 9 FT 120 VAC 60 Hz 2 A

Recommended Tools
2. Connecting the Hanger Tube to Motor
With the hanger tube aligned to the motor shaft,
tighten the 2 bolts and 2 screws to secure the assembly.
Install and expand the cotter pins.
RECOMMENDED TORQUE: M4 - 2Nm, M6 – 14Nm
4. Secure Fan Assembly to the Ceiling Bracket
Lift the fan assembly and place it within the ceili
ng bracket.
Secure fan using the bolts and washers provided.
Secure the safety cable into the eye bolt with the shackle
.
Ensure the safety cable has a slack of 12” to 16”.
5. Securing the Hanger Tube
Adjust the hanger tube to be perpendicular to the
ground. Fully tighten the 2 upper hanger tube
bolts to secure the hanger tube.
Wire
Cutters
Electrical Test
Pen
9/16”, 10mm,
13mm Sockets &
Torque Wrench
Level
Clamp
3, 5, 8mm
Allen Keys
Remove the 5 inner screws followed by the 3 outer bolts
to unsecure the motor cover. Lift and secure the motor
cover with clamp to expose the motor assembly.
10. Un-securing the Motor Cover
to install the blades
Push the fan blade towards the motor and secure the fan
blade using the upper fan blade mount and the 5 bolts.
Repeat this with the remaining fan blades.
12. Installing the Fan Blade
13. Repositioning the Motor Cover
Lower the motor cover ensuring a good fit.
NOTE THAT THE COLOUR POSITIONING
MARKERS ARE TO BE ALIGNED.
14. Securing the Motor Cover
To secure the motor cover, insert and tighten the 3
outer bolts followed by the 5 inner screws.
Rotate the fan by hand to check for problems.
You are now ready to power up the fan.
11. Un-secure Fan Blade Mount Plate
Unsecure the upper fan blade mount
by removing the 4 bolts. Loosen the middle bolt.
DO NOT REMOVE THE LOWER FAN BLADE MOUNT!
7. Grounding Wire Connections
Connect
the
grounding
wires to
the ceiling
bracket as
shown.
6. Installing the Motor Controller Box
Insert the motor controller box into the fan mount.
Secure the box using the double sided tape provided.
Connect the wire harness to the terminal block.
1B. Do NOT mount only to a fan junction box.
The (4) outer holes must be used to secure
the bracket to the ceiling.
9. Secure the Top Canopy
Raise the top canopy and secure it using
the screws on both sides of the canopy..
WARNING- ENSURE MAINS POWER IS DIS-CONNECTED
8. Connect to Mains
Connect to Mains - Ground wire first,
followed by Neutral and Live.
Plug in connector firmly.
Mount the ceiling bracket using (4) 3/8” or equivalent lag
screws . Install the closed eye bolt for safety cable.
Ensure eye screw can be covered by the canopy cover.
MAX TORQUE FOR ANCHOR/SAFETY BOLTS: 25Nm
Mount the Ceiling Bracket
1A. Mounted on Wood Framed Ceiling
3. Assemble Mounting Bracket to Hanger Tube
Ensure the canopy cover is
inserted into the hanger
tube before assembling
the mounting bracket to
the hanger tube.
The 2 bolts should be
secure but not fully
tightened to allow the
hanger tube to naturally
swing into a vertical
position after Step 5.
5/16” Drill
See wiring diagram
on next page.

Recommended Tools
2. Connecting the Hanger Tube to Motor
With the hanger tube aligned to the motor shaft,
tighten the 2 bolts and 2 screws to secure the assembly.
Install and expand the cotter pins.
RECOMMENDED TORQUE: M4 - 2Nm, M6 – 14Nm
4. Secure Fan Assembly to the Ceiling Bracket
Lift the fan assembly and place it within the ceiling bracket.
Secure fan using the bolts and washers provided.
Secure the safety cable into the eye bolt with the shackle.
Ensure the safety cable has a slack of 12” to 16”.
5. Securing the Hanger Tube
Adjust the hanger tube to be perpendicular to the
ground. Fully tighten the 2 upper hanger tube
bolts to secure the hanger tube.
Wire
Cutters
Electrical Test
Pen
9/16”, 10mm,
13mm Sockets &
Torque Wrench
Level
Clamp
3, 5, 8mm
Allen Keys
Remove the 5 inner screws followed by the 3 outer bolts
to unsecure the motor cover. Lift and secure the motor
cover with clamp to expose the motor assembly.
10. Un-securing the Motor Cover
to install the blades
Push the fan blade towards the motor and secure the fan
blade using the upper fan blade mount and the 5 bolts.
Repeat this with the remaining fan blades.
12. Installing the Fan Blade
13. Repositioning the Motor Cover
Lower the motor cover ensuring a good fit.
NOTE THAT THE COLOUR POSITIONING
MARKERS ARE TO BE ALIGNED.
14. Securing the Motor Cover
To secure the motor cover, insert and tighten the 3
outer bolts followed by the 5 inner screws.
Rotate the fan by hand to check for problems.
You are now ready to power up the fan.
11. Un-secure Fan Blade Mount Plate
Unsecure the upper fan blade mount
by removing the 4 bolts. Loosen the middle bolt.
DO NOT REMOVE THE LOWER FAN BLADE MOUNT!
7. Grounding Wire Connections
Connect
the
grounding
wires to
the ceiling
bracket as
shown.
6. Installing the Motor Controller Box
Insert the motor controller box into the fan mount.
Secure the box using the double sided tape provided.
Connect the wire harness to the terminal block.
1B. Do NOT mount only to a fan junction box.
The (4) outer holes must be used to secure
the bracket to the ceiling.
9. Secure the Top Canopy
Raise the top canopy and secure it using
the screws on both sides of the canopy..
WARNING- ENSURE MAINS POWER IS DIS-CONNECTED
8. Connect to Mains
Connect to Mains - Ground wire first,
followed by Neutral and Live.
Plug in connector firmly.
Mount the ceiling bracket using (4) 3/8” or equivalent lag
screws . Install the closed eye bolt for safety cable.
Ensure eye screw can be covered by the canopy cover.
MAX TORQUE FOR ANCHOR/SAFETY BOLTS: 25Nm
Mount the Ceiling Bracket
1A. Mounted on Wood Framed Ceiling
3. Assemble Mounting Bracket to Hanger Tube
Ensure the canopy cover is
inserted into the hanger
tube before assembling
the mounting bracket to
the hanger tube.
The 2 bolts should be
secure but not fully
tightened to allow the
hanger tube to naturally
swing into a vertical
position after Step 5.
5/16” Drill
See wiring diagram
on next page.

Light Switch
Speed Increase
FAN REMOTE CONTROLLER
Fan OFF
Fan ON
Timer
Rotation Winter/
Summer Mode
Speed Decrease
WIRING DIAGRAM
5
2
WARNING - MAKE SURE THE POWER SUPPLY IS OFF BEFORE ATTEMPTING INSTALLATION
WARNING - TO REDUCE THE RISK OF FIRE, ELECTRIC SHOCK OR IJNURY TO PERSONS,
UNPLUG OR DISCONNECT THE APPLIANCE FROM THE POWER SUPPLY BEFORETHEFAN
INSTALLATION, CLEANING OR SERVICING.
WARNING - TO REDUCE THE RISK OF ELECTRIC SHOCK, THIS FAN MUST BE INSTALLED WITH A
GENERAL-USE, ISOLATING WALL CONTROL/SWITCH.
ALL SET SCREWS MUST BE CHECKED AND RE-TIGHTENED WHERE NECESSA RY, B E F O R E
INSTALLATION.
AFTER MAKING THE WIRE CONNECTIONS, THE WIRES SHOULD BE SPREAD APART WITH THE
GROUNDED CONDUCTOR AND THE EQUIPMENT-GROUNDING CONDUCTOR ON ONE SIDE OF
THE OUTLET BOX AND THE UNGROUNDED CONDUCTOR ON THE OTHER SIDE OF THE
OUTLET BOX.
THE SPLICES AFTER BEING MADE SHOULD BE TURNED UPWARD AND PUSHED CAREFULLY UP
INTO THE CANOPY.
CONDUCTOR OF A FAN IDENTIFIED AS GROUNDED CONDUCTOR TO BE CONNECTED TO A
GROUNDED CONDUCTOR OF POWER SUPPLY, CONDUCTOR OF FAN IDENTIFIED AS
UNGROUNDED CONDUCTOR TO BE CONNECTED TO AN UNGROUNDED CONDUCTOR OF
POWER SUPPLY, CONDUCTOR OF FAN IDENTIFIED FOR EQUIPMENT GROUNDING TO BE
CONNECTED TO AN EQUIPMENT-GROUNDING CONDUCTOR.
SUITABLE FOR USE WITH SOLID-STATE SPEED CONTROLS
FAN MODEL NO.: HVLS 108
WEIGHT OF FAN: 60 LBS
Wires installed by the factory Wires installed by fan installer
White Wire to
EMI Filter
Yellow/Green Wire
to Ring Terminal
Black Wire to
EMI Filter
Neutral (White) Wire
to Power Supply
Ground (Copper) Wire
to Ground
Live (Black)Wire to
Power Supply
Model Diameter Input Power Rated Current
HVLS 108 9 FT 120 VAC 60 Hz 2 A

READ THE ENTIRE MANUAL
AND SAVE THE INSTRUCTIONS
THE FAN IS TO BE INSTALLED SO THAT THE BLADES ARE MORE THAN 10 FEET ABOVE
THE FLOOR
THE MINIMUM CLEARANCE OF THE TIP OF BLADES FROM ANY OBSTRUCTIONS
INCLUDING LIGHTS, WALLS OR STRUCTURES SHALL BE A MINIMUM OF 20 INCHES.
WARNING - TO REDUCE THE RISK OF FIRE, ELECTRIC SHOCK, OR PERSONAL INJURY,
MOUNT DIRECTLY TO A STRUCTURAL FRAMING MEMBER.
WARNING - TO REDUCE THE RISK OF PERSONAL INJURY, DO NOT BEND THE BLADE
BRACKETS WHEN INSTALLING THE BRACKETS, BALANCING THE BLADES, OR CLEANING
THE FAN. DO NOT INSERT FOREIGN OBJECTS IN BETWEEN ROTATING FAN BLADES.
WARNING - TO REDUCE THE RISK OF FIRE, ELECTRIC SHOCK, OR PERSONAL INJURY,
DO NOT ATTEMPT TO OPEN OR REPAIR ANY PARTS OR COMPONENTS OF THE FAN.
WARNING - TO REDUCE THE RISK OF FIRE, ELECTRIC SHOCK, OR PERSONAL INJURY,
DO NOT OPERATE THE FAN IF ANY PARTS OF IT IS DAMAGED OR APPEARS TO BE
DAMAGED.
WARNING - TO REDUCE THE RISK OF FIRE, ELECTRIC SHOCK, OR PERSONAL INJURY,
ALL WIRING MUST BE IN ACCORDANCE WITH THE NATIONAL ELECTRICAL CODE,
ANSI/NFPA 70.
WARNING - TO REDUCE THE RISK OF FIRE, ELECTRIC SHOCK, OR PERSONAL INJURY,
DO NOT ATTEMPT TO OPEN OR TOUCH ANY OF THE ELECTRONICS INSIDE THE
CONTROL BOX AS MANY OF THE PARTS OPERATE AT LIVE VOLTAGE.
WARNING - TO REDUCE THE RISK OF FIRE, ELECTRIC SHOCK, AND INJURY TO
PERSONS, THE FAN MUST BE INSTALLED WITH THE BLADES THAT ARE MARKED (ON
THEIR CARTONS) TO INDICATE THE SUITABILITY WITH THIS MODEL. OTHER BLADES
CANNOT BE SUBSTITUTED.
WARNING - TO REDUCE THE RISK OF FIRE, ELECTRIC SHOCK, OR PERSONAL INJURY,
THE FAN SUSPENSION SYSTEM SHALL BE INSPECTED REGULARLY OR AT LEAST ONCE
EVERY TWO YEARS.
1
6
Parts List
Ceiling Bracket Hardware
(4) 3/8” LAG SCREW
(4) 3/8” FLAT WASHER
Safety Cable Hardware
(1) 3/8” EYE LAG SCREW
(1) 3/8” FLAT WASHER
(1) SAFETY CABLE SHACKLE
Tube Bracket Hardware
(2) M6-1 X 85MM
(2) M6 SPLIT WASHER
(4) M6 FENDER WASHER
(2) M6 NYLOCK NUT
(2) COTTER PIN
Motor Mount Hardware
(2) M6-1 X 75MM
(2) M6 SPLIT WASHER
(4) M6 FLAT WASHER
(2) M6 NYLOCK NUT
(2) COTTER PIN
Wiring Cover Hardware
(2) M4-0.7 X 20MM
Earth Wire Mount
(Controller)
(1) M4-0.7 X 5MM
(2) M4 EXT TOOTH
Earth Wire Mount
(Incoming)
(1) M4-0.7 X 5MM
(2) M4 EXT TOOTH
(1) Ceiling Bracket (1) Mounting Bracket (1) Controller Box
(1) Motor (1) Canopy Cover (6) Blades
(1) Hanger Tube
*Remote, batteries and safety cable included but not shown.
FOR HELP, CALL 1-800-433-1626
OR VISIT WWW.BVC.COM

HVLS 108
BLDC HVLS CEILING FAN
Installation Guide
v.1.0 (US) | Jan 2019 For help, call 1-800-433-1626
or visit www.bvc.com
WARRANTY
Ventamatic, Ltd . extends this warranty to the original retail purchase of this model
or, if this unit is purchased and installed by a building contractor, then to the original
owner of the home. No subsequent purchaser of the unit or of a home in which it is
installed is entitled to any of the benefits of this warranty.
This product is warranted against defects in materials and workmanship for a period
of one (1 ) year from the date of original retail purchase. No other parts or
components are warranted. There is no warranty for defects caused by abuse, faulty
installation, or the like.
Repairs or replacement parts supplied under this warranty are warranted only for the
period of this warranty; that is, one (1) year from the date of the original retail
purchase of the unit.
In the event of a defect or malfunction, we will replace or repair the defective part or
component only and return the new or repaired part to you freight prepaid.
You must bear all other expenses incurred in obtaining repairs, including labor
required for field repair or replacement.
The company reserves the right to demand and receive written evidence of the date
of purchase before undertaking its obligations under this warranty. The right to
demand and receive written evidence of date of purchase extends to all licensed
dealers of Ventamatic, Ltd. products.
You should, therefore, retain your sales slip and attach a copy of it to the warranty
claim.
In order to start a warranty claim it is suggested that you first contact the dealer to
ascertain if they will honor the warranty. Products purchased through authorized
Ventamatic, Ltd. dealers will have warranty claims assessed and handled by the
authorized dealer. Any and all implied warranties which may exist terminate upon
the expiration of this warranty one (1) year from the date of the original retail
purchase. Some states do not allow limitations on how long an implied warranty
lasts, so this limitation may not apply to you. Ventamatic, Ltd. is not liable to you for
incidental or consequential damages arising out of defect or malfunction of a unit or
its installation or out of any alleged breach of this warranty. Some states do not allow
the exclusion or limitation of incidental or consequential damages, so this limitation
may not apply to you. This warranty gives you specific legal rights and you may also
have other rights which may vary from state to state.
Table of contents
Other Big Air Fan manuals
Popular Fan manuals by other brands
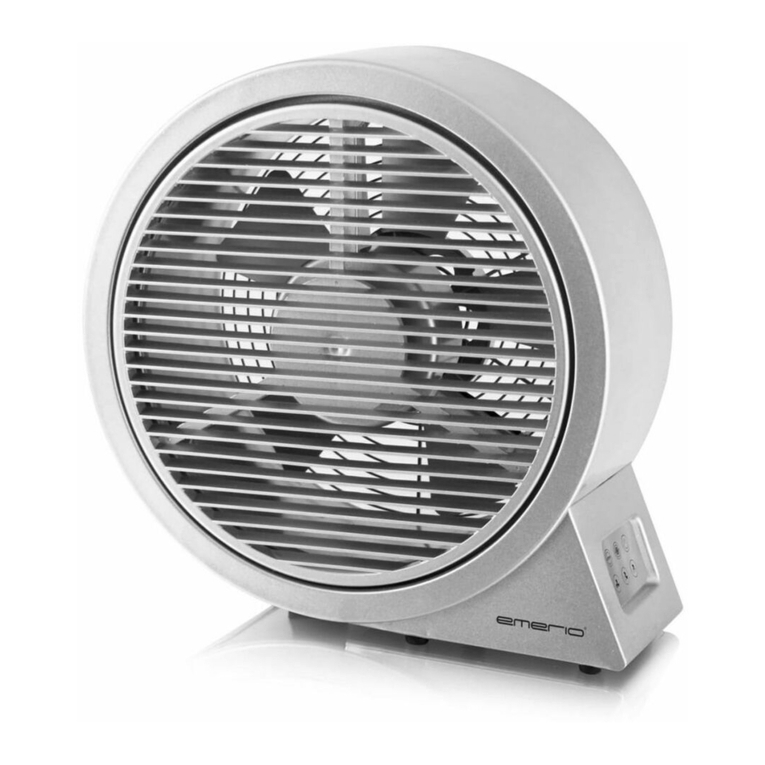
emerio
emerio FN-108451.1 instruction manual

Hunter
Hunter 21100 Owner's guide and installation manual
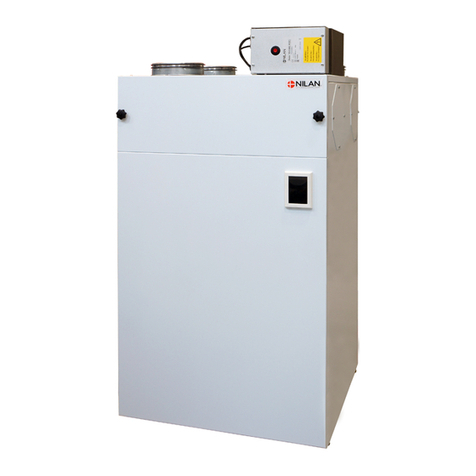
nilan
nilan Combi S 302 Polar Top user manual

Helios
Helios GX 150 Installation and operating instructions
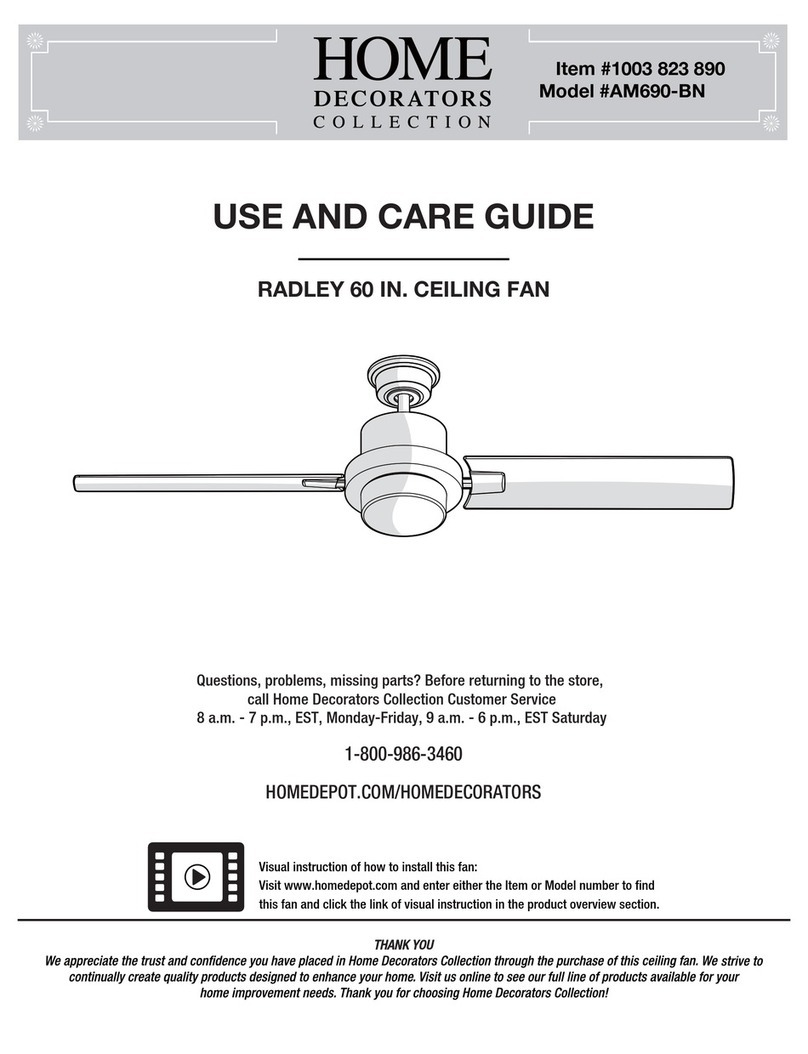
Home Decorators Collection
Home Decorators Collection RADLEY AM690-BN Use and care guide

Maico
Maico AWV 10 Mounting instructions
Sabiana
Sabiana Carisma Fly CVP-ECM Installation, use and maintenance manual

Kichler Lighting
Kichler Lighting Compass 300322 instruction manual
Broan
Broan QTRE110FLT instructions

aldes
aldes Aereco InspirAIR TOP BCA Assembly instructions

Prima Klima
Prima Klima BLUELINE PK300/315-EC instructions

Kalorik
Kalorik TKG VT 2000 operating instructions

