manuals.online logo
Brands
  1. Home
  2. •
  3. Brands
  4. •
  5. aldes
  6. •
  7. Fan
  8. •
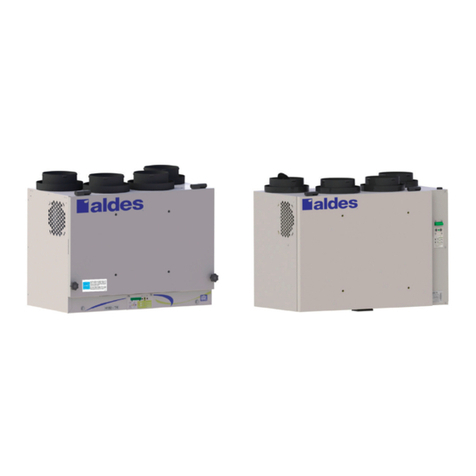
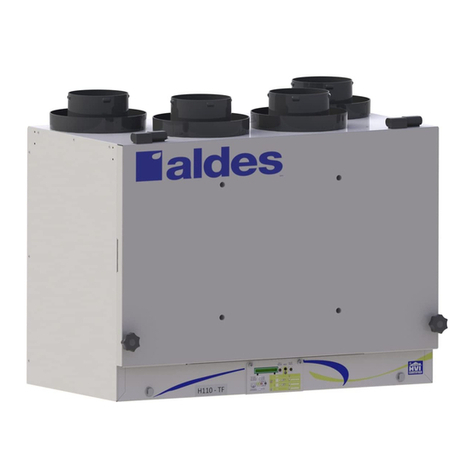
  9. aldes Aereco InspirAIR TOP BCA User manual

aldes Aereco InspirAIR TOP BCA User manual

www.exhausto.dk
InspirAIR® TOP BCA
Beépítési útmutató
Assembly instructions
Installationsanleitung
Montagehandleiding
Manual de instalación
Istruzioni di montaggio
HU
EN
DE
NL
ES
IT
DA
RU
Montagevejledning
Инструкция по применению
HU - Beépített elektromos előfűtő1.0 kW
EN - Internal pre-heating coil 1.0 kW
DA - Internt forvarmeflade 1,0 kW
DE - Internes Vorheizregister 1,0 Kw
NL - Interne voorverwarmingsbatterij 1,0 kW
ES - Batería interna precalentamiento 1.0 kW
IT - Batteria interna di antigelo 1,0 kW
RU - Внутренняя батарея предварительного нагрева 1,0 кВт
www.aldes.com
1. HU. Referenciák és kompatibiltás / EN. References and compatibilities / DA. Referencer og kompatibiliteter / DE. Referenzen und Kompatibilitäten /
NL. Referenties en compatibiliteit / ES. Referencias y compatibilidades / IT. Riferimenti e compatibilità / RU. Рекомендации и совместимости
2. HU. Szállítás és leírás / EN. Scope of supply and description / DA. Indhold og beskrivelse / DE. Inhalt und Beschreibung / NL. Inhoud en beschrijving /
ES. Contenido y descripción / IT. Contenuto e descrizione / RU. Содержание и описание
A B C
HU
Beépített elektromos előfűtő:
-1x kék (N) és 1x sárga/zöld ( ) csatlakozóhoz (C)
és 1x barna (L1) a szilárdtest reléhez (B)
Előre bekötött szilárdtest relé:
-1x kábel + csatlakozó a vezérléshez «X2»
-1x barna a csatlakozóhoz (C)
Elektromos csatlakozó
(tartozék InspirAIR® Top)
EN
Pre-wired internal preheating battery:
-1x blue (N) and 1x yellow/green ( ) to connector
(C) and 1x brown (L1) to solid state relay (B)
Pre-wired solid state relay:
-1x cable + connector to control
-1x brown to connector (C)
Electrical power connector
(included on InspirAIR®Top)
DA
Kablet intern forvarmeflade:
-1x Blå (N) og 1x gul/grøn ( ) til forsyningsklemme
(C) og 1x Brun (L1) til Solid State Relæ (B)
Forkablet Solid State Relæ
-1x rød / hvid til styring
-1x brun til forsyningsklemme (C)
Forsyningsklemme
(inkluderet på VEX40T)
DE
Vorverdrahtete interne Vorheizbatterie:
-1x blau (N) und 1x gelb/grün ( ) zum Stecker (C)
und 1x braun (L1) zum Halbleiterrelais (B)
Vorverdrahtetes Halbleiterrelais:
-1x kabel + Stecker zur Steuerung
-1x braun an Stecker (C)
Stromanschluss
(im Lieferumfang des
InspirAIR®Top enthalten)
NL
Voorbedrade interne voorverwarmingsbatterij:
-1x blauw (N) en 1x geel/groen ( ) naar connector (C)
en 1x bruin (L1) naar solid state relais (B)
Voorbedraad solid state relais:
-1x kabel + connector voor bediening
-1x bruin naar connector (C)
Elektrische voedingsconnector
(opgenomen op de InspirAIR®
Top)
ES
Batería de precalentamiento interna precableada:
-1x azul (N) y 1x amarillo/verde ( ) al conector (C)
y 1x marrón (L1) al relé de estado sólido (B)
Relé de estado sólido precableado:
-2x cable + conector hacia el control
-1x marrón al conector (C)
Conector de alimentación
eléctrica
(incluido en el InspirAIR®Top)
IT
Batteria interna di antigelo precablata:
-1x blu (N) e 1x giallo/verde ( ) al connettore (C)
e 1x marrone (L1) al relè (B)
Relè precablato:
-1x cavo + connettore per il controllo
-1x marrone al connettore (C)
Connettore di alimentazione
elettrica
(incluso su InspirAIR®Top)
RU
Предварительно смонтированная внутренняя
батарея предварительного нагрева:
-1x синий (N) и 1x желто-зеленый ( ) к разъему
(C) и 1x коричневый (L1) к твердотельному реле (B)
СПредварительно подключенное твердотельное
реле:
-1x Кабель + разъем для управления
-1x коричневый к разъему (C)
Разъем электрического
питания
(включены в InspirAIR® Top)
3. HU. Elektromos bekötési diagram / EN. Wiring diagram / DA. Ledningsdiagram / DE. Verdrahtungsplan / NL. Bedradingschema
ES. Esquema de cableado / IT. Schema di cablaggio / RU. Монтажная схема
4. HU. Szerelés / EN. Installation / DA. Installation / DE. Installation / NL. Installatie / ES. Instalación / IT. Installazione / RU. Установка
1 2 3 4
HU Szedje le a zöld fedelet a berendezésről. Ellenőrizze
hogy a berendezés nincs áram alatt.
Távolítsa el a tömítőhabot a kábel nyílásból
kívánt oldalon (A vagy B elrendezés).
Vezesse át az elektromos tápkábelt a
nyíláson.
Helyezze be az előfűtőegységet.
Helyezze vissza a tömítőhabot.
EN Unscrew the green channel. Check that the power to
the unit is turned off.
Remove the foam from the desired side (A or B)
of the cable gland.
Pass the battery power cable through the
grommet.
Install the battery in the unit.
Replace the foam.
DA Demonter den grønne afdækning på top af anlæg.
Kontroller, at forsyningsspænding til anlæg er afbrudt.
Fjern isoleringen fra den ønskede side (A eller
B) til kabelgennemføringen
Før kabel fra forvarmeflade gennem hulet Installer forvarmefladen i anlægget.
Genplacer isoleringen
DE Schrauben Sie den grünen Kanal ab. Überprüfen Sie, ob
das Gerät ausgeschaltet ist.
Entfernen Sie den Schaum von der gewünschten
Seite (A oder B) der Kabelverschraubung.
Führen Sie das Batteriekabel durch die
Tülle.
Setzen Sie den Akku in das Gerät
ein. Ersetzen Sie den Schaumstoff.
NL Schroef het groene kanaal los. Controleer of de stroom
naar het apparaat is uitgeschakeld.
Verwijder het schuim van de gewenste zijde
(A of B) van de kabelwartel.
Leid de batterijstroomkabel door de
doorvoertule.
Installeer de batterij in het
apparaat. Vervang het schuimrubber.
ES Desatornillar el capó verde. Comprobar que la
alimentación de la unidad esté cortada.
Retirar la espuma del lado deseado (A o B). Pasar el cable de alimentación de la
batería a través del ojal.
Instalar la batería en la unidad.
Volver a colocar la espuma.
IT Svitare il pannello verde. Verificare che l'unità sia spenta. Rimuovere la guarnizione del passacavo in
corrispondenza del lato desiderato (A o B).
Infilare il cavo di alimentazione della
batteria nel passacavo.
Installare la batteria nel attacco della
centrale. Ripristinare la guarnizione
RU Откручиваем зеленый канал. Убедитесь, что питание
устройства отключено.
Удалите пену с нужной стороны (A или B)
кабельного ввода.
Пропустите кабель питания батареи через
втулку.
Установите аккумулятор в блок.
Замените пену.
Art. InspirAIR®Top InspirAIR®Side
11023486 ✔
X
ON
OFF
A
B
C
Aldes-InspirAIRTopBCAInterneDTB-Inst-11029961C-092021 - Imprimé en France/Printed in France - RCS Lyon 956 506 828 - Aldes se réserve le droit d’apporter à ses produits toutes modifications liées à l’évolution
de la technique / Aldes reserves the right to modify its products at any time to introduce new technologies.
8 9
HU Helyezze vissza a zöld fedelet, rendezze el vezetékeket hogy alatt legyenek és
csavarja vissza. Jelölje ✔a termék adattábláján az " Opció" oszlopba egy letörölhetetlen tollal, hogy az akkumulátor helyesen be van
helyezve.
EN Put back the green channel, using it to press the wires underneath
and screw it again Write ✔ on the product nameplate with an indelible pen (hexane resistant) that the battery is correctly installed in the
“Option” column
DA Sæt den grønne afdækning tilbage, tryk den på plads, og skru den fast. Skriv ✔på typeskilt med en permanent pen (hexan bestandig), for at markere at forvarmeflade er korrekt installeret i
kolonnen "Option"
DE Setzen Sie den grünen Kanal wieder ein, achten Sie bitte darauf, dass keine
Kabel gequetscht sind und schrauben Sie ihn erneut fest. Schreiben ✔ Sie mit einem unauslöschlichen Stift (hexanbeständig) auf das Produktschild, dass der Akku in der Spalte
"Option" korrekt eingelegt ist
NL Plaats de groene kabelgoot terug, gebruik deze om de draden eronder te
drukken en schroef hem weer vast Controleer ✔ met een onuitwisbare pen (hexaan bestendig) op het naamplaatje van het product of de batterij correct is
geplaatst in de kolom “Option”
ES Vuelva a colocar el capó verde, utilizándolopara presionar los cables debajo y
atornillarlo nuevamente cuidando de no pinzar los cables. Escribir ✔en la placa de identificación del producto con un bolígrafo indeleble (resistente al hexano) que la batería está
instalada correctamente en la columna “Option”
IT Riposizionare il pannello verde, usandolo per premere i fili sottostanti
e riavvitarlo Scrivere ✔ sulla targhetta del prodotto con un pennarello indelebile (resistente all'esano) che la batteria sia correttamente
installata nella colonna “Option”
RU Установите на место зеленый кабельный канал, прижмите его к проводам
и снова вкрутите. Напишите ✔ несмываемой ручкой на паспортной табличке продукта (гексан стойкий), что аккумулятор
установлен правильно, в столбце“Option”
HU. Hivatkozási példa
EN. Reference as exemple
DA. Henvisning som eksempel
DE. Referenz als Beispiel
NL. Referentie als voorbeeld
ES. Referencia como ejemplo
IT. Riferimento come esempio
RU. ссылка в качестве примера
5 6 7
HU Szerelje fel a relét a lemezhez csavarva. Csatlakoztassa a vezérlőt az
egységhez, a tápellátást (barna vezeték) pedig a (C) csatlakozóhoz. Kösse be az elektromos kábelekt: kék (N) és sárga/zöld ( ) a csatlakozón (C)
és barna (L1) a félvezető relén (B). Ellenőrizze az elektromos bekötését.
EN Install the solid state relay by screwing it to the sheet metal. Wire the control to
the unit and the power (brown wire) to the connector (C). Wire the battery cable: blue (N) and yellow/green ( ) on the connector (C)
and brown (L1) on the solid-state relay (B). Check the correct wiring of the various
components.
DA Monter solid state relæet ved at skrue det på metalpladen. Forbind til X2 og
brun ledning til forsyningsklemme (C). Kablet forvarmeflade: blå (N) og gul/grøn ( ) forbindes til forsyningsklemmer
og brun (L1) på solid state relæet (B). Kontroller, at de forskellige komponenter
er korrekt tilsluttet.
DE
Installieren Sie das Halbleiterrelais, indem Sie es mit dem Blech verschrauben.
Verdrahten Sie die Steuerung mit dem Gerät und die Stromversorgung (braunes
Kabel) mit dem Stecker (C).
Verdrahten Sie das Registerkabel: blau (N) und gelb/grün ( ) am Stecker (C)
und braun (L1) am Halbleiterrelais. Überprüfen Sie die korrekte Verkabelung
der verschiedenen Komponenten.
NL Installeer het solid-state relais door het op het plaatstaal te schroeven. Sluit de
bediening aan op de unit en de stroom (bruine draad) op de connector (C). Sluit de batterijkabel aan: blauw (N) en geel/groen ( ) op de connector (C) en
bruin (L1) op het solid-state relais (B). Controleer de correcte bedrading van de
verschillende componenten.
ES Instalar el relé de estado sólido atornillándolo a la chapa. Conecte el control a la
unidad y la alimentación (cable marrón) al conector (C). Conectar los cables de la batería: azul (N) y amarillo/verde ( ) en el conector
(C) y marrón (L1) en el relé de estado sólido (B). Verificar el cableado correcto de los
diferentes componentes
IT Installare il relè avvitandolo alla lamiera. Collegare il controllo all'unità e
l'alimentazione (filo marrone) al connettore (C) Collegare i cavi della batteria: blu (N) e giallo/verde ( ) sul connettore (C) e
marrone (L1) sul relè (B). Verificare il corretto cablaggio dei vari
componenti.
RU
Установите твердотельное реле, прикрутив его к листу. Подключите блок
управления (красный / чёрный) к блоку, а питание (коричневый провод)
к разъему (C).
Подключите кабель аккумулятора: синий (N) желто-зеленый ( ) на
разъеме (C) и коричневый (L1) на твердотельном реле (B).
Проверьте правильность
подключения различных
компонентов.
5. HU. Biztonsági utasítások / EN. Safety instructions / DA. Sikkerhedsinstruktio-
ner / DE. Sicherheitshinweise / NL. Veiligheidsinstructies / ES. Consignas
de seguridad / IT. Istruzioni di sicurezza / RU. Инструкции по безопасности
6. HU. Karbantartás / EN. Maintenance / DK. Vedligeholdelse / DE. Wartung /
NL. Onderhoud / ES. Mantenimiento / IT. Manutenzione / RU. Техническое
обслуживание
HU
Az előfűtőelőtti légcsatornának legalább 50 cm-en keresztül nem gyúlékony anyagból kell
készülnie. Erősen ajánlott horganyzott fém csőhasználata.
A légszennyezettség mértékétől függően a tekercseket rendszeresen ellenőrizni kell, és szükség
esetén meg kell tisztítani. Minden beavatkozás előtt ellenőrizze, hogy az akkumulátor hideg-e.
Hosszabb használaton kívüli időután az akkumulátor elsőújraindításakor átmenetileg égett szag
jelentkezhet.
EN
The sheath upstream of the coil must be made of non-flammable material over at least 50 cm.
It is strongly recommended to use a metal duct : Aldes Alflex M1 or M0, rigid galvanized ...
Depending on the degree of air pollution, the heating resistors should be checked periodically and if
necessary cleaned. Check that the battery is cold before any intervention.
After a long period of non-use, a burning smell may appear temporarily when the battery is restarted
for the first time.
DA
Røret efter varmefladen skal være lavet af ikke-antændeligt materiale over mindst 50 cm.
anbefales kraftigt at bruge et metalrør mellem varmefladen og HRV : Aldes Alflex M1 eller M0,
spirorør ...
Afhængigt af graden af luftforurening skal varmelegemet med jævne mellemrum kontrolleres og om
nødvendigt rengøres. Kontroller at batteriet er koldt, før du griber ind. Efter en lang periode uden
brug, og når forvarmeflade startes for første gang, kan man opleve at det midlertidigt lugter brændt.
DE
Der Kanal vor und nach dem Heizregister muss mind. 50 cm aus nicht brennbarem Marterial
bestehen. Es wird dringend empfohlen einen Metallkanal zwischen Register und Lüftungsgerät
zu verwenden: Aldes Alflex M1 oder M0, starr verzinkt...
Je nach Luftverschmutzungsgrad sollten die Heizwiderstände regelmäßig überprüft und gegebenen-
falls gereinigt werdenÜberprüfen Sie vor jedem Eingriff, ob das Zubehör kalt ist.
Nach einer langen Zeit der Nichtbenutzung kann beim ersten Neustart der Batterie vorübergehend
ein brennender Geruch auftreten.
NL
Het omhulsel stroomopwaarts van de spoel moet gemaakt zijn van niet-brandbaar materiaal
over een lengte van minstens 50 cm. Het wordt sterk aanbevolen om een metalen buis te
gebruiken : Aldes Alflex M1 of M0, hard gegalvaniseerd...
Afhankelijk van de mate van luchtverontreiniging dienen de verwarmingsweerstanden periodiek ge-
controleerd en eventueel gereinigd te worden. Controleer of het accessoire koud is voordat u ingrijpt
Na een lange periode van niet-gebruik kan er tijdelijk een brandlucht verschijnen wanneer de batterij
voor de eerste keer opnieuw wordt opgestart.
ES
El conducto aguas arriba de la batería debe ser de material no inflamable de al menos 50
cm. Es muy recomendable utilizar un conducto metálico : Aldes Alflex M1 o M0, galvanizado
rígido...
Dependiendo del grado de contaminación del aire, las resistencias calefactoras se deben revisar
periódicamente y, si es necesario, limpiar. Comprobar que la batería esté fría antes de cualquier
intervención. Después de un largo período de no utilización, es posible que aparezca temporalmente
un olor a quemado cuando se reinicia la batería por primera vez.
IT
Il canale a monte della batteria elettrica deve essere in materiale non infiammabile per almeno
50 cm. Si consiglia vivamente di utilizzare un condotto metallico : Aldes Alflex M1
o M0, rigido zincato ...
A causa dell'inquinamento atmosferico, le resistenze di riscaldamento devono essere controllate
periodicamente e se necessario pulite. Verificare che la batteria sia fredda prima di qualsiasi
intervento Dopo un lungo periodo di inutilizzo, si potrebbe avvertire temporaneamente odore di
bruciato al riavvio della batteria.
RU
Оболочка перед батареей должна быть изготовлена из негорючего материала на расстоянии не
менее 50 см. Настоятельно рекомендуется использовать металлический кабелепровод : Aldes
Alex M1 или M0, жесткий оцинкованный ...
В зависимости от степени загрязнения воздуха резисторы нагрева следует периодически проверять
и при необходимости очищать. Перед любым вмешательством убедитесь, что аксессуар остыл.
После длительного перерыва в использовании может временно появиться запах гари при первой
перезагрузке аккумулятора.
✔
Other aldes Fan manuals

aldes DESIGN User manual

aldes

aldes DESIGN User manual

aldes EasyHOME Hygro Compact CLASSIC User manual

aldes

aldes EasyHOME Hygro Compact CLASSIC User manual

aldes H/E95 Instruction manual

aldes

aldes H/E95 Instruction manual

aldes DESIGN User manual

aldes

aldes DESIGN User manual

aldes SFP 300 SP User manual

aldes

aldes SFP 300 SP User manual

aldes IN LINE XSilent User manual

aldes

aldes IN LINE XSilent User manual

aldes Aereco InspirAIR BCA User manual

aldes

aldes Aereco InspirAIR BCA User manual

aldes InspirAIR Home 240 Product manual

aldes

aldes InspirAIR Home 240 Product manual

aldes EasyVEC C4 Series User manual

aldes

aldes EasyVEC C4 Series User manual

aldes Dee Fly User manual

aldes

aldes Dee Fly User manual

aldes INEA 100 User manual

aldes

aldes INEA 100 User manual

aldes TAVA Series User manual

aldes

aldes TAVA Series User manual

aldes InspirAIR Side Premium 150 User manual

aldes

aldes InspirAIR Side Premium 150 User manual

aldes INEA ECO SILENT 100 H User manual

aldes

aldes INEA ECO SILENT 100 H User manual

aldes Bahia Curve L C31 User manual

aldes

aldes Bahia Curve L C31 User manual

aldes Mono User manual

aldes

aldes Mono User manual

aldes InspirAIR FRESH Instruction manual

aldes

aldes InspirAIR FRESH Instruction manual

aldes Sekoia User manual

aldes

aldes Sekoia User manual

aldes AG 638 User manual

aldes

aldes AG 638 User manual

aldes Aereco InspirAIR SP 240 User manual

aldes

aldes Aereco InspirAIR SP 240 User manual

aldes ZRT-R Series User manual

aldes

aldes ZRT-R Series User manual

aldes Dee Fly Cube 550 User manual

aldes

aldes Dee Fly Cube 550 User manual

aldes INEA EXPERT 100 H User manual

aldes

aldes INEA EXPERT 100 H User manual

aldes EasyHOME Auto CLASSIC User manual

aldes

aldes EasyHOME Auto CLASSIC User manual

Popular Fan manuals by other brands

KDK 23BWBH Installation and operating instructions

KDK

KDK 23BWBH Installation and operating instructions

S&P HTB-75 N Installation manual and operating instructions

S&P

S&P HTB-75 N Installation manual and operating instructions

Vivax FS-41M user manual

Vivax

Vivax FS-41M user manual

Hunter 52485 installation manual

Hunter

Hunter 52485 installation manual

Black & Decker BXFT50005GB quick start guide

Black & Decker

Black & Decker BXFT50005GB quick start guide

Honeywell HSF1640 Series manual

Honeywell

Honeywell HSF1640 Series manual

Fanimation Andover FP5220 Series Specification sheet

Fanimation

Fanimation Andover FP5220 Series Specification sheet

Fanimation Air Shadow FP815FS owner's manual

Fanimation

Fanimation Air Shadow FP815FS owner's manual

LUCCI THERMALITE 3 IN 1 Installation instructions manual

LUCCI

LUCCI THERMALITE 3 IN 1 Installation instructions manual

Fanimation Showroom AIRE DELUXE FP6245B Series manual

Fanimation

Fanimation Showroom AIRE DELUXE FP6245B Series manual

Sulion TERRA manual

Sulion

Sulion TERRA manual

Ebmpapst S4D200-AH14-01 operating instructions

Ebmpapst

Ebmpapst S4D200-AH14-01 operating instructions

WAFE 200 E user manual

WAFE

WAFE 200 E user manual

CONCORD Ponderosa 52PD Owner's manual and installation instructions

CONCORD

CONCORD Ponderosa 52PD Owner's manual and installation instructions

Hunter 21585 Parts guide

Hunter

Hunter 21585 Parts guide

cecotec FORCESILENCE 9800 SKYLINE BLADELESS instruction manual

cecotec

cecotec FORCESILENCE 9800 SKYLINE BLADELESS instruction manual

NuTone 744SFLNT instruction manual

NuTone

NuTone 744SFLNT instruction manual

Klimatronic CoolBreeze 3000 TVM manual

Klimatronic

Klimatronic CoolBreeze 3000 TVM manual

manuals.online logo
manuals.online logoBrands
  • About & Mission
  • Contact us
  • Privacy Policy
  • Terms and Conditions

Copyright 2025 Manuals.Online. All Rights Reserved.