Big Sky Wisp 1P Moon View User manual

Big Sky International, Inc. 970 W Broadway, Ste E289 Jackson, WY 83001 USA pg 1 of 2 Revised 2019-08-15
www.BigSkyInternational.com 888-535-7085
Big Sky International, Inc. - Wisp 1P “Moon View” (MV) tent revD
Setup instructions:
1) Clear the ground of any sharp options that will damage the tent floor.
2) Insert 38cm (15in) pole into foot end pocket, if not already inserted. Pole pocket has flap next to
ground with Velcro that open/closes. (see drawing below)
3) Lay out the tent.
4) Stake/peg four (4) main webbing loops
a. (1) Stake/peg head end with 1cm (3/8in) webbing
b. There should be a straight line between head and foot end stakes/pegs. (2) Stake/peg foot
end with 1cm (3/8in) webbing.
Note: if strong wind these may be reversed since foot end should be staked/pegged into
the wind, but doing the foot end you will not able to see if ridge line between poles are in
a straight so may need to adjust foot end peg after staking/pegging head end
c. (3) Stake/peg the non-door side of Wisp tent, it should 90 degrees from straight line
between head end and foot end.
See drawing below:
Note: do not tighten stake/peg webbing loops yet.
** Warning **
The silnylon fabric that we use is very popular for lightweight products, but it
will burn so keep it away from heat or open flame.
We have enclosed a fabric swatch for a test burn… after burning a fabric swatch
you need to decide to either to accept the risk of using the product with this fabric
or return the unused
p
roduct for full refund.
Big Sky International, Inc. 970 W Broadway, Ste E289 Jackson, WY 83001 USA pg 2 of 2 Revised 2019-08-15
www.BigSkyInternational.com 888-535-7085
5) Adjust hiking pole length to 120cm.
6) Insert hiking/trekking pole from side with zipper. Unzip door if necessary to insert trekking pole,
then close door zipper before (4) pegging door vestibule.
Important: handle should be UP and pointy end DOWN toward the ground.
The hiking/trekking pole should be adjusted so it is vertical and parallel to the mesh netting wall.
7) Stake/peg (5) foot end and head end. These stake/peg loops have cord with LineLoks.
8) Optional: (6) door stake/peg and (7) extra room guy line
9) Tighten stake/peg cords. Reset stakes/pegs if necessary. Cords may have to be tightened again
later, especially after rain storm, etc. so leave enough untightened cord for later adjustments.
Note: If you have never used a hiking/trekking pole tent before you may be surprised the amount
of stakes/pegs it requires. Please remember on a freestanding tent the poles hold the tent up and
the stakes/pegs resist wind loads, etc. On a hiking/trekking pole tent the stakes/pegs need to have
enough holding power to hold the tent up AND resist wind loads, etc.
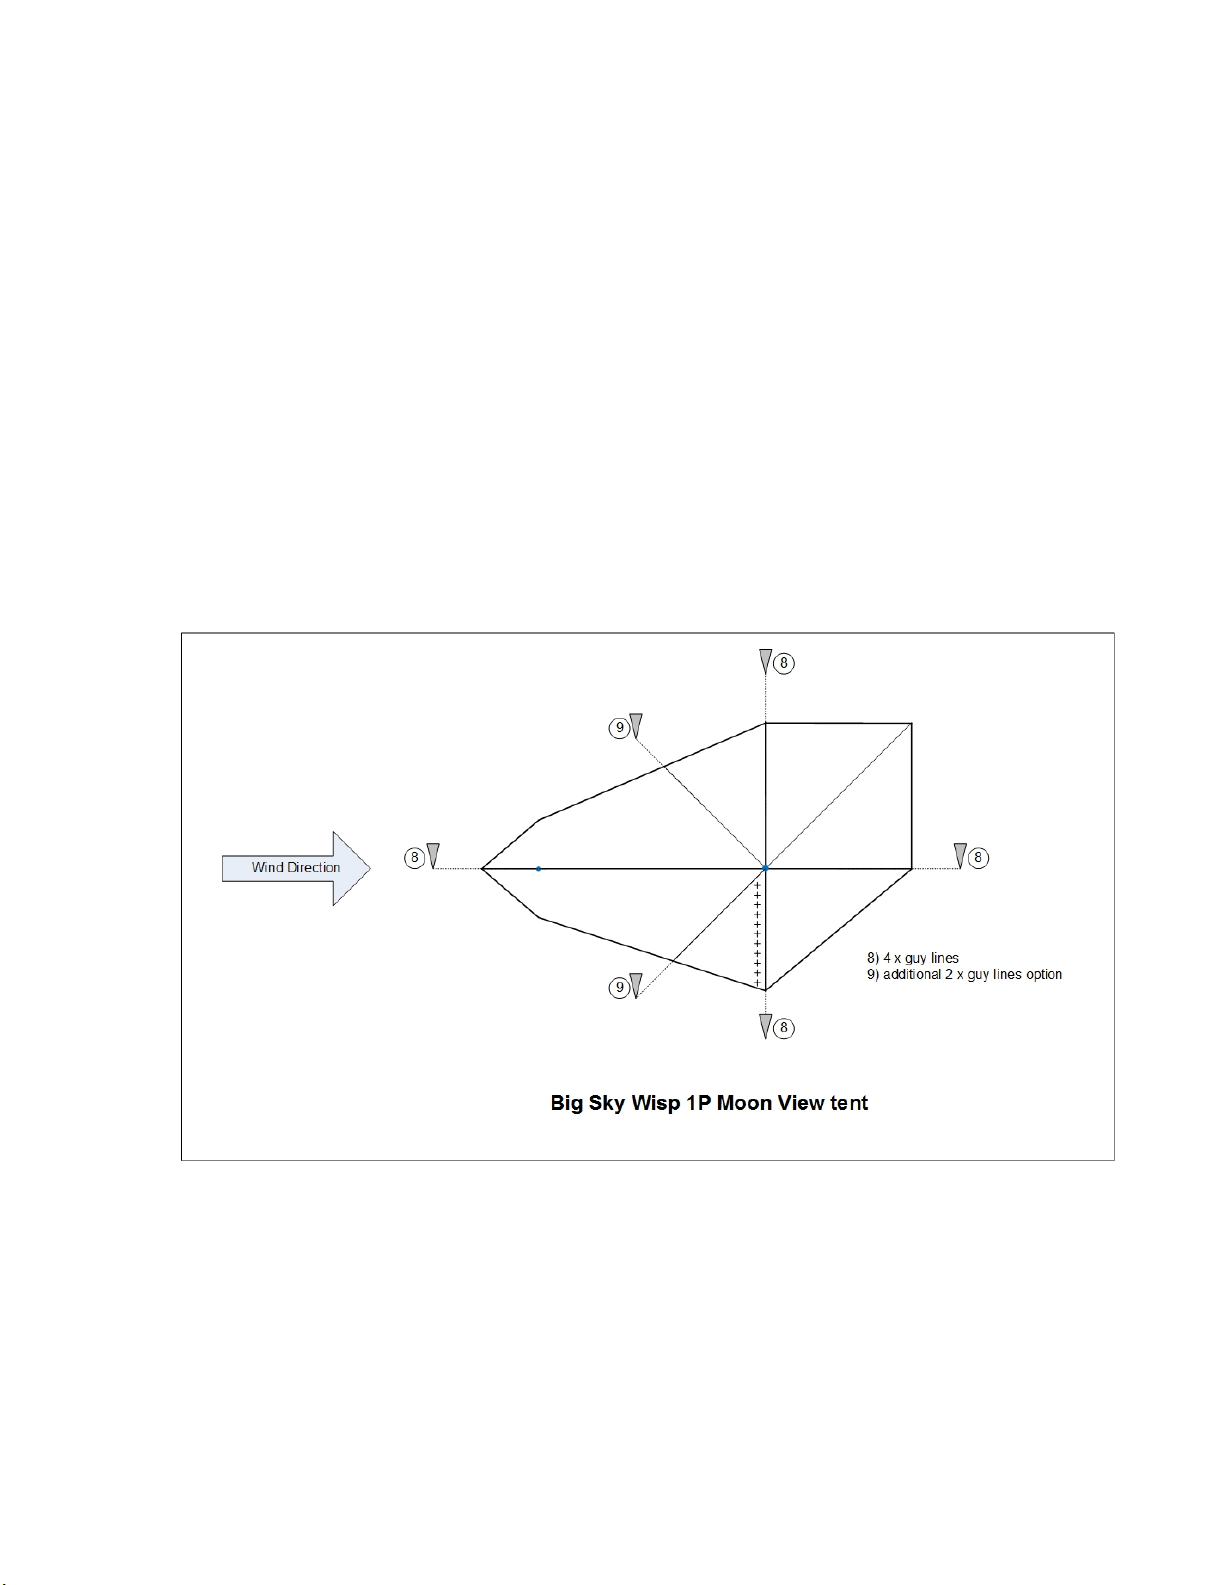
10) Install optional guy lines. (See guy line diagram below)
Tip: using guy lines will increase the interior room because they pull the sides out.
Packing instructions:
1) Reverse the setup instructions
2) We suggest rolling rather that stuffing. It results in a smaller volume. We also suggest rolling the
end pole and stakes up in the tent or carrying them separately.
Caution: Trying to “stuff” the poles and/or the stakes/pegs may result in tearing the mesh or tent.
Table of contents
Other Big Sky Tent manuals


