manuals.online logo
Brands
  1. Home
  2. •
  3. Brands
  4. •
  5. Billyoh
  6. •
  7. Garden House
  8. •
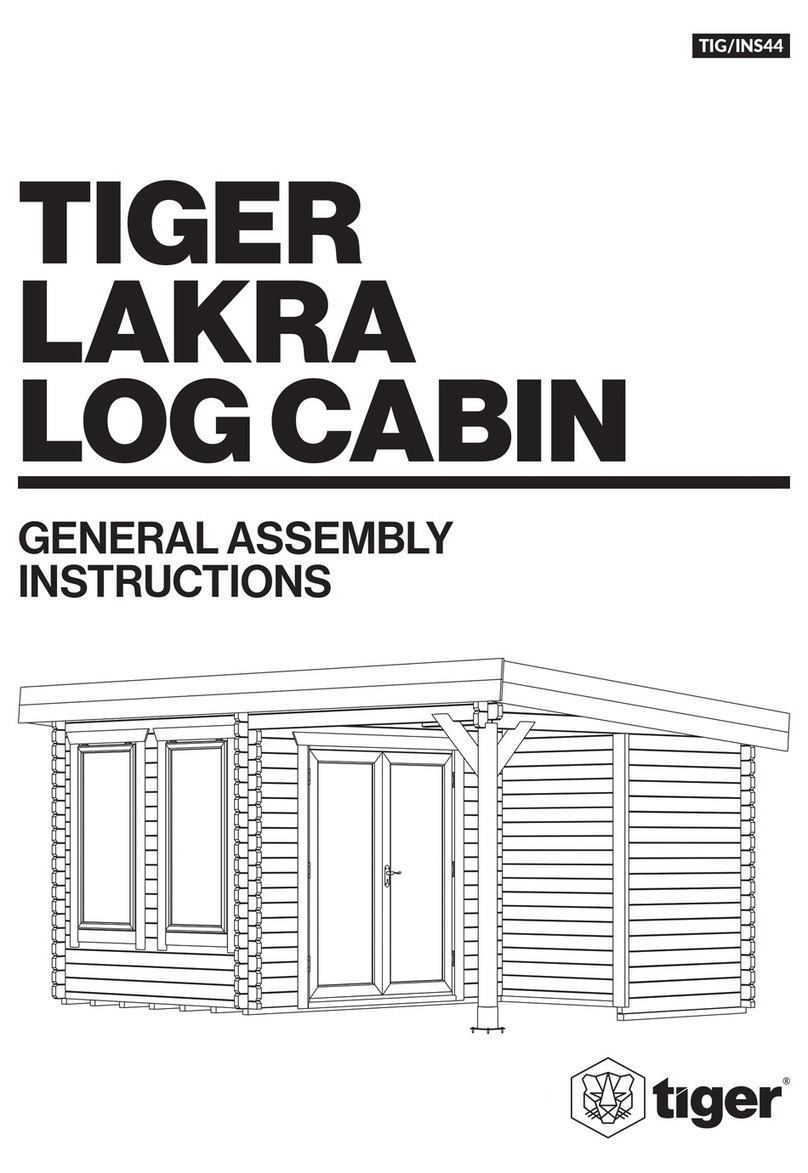
  9. Billyoh 6000 Series Instruction Manual

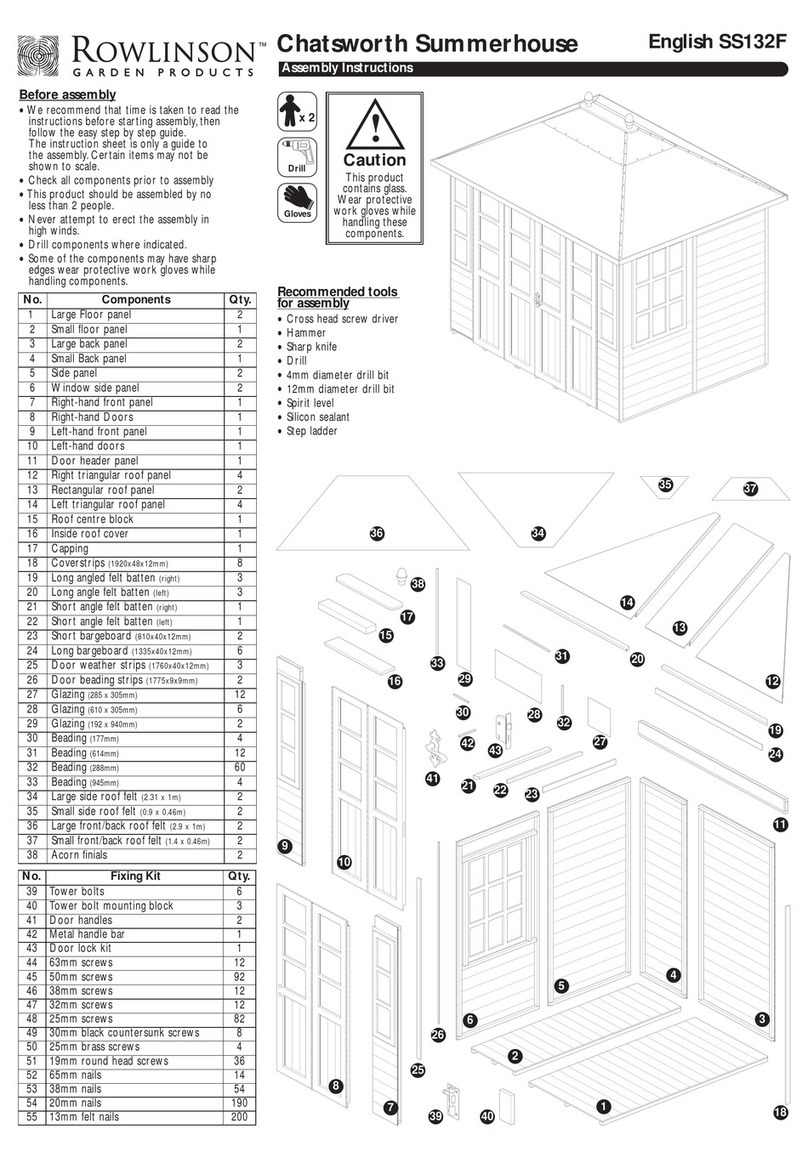
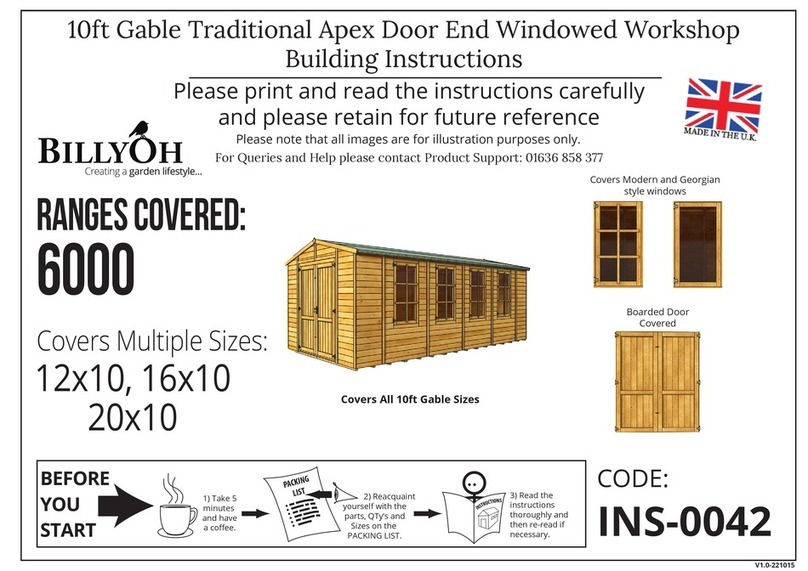
Billyoh 6000 Series Instruction Manual

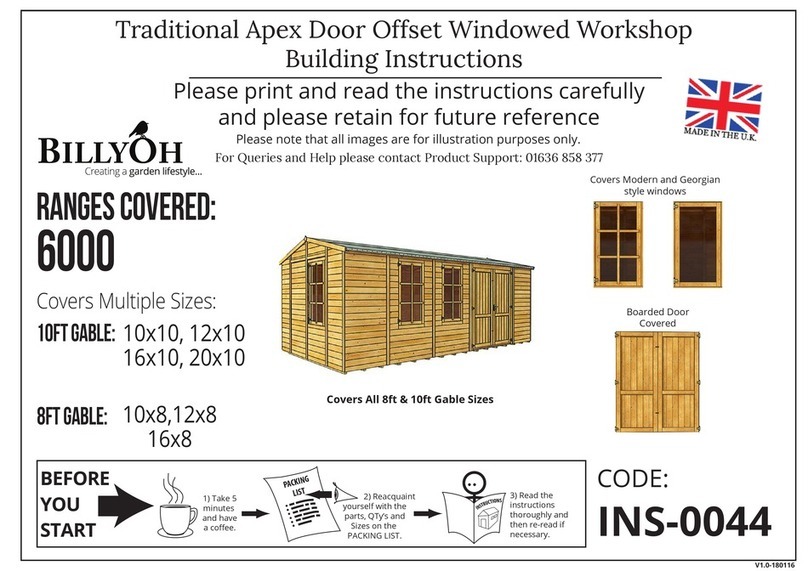
Covers All 8ft & 10ft Gable Sizes
V1.0-210116
2) Reacquaint
yourself with the
parts, QTy’s and
Sizes on the
PACKING LIST.
PACKING
LIST
1) Take 5
minutes
and have
a coffee.
3) Read the
instructions
thoroughly and
then re-read if
necessary.
BEFORE
YOU
START
6000
10ft Gable:
8ft Gable:
RANGEs Covered:
Covers MultipleSizes:
10x10, 12x10
16x10, 20x10
10x8,12x8
16x8
CODE:
INS-0046
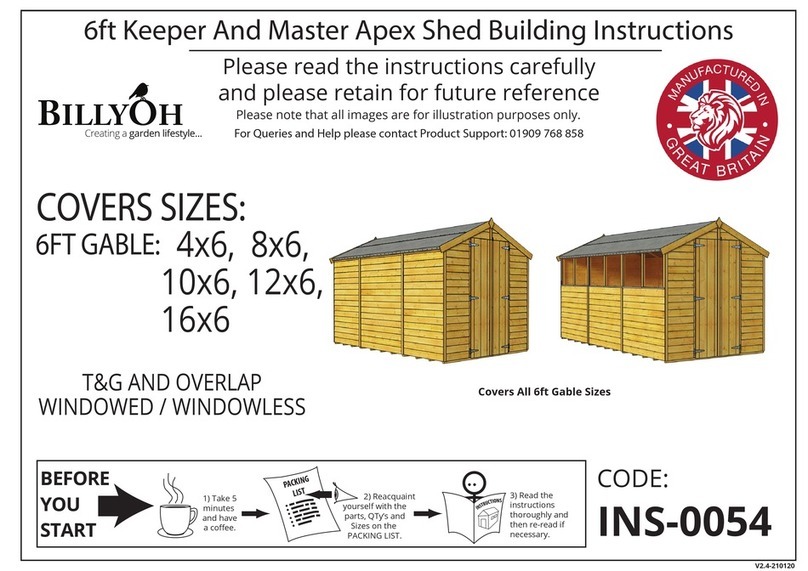
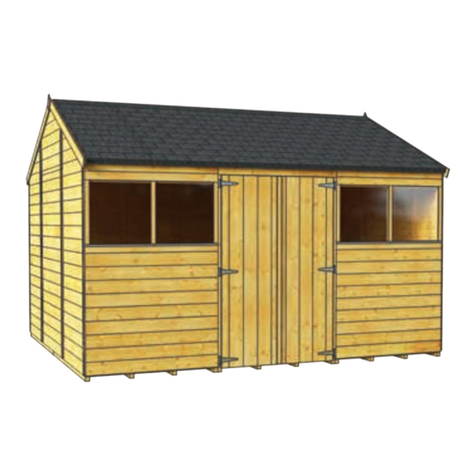
Traditional Apex Door Offset Windowless Workshop
Building Instructions
Please print and read the instructions carefully
and please retain for future reference
Please note that all images are for illustration purposes only.
For Queries and Help please contact Product Support: 01636 858 377
Boarded Door
Covered
Flag Stones
Sharp Sand
50mm deep
CONCRETE BASE
75 mm of Concrete
laid on top of
75mm of
hardcore.
FLAG STONES
Slabs laid on 50mm
of sharp sand.
mm051
Concrete
75mm deep
Hardcore
75mm deep
When thinking about where the
building and base are going to be
constructed ensure that there will
be access to all sides for maintenance
work and annual treatment. This
building should be situated at least
2 feet away from any structures or
obstructions (such as fences, buildings,
trees etc). We recommend that areas
around playhouses have a soft
surface such as play bark or grass.
All garden buildings must be built on
a level, at base to be erected correctly.
BUILDING A BASE
Tongue
&
Groove
Overlap
Outside
of
building
Outside
of
building
CLADDING STYLE
Overlap: This style of cladding is
very traditional and uses rough
sawn timber.
This gives the panels their
unnished look and helps the
building to blend in to it’s
natural surrondings. When the
wood has dried through hotter
weather knots may become
loose, which is natural. Overlap
is an economic solution for
lower impact use.
Shiplap Cladding: This style of
cladding allows the timber to
interlock giving greater strength
to the building. It also creates
a smoother nish and continous
lines throughout the panel. Due
to the natural movement of
wood the lines between tongue
and groove panels may not
marry up.
PANEL ORIENTATION
It is essential to ensure that the panels of your
building are in the correct orientation. Assembly
in the wrong orientation may lead to water
ingress and deterioration.
BOARDS OVER HANG THE EDGE OF THE FLOOR
In most cases the lower edge of the panels
overhangs the oor of the building and the panel
is xed to oor with screws through the frame on
the inside of the panel.
PRODUCT MAINTENANCE CHECK LIST:
Wooden Sheds / Playhouses / Summerhouses
Level Base:
A rm level base and protection from moisture penetration is key to
maintaining the building.
Seal The Windows:
Use a silicone sealant on the inside and outside of the windows as soon
as possible after assembly is a strong way of sealing the windows.
Annually Treat The Building:
Treat your building after construction with a good quality water
resistant treatment. Repeat this process annually inside and out.
The Building Must Not Be In Contact With Anything:
Overhanging hedges or trees must be cut back regularly as a branch
may pierce the roong felt or glazing and would allow water ingress.
Regularly Check / Replace Damaged Felt:
Check the felt regularly. Any damaged felt must be replaced.
Lubrication:
Use a suitable oil to lubricated all moving parts, such as hinges, for
continued propper use.
TROUBLE SHOTTING GUIDE
Pre-Assembly
Q: When is the best time to apply treatment? A: To truly cover all parts of the building, that will be exposed to the elements, you should
treat your product with a high quality wood treatment before assembling the building.
Q: What type of base should I use? A: You must lay a solid at / level base. Failure to do so will result in your building tting together
incorrectly. We highly recommend a properly laid and at and level concrete or ag stone base (see Building a Base section of this instruction
document).
Q: I have glazing / xing kit missing. What should I do? A: Firstly check that all of your building’s parts are there by laying them
all out on the ground. Check between the panels / larger parts as the glazing comes banded together and is placed between the panels, along
with the xing kit, for safer transportation. If they are still not found please visit our Support Centre - www.gardenbuildingsdirect.co.uk/help
Q: What tools do I require? A: Drill with 4.5, 3 and 2mm drill bit / Hammer / Spirit Level / Measuring Tape / Screwdriver (Phillips) / Stanley
Knife / Wood Saw / Step Ladder.
Q: Are my window & plain panels interchangeable?A: On apex buildings the window & plain panels are interchangeable where they
are the same size or make up the same size panel as the opposing wall with more than one part.
Q: Can I have my personnel door on the other side of my building? A: Yes.
During Assembly:
Q: How are the windows xed to the building? A: This process depends on the individual building. Please read the instructions to nd
out which method your particular building uses.
Q: Which way do the joists run? A: This process depends on the individual building. Please read the instructions to nd out which way the
joists run.
Q: My building seems a little imsy? A: Your building won’t reach full rigidity until fully assembled so do not panic.
Q: Construction seems tricky? A: Take your time and read the instructions thoroughly. These buildings should be constructed by two people.
If in doubt seek professional help.
Q: The felt seems a little tight? A: To reduce waste, to help protect the environment and reduce costs for our customers we only supply the
required amount of felt or roong material.
Q: My building isn’t going together properly, it is twisted. A: It sounds like you are building on an uneven surface. You must build
on a at / level base for your building to t together correctly.
Post-Assembly:
Q: Why is there a gap around the doors? A: During the year the wood of your building will shrink and expand, which will create a gap
around you building’s doors. This is natural.
Q: My building is not water tight around the windows. A: These products have been designed as an aordable solution to
most popular light domestic uses and we do not state that they are water tight. Use silicon sealant around the windows to improve the water
resistant qualities of the building.
Q: My building has developed a leak A: Use silicon sealant to stop the leak and make sure that your building is not in a damp area and if
necessary move it and replace the damaged boards.
For Queries and Help please call Product Support:
01636 858 377
Use the dimensions that are on the
techincal details documentation for your
specic building to workout the required
dimensions when laying your solid base.
Do not forget about the roof overhang when
chosing your building location. Keep in mind
where the roof will nish and how you will
maintain the building.
FLOORLESS BUILDINGS
For buildings that are bought without
oors please go to this webpage to
download the NO FLOOR GUIDE which
will guide you in building a base for your
oorless building:
www.billyoh.com/global/guides/NO-FLOOR-GUIDE.pdf
BASE DIMENSIONS
EXTERNAL RIDGE HEIGHT
EXTERNAL EAVES
HEIGHT
EXTERNAL WIDTH
EXTERNAL
DEPTH
BUILDING DIMENSION TERMINOLOGY
When xing
WINDOW CLOAKING
STRIPS over two
glazing panes
make sure not to
pierce the glazing
beneath.
To reduce wood splitting
BLUNT ALL NAIL and PANEL
PIN POINTS by hitting them
with a hammer before
xing window parts.
In hard to reach areas when
glazing and tting CLOAKING STRIPS
try using a hammer and 6” inch
nail to x the nails and pins.
When xing WINDOW
BEADING get your nails or
pins xed in the beading
away from the glazing
before nal
positioning.
TIPS ON GLAZING YOUR BUILDING:
1
2
3
4
5
Use a piece of
CARDBOARD to protect
the glazing when
xing WINDOW
CLOAKING STRIPS,WINDOW
BEADING or WINDOW
CROSSES.
GENERAL RECOMMENDATIONS
Thank you for purchasing this building. We hope you will be delighted with your new building for many years to come.
These instructions have been written as a guide to assembling this building and will provide you with an overview of
the process of constructing this building. There are a number of considerations to be thought of before constructing
the building and how to maintain your building upon completion. This section is also aimed at ensuring you are aware
of considerations such as: location for construction, treatment of the building and construction information.
GLAZING: The glazing is generally bound with a holding band and may look like one thick piece when delivered. It
may even be in between two of the panels as might the xing kit. REMOVE PROTECTIVE FILM FROM ALL GLAZING
BEFORE USE. The glazing is safer to use than glass and is an economic solution for garden building use, but must be
installed correctly, carefully and safely. Glazing that is tted to the outside of buildings is an uncomplicated method
that does not require beading. The glazing on all the garden buildings does not make the windows water tight and
we suggest using a silicon sealant to improve water resistance around the edges of the glazing.
DOORS: Generally the doors are sent loose for all buildings. Some buildings such as summerhouses may have the
doors already xed to the door frame. If your building is not built on a at, level surface you may experience diculties
when tting your doors. You may nd a gap between the doors or around the edges.
This is not a fault as the doors will move, shrink and expand during dierent weather conditions. Occasionally during
transit the door frame can become misaligned. This is easily solved by hanging the door on a level surface BEFORE the
panels are attached. SUMMERHOUSES: Some summerhouse doors are held together at the base of the frame with a
screw or nail for transportation purposes. Remove this screw or nail before commencing construction.
PANELS: The panels that of your building may move during transit resulting in them becoming un-square. Simply tap
the panel at it’s corners and make sure that the measurements from top to bottom diagonally across the panel is equal.
This should make the panel square
BUILDING LOCATION & CONSTRUCTION: Locate your building in a suitable and well prepared area, which is at and
protects the building as much as possible from extreme weather conditions such as high wind, snowfall, ooding etc.
It is very important that a solid and level foundation is prepared to ensure the building will be level and square. This will
help ensure that all parts t correctly. The building is not fully structurally sound until construction is complete. You
may experience moments, such as when building the wall panels, where you feel the building is not safe and may be
exing too much. This is perfectly natural so do not worry and take your time as full rigidity for the building will only
occur on completion of the construction process. We recommend that you construct your building within 1 month of
delivery as the timber may begin to warp.
TREATMENT: Treating the product when assembled is essential to ensure the building will not deteriorate. We
recommend you apply the nishing product to a small area to ensure it provides the intended result before proceeding.
IMPORTANT NOTICE: The natural moisture content of wood will change according to season. We recommend
applying a quality timber treatment to minimise the eects. Re-apply treatment annually to prolong the building’s life.
WOOD CHARACTERISTICS: Wood is a natural material, which means that no two boards on your building will be
identical and will expand and contract due to moisture levels. This natural aect of expansion and contraction is
inevitable and is compensated for by the tongue and groove construction in tongue and groove buildings. The timber
in overlap buildings may warp and twist over time, which is a natural process. The timber may crack naturally over
time, but will not aect the structural integrity of the building provided it has been assembled as advised. Keep panels
away from trees, fences and other high moisture containing elements to reduce and help prevent warping. If boards
warp and twist it is possible to purchase replacement boards to do so call our Product Support on 01636 858377.
Keep your building ventilated to avoid mould.
This building is water resistant, but not water tight. Please wait for weather to change before notifying us if you notice changes in the structure.
TOOLS REQUIRED: - Drill with 4.5, 3 and 2mm drill bit / Hammer / Spirit Level / Measuring Tape / Screwdriver (Phillips) /
Stanley Knife / Wood Saw / Step Ladder.
PLEASE NOTE: You are advised to pilot drill all screw holes and ensure all screwheads are countersunk.
CUSTOMER SERVICE: If there are any queries regarding the building construction or aftercare please contact the
supplier of the building who will do their upmost to ensure customer satisfaction.
ADDITIONAL SAFETY RULES AND GUIDELINES:
- No one should use the equipment until properly assembled.
- Read the instructions thoroughly a couple of times before attempting each section of the build.
- Make sure you have adequate space, a safe working environment and a at level base to work on.
- Take your time, do not panic.
- Construct your building within one month of delivery to stop parts warping / bowing.
ADDRESS:
Kybotech Ltd, Parry Business Park, Grassthorpe Road, Sutton-on-Trent, Newark, Notts, NG23 6QX
CUSTOMER SERVICES:
01683 858 377
IMPORTANT SAFETY NOTICES
ALWAYS BE ON THE SAFE SIDE – IMPORTANT SAFETY TIPS
- This building should be constructed by at least two adults.
- Do not use this product if it has been modified or damaged.
- Allow adequate time to complete construction. If you hit any snags, take a break, keep calm, and seek additional help if
necessary.
- Make sure that there is adequate space around the construction site to enable access to all sides of the building during
construction.
- Do not attempt to construct the building in strong winds or poor weather conditions.
- Make sure that any ladders used during construction are in a good condition and that all tools are in good working order.
- The building is not completely stable until construction is complete and the roof of this building is not intended to
support significant weight. Do not climb on the roof.
- Keep bags, nails and fixings out of the reach of children.
Due to the nature of wooden panel products please watch out for the following minor blemishes:
- Protruding nails = hammer in the nails so that they are flush with the wood’s surface.
- Splintered wood = smooth down with sandpaper.
- Loose or dead knots = use a non-toxic wood glue to secure.
- Wear protective gloves and robust clothes during construction.
- Make sure that any paint or preservative that you use is non-toxic and complies with EN71 regulations.
- Perform periodical checks throughout the life of the building to ensure that the original condition is maintained.
- Construct your building within a month of delivery to reduce the chances of the panels / boards warping.
PRODUCT WARRANTY
- If there is any cause for concern or any other problems are found on or after delivery, such as damaged parts DO NOT
BUILD, please visit our Support Centre -
www.gardenbuildingsdirect.co.uk/help
for further advice and resolution and
stop all use before assembly until issues are resolved.
- IMPORTANT: Throughout the life of the building please conduct checks to ensure the original condition is maintained.
MAINTENANCE
- Products are built to the highest quality standards and should provide convenient, secure storage for years to come,
this of course being subject to reasonable use, care and transportation.
AFTER MARKET MODIFICATION
- We do not recommend modifying this product. However, customers do enjoy modifying their buildings with their own
specific needs in mind as our products allow for a wide range of uses.
- If you modify this product for your own personal requirements you are doing so at your own risk.
- Customers who modify their buildings should make sure to do so safely and so that they do not affect the integrity of
the structure.
- If you are thinking of modifying this building be aware that any modifications invalidate your warranty and may affect
your consumer rights.
- If in doubt about the product’s limitations please read and understand all of the instructions and guidance notes. If
necessary please contact the retailer that the item was purchased from.
- Please contact the retailer from which the product was purchased for warranty and guarantee information.
- PLEASE NOTE: The warranty does not extend to damage caused by post-purchase transportation, careless handling or
damage caused by misuse or modication.
- Treat your building annually with a quality timber treatment to comply with the buildings warranty.
GARDEN BUILDINGS: THESE PRODUCTS ARE INTENDED FOR DOMESTIC AND OUTDOOR USE ONLY.
These products have been designed as an aordable solution to most popular light domestic uses.
- If you ever need to purchase spare parts for your building you can do so by contacting customer services by calling our
Product Support -
01636 858 377
where our friendly team will help you buy what you need.
SPARE PARTS
U2004 6000 Traditional Apex Workshop
10ft Gables
(P) 3ft
879mm
(P) 3ft
879mm
(PG) 2ft
586mm
(PG) 2ft
586mm
(P) 3ft
879mm
(P) 3ft
879mm
(PG) 2ft
586mm
(PG) 2ft
586mm
(P) 3ft
879mm
(P) 3ft
879mm
(P) 3ft
879mm
(P) 3ft
879mm
12x10
(PG) 2ft
586mm
(PG) 2ft
586mm
(P) 3ft
879mm
(P) 3ft
879mm
(P) 3ft
879mm
(PG) 2ft
586mm
(PG) 2ft
586mm
(P) 3ft
879mm
(P) 4ft
1172mm
(P) 3ft
879mm
(P) 3ft
879mm
(P) 4ft
1172mm
(P) 4ft
1172mm
(P) 2ft
586mm
(P) 2ft
586mm
(P) 4ft
1172mm
(P) 4ft
1172mm
(P) 4ft
1172mm
20x10
(P) 3ft
879mm
(PG) 2ft
879mm
(PG) 2ft
879mm
(P) 3ft
879mm
(P) 3ft
879mm
(P) 3ft
879mm
(P) 3ft
879mm
(PG) 2ft
586mm
(PG) 2ft
586mm
(P) 2ft
586mm
(P) 2ft
586mm
(P) 4ft
1172mm
(P) 4ft
1172mm
(P) 4ft
1172mm
(P) 4ft
1172mm
16x10
(P) 3ft
879mm
(P) 3ft
879mm
(P) 3ft
879mm
(P) 3ft
879mm
(P) 3ft
879mm
24657-Assembled-19mm-TG-Floor-D(1490mm)xW(3ft/879mm)
24760-Assembled-28mm-TG-Floor-D(1490mm)xW(3ft/879mm)
24658-Assembled-19mm-TG-Floor-D(1490mm)xW(4ft/1172mm)
24761-Assembled-28mm-TG-Floor-D(1490mm)xW(4ft/1172mm)
FLOORS USED:
(PG) 2ft
879mm
(PG) 2ft
879mm
(P) 3ft
879mm
(P) 3ft
879mm
(PG) 2ft
586mm
(PG) 2ft
586mm
(P) 1ft
586mm
(P) 3ft
879mm
(P) 2ft
586mm
(P) 3ft
879mm
(P) 2ft
586mm
10x10
(P) 2ft
586mm
(P) 1ft
586mm
Exploded View - 20x10 Traditional Apex Windowless Workshop
Double Door Offset
Plain
Panels (PP)
Floor Section ASM (TG)
Double Door (DD)
Finial (FI)
Fascia Board
(FB)
Roof Felt (Comes in roll(s))
Roof Panel (RTG)
Panel Gable
Centre (PGC)
Panel Gable
Left (PGL)
Panel Gable
Right (PGR)
Cloaking
Strip (CSP)
4ft Plain
Panels (PP)
Roof Truss
(TRU)
Exploded View - 16x10 Traditional Apex Windowless Workshop
Double Door Offset
Plain
Panels (PP)
Floor Section ASM (TG)
Double Door (DD)
Finial (FI)
Fascia Board
(FB)
Roof Felt (Comes in roll(s))
Roof Panel (RTG)
Panel Gable
Centre (PGC)
Panel Gable
Left (PGL)
Panel Gable
Right (PGR)
Cloaking
Strip (CSP)
3ft Plain
Panels (PP)
Roof Truss
(TRU)
Exploded View - 12x10 Traditional Apex Windowless Workshop
Double Door Offset
Plain
Panels (PP)
Floor Section ASM (TG)
Double Door (DD)
Finial (FI)
Fascia Board
(FB)
Roof Felt (Comes in roll(s))
Roof Panel (RTG)
Panel Gable
Centre (PGC)
Panel Gable
Left (PGL)
Panel Gable
Right (PGR)
Cloaking
Strip (CSP)
3ft Plain
Panels (PP)
Roof Truss
(TRU)
Exploded View - 10x10 Traditional Apex Windowless Workshop
Double Door Offset
Plain
Panels (PP) Floor Section
ASM (TG)
Double Door (DD)
Finial (FI)
Fascia Board
(FB)
Roof Felt (Comes in roll(s))
Roof Panel (RTG)
Panel Gable
Centre (PGC)
Panel Gable
Left (PGL)
Panel Gable
Right (PGR)
Cloaking
Strip (CSP)
3ft Plain
Panel (PP)
Roof Truss
(TRU)
For Queries and Help please call Product Support:
01636 858 377
S70 x 8 Flip Floor back over with the
joists running left to right
Back Side
/D\ȵRRUVHFWLRQVZLWK
-RLVWVIDFLQJXSZDUGV
7KHȵRRUVHFWLRQVZLOO
EHPPRUPP7*
Floor Stages
Side
Back
S50 x 5
Pilot drill holes
EHIRUHȴ[LQJ
Plain
Gable
(PG)
Plain Panel (PP)
Back
Side
Top View Diagram
Place a Plain Panel
(PP) along the
HGJHRIWKHȵRRU
ΖWVKRXOGȴWȵXVK
with the back
HGJHRIWKHȵRRU
&KHFN3DJHIRU
wall panels
position and
VL]HV
Wall Panel Stages
Side
Back
1
45 6
2 3
For Queries and Help please call Product Support:
01636 858 377
S50 x 4
Fix the Gable Central
Panel to the top of
3ft Plain Panel
Central Gable Fixing Stage
3ft Plain Panel
S50 x 5
S50 x 5
/D\DQGȴ[WKHWZR
IW3ODLQ3DQHOV
3ft Plain
Panel
3ft Plain
Panel
S50
Fix additional wall panels. They
VKRXOGOLQHXSZLWKWKHȵRRUV
Truss Fixing Stage
Use the Gable Apex Panels
to align the Truss sections
(TRU)
S50 x 5
Fix the Side Gable Panel
7
10 11 12
8 9
For Queries and Help please call Product Support:
01636 858 377
Place the Plain Gable Section
next to the Back Plain Panels
Back
Back
S50 x 5
Fix the Truss
pieces together
N30 x 12
x 1
x 1
x 2
833mm
1497mm
2250mm
S50 x 10
Place the Plain Panel on the
inside of the Apex Gable Panels
Front
/D\DQGȴ[WKHWZR
IW3ODLQ3DQHOWRS
3DQHO*DEOH&HQWUDO
S50
13
16 17 18
14 15
For Queries and Help please call Product Support:
01636 858 377
S50 x 5
Front
4ft Window Panels
ȴ[DWWKHIURQW S50 x 5
Front
3ft Plain Panels
ȴ[DWWKHIURQW
12x10 16x10 Only
S50 x 5
Front
3ft Plain Panels
ȴ[DWWKHIURQW
20x10 10x10 Only
S50 x 5
On a 16x10,12x10 and 10x10
building this will be
a 3ft Window Panel
S50 x 8
Fix the Door Frames
and Door Treshold
S50 x 5
On 16x10 building this
will be 2ft Plain Panel,
On 12x10 and
10x10 building
this will be 1ft
Window panel
19
22 23 24
20 21
For Queries and Help please call Product Support:
01636 858 377
S50 x 8
1
2
The Truss must be positioned where the Roof
Panels will meet. This will be either 879mm
or 1172mm. Please see the diagram.
x 2 The distance 879mm
or 1172mm is the
width of a Roof Sheet.
Measure from the
framing to the
centre of the Truss
Truss Position Diagram
Side View
879mm or 1172mm
)LWDQGȴ[WKH'RRUIUDPHV
S50 x 13
S50
Screw the Wall
3DQHOVWRWKHȵRRU
Side View
Correct Position Side View
Incorrect Position
Roof Panel Position
Line up the Roof Panel with
the framing not the cladding
S50
x 6
25
28 29 30
26 27
For Queries and Help please call Product Support:
01636 858 377
S70 x 10
7KH5RRI3DQHOVKRXOGȴWKDOI
ZD\DFURVVWKH5RRI7UXVV
The Roof
Panel should
PDWFh Whe
Side Panel
widWh.
Position the
Roof Panel
square with
ȴUVWVKHHW
and push up
to the centre
S70 x 10
Position the Roof Panel
square with the framing
S70 x 10
Push the Roof Panel
up to the centre.
This will require 2 people
make the building ridgid. S70 x 10
S70 x 10
31
34 35 36
32 33
For Queries and Help please call Product Support:
01636 858 377
S70 x 10
S70 x 10
Push the Roof Panel
up to the centre.
This will require 2 people
make the building ridgid.
S70 x 10
Push the Roof Panel
up to the centre.
This will require 2 people
make the building ridgid.
S70 x 10
Push the Roof Panel
up to the centre.
Hinges
ȴ[WRWKHVH
place
Back View of Doors
Door Fixing Stage
S70 x 10
37
40 41 42
38 39
For Queries and Help please call Product Support:
01636 858 377
2mm
Gap
4mm
Gap
S30 x 12
S25 x 2
x 2
S25 x 4
Align Door Lock Handle over
the key hole on the inside of
0DLQ'RRU7KHORFNȴWVFHQWUDOO\
to the frame.
Fixing the Door Lock Handle
x 1
S25 x 24
x 6
S30 x 4
S25 x 12
x 2
x 2
100mm
Top
Bottom
Fix the
Door Cloaking
Strip to the door.
S30 x 4
CSP
x 1
1850mm
Fix the Door Rebate to
the side of the frames
on each side
PP x 16
DR
DR
x 2
x 2
1558mm
1859mm
43
46 47 48
44 45
For Queries and Help please call Product Support:
01636 858 377
N40
CSP
2100mm
Cut to size
S50 x 16
1610mm x 4
Facia Block Fixing Stage
Cloaking Strip Fixing Stage
N40
Cut to size
CSP
2100mm
T10
Tack to hold
in place
70mm overhang at
each end
Fold over
Eaves T10
Fold over
Corner
100mm
Felt Fixing Stage
Length of
roof + 140mm
x 4
Front View
(10ft Gables)
(4 PIECES OF FELT)
Felt
Felt
Felt
Felt
49
52 53 54
50 51
For Queries and Help please call Product Support:
01636 858 377
100mm
T10
T10
Repeat previous stages
for this side
T10
Repeat previous stages
for this side
100mm
For Shingles Roof Covering Only
Use the Shingles Instructions
that come with the packs
For Shingles Roof Covering Only
Only 1 roll of felt is used
as a starter layer for the
Shingles
Cut the full roll of felt in half
lenght ways
x 1
55
58 59 60
56 57
For Queries and Help please call Product Support:
01636 858 377
N30 x 4
x 2
3LORWGULOOKROHVȴUVW
Treat after assembly and
annually to protect
Protect your building
[7UDGLWLRQDO$SH[:LQGRZOHVV:RUNVKRS'RRU2΍VHW6KRZQ
N30 x 16
x 4
1800mm
Facia Fixing Stage
Treat after assembly and
annually to protect
Protect your building
[7UDGLWLRQDO$SH[:LQGRZOHVV:RUNVKRS'RRU2΍VHW6KRZQ
Treat after assembly and
annually to protect
Protect your building
[7UDGLWLRQDO$SH[:LQGRZOHVV:RUNVKRS'RRU2΍VHW6KRZQ
Treat after assembly and
annually to protect
Protect your building
[7UDGLWLRQDO$SH[:LQGRZOHVV:RUNVKRS'RRU2΍VHW6KRZQ
61
64 65 66
62 63
For Queries and Help please call Product Support:
01636 858 377
N30 x 16
x 4
1800mm
Facia Fixing Stage
N30 x 4
x 2
3LORWGULOOKROHVȴUVW
Use the Shingles Instructions
that come with the packs
For Shingles Roof Covering Only
Treat after assembly and
annually to protect
Protect your building
[7UDGLWLRQDO$SH[:LQGRZHG:RUNVKRS'RRU2΍VHW6KRZQ
Treat after assembly and
annually to protect
Protect your building
[7UDGLWLRQDO$SH[:LQGRZHG:RUNVKRS'RRU2΍VHW6KRZQ
Treat after assembly and
annually to protect
Protect your building
[7UDGLWLRQDO$SH[:LQGRZHG:RUNVKRS'RRU2΍VHW6KRZQ
67
70 71 72
68 69

This manual suits for next models

3

Other Billyoh Garden House manuals

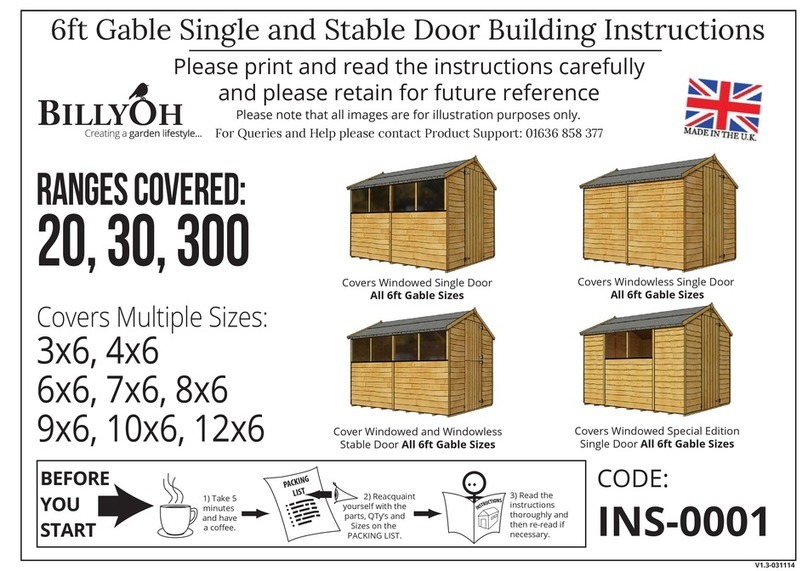
Billyoh Lollipop Max Playhouse Instruction Manual

Billyoh

Billyoh Lollipop Max Playhouse Instruction Manual

Billyoh INS-0001 User manual

Billyoh

Billyoh INS-0001 User manual

Billyoh Darcy User manual

Billyoh

Billyoh Darcy User manual

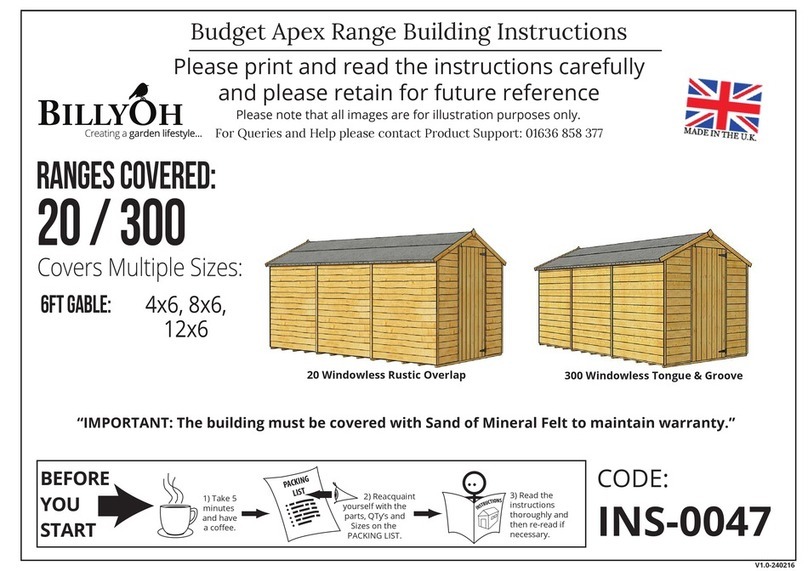
Billyoh Budget Apex INS-0047 Instruction Manual

Billyoh

Billyoh Budget Apex INS-0047 Instruction Manual

Billyoh INS-0044 Instruction Manual

Billyoh

Billyoh INS-0044 Instruction Manual

Billyoh INS-0042 Instruction Manual

Billyoh

Billyoh INS-0042 Instruction Manual

Billyoh NS-0060 User manual

Billyoh

Billyoh NS-0060 User manual

Billyoh INS-0005 User manual

Billyoh

Billyoh INS-0005 User manual

Billyoh INS-0051 User manual

Billyoh

Billyoh INS-0051 User manual

Billyoh INS-0054 Instruction Manual

Billyoh

Billyoh INS-0054 Instruction Manual

Billyoh APEX Instruction manual

Billyoh

Billyoh APEX Instruction manual

Billyoh Mia 19351 User manual

Billyoh

Billyoh Mia 19351 User manual

Popular Garden House manuals by other brands

OLT GS84-SLIDER-CEDAR-AK Assembly manual

OLT

OLT GS84-SLIDER-CEDAR-AK Assembly manual

Best Barns Belmont II Assembly Book

Best Barns

Best Barns Belmont II Assembly Book

Luoman 724 Building instructions

Luoman

Luoman 724 Building instructions

Lemeks ELF16-3535 installation manual

Lemeks

Lemeks ELF16-3535 installation manual

Best Barns Cypress R Assembly Book

Best Barns

Best Barns Cypress R Assembly Book

Sunjoy A102014100 Assembly instruction

Sunjoy

Sunjoy A102014100 Assembly instruction

Palmako EL16-2132 Assembly, installation and maintenance manual

Palmako

Palmako EL16-2132 Assembly, installation and maintenance manual

Solid S8969 Assembly instructions

Solid

Solid S8969 Assembly instructions

Lemeks Palmako Roger FRE44-3857 manual

Lemeks

Lemeks Palmako Roger FRE44-3857 manual

Panda XPANDAOFFICE Assembly instructions

Panda

Panda XPANDAOFFICE Assembly instructions

Palmako Tony WW-38 installation manual

Palmako

Palmako Tony WW-38 installation manual

STILLA Willow 12x8 Assembly instructions

STILLA

STILLA Willow 12x8 Assembly instructions

Outdoor living today SS84S-METAL-FJ Assembly manual

Outdoor living today

Outdoor living today SS84S-METAL-FJ Assembly manual

for Living Essex Grill Gazebo L-GG095PST-D Assembly instructions

for Living

for Living Essex Grill Gazebo L-GG095PST-D Assembly instructions

Tiger KIPLING LOG CABIN Assembly instructions

Tiger

Tiger KIPLING LOG CABIN Assembly instructions

Solid Nancy S8207 manual

Solid

Solid Nancy S8207 manual

GUIDESSIMO S7774 Assembly instructions

GUIDESSIMO

GUIDESSIMO S7774 Assembly instructions

Karibu Askola 4 Building instructions

Karibu

Karibu Askola 4 Building instructions

manuals.online logo
manuals.online logoBrands
  • About & Mission
  • Contact us
  • Privacy Policy
  • Terms and Conditions

Copyright 2025 Manuals.Online. All Rights Reserved.