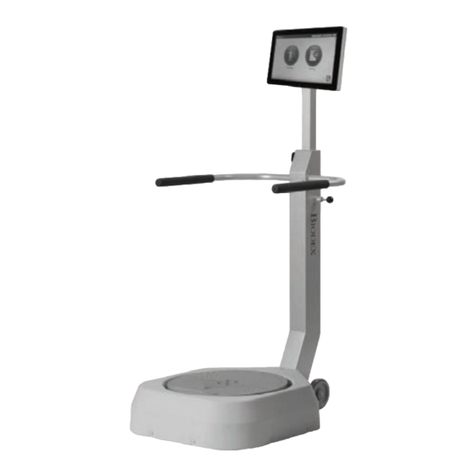
biodex SIT2STAND 950-560-10 Installation and operating instructions

SIT2STAND™TRAINER
OPERATION/SERVICE MANUAL
950-560
950-560-10
FN: 1 5-266 Rev C 12/15

SIT2STAND TRAINER
This manual covers operation procedures for the following product:
950-560 Sit2Stand™ Trainer
950-560-10 Sit2Stand™ Trainer – International delivery
Contact Information
Biodex Medical Systems, Inc.
20 Ramsey Road, Shirley, New York,
11967-4704
Tel: 800-224-6339
(Int’l 631-924-9000)
Fax: 631-924-8355
email: [email protected]
www.biodex.com

BIODEX MEDICAL SYSTEMS, INC. © 2015 III
Table of Contents
CHAPTER 1: INTRODUCTION...................................................................................................................................1
Theory of Operation...................................................................................................................1
Muscles Used During Sit2Stand Sequence...................................................................................2
Initial Setup and Considerations ................................................................................................4
CHAPTER 2: OPERATION........................................................................................................................................ 5
Using the Sit2Stand with Patients...............................................................................................5
Recommended Training Methods, Goals, and Considerations for Sit2Stand
Exercises ...................................................................................................................................9
Integrating the Biodex BioSway into a Sit2Stand Exercise Program ...........................................10
Sit2Stand in Fitness Facilities ...................................................................................................11
CHAPTER 3: MAINTENANCE...............................................................................................................................13
CHAPTER 4: BIBLIOGRAPHY................................................................................................................................14
CHAPTER 5: SCHEMATICS ...................................................................................................................................15

IV SIT2STAND TRAINER
Definition of Symbols
The following symbols and their associated definitions are used and implied
throughout this manual.
Symbol Definition
Carefully read these instructions prior to use
Caution - Consult accompanying documents
Warning - Injuries to health may result
General Mandatory Action
Dangerous Voltage
“On” Power
“Off” Power
Earth (ground)
Alternating Current
Fuse
USB Connector/Cable
Waste in Electrical Equipment
Date of Manufacture
Type B Applied Part
CE Mark
CE Mark for products with EC Certificate
Certified for Safety by ETL Intertek

BIODEX MEDICAL SYSTEMS, INC. © 2015 V
Before Proceeding
NOTE: The warnings, cautions and instructions provided in this manual must be read,
followed and kept available for consultation at all times. Observing the information,
instructions and procedures presented throughout this manual is essential for using this
product both properly and safely.
SPECIFIC CAUTIONS
@**-5-,*7/3*'$'#"20',#".#01-,,#*2-operate or service this product.
@If the #/3'.+#,2'131#"',+,,#0-2&,1.#!'$ied in this operation manual,
2&#.0-2#!2'-,.0-4'"#" 72&##/3'.+#,2+7 #impaired and results could be
compromised.
@ever leave patient unattended.
EN GARDE SPÉCIFIQUES
@Permettez au personnel seulement autorisé, entraîné de faire marcher ou assurer
l'entretien de ce produit.
@'*;/3'.#+#,2#1232'*'1;",13,#+,'<0#320#/3',"'/3;",1!#+,3#*
"-.;02'-,*.0-2#!2'-,$-30,'#.0*;/3'.#+ent peut être diminuée et les
résultats pourraient être compromis.
@#/3'22#,2+'1*#.2'#,21,11304#'**,!# sur.
CAUTION: Unauthorized modifications to this product are not permitted and will void
the manufacturer’s warranty. Unauthorized modification of the product may result in a
&80"2-2#0,"-0.2'#,2-,-2+-"'$72&'1#/3'.+#,25'2&-3232&-0'82'-,
from the manufacturer.
ATTENTION: Les modifications faites sans autorisation à ce produit ne sont pas
permises et va faire le vide la garantie du fabricant. La modification faite sans
autorisation du produit peut s'ensuivre dans un hasard à l'utilisateur et--3*#.2'#,2e
+-"'$'#8.1!#2;/3'.#+#,21,132-0'12'-,"3$ 0'!,2
CAUTION: **patients should consult a physician before beginning any rehabilitation
program.
ATTENTION: Tous les patients devraient consulter un médecin avant de commencer
un programme de réadaptation.

VI SIT2STAND TRAINER
Training
This operation manual includes assembly and operating instructions. Operating/assembly
questions can be directed to the service department during business hours.
User Profile
Patient
The product (without accessories) shall accommodate patients fitting the following profile:
Height:
5th percentile female, 20-95 years of age (ht. 60”), to
95th percentile male, 20-95 years of age (ht. 74”)
Weight: Up to 350 lbs. with a maximum support load of 250 lbs. for a 70% minimum support
Clinician
The product shall accommodate clinicians fitting the following profile:
5th percentile female, 20-65 years of age, to
95th percentile male, 20-65 years of age
Authorized European Community Representative:
E
E
C
C
R
R
E
E
P
P
Emergo Europe
Molenstraat 15
2513 BH, The Hague
The Netherlands

BIODEX MEDICAL SYSTEMS, INC. © 2015 VII
Important Safety Information
CAUTION: Federal Law restricts this device to sale by or on the order of a physician or
other licensed professional.
ATTENTION: La Loi Fédérale restreint cet artifice à la vente par ou sur l'ordre d'un
docteur ou d'autre professionnel agréé.
Follow the unpacking and assembly instructions document.
Before using this equipment, read the entire operation manual carefully. Failure to read
the manual may result in user error or injury. Be sure to save all provided documents for
future reference.
Make certain to understand all warning and caution labels as explained in the Before
Proceeding section of this manual.
This product should be used only as specified in the operation manual.
The Biodex Sit2Stand Trainer is designed for use in a patient environment.
Biodex Sit2Stand Trainer sont conçus pour une utilisation dans un environnement du
patient.
For product specifications, refer to the Table of Contents.
Reference Cleaning and Maintenance instructions in Table of Contents.
CAUTION: Do not allow any patient to exercise unattended on the Sit2Stand.
ATTENTION: #.1*'11#03,.2'#,21,11304#'**ance à exercer sur le Sit2Stand.
WARNING: Immediately discontinue exercise if patient feels faint, dizzy or short of
breath.
AVERTISSEMENT: Cesser immédiatement l'exercice si le patient se sent faible, étourdi
ou à court de souffle.

VIII SIT2STAND TRAINER
CAUTION: Periodically monitor the heart rate of patients exercising on the Sit2Stand.
ATTENTION: 304#'**#0 0;%3*'<0#+#,2 *# 236 "# patients exerçant sur le Sit2Stand
!0"'/3#.
CAUTION: Instruct patients to use the handrails when learning to use the Sit2Stand,
especially during first time use.
ATTENTION: Demander aux patients d'utiliser les mains courantes lors de
l'apprentissage premier à marcher sur la Sit2Stand.
CAUTION: This product is intended to remain in one location during operation. It is
provided with wheels for relocation which should be used when moving the unit.
ATTENTION: Ce produit est destiné à rester à un endroit pendant le fonctionnement. Il
est muni de roues pour la réinstallation /3'"#40'#,2=20#32'*'1;1 lors du déplacement
de la unité.
CAUTION: Keep hands, feet, and head away from moving parts and adjustment tubes.
ATTENTION: Garder les mains, *#1.'#"1#2*2=2#*-',"#1.'<!#1+- '*#1#2"#123 #1
d'ajustement.
CAUTION: Ensure that all adjustment pins and knobs are fully secured before using the
machine.
ATTENTION: #'**#09!#/3#2-32#1*#1 0-!"#0;%*%##2*#1 -32-,11-,2
#,2'<0#+#,2%0,2'14,2"32'*'1#0*+!&',#.

BIODEX MEDICAL SYSTEMS, INC. © 2015 IX
Biodex Product Warranty
1. Product Warranty
A. This equipment and its accessories are warranted by BIODEX MEDICAL SYSTEMS, INC.
against defects in materials and workmanship for a period of one year from the date of
shipment from BIODEX MEDICAL SYSTEMS, INC. During the warranty period, BIODEX
MEDICAL SYSTEMS, INC. will in its sole discretion, repair (on-site), send replacement parts or
replace the equipment found to have such defects, at no charge to the customer.
EXCEPT AS STATED ABOVE, THERE ARE NO WARRANTIES, EXPRESSED OR IMPLIED,
INCLUDING WITHOUT LIMITATION WARRANTIES OR MERCHANTABILITY OR
FITNESS FOR
USE. BIODEX DOES NOT ASSUME LIABILITY FOR INCIDENTAL,
CONSEQUENTIAL OR INDIRECT
DAMAGES INCLUDING LOSS OF USE, SALES, PROFITS
OR BUSINESS INTERRUPTION.
B. This warranty does not apply if the product, as determined by BIODEX MEDICAL
SYSTEMS, INC., is defective due to abuse, misuse, modification or service performed by
other than a BIODEX MEDICAL SYSTEMS, INC. authorized repair representative. Misuse
and abuse include, but are not limited to, subjecting limits and allowing the equipment to
become contaminated by fluid materials.
C. In order to obtain warranty repair service and to expedite repair process, please contact
BIODEX MEDICAL SYSTEMS, INC. Support Services Dept. at 800-224-6339, and select
product support as prompted.
2. Warranty is non-transferable.
3. Non-Warranty Service
A. Repairs and/or replacements not covered by this warranty may be performed by
BIODEX MEDICAL SYSTEMS, INC. authorized service representatives.
B. The cost of transportation to and from the service location will be the responsibility of the
customer.

X SIT2STAND TRAINER
Service Procedure
If you think you have a service problem, take the following action:
1. Check to see that the problem occurs more than once.
2. Refer to the instruction manual and operations procedure.
If you still think you have a service problem, call BIODEX MEDICAL SYSTEMS, INC.,
Service Department at (800) 224-6339 and select product service as prompted.
Keep yourself and the phone next to the equipment.
1. Service will ask you for a brief description of the problem. We will ask specific questions about
the malfunction that occurred. This diagnostic process may take a few minutes, so call us when
you can set aside an uninterrupted block of time.
2. After taking the information, we will advise on the action we will take.
3. Sometimes service personnel must consult with engineering and it may take time to get back
to you. Be sure to let the service representative know your schedule so that we can call at a
convenient time.
4. The return call may be from a person other than whom you first reported the problem to.
5. After analyzing the problem, we will decide if the unit can be repaired on site, or replacement
parts will be sent.
6. If the unit must be returned, Biodex will provide a return materials authorization number
(R.M.A. #.) Pack the table in the carton that it was originally shipped in. It is the customer's
responsibility for any damage that occurs during shipping.
7. Non-warranty/non-service contract charges for repair are as follows:
a. Materials
+
b. Time
+
c. Travel Zone
Contact information
Biodex Medical Systems, Inc.
20 Ramsey Road, Shirley, New York, 11967-4704
Tel: 800-224-6339 (Int’l 631-924-9000)
Fax: 631-924-8355
email: [email protected]
www.biodex.com

BIODEX MEDICAL SYSTEMS, INC. © 2015 1
1. Introduction
Theory of Operation
It is important for the therapist to know and clearly understand the normal kinematic
movement components of the sit-to-stand sequence.
The progressive steps of the sit-to-stand motion, from a seated position, are as
follows:
oPhase one - Flexion momentum - Anterior pelvic tilt, lumbar and thoracic
extension
oPhase two - Momentum transfer - Trunk flexion, hip flexion, head extension and
maximal dorsiflexion
oPhase three – Extension - Lumbar and thoracic extension, scapular depression
(This movement continues until the center of mass is directly over the base of
support.)
oPhase four – Stabilization – Regaining postural stabilization. Starts with terminal
hip extension and ends with full extension of trunk and hips (Optimal end
position is 0° hip and trunk extension.)
Fig. 1.1 The four phases in the sit-to-stand sequence.
The functional task of being able to arise from the seated position is necessary for most
activities of daily living (ADLs). Patients may have a multitude of impairments such as
decreased muscle strength, sensation/proprioception issues, and visual perceptual
problems that lead to limitations in their ability to perform even the most basic aspects
of the sit-to-stand sequence. These impairments can lead to fear of movement,
increased anxiety, and limited trust in the therapist, making it difficult for patients to
learn the components of sit-to-stand. In the cases of elderly or severely deconditioned
individuals, when the inability to perform this basic skill is lost it can lead to impaired
functioning and independence with mobility as well as with ADLs.

2 SIT2STAND TRAINER
Therapists should have adequate clinical knowledge of proximal and distal key points of
control on patients’ bodies to facilitate sit-to-stand exercises. Based on this knowledge,
therapists can use these handling techniques to teach the patient the appropriate steps
in the sit-to-stand sequence. The therapist should engage the patient in a variety of
practice and graded training sessions to teach this skill.
The Sit2Stand device is built to exercise and strengthen a patient through normal sit-to-
stand kinematics. In particular, it is designed to get the patient’s center of mass over his
or her feet, a key component in the early phases of the sit-to-stand motion. It also
relieves the therapist of the physical demands of manual facilitation, allowing them to
focus on other physiological responses, such as blood pressure. The therapist can also
observe and assess isolated muscle and joint activity in conjunction with behavioral
responses of the patient.
Muscles used during the sit-to-stand sequence
Fig. 1.2 Muscles used in the sit-to-stand sequence: trunk (1), glutes (2), quadriceps (3), hamstring (4), calves (5),
tibialis anterior (6)

BIODEX MEDICAL SYSTEMS, INC. © 2015 3
1. Trunk
The trunk muscles move the vertebral column and form the thoracic and abdominal
walls. The anterior portion of the trunk contains the abdominal muscles. The abdominal
muscles are responsible for flexing the trunk. The posterior portion of the trunk
contains the erector spinae muscles. These muscles run longitudinally on each side of
the vertebral column and are the prime movers responsible for extending the vertebral
column to maintain erect posture. The trunk muscles work together to contribute to
spine stability in a variety of postures.
2. Glutes
The gluteal musculature is comprised of the gluteus maximus, gluteus medius and
gluteus minimus. The prime movement for the gluteus maximus is extension of the
thigh at the hip. The maximus also works to control downward movement of the hips
when you lower yourself to the chair. The medius and minimus help to steady the pelvis
during weight bearing activities.
3. Quadriceps
The quadriceps muscles are on the anterior aspect of the thigh and are used in both
sitting and standing. They act in an eccentric contraction to resist gravity when you
lower yourself into a chair. The quadriceps also concentrically contract to extend your
leg at the knee, which allows you to stand. The action of the quadriceps is to flex the
hip and extend the knee.
4. Hamstrings
The hamstring muscle group is comprised of 3 separate muscles; the bicep femoris, the
semintendinosus, and the semimembranosus. They originate from the ischial tuberosity
of the pelvic bone and insert on the medial and lateral surfaces of the tibia. Hamstrings
are primarily knee flexors and secondarily hip extensors.
5. Gastro/Soleus
The gastrocnemius function is to flex the knee and plantarflex the foot with the assist of
the plantaris muscle. The soleus muscles plantarflex and invert the foot. Any movement
with body weight on the foot will recruit the soleus in to assist as a stabilizer when
rising to a stand position or lowering to a sit position.
6. Tibialis Anterior
The tibialis anterior is located lateral to the shin bone on the front of the lower leg. This
muscle is responsible for dorsiflexing the foot but also works in an eccentric action to
prevent hyper-flexion of the ankle when you lower into a sitting position. It also helps to
stabilize the lower leg when standing.

4 SIT2STAND TRAINER
Initial Setup and Considerations
The wheels in the rear of the Sit2Stand base (and the finger grips in the front) can be
used to move the unit to any safe, open space in your facility.
Fig. 1.3 Moving the Sit2Stand.
You should also be aware of two particular areas of moving parts in the Sit2Stand
device. The first is the area underneath the seat, and the second is where the seating
column rests on the base. Be sure to keep your hands and feet clear of these areas.
Fig. 1.4 Keep your hands and feet clear of areas with moving parts.

BIODEX MEDICAL SYSTEMS, INC. © 2015 5
2. Operation
Using the Sit2Stand with Patients
For patients who are independent or require only supervisory assistance (ones who do
not need to be transferred from a wheelchair), simply stand by and direct them into the
sit-to-stand exercise position on the device. Have them slide back so that their buttocks
are towards the back of the seat. Apply the seat belt.
Fig. 2.1 Getting a patient ready for exercises.
There are three lines for marking foot placement on the base. Patients should work with
therapists in finding the safest, most comfortable position for exercising. In general,
patients should always hold onto the handrails when exercising. But in particular, keep
in mind that if patients place their feet behind the lines, they should always hold onto
the handrails while exercising to keep from being pushed forward and possibly off
balance.
Fig. 2.2 Use the markings on the base as a reference for patient foot placement.

6 SIT2STAND TRAINER
Hip Flexion Wedge
Note that the wedge below the seating column can be used to create more or less
flexion in a patient's hips. For less flexion, flip the wedge over the opening in the
middle of the base. For more flexion, flip it to the side so the seating column will rest
on a lower plane.
Fig. 2.3 Use the wedge to create more or less hip flexion.

BIODEX MEDICAL SYSTEMS, INC. © 2015 7
Adjusting Seat Height
Adjust the Sit2Stand seat height as appropriately needed for various patients
(approximate level of SI (sacroiliac) joint.)
To raise the seat, simply pull it up by gripping the two handles on either side of the
seat. To lower it, pull out the black knob on the seating column and push the seat
downward.
Fig. 2.4 Adjust the Sit2Stand seat height as needed.
Adjusting the Assist Resist Tension Knob
Adjust the Sit2Stand Assist ResistTM tension knob so as to provide the appropriate
amount of “help” during patient exercises. By moving the slider knob downward, you
increase the tension on the elastic cord, and thus also increase the amount of assistance
the patient receives when moving into the standing position. As a general guideline, a
tension level that is equal to 20-50% of the patient’s body weight is recommended.
Fig. 2.5 Adjust the Assist Resist tension knob as needed.

8 SIT2STAND TRAINER
CAUTION: Once a patient is seated (or is somehow pressing down on the seat) the
#*12'!!-0"2&2!-,,#!212'12#1'12),- 2-2&# 1# will be under tension.
�#$-0#2'12#1'12),- 1&-3*"-,*7 #"(312#".0'-02-#6#0!'1',%5'2&2&#
device. Pulling up on the knob while it is under tension may cause it to “snap” to one side
of the slider range.
ATTENTION,#$-'1/33,.2'#,2#1211'1-3#12#,/3#*/3#1-02##,..37,2130*#
1'<%#*#!-0"-,;*12'/3#/3'0#*'#*# -32-,'"#0;1'12#89* 1#1#01-312#,1'-,
0!-,1;/3#,2*# -32-,'"#0;1'12#8,#"-'2=20#(312;#4,2"#6#0!#04#!
l'appareil. Tirer 130*# -32-,*-01/3'*#121-312#,1'-,.#32.0-4-/3#0*#,.93,
côté de la plage du curseur.
Fig. 2.6 Always set the Assist Resist knob prior to sitting down on the seat.

BIODEX MEDICAL SYSTEMS, INC. © 2015 9
Removing the Handrails
The device’s handrails can be removed to allow for easier patient access from a
wheelchair. (It also allows more advanced patients to have a more challenging exercise
setup, where they must rise from a seated position using just their leg and trunk
muscles.) To remove a handrail, simply pull the release pin at the connection point, lift
it up a few inches, and then remove it from the base.
Fig. 2.7Pull the pin near the connection points to remove the handlebars.
To assist a “minimally involved” patient (one who needs to be transferred from a
wheelchair) into a sit-to-stand exercise position, move one of the handrails out of the
way and position the patient’s wheelchair at a 45° angle to the device. Help the patient
to step onto the device and get into position for exercises. Apply the seat belt.
Fig. 2.8Getting a “minimally involved” patient ready for exercises.

10 SIT2STAND TRAINER
Recommended Training Methods, Goals, and Considerations for
Sit2Stand Exercises
Training
method
Intensity
Frequency
Goals
Special
Considerations
Strength 8-15 reps 1-
2 sets
2-3 days per
week
-Improved skeletal muscle
strength
-Maintenance and /or
growth of muscle mass
-Improve functional tasks
for transfers, walking and
stair climbing
-Precautions for
range of
motion
limitations
-Precautions for
holding breath
Endurance 12-15 reps
3-4 sets
3-4 days per
week
-Promote increase muscle
mass
-Growth in bone density
-Enhanced immune
system
-Increased functional
ability to perform
activities for longer
durations
-Less tension
-Increased
fatigue
-Longer
exercise
durations
-Potential
orthopedic
injury
Range of
motion
Within
comfortable
ranges
Daily -Increased range of
motion as tolerated
-Joint lubrication
-Alerts to
surgical
precautions or
contra-
indications
-Alerts to pain
-Use range of
motion stop if
necessary
This manual suits for next models
1
Table of contents
Other biodex Fitness Equipment manuals
Popular Fitness Equipment manuals by other brands

Pepita
Pepita SmileHome SH-0010 Instructions for use
Sport-thieme
Sport-thieme power instruction manual
SportsArt Fitness
SportsArt Fitness A922 owner's manual
Nintendo
Nintendo Wii Fit Plus Getting started
Hoist Fitness
Hoist Fitness CF2179 owner's manual
Eleiko
Eleiko SVR INSERT PLATFORM PRESTERA DOUBLE HALF RACK... user manual
