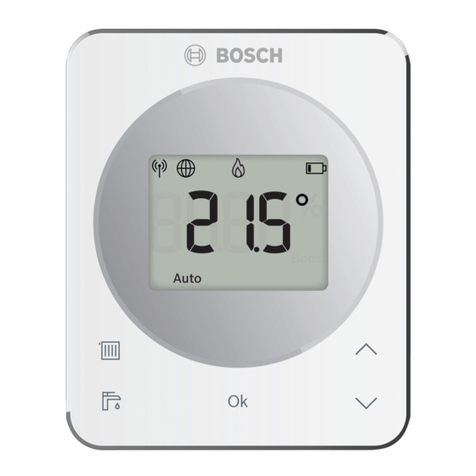
Bitron Video AV2010/32 User manual

TECHNICAL INFORMATION & SUPPORT
CHARACTERISTICS
• Electronic command device for independent mounting
• Relay ............................. 250V 5A cos(Φ)=1 resistive load NC/COM/NO
• Temperature sensor ...... Accuracy ±0.5°C, resolution 0.1°C
• Radio system................. ZigBee Home Automation 1.2 - 2.4 GHz
• Encrypted communication, regular connectivity test, battery warning
• Power supply................. 2 Alkaline AA type batteries
• Battery lifetime............... ca. 2 years depending on usage profile
• Operating temperature .. -10 - to 60°C
• Humidity ........................ Up to 85% non-condensing
• Dimensions.................... 85 x 85 x 24 mm
• Case protection class.... IP30
• Action type and complimentary action type 1.C
• Isolation class II, high voltage cl. II, pollution cl. 2, software cl. A
• Compliant with directives 2006/95/CE, 89/336/EEC, 99/5/EEC
In order to use this product with QIVICON, you need a QIVICON Home
Base with a QIVICON ZigBee radio dongle.
Für die Verwendung dieses Produkts mit QIVICON benötigen Sie über
eine mit einem QIVICON ZigBee Funkstick ausgestattete QIVICON Home
Base.
SUPPORT
In case of connection problems, we advise to use smart plugs in order to
increase the range of the ZigBee radio network. For further information
and for product support, please consult http://support.bitronvideo.eu.
LEGAL
Subject to modifications and mistakes. The product is compliant with the
CE requirements and further relevant standards. You may download the
declaration of conformity at support.bitronvideo.eu or request a copy
through our support.
MANUFACTURER
BITRON VIDEO
Bitron Video s.r.l.
Via Cimarosa 39 – 10154 Torino Italy
DS902010-018A LBT90373 MADE IN ITALY
ENGLISH
FUNCTION
The thermostat allows you to manage a heating or cooling system using
the built-in relay. The temperature threshold value can be set either
manually using the buttons or automatically by the smart home system.
SECURITY ADVISE
Depending on the heating system it is possible that the conductors to and
from the heating system mains voltage. In this case the installation of the
thermostat needs to be carried out by an electrician. In any case we
advise to disconnect the entire home from mains power before the
installation (master switch). As the heating system is most probably
connected to a separate circuit it is not sufficient to remove power only in
the room where the thermostat is going to be installed.
INSTALLATION
Please follow for these guidelines for the correct positioning of the
thermostat (fig. 3):
Position the thermostat at a position which is typical for the area to
be managed (e.g. living room, sleeping room, bathroom).
Wall-mount the device at about 1.5 m.
Avoid direct sunlight.
Do not expose the thermostat to airflow (door/window) or to warm
objects (radiators).
This step requires that you have a QIVICON Home Base equipped with a
QIVICON ZigBee radio dongle.
1. Open the case by light pressure with a flat screwdriver on the strap
at the center bottom surface and slide away the mounting base.
2. For your security, disconnect the heating system from mains power
and ensure the contacts do not carry electric tension.
3. Open the protective cover using a cross screwdriver (fig. 2). The relay
can operate in normally open (NO+COM) or normally closed
(NC+COM) mode. Standard is NC which means that the heating system
will be enabled by closing the relay and disabled by opening the relay.
COM is the common contact for both settings. Ensure that the cables
are well connected and close the cover. In case the heating system
provides 3 wires for the connection of the thermostat do only connect
the two switch conductors, the ground wire remains unused.
4. Fix the mounting base on the wall and insert the AA batteries
following the polarity indicated. Now close the case (fig. 1).
5. Follow the indications for the addition of new devices of the installation
wizard, which can be found in the app or in the web interface of your
QIVICON system. For further information on the registration process,
please consult http://support.bitronvideo.eu.
OPERATION
In standby mode the display will show the current temperature measured
by the thermostat. The desired temperature can be set either manually by
pressing the –(decrease) or +(increase) button or automatically through
suitable apps for the QIVICON system. When setting the temperature and
when the QIVICON system transmits a new temperature value to the
thermostat, SET will be shown on the display (fig. 4).
The status of the relay (heating, cooling, fan) is indicated by an icon in the
left part of the display (fig. 4). If no icon is shown, the relay is in off mode.
In case of low battery, the battery icon will be shown on the left bottom of
the display.
Fig./Abb. 1 Fig./Abb. 2
Fig./Abb 3 Fig./Abb 4
AV2010/32
THERMOSTAT
QUICK START GUIDE
THERMOSTAT
KURZBEDIENUNGSANLEITUNG
TERMOSTATO
GUIDA RAPIDA

AV2010/32
DEUTSCH ITALIANO
FUNKTION
Das Thermostat ermöglicht Ihnen, ein Heizungs- oder Kühlsystem über
das integrierte Relais zu steuern. Die Temperaturschwelle kann manuell
über die Tasten oder automatisch über ein Smart Home System.
SICHERHEITSHINWEISE
In Abhängigkeit vom verwendeten Heizungssystem können die
Schaltleitungen von und zu der Heizung Netzspannung führen. In diesem
Fall darf die Installation nur von einem Elektriker (VDE 0100) durchgeführt
werden.
Grundsätzlich sollte vor der Installation zur Sicherheit die
Stromversorgung im gesamten Haus/Wohnung unterbrochen werden
(Hauptsicherung). Es ist nicht ausreichend, die Stromversorgung nur in
dem Raum zu unterbrechen, in dem das Thermostat installiert werden soll,
da die Heizung mit hoher Wahrscheinlichkeit einen eigenen Stromkreis
verwendet.
INSTALLATION
Zur richtigen Positionierung des Thermostats beachten Sie bitte die
folgenden Hinweise (Abb. 3):
Installieren Sie das Thermostat mit einer für den zu steuernden
Bereich typischen Temperatur, z.B. Wohnzimmer, Schlafzimmer
oder Bad.
Befestigen Sie das Thermostat an einer Wand auf ca. 1,5m Höhe.
Vermeiden Sie direkte Sonneneinstrahlung.
Das Thermostat sollte sich in ausreichendem Abstand von Luftfluss
(Fenster/Türen) und Wärmequellen (Heizkörpern) befinden.
Dieser Schritt setzt voraus, dass Sie über eine mit einem QIVICON ZigBee
Funkstick ausgestattete QIVICON Home Base verfügen.
1. Öffnen Sie das Gehäuse durch einen Druck mit einem flachen
Schrabenzieher auf die Befestigungslasche in der Mitte der
Unterseite und klappen Sie die Installationsbasis auf.
2. Zur Ihrer Sicherheit trennen Sie das Heizsystem von der
Stromversorgung und achten Sie darauf, dass die Kontakte stromlos
sind.
3. Öffnen Sie die Schutzabdeckung der Kontakte durch Lösen der
beiden Kreuzschlitzschrauben (Abb. 2). Das Thermostat kann
normalerweise geöffnete (NO+COM) und normalerweise
geschlossene (NC+COM) Kontakte steuern. Standard ist NC, wobei
die Heizung durch Schließen des Relais eingeschaltet und durch
Öffnen ausgeschaltet wird. Der COM Kontakt ist der gemeinsame
Leiter bei beiden Einstellungen. Vergewissern Sie sich, dass die
Kabel fest verbunden sind und schließen Sie die Abdeckung.
Falls Ihr Heizungssystem 3 Drähte für den Anschluss des
Thermostats bereitstellt, verbinden nur die beiden Schaltkontakte.
Der Nulleiter wird nicht verwendet.
4. Befestigen Sie die Installationsbasis an der Wand. Legen Sie die AA
Batterien entsprechend der Polarität ein und schließen Sie das
Gehäuse (Abb. 1).
5. Folgen Sie den Anweisungen des Verbindungsassistenten zum
Hinzufügen neuer Geräte, der sich in der App oder Weboberfläche
Ihres QIVICON Systems befindet. Weitere Informationen zum
Registrierungsprozess finden Sie unter http://support.bitronvideo.eu.
Zur Verwendung des Thermostats an einer anderen Home setzen die das
Gerät zurück (siehe technische Anleitung) und führen Sie die Prozedur
zum Hinzufügen neuer Geräte Ihres Systems erneut aus. Sobald der
Installationsprozess erfolgreich abgeschlossen wurde, wird das
Thermostat nicht mehr mit dem System kommunizieren, bei dem es zuvor
angemeldet war.
BETRIEB
Im Ausgangszustand wird auf dem Display die vom Thermostat
gemessene Raumtemperatur angezeigt.
Die gewünschte Temperatur kann manuell über die Taste –gesenkt und
über die Taste +erhöht werden. Die Temperatur kann auch über geeignete
Apps für QIVICON gesteuert werden. Während Sie die Temperatur
einstellen, oder wenn von dem QIVICON System ein neuer Temperaturwert
übertragen wird, erscheint im Display die Meldung „SET“ (Abb. 4).
Der Status des Relais (Heizen, Kühlen, Ventilator) wird über ein
entsprechendes Symbol im linken Displaybereich angezeigt (Abb. 4).
Wenn kein Symbol angezeigt wird, ist das Relais ausgeschaltet.
Bei geringem Batteriestand wird ein entsprechendes Symbol unten links
im Display angezeigt (Abb. 4).
KUNDENDIENST
Bei Verbindungsproblemen empfehlen wir die Verwendung von Smart
Plugs zur Vergrößerung der Reichweite des ZigBee Funknetzes. Für
weitere Informationen und für Support zum Produkt besuchen Sie bitte
http://support.bitronvideo.eu.
FUNZIONE
Il termostato permette di controllare un impianto di riscaldamento e/o
raffreddamento tramite un relè incorporato. La soglia di temperatura può
essere impostata manualmente tramite i tasti oppure in automatico il
sistema smart home.
AVVISI DI SICUREZZA
In funzione al tipo di caldaia installata, è possibile che i conduttori da e
verso la caldaia siano a tensione di rete. In questo caso, l'installazione
deve essere effettuata obbligatoriamente da un elettricista.
Per motivi di sicurezza, si raccomanda comunque di staccare sempre
corrente in tutta la abitazione (interruttore generale). Non è sufficiente
togliere corrente solo nella stanza in cui viene installato il termostato
poiché la caldaia sarà collegata, quasi sicuramente, ad un circuito
separato.
INSTALLAZIONE
Per un corretto posizionamento del termostato consigliamo di seguire le
indicazioni riportate (fig. 3):
Collocare il termostato in un luogo dove il valore della temperatura sia
rappresentativo. Esempio: la zona giorno, la zona notte, il bagno ecc.
Posizionare il termostato su una parete ad un’altezza di circa 1,5 m.
Evitare aree in cui il termostato è esposto alla luce diretta del sole.
Posizionare il termostato lontano da correnti d’aria (finestre/porte) e
fonti di calore (radiatori).
Per l’installazione è necessario disporre di una QIVICON Home Base
dotata di chiavetta radio ZigBee.
1. Spingere leggermente la levetta, posta sul lato inferiore del
termostato, con un cacciavite a taglio e togliere la staffa di
fissaggio.
2. Per sicurezza, togliere corrente all’impianto di riscaldamento e
assicurarsi che i contatti siano privi di tensione elettrica.
3. Aprire la protezione dei contatti sollevando le due viti e collegare i
due fili per il controllo della caldaia ai rispettivi morsetti (fig 2). Il
termostato può gestire sia sistemi a contatto normalmente aperto
(NO+COM) sia sistemi a contatto normalmente chiuso (NC+COM).
Lo standard è NC, in cui il contatto si chiude per accendere la
caldaia e si apre per spegnerla. Il contatto COM è il contatto
comune. Assicurarsi che i cavi siano ben fissati e richiudere la
protezione.
Se il vostro impianto caldaia dispone di 3 fili per il collegamento del
termostato, collegare soltanto i due conduttori per il controllo; il
conduttore neutro non viene utilizzato.
4. Fissare la staffa sulla parete. Inserire le batterie di tipo AA secondo
la polarità indicata e chiudere il dispositivo (fig .1).
5. Per l’aggiunta di nuovi dispositivi seguire le indicazioni
dell’assistente all’installazione disponibile all’interno dell’app o
dell’interfaccia web del vostro sistema QIVICON. Per ulteriori
informazioni sul processo di registrazione consultare il sito
http://support.bitronvideo.eu.
Per utilizzare il termostato con un'altra Home Base è necessario resettare
il terminale (vedi manuale tecnico) e ripetere la procedura di registrazione
sul nuovo sistema. Una volta conclusa con successo la nuova
installazione, il sensore non comunicherà più con il sistema su cui era
stato registrato precedentemente.
UTILIZZO
In modalità di riposo, sul display viene visualizzata la temperatura
ambiente rilevata dal termostato.
La temperatura desiderata può essere impostata o manualmente usando il
tasto –per abbassare e il tasto +per aumentare la temperatura desiderata
o automaticamente tramite le app compatibili del sistema QIVICON.
Impostando manualmente la temperatura o quando viene ricevuto un nuovo
valore di temperatura dal sistema QIVICON, sul display viene visualizzato la
temperatura desiderata insieme al testo “SET” (fig. 4).
Lo stato del relè (riscaldamento, raffreddamento, ventilatore) viene
indicato dall’apposita icona a sinistra sul display (fig. 4). Se non è accesa
alcuna icona il relè è spento.
In caso di basso livello di energia viene visualizzata l’icona “batteria
scarica” in basso a sinistra (fig. 4).
ASSISTENZA
Qualora sussistessero problemi di connessione consigliamo l’utilizzo di
smart plug per aumentare il raggio della rete radio ZigBee. Per ulteriori
informazioni e assistenza sul prodotto consultare il sito
http://support.bitronvideo.eu.
Table of contents
Popular Thermostat manuals by other brands
Kermi
Kermi WRT Instructions for installation and use

JUMO
JUMO EM Series operating instructions
Honeywell Home
Honeywell Home RLV3150A1004 user guide
VDH
VDH MC 785-DF KLIMA operating manual
Oriental motor
Oriental motor AM2-XA1 operating manual
Silvercrest
Silvercrest Classic Model L Operating instructions and safety advices

