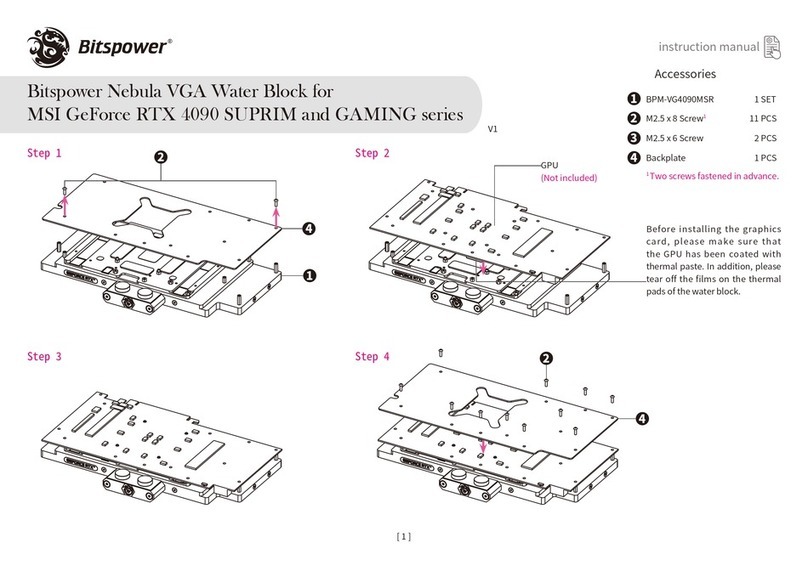
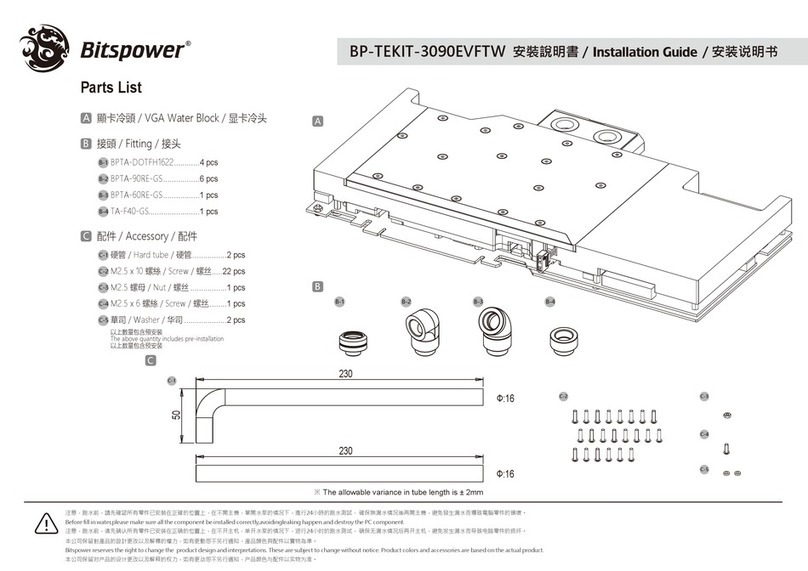
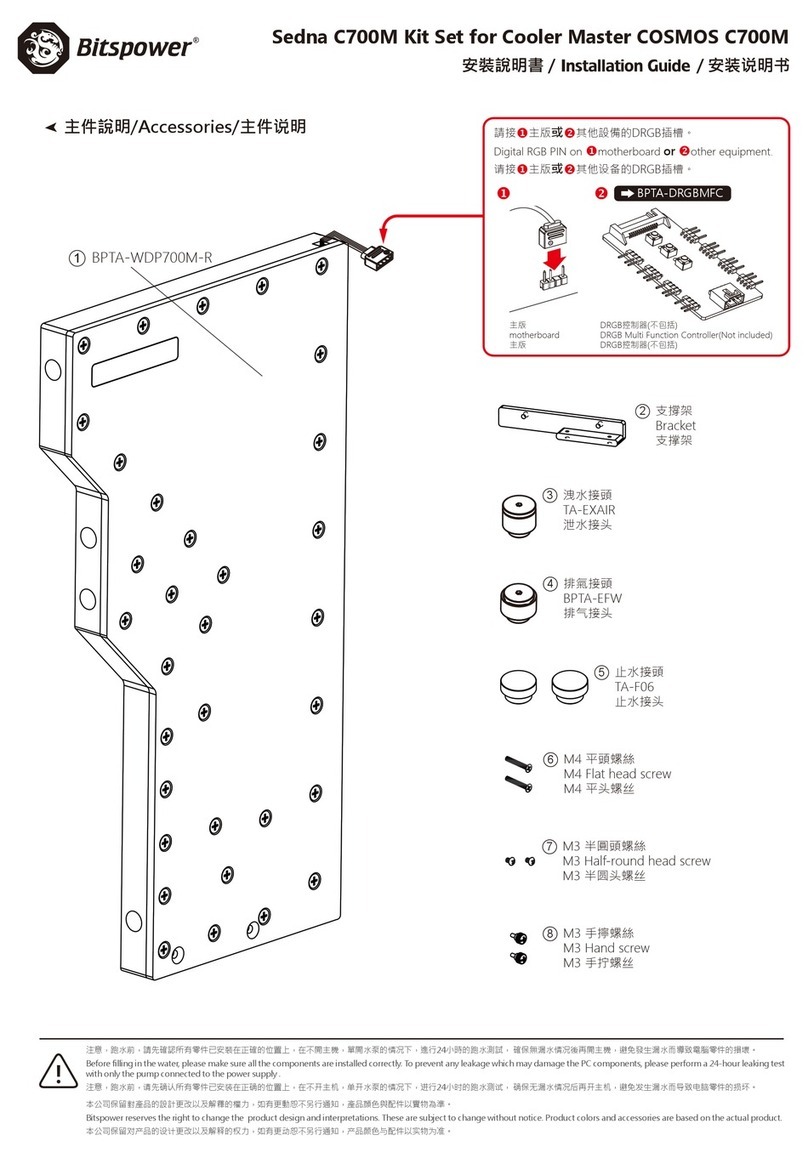
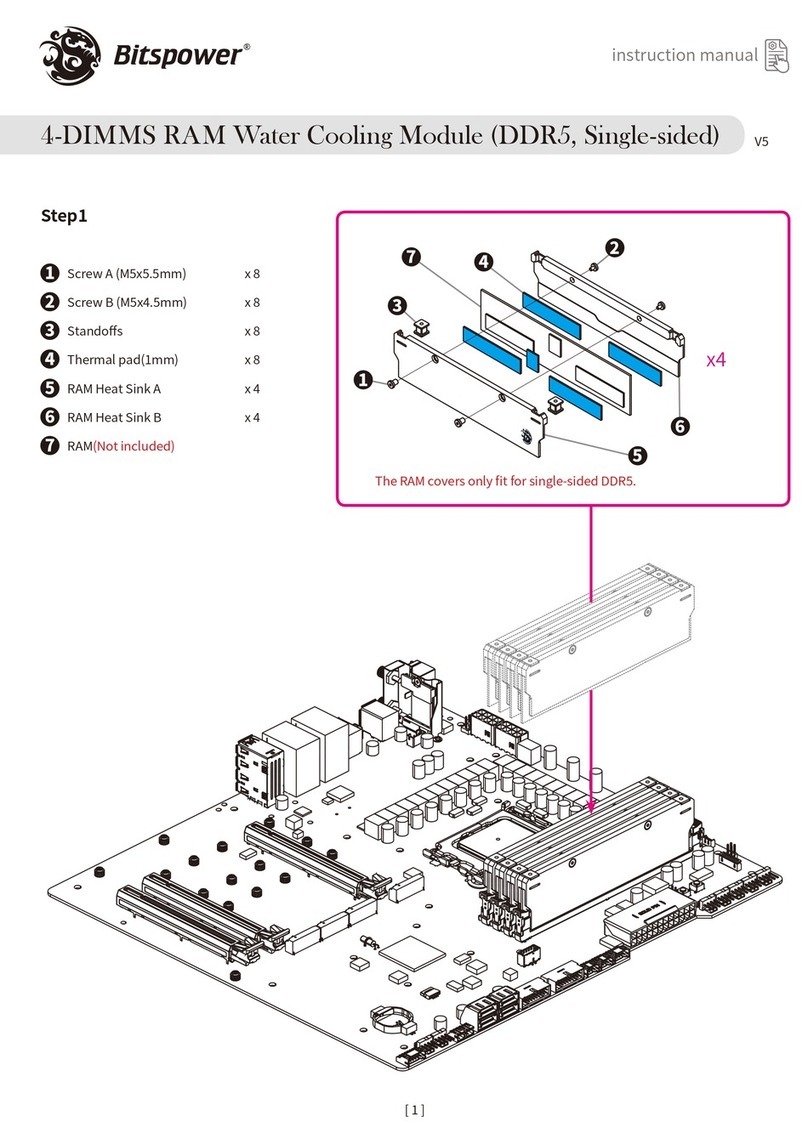
manuals.online logo
Brands
  1. Home
  2. •
  3. Brands
  4. •
  5. Bitspower
  6. •
  7. Computer Hardware
  8. •
  9. Bitspower BP-VTS-PCIE4 User manual

Bitspower BP-VTS-PCIE4 User manual

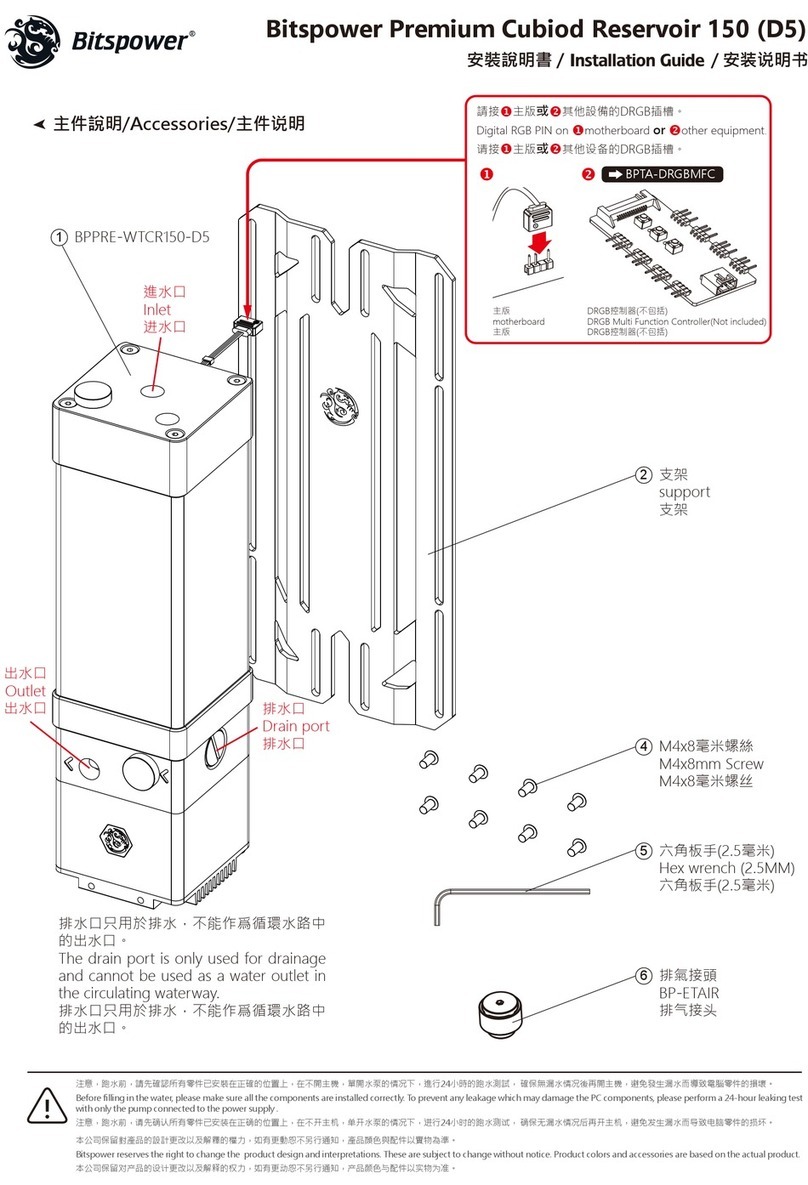
注意,跑水前,請先確認所有零件已安裝在正確的位置上,在不開主機,單開水泵的情况下,進行24小時的跑水測試, 確保無漏水情况後再開主機,避免發生漏水而導致電腦零件的損壞。
注意,跑水前,请先确认所有零件已安装在正确的位置上,在不开主机,单开水泵的情况下,进行24小时的跑水测试, 确保无漏水情况后再开主机,避免发生漏水而导致电脑零件的损坏。
Before fill in water,please make sure all the component be installed correctly,avoidingleaking happen and destroy the PC component.
本公司保留對產品的設計更改以及解釋的權力,如有更動恕不另行通知,產品顏色與配件以實物為準。
本公司保留对产品的设计更改以及解释的权力,如有更动恕不另行通知,产品颜色与配件以实物为准。
Bitspower reserves the right to change the product design and interpretations. These are subject to change without notice. Product colors and accessories are based on the actual product.
組合示意 / Combination diagram / 组合示意
組件列表 / Componet list / 组件列表
VGA Vertical GPU Support with PCI-E 4.0 Riser Cable
①2020-BPTA-VGSUP-A 2 pcs ②2020-BPTA-VGSUP-B 1 pc
V1/第一版
注意,跑水前,請先確認所有零件已安裝在正確的位置上,在不開主機,單開水泵的情况下,進行24小時的跑水測試, 確保無漏水情况後再開主機,避免發生漏水而導致電腦零件的損壞。
注意,跑水前,请先确认所有零件已安装在正确的位置上,在不开主机,单开水泵的情况下,进行24小时的跑水测试, 确保无漏水情况后再开主机,避免发生漏水而导致电脑零件的损坏。
Before fill in water,please make sure all the component be installed correctly,avoidingleaking happen and destroy the PC component.
本公司保留對產品的設計更改以及解釋的權力,如有更動恕不另行通知,產品顏色與配件以實物為準。
本公司保留对产品的设计更改以及解释的权力,如有更动恕不另行通知,产品颜色与配件以实物为准。
Bitspower reserves the right to change the product design and interpretations. These are subject to change without notice. Product colors and accessories are based on the actual product.
組件列表 / Componet list / 组件列表
預安裝部分 / Pre installtion part / 预安装部分
VGA Vertical GPU Support with PCI-E 4.0 Riser Cable
③2020-BPTA-VGSUP-C 1PCS
④SW-P+M3x6-BK 11PCS
⑤VG-SCM4IM25H3 2PCS
⑥SW-P+M25X8-BK 2PCS
SW-P+M3x6-BK 4PCS
2020-BPTA-VGSUP-B 1PCS
2020-BPTA-VGSUP-A 2PCS
VG-SCM4IM25H3 2PCS
注意,跑水前,請先確認所有零件已安裝在正確的位置上,在不開主機,單開水泵的情况下,進行24小時的跑水測試, 確保無漏水情况後再開主機,避免發生漏水而導致電腦零件的損壞。
注意,跑水前,请先确认所有零件已安装在正确的位置上,在不开主机,单开水泵的情况下,进行24小时的跑水测试, 确保无漏水情况后再开主机,避免发生漏水而导致电脑零件的损坏。
Before fill in water,please make sure all the component be installed correctly,avoidingleaking happen and destroy the PC component.
本公司保留對產品的設計更改以及解釋的權力,如有更動恕不另行通知,產品顏色與配件以實物為準。
本公司保留对产品的设计更改以及解释的权力,如有更动恕不另行通知,产品颜色与配件以实物为准。
Bitspower reserves the right to change the product design and interpretations. These are subject to change without notice. Product colors and accessories are based on the actual product.
用戶安裝部分 / Customer installtion part / 用户安装部分
VGA Vertical GPU Support with PCI-E 4.0 Riser Cable
※ 匹配機箱為聯力O11-Dynamic
(機箱不包含在套裝內)
The matching chassis is LIANLI
O11D-Dynamic
(The chassis is not included in
the package)
匹配机箱为联力O11-Dynamic
(机箱不包含在套装内)
Step 1
拆除顯卡出線擋板及底部固態硬盤支架
Remove the Graphics card outlet baffle
and the bottom SSD bracket
拆除显卡出线挡板及底部固态硬盘支架
注意 / Attention / 注意
紅框處螺絲請保留,後續步驟需要使用
Please keep the screws in the red wire frame
You need to use them in the following steps
红框处螺丝请保留,后续步骤需要使用
注意,跑水前,請先確認所有零件已安裝在正確的位置上,在不開主機,單開水泵的情况下,進行24小時的跑水測試, 確保無漏水情况後再開主機,避免發生漏水而導致電腦零件的損壞。
注意,跑水前,请先确认所有零件已安装在正确的位置上,在不开主机,单开水泵的情况下,进行24小时的跑水测试, 确保无漏水情况后再开主机,避免发生漏水而导致电脑零件的损坏。
Before fill in water,please make sure all the component be installed correctly,avoidingleaking happen and destroy the PC component.
本公司保留對產品的設計更改以及解釋的權力,如有更動恕不另行通知,產品顏色與配件以實物為準。
本公司保留对产品的设计更改以及解释的权力,如有更动恕不另行通知,产品颜色与配件以实物为准。
Bitspower reserves the right to change the product design and interpretations. These are subject to change without notice. Product colors and accessories are based on the actual product.
VGA Vertical GPU Support with PCI-E 4.0 Riser Cable
Step 2
將預安裝的組件鎖固到機箱底部
Lock the pre installed components to the
bottom of the chassis
将预安装的组件锁固到机箱底部
機箱底板紅圈處為固定螺絲孔位
The red circle on the chassis bottom plate
is the fixed screw hole
机箱底板红圈处为固定螺丝孔位
螺絲可直接通過支架預留缺口進行鎖固
The screw can be locked directly through the reserved
gap of the bracket
螺丝可直接通过直接预留缺口进行锁固
SW-P+M3x6-BK 4PCS
注意,跑水前,請先確認所有零件已安裝在正確的位置上,在不開主機,單開水泵的情况下,進行24小時的跑水測試, 確保無漏水情况後再開主機,避免發生漏水而導致電腦零件的損壞。
注意,跑水前,请先确认所有零件已安装在正确的位置上,在不开主机,单开水泵的情况下,进行24小时的跑水测试, 确保无漏水情况后再开主机,避免发生漏水而导致电脑零件的损坏。
Before fill in water,please make sure all the component be installed correctly,avoidingleaking happen and destroy the PC component.
本公司保留對產品的設計更改以及解釋的權力,如有更動恕不另行通知,產品顏色與配件以實物為準。
本公司保留对产品的设计更改以及解释的权力,如有更动恕不另行通知,产品颜色与配件以实物为准。
Bitspower reserves the right to change the product design and interpretations. These are subject to change without notice. Product colors and accessories are based on the actual product.
VGA Vertical GPU Support with PCI-E 4.0 Riser Cable
SW-P+M3x6-BK 2PCS
Step 3
將螺絲鎖到支架上
Lock the screw to the bracket
将螺丝稍到支架上
※稍微鬆開支架螺絲,可調節顯卡的安裝高度
※A slight release of the bracket screws can adjust the
mounting height of the graphics card.
※稍微松开支架螺丝,可调节显卡的安装高度
TIPS 1
★關於支架的使用高度調節
2020-BPTA-VGSUP-A設定了固定調節位置及自由調節位置。
固定位置為紅線處,高度行程為10mm,其餘為自由調節位置,最大行程12mm。
★Height adjustment of bracket
2020-BPTA-VGSUP-A has fixed adjustment position and free adjustment
position.
The fixed position is at the red line, the height stroke is 10 mm, the rest
are free adjustment positions, and the maximum stroke is 12 mm.
★关于支架的使用高度调节
2020-BPTA-VGSUP-A设定了固定调节位置及自由调节位置。
固定位置为红线处,高度行程为10mm,其余为自由调整位置,最大行程12mm。
10
12
注意,跑水前,請先確認所有零件已安裝在正確的位置上,在不開主機,單開水泵的情况下,進行24小時的跑水測試, 確保無漏水情况後再開主機,避免發生漏水而導致電腦零件的損壞。
注意,跑水前,请先确认所有零件已安装在正确的位置上,在不开主机,单开水泵的情况下,进行24小时的跑水测试, 确保无漏水情况后再开主机,避免发生漏水而导致电脑零件的损坏。
Before fill in water,please make sure all the component be installed correctly,avoidingleaking happen and destroy the PC component.
本公司保留對產品的設計更改以及解釋的權力,如有更動恕不另行通知,產品顏色與配件以實物為準。
本公司保留对产品的设计更改以及解释的权力,如有更动恕不另行通知,产品颜色与配件以实物为准。
Bitspower reserves the right to change the product design and interpretations. These are subject to change without notice. Product colors and accessories are based on the actual product.
VGA Vertical GPU Support with PCI-E 4.0 Riser Cable
SW-P+M3x6-BK 1PCS
▲Step 1 保留的螺絲
Step 1 Retained screws
Step 1 保留的螺丝
Step 4
將垂直支架鎖固到機箱上
Lock the vertical bracket to the chassis
将垂直支架锁固到机箱上
2020-BPTA-VGSUP-C 1PCS
※此支架鎖固後,方可安裝主板
※After the bracket is locked, the motherboard can be
installed
※此支架锁固后,方可安装主板
TIPS 2
★關於鎖固位置的對應
2020-BPTA-VGSUP-C共有6個固定槽口,分為兩組,分別對應2020-BPTA-VGSUP-A設定的固定位置。
如在Step 3當中設定的固定位置在最下方,則對應2020-BPTA-VGSUP-C的鎖固位置為左圖的三個槽位最底端。
如在Step 3當中設定的固定位置在10mm處,則對應2020-BPTA-VGSUP-C的鎖固位置為右圖的三個槽位最底端。
★On the correspondence of locking position
There are 6 fixed slots in 2020-BPTA-VGSUP-C, which are divided into two groups, corresponding to the fixed position set by
2020-BPTA-VGSUP-A respectively.
If the fixed position set in step 3 is at the bottom, the locking position corresponding to 2020-BPTA-VGSUP-C is the bottom of
the three slot holes in the Left figure.
If the fixed position set in step 3 is At the position of 10 mm, the locking position corresponding to 2020-BPTA-VGSUP-C is the
bottom of the three slot holes in the Right figure.
★关于锁固位置的对应
2020-BPTA-VGSUP-C共有6个固定槽位,分为两组,分别对应2020-BPTA-VGSUP-A设定的固定位置。
如在Step 3当中设定的固定位置在最下方,则对应2020-BPTA-VGSUP-C的锁固位置为左图的三个槽位最底端。
如在Step 3当中设定的固定位置在10mm处,则对应2020-BPTA-VGSUP-C的锁固位置在右图的三个槽位最底端。
注意,跑水前,請先確認所有零件已安裝在正確的位置上,在不開主機,單開水泵的情况下,進行24小時的跑水測試, 確保無漏水情况後再開主機,避免發生漏水而導致電腦零件的損壞。
注意,跑水前,请先确认所有零件已安装在正确的位置上,在不开主机,单开水泵的情况下,进行24小时的跑水测试, 确保无漏水情况后再开主机,避免发生漏水而导致电脑零件的损坏。
Before fill in water,please make sure all the component be installed correctly,avoidingleaking happen and destroy the PC component.
本公司保留對產品的設計更改以及解釋的權力,如有更動恕不另行通知,產品顏色與配件以實物為準。
本公司保留对产品的设计更改以及解释的权力,如有更动恕不另行通知,产品颜色与配件以实物为准。
Bitspower reserves the right to change the product design and interpretations. These are subject to change without notice. Product colors and accessories are based on the actual product.
VGA Vertical GPU Support with PCI-E 4.0 Riser Cable
SW-P+M25X8-BK 2PCS
Bitspower PCI-e線材
Bitspower PCI-e wire
Bitspower PCI-e线材)
Step 5
安裝PCI-e線材
Install the PCI-e wire
安装PCI-e线材
SW-P+M3x6-BK 2-3PCS
Step 6
安裝顯卡(需另购)
Install the Graphics card
(to be purchased separately)
安装显卡(需另购)
注意,跑水前,請先確認所有零件已安裝在正確的位置上,在不開主機,單開水泵的情况下,進行24小時的跑水測試, 確保無漏水情况後再開主機,避免發生漏水而導致電腦零件的損壞。
注意,跑水前,请先确认所有零件已安装在正确的位置上,在不开主机,单开水泵的情况下,进行24小时的跑水测试, 确保无漏水情况后再开主机,避免发生漏水而导致电脑零件的损坏。
Before fill in water,please make sure all the component be installed correctly,avoidingleaking happen and destroy the PC component.
本公司保留對產品的設計更改以及解釋的權力,如有更動恕不另行通知,產品顏色與配件以實物為準。
本公司保留对产品的设计更改以及解释的权力,如有更动恕不另行通知,产品颜色与配件以实物为准。
Bitspower reserves the right to change the product design and interpretations. These are subject to change without notice. Product colors and accessories are based on the actual product.
VGA Vertical GPU Support with PCI-E 4.0 Riser Cable
TIPS 3
★關於顯卡安裝槽位的調整
2020-BPTA-VGSUP-C設定了3個顯卡槽位,預安裝的支架部分,將顯卡設定在第2-3槽及第1-3槽,以適用於更多的顯卡
類型。
若顯卡的厚度在2個槽位之內,則可對安裝位置進行調整,可使顯卡安裝到第1-2槽。
★Adjustment of installation slot of Graphics card
2020-BPTA-VGSUP-C sets three graphics card slots, and the pre installed bracket part sets the Graphics card in slots 2ND-3RD and
1ST-3RD to suit more types of graphics cards.
If the thickness of the Graphics card is within 2 slots, the installation position can be adjusted to make the card installed in the 1ST-2ND
slot.
★关于显卡安装槽位的调整
2020-BPTA-VGSUP-C设定了3个显卡槽位,预安装的支架部分,将显卡设定在第2-3槽及第1-3槽,以适用于更多显卡
类型。
若显卡的厚度在2个槽位之内,则可对安装位置进行调整,可是显卡安装到第1-2槽。
VG-SCM4IM25H3 2PCS
※更改螺絲的鎖固孔位
※Change the locking hole position of the screw
※更改螺丝的锁固孔位
注意,跑水前,請先確認所有零件已安裝在正確的位置上,在不開主機,單開水泵的情况下,進行24小時的跑水測試, 確保無漏水情况後再開主機,避免發生漏水而導致電腦零件的損壞。
注意,跑水前,请先确认所有零件已安装在正确的位置上,在不开主机,单开水泵的情况下,进行24小时的跑水测试, 确保无漏水情况后再开主机,避免发生漏水而导致电脑零件的损坏。
Before fill in water,please make sure all the component be installed correctly,avoidingleaking happen and destroy the PC component.
本公司保留對產品的設計更改以及解釋的權力,如有更動恕不另行通知,產品顏色與配件以實物為準。
本公司保留对产品的设计更改以及解释的权力,如有更动恕不另行通知,产品颜色与配件以实物为准。
Bitspower reserves the right to change the product design and interpretations. These are subject to change without notice. Product colors and accessories are based on the actual product.
VGA Vertical GPU Support with PCI-E 4.0 Riser Cable
注意:Bitspower建議消費者使用蒸餾水、純凈水,加入Bitspower的染劑作為水冷液使用;如客戶自行選購的水冷
液導致電鍍層剝落、水道堵塞、水泵轉動不正常、水箱管破裂或密封圈變型以致漏水等及其它不可抗力之問
題時,消費者自行承擔相關產品責任。
未注水前,請勿啟動水泵電源。
注意:Bitspower建议消费者使用蒸馏水、纯净水,加入Bitspower的染剂作为水冷液使用;如客户自行选购的水冷
液导致电镀层剥落、水道堵塞、水泵转动不正常、水箱管破裂或密封圈变型以致漏水等及其它不可抗力之问
题时,消费者自行承担相关产品责任。
未注水前,请勿启动水泵电源。
Notice:
Bitspower recommends that consumers add the Bitspower dye to distilled water or purified water for
their water-cooling liquid. If the consumer chooses different water-cooling liquids, the resulting
impurities may cause peeling of the coating on some of the hardware, water channels blockage by
built-up residue, improper operation of the water pump, water tank tube breakage, and o-rings
deformation leading to leakage. Any issues related to the use of inappropriate water-cooling liquid
will be the responsibility of the consumer.
Do not turn on the pump if the reservoir is empty.
注意:當使用測氣產品測試水路時,為避免由于壓力過大導致產品損壞,輸入的壓力請不要超過0.5kg/cm2 (Bar),如因
壓力過大造成產品損壞, 將由客戶自行承擔.嚴禁客戶在水路有水及水泵開啟的情況下進行氣體飽壓測試。
注意:当使用测气产品测试水路时,为避免由于压力过大导致产品损坏,输入的压力请不要超过0.5kg/cm2 (Bar),如因
压力过大造成产品损坏, 将由客户自行承担.严禁客户在水路有水及水泵开启的情况下进行气体饱压测试。
Notice:
When using leak tester on water cooling loop, in order to avoid product damage due to excessive
pressure, the input pressure should not exceed 0.5kg/cm2 (Bar). If the product is damaged due to
excessive pressure, it will be borne by the customer. Forbidden to use the leak teser when there is
water in the loop or the pump is runing.

Other Bitspower Computer Hardware manuals
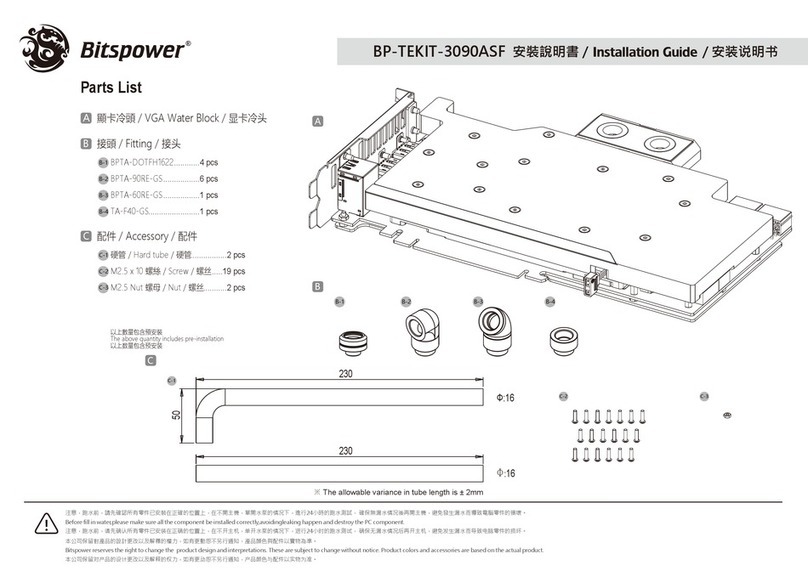
Bitspower BPTA-WDP700M-KIT User manual

Bitspower

Bitspower BPTA-WDP700M-KIT User manual

Bitspower CR803 User manual

Bitspower

Bitspower CR803 User manual

Bitspower BP-RAMS22D-D5 User manual

Bitspower

Bitspower BP-RAMS22D-D5 User manual

Bitspower BP-VG3090EVXC3 User manual

Bitspower

Bitspower BP-VG3090EVXC3 User manual

Bitspower BP-TEKIT-3090EVFTW User manual

Bitspower

Bitspower BP-TEKIT-3090EVFTW User manual

Bitspower BP-VG3090CFA User manual

Bitspower

Bitspower BP-VG3090CFA User manual

Bitspower Sedna H510i User manual

Bitspower

Bitspower Sedna H510i User manual

Bitspower BP-VG3090TIMT User manual

Bitspower

Bitspower BP-VG3090TIMT User manual

Bitspower Nebula VGA User manual

Bitspower

Bitspower Nebula VGA User manual

Bitspower BPTA-WDP303-KIT User manual

Bitspower

Bitspower BPTA-WDP303-KIT User manual

Bitspower CR801 User manual

Bitspower

Bitspower CR801 User manual

Bitspower O11DXL User manual

Bitspower

Bitspower O11DXL User manual

Bitspower BP-VG3090AST User manual

Bitspower

Bitspower BP-VG3090AST User manual

Bitspower Orion VGA User manual

Bitspower

Bitspower Orion VGA User manual

Bitspower BP-VG4080AST User manual

Bitspower

Bitspower BP-VG4080AST User manual

Bitspower BPTA-CPUMS-V2-SKA User manual

Bitspower

Bitspower BPTA-CPUMS-V2-SKA User manual

Bitspower Touchaqua TA-XYZ-RES User manual

Bitspower

Bitspower Touchaqua TA-XYZ-RES User manual

Bitspower BP-TEKIT-3080FE User manual

Bitspower

Bitspower BP-TEKIT-3080FE User manual

Bitspower X-TEND BP-VG4090FE-BKP User manual

Bitspower

Bitspower X-TEND BP-VG4090FE-BKP User manual

Bitspower D5/MCP655 MOD KIT User manual

Bitspower

Bitspower D5/MCP655 MOD KIT User manual

Bitspower Sedna PH518 User manual

Bitspower

Bitspower Sedna PH518 User manual

Bitspower Summit M Pro User manual

Bitspower

Bitspower Summit M Pro User manual

Bitspower BP-LPM2HS-BK User manual

Bitspower

Bitspower BP-LPM2HS-BK User manual

Bitspower TA-DIO240-RGB User manual

Bitspower

Bitspower TA-DIO240-RGB User manual

Popular Computer Hardware manuals by other brands
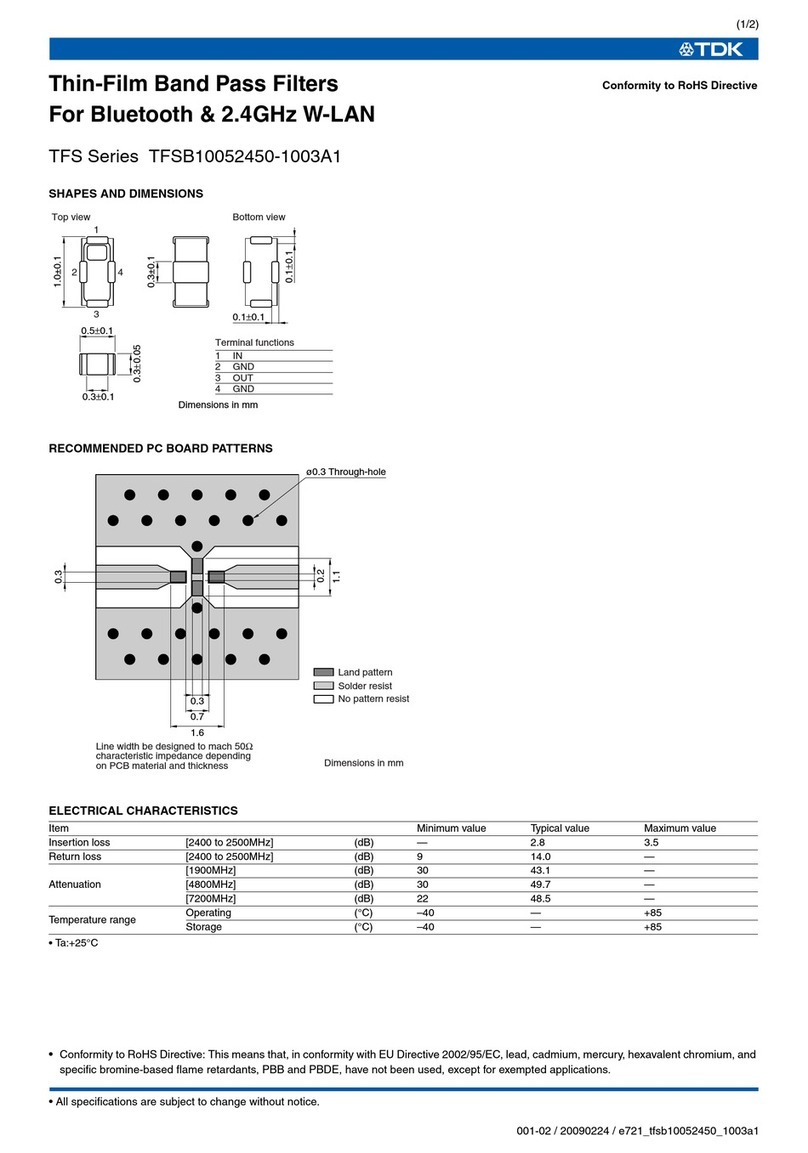
Kontron Kiss-Stor 0/5 user manual

Kontron

Kontron Kiss-Stor 0/5 user manual

Alphacool Core Geforce RTX 4090 quick start guide

Alphacool

Alphacool Core Geforce RTX 4090 quick start guide

Epson C11CA31121 user guide

Epson

Epson C11CA31121 user guide

NXP Semiconductors S32G-VNP-EVB quick start guide

NXP Semiconductors

NXP Semiconductors S32G-VNP-EVB quick start guide

Intel Xeon E5-2400 Thermal/Mechanical Design Guide

Intel

Intel Xeon E5-2400 Thermal/Mechanical Design Guide

Alphacool Core Flat Reservoir Series installation instructions

Alphacool

Alphacool Core Flat Reservoir Series installation instructions

VersaLogic VL-12CT96 Reference manual

VersaLogic

VersaLogic VL-12CT96 Reference manual

Intel MFS5520VI - Multi-Flex Server Compute Module user guide

Intel

Intel MFS5520VI - Multi-Flex Server Compute Module user guide

SightLine 1750-OEM quick start guide

SightLine

SightLine 1750-OEM quick start guide

Autocall A100-3109 IDNet 2 installation instructions

Autocall

Autocall A100-3109 IDNet 2 installation instructions

Cypress Semiconductor CY7C1338G Specification sheet

Cypress Semiconductor

Cypress Semiconductor CY7C1338G Specification sheet

Digital Equipment GT44 user guide

Digital Equipment

Digital Equipment GT44 user guide

ISE Fleet Services A317 installation guide

ISE Fleet Services

ISE Fleet Services A317 installation guide

EK-Quantum Reflection2 7000D D5 PWM D-RGB user guide

EK-Quantum

EK-Quantum Reflection2 7000D D5 PWM D-RGB user guide

TRENDnet TU3-H2EC Quick installation guide

TRENDnet

TRENDnet TU3-H2EC Quick installation guide

Advantech MIC-75M20 Startup manual

Advantech

Advantech MIC-75M20 Startup manual

Alesis NanoCompressor Reference manual

Alesis

Alesis NanoCompressor Reference manual

Omega Engineering USB-4761 user guide

Omega Engineering

Omega Engineering USB-4761 user guide

manuals.online logo
manuals.online logoBrands
  • About & Mission
  • Contact us
  • Privacy Policy
  • Terms and Conditions

Copyright 2025 Manuals.Online. All Rights Reserved.