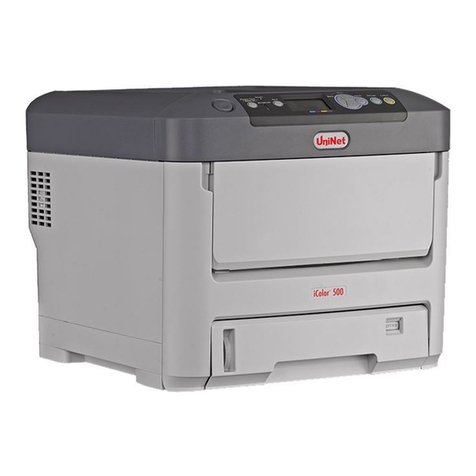
Bizerba GLP Series User manual

GLP printer driver
Operating instructions
from program version 4.00
6.562.98.5.01.01 en

Translation of the original operating instructions
Alle Rechte vorbehalten
All rights reserved
Tous droits réservés
Reservados todos los derechos
Tutti i diritti riservati
© 12 / 2010
Bizerba GmbH & Co. KG,
72336 Balingen
Postfach 10 01 64
72301 Balingen/Germany,
Tel. (+49 7433) 12-0, Fax (+49 7433) 12-2696
E-mail: marketing@bizerba.com
Internet: http://www.bizerba.com

GLP printer driver
List of contents
6.562.98.5.01.01
-3-
List of contents
1Instructions............................................................................................................... 4
1.1 Safe-keeping................................................................................................4
1.2 Target group.................................................................................................4
1.3 Symbols used...............................................................................................4
2Device........................................................................................................................ 5
2.1 GLP-58.........................................................................................................5
2.2 GLP-80/160..................................................................................................6
3Software .................................................................................................................... 7
3.1 Intented use .................................................................................................7
3.2 Rights...........................................................................................................7
3.3 Guaranty......................................................................................................7
3.4 Virus protection............................................................................................8
3.5 Hardware requirements................................................................................8
3.6 Software requirements................................................................................. 8
4Installation ................................................................................................................ 9
4.1 Before installing............................................................................................9
4.2 Step 1: Installation of drivers and programs.................................................9
4.3 Step 2: USB driver .....................................................................................10
4.3.1 Automatic installation of USB driver...........................................................10
4.3.2 Manual adjustment.....................................................................................11
4.4 Step 3: Set up printer.................................................................................11
4.5 Step 4: Test printout................................................................................... 13
4.6 Upgrade of a previous installation (only 32-Bit setup)................................ 14
4.6.1 Step 1: Upgrade......................................................................................... 14
4.6.2 Step 2: Rework...........................................................................................16
4.7 Help programs/tools................................................................................... 17
4.7.1 GLP 80/160 configuration program............................................................17
4.7.2 Modify log path...........................................................................................18
4.7.3 Profibus (only Windows 2000, XP, 2003- 32 bit)........................................18
4.7.4 Rocket Port multi-serial interface cards (only 32 bit).................................. 18
4.8 Uninstalling................................................................................................. 18

Instructions
GLP printer driver
-4-
6.562.98.5.01.01
1 Instructions
Please, read these operating instructions before connecting and switching on the device.
In the operating instructions you will find information how to use the full functionality of the
device and how to avoid possible dangers.
We offer product related training classes. Please, refer to your Bizerba specialist.
We continue with the development of our products which are also subject to different
country regulations. Examples of pictures and graphics contained in these instructions
may vary from the version which you receive.
1.1 Safe-keeping
The operating instructions are part of this device and have to be in immediate vicinity of
this device, easily accessible to everyone.
When selling this device, the operating instructions have to be attached in their entirety.
1.2 Target group
The device must only be operated by trained personnel. This means, that the operator
has to be familiar with the contents of these operating instructions.
For the operation of the program, basic knowledge of the MS-Windows user surface is of
advantage.
1.3 Symbols used
The following symbols are used in the operating instructions:
Character Description
Text with arrow requires your action.
Item number in figures.
Notes
These notes are mandatory for you.
Information
This information helps for better understanding.
1

GLP printer driver
Device
6.562.98.5.01.01
-5-
2 Device
2.1 GLP-58
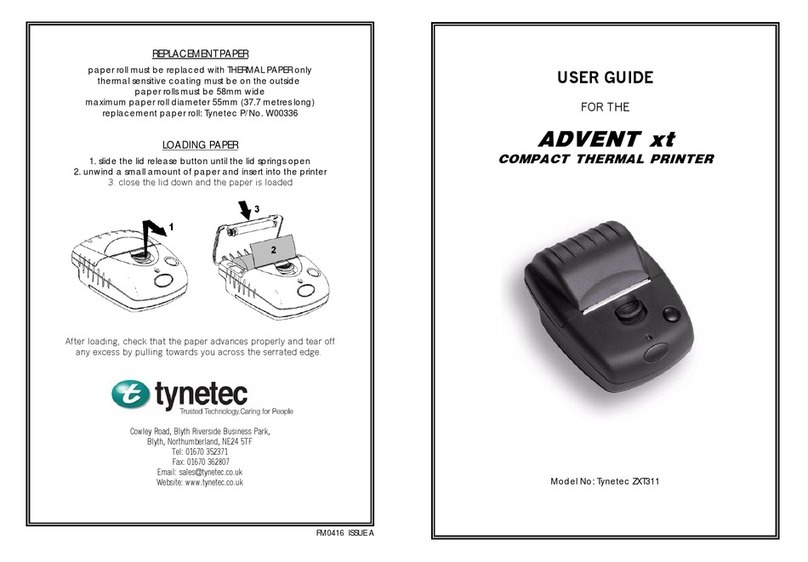
The GLP 58 printer is designed as a basic printer which understands three different
operating modes:
−After switching on, the printer is in Epson operating mode (9600 baud, 8n1, RTS-
CTS), in which Epson-ESC commands are understood. From this operating mode
one can switch to the others.
−In pixel mode (115200 baud, 8n1, RTS-CTS), exclusively graphic data are sent to the
printer, which, afterwards, returns to the Epson operating mode.
−In industry mode (9600…1152000 baud, 8o1, no handshake), commands are
understood in Bizerba’s own format. Texts and graphics can be transferred. In order
to change to another operating mode, the device has to be switched off.
At the beginning of the communication, the GLP printer driver tries to establish in which
operating mode the printer is. Then the device switches to industry mode, whereas the
interface speed set in the printer driver (9600, 57600, 115200 baud) is favored. If the
printer is already in industry mode, the present interface speed will be taken over.
Display LED (green)
Lights up continuously when the device is ready to
operate.
Flashes when paper/label end is reached.
Acknowledge key
Is entered after a label has been printed and taken off.
Only after acknowledging, the printing will continue.
For linerless paper, this key is of no significance.
Paper feed key
Briefly operating this key advances the paper by 18 mm
or until the next label appears. Pressing this key for a
longer time (>2 seconds) will cause continuous feed until
the key is entered again.
Pressing and holding both keys at the same time triggers
a test print with the program version of the firmware.

Device
GLP printer driver
-6-
6.562.98.5.01.01
2.2 GLP-80/160
The GLP 80/160 printer can be operated also without display/operating unit. This unit
allows to comfortably configure the GLP printer. But even without this unit, it is possible,
to configure the GLP printer via its operating panel.
Description of keys on operating panel:
−T1 = PRINT
−T2 = FEED
−T3 = STOPP
−T4 = PAUSE
−T5 = RESET
−T6 = RESERVE
In order to set the printer, also without an operating
unit, to a certain operating mode when it switching
on, the following key combinations are available:
−T4+T6 = SLIP operating mode (single)
−T5+T1 = GLP to PC (19200 baud)
−T5+T2 = GLP is a total printer
−T5+T3 = GLP operates as labeler
−T5+T4 = Service mode
−T5+T6 = GLP to PC (57600 baud)
Depending on the configuration or operating mode, data on the interface speed have to
be indicated accordingly in the printer driver!

GLP printer driver Software
6.562.98.5.01.01 -7-
3 Software
These operating instructions are valid as of program version 4.00 of the GLP printer
driver.
Bizerba Windows printer drivers for manual printing systems of the GLP(-W) 80/160
series and the GLP 58 series. With this driver, these printers can be used analog to
desktop print systems. From each Windows based program printouts can be directly sent
to ticket and label printers.
The installation program ("Setup") is available in German or English. The operator
languages are German, English, French, Italian or Spanish.
3.1 Intended use
The GLP printer driver is intended for a GLP 80/160 or 58 printer under Windows. This
driver allows for Windows programs to be printed by GLP units.
3.2 Rights
All rights for the documentation and software program are reserved by Bizerba. The
information in this document may be modified without special notice. Bizerba does not
enter into any commitment with this document.
The rightful purchase of the software licenses and manuals allows the use of the
programs based on the number of licenses. CD copies are only permitted for data backup
(working copies).
3.3 Guaranty
In spite of all efforts we cannot entirely prevent errors in the description. We always value
your comments and suggestions.
We decline any responsibility for damages caused by:
−non-compliance with these operating instructions.
−Defective electrical installation.
−defect programming and operation.
−modifications of operating system and configuration and on our software and
configuration.
The guaranty does not cover defects/damages caused by access of unauthorized
persons.
We continue with the development of our products which are also subject to different
country regulations. Examples of pictures and graphics contained in these operating
instructions may vary from the version which you receive.

Software GLP printer driver
-8- 6.562.98.5.01.01
3.4 Virus protection
Prior to delivery, this software is manufactured and tested against viruses based on the
state-of-the-art technology.
Nevertheless, it cannot be excluded, that computer viruses or other damaging software
may be transferred due to other programs and/or third parties.
For your own safety, we recommend that you check your PC against viruses using an up-
to-date virus protection program on a regular basis and after installation of new software.
It is also recommended to check your PC before and after installation of software from
other manufacturers or data carriers.
For a virus analysis we recommend the purchase of a virus analysis program which is
permanently being updated based on the latest technology available.
3.5 Hardware requirements
−Pentium II starting at 300 MHz
−512 MB RAM
−minimum 100 MB free hard disk space
3.6 Software requirements
Supported operating systems:
−Microsoft Windows 2000 Professional with Service Pack 4
−Microsoft Windows XP Professional with Service Pack 3, (32 bit)
−Microsoft Windows 2003 server with current Service Pack (32 Bit)
−Microsoft Windows Vista Business, Enterprise and Ultimate with current Service
Pack, (32 or 64 Bit)
−Microsoft Windows 7 Professional or Ultimate (32 or 64 Bit)
−Microsoft Windows 2008 Server (32 or 64 bit)
−Microsoft Windows 2008 R2 Server (64 Bit)
Operation under Windows Terminal Server is supported.
Operation on a virtual machine has not been tested due to a high number of virtual
machines. However, it should work for communication via a serial interface and TCP/IP
(without guarantee).

GLP printer driver
Installation
6.562.98.5.01.01
-9-
4 Installation
The installation of our system components is usually carried out by our customer service.
During installation, the Bizerba installation guidelines have to be strictly observed. The
installation guidelines can be obtained from Bizerba’s customer service.
4.1 Before installing
Ensure that the computer conforms to the requirements of the Bizerba Flow Control.
Before installing, end all Windows programs such as Word, Outlook etc.
End all programs. Otherwise, installation errors may occur since files
cannot be accessed.
Contrary to other installations, the installation of the GLP printer driver is performed in
several steps. After installing the drivers and programs, the USB support may also have
to be setup before a printer is installed via Windows and configured via the GLP
configuration.
Please do the setup first before connecting a printer via USB.
The installation requires administrative rights. For the operation, rights as a
main user are necessary.
On the terminal server installation needs to be done via the control panel
(no direct call-up of SETUP.EXE)
4.2 Step 1: Installation of drivers and programs
To run the installation, login as administrator:
On a Windows terminal server, the context has to be set to "installation" or you start the
installation via the control panel.
Start SETUP.EXE on installation media.
If you start the installation under Windows Vista, Windows 7 or Windows 2008
(R2)server, a dialog will appear to request extended rights via the user account control
(UAC- User Account Control).
Confirm dialog.
A start-up screen appears and the setup guides through the installation.
−With “Next” the next display page appears.
−Click "Back" to return to the previous page.
−Click "Cancel" to end the dialog window and the setup program.
Click on "Next".

Installation
GLP printer driver
-10-
6.562.98.5.01.01
The license agreement for the installation and the operation of the GLP printer driver
appears. Read the license conditions carefully. You can print the license agreements.
Before you continue with the installation, you must agree and accept the terms of the
license conditions.
After confirmation of the license conditions a selection page appears:
−In the 32-bit setup you can select between a complete and user-defined installation.
For the user-defined installation a path can be adapted.
−In the 64-bit setup you can directly chose the components you wish to install and
adjust the installation path.
Support for Profibus is only available under Microsoft Windows 2000
(Professional Server), XP and 2003 server (32 bit each) and are not
available otherwise!
By confirming the selected modules or the installation type you are requested to confirm
the installation again. Installation then starts.
Starting with version 4.00 the printer and USB drivers are digitally signed. However, you
need to confirm the installation of these drivers explicitly during installation. The printer
drivers are absolutely necessary for a smooth operation. The USB drivers are optionally.
If you install the USB drivers, an information screen appears saying that from then on a
GLP printer can be connected via USB.
When the installation is completed, the software is ready for operation.
4.3 Step 2: USB driver
If the USB support has been selected during setup, the preconditions for the operation of
a GLP printer are being created. The following steps are required for the operation:
These steps depend on the Windows operating system.
4.3.1 Automatic installation of USB driver
Turn the GLP printer on and wait until the printer is initialized.
Connect the GLP printer via USB cable to the PC.
Windows identifies that a new device has been connected and installs the matching
driver “Bizerba Gx USB”.

GLP printer driver
Installation
6.562.98.5.01.01
-11-
4.3.2 Manual adjustment
If the printer is identified as a „USB device“, the assignment needs to be corrected. Open
the start-up menu of Windows and execute command “devmgmt.msc” as an
administrator.
Fig. 1
Update the driver manually by selecting „Bizerba Gx USB“ from the driver list. As soon as
the update is completed, the printer can respond.
4.4 Step 3: Set up printer
After preparation, the printer is ready to be set up. Depending on the operating system,
there are different ways of proceeding.
Open the control panel and go to "Printers and fax devices" (Windows 2000, XP, 2003) or
"Hardware and Sound" (Vista or later version). The entry “Bizerba GLP” should than
occur.
Fig. 2
Use this to access the control program, where you can set up and configure the GLP
printers. In the left field of the window you can set up new printers or edit/delete existing
printers. In the right field the set parameters to the selected printer occur.

Installation GLP printer driver
-12- 6.562.98.5.01.01
Fig. 3
After the first installation, the navigation field is empty and new printer can be set up by
right mouseclicking. The standard Windows dialog opens to set up a new printer.
−Select the installation of a local printer. Remove the tick at “Plug-and-Play
installation”.
−The GLP printers communicate via a separate connection. Therefore, select „Set up
new connection“ on the following page and select connection type
“Bizerba GLP port”.
−Define the connected GLP printer type in a separate window and enter a name for
the new connection. Then define the communication parameters.
If you select USB, we recommend to set option “Cancel device connection”.
Then the USB hardware identification of the device is re-defined.
Each GLP-80/160 printer has a universal USB hardware ID.
−Select the matching printer in the Windows dialog under manufacturer "Bizerba”.
−The driver installed should be kept. You can now chose if you want to release the
printer for the network or if the printer is to work as a new standard printer.
−If the control program does not refresh after completion, please press for
“Refresh”.
−GLP-specific parameters can be set in the settings.
−A summary of the printers and driver parameters can be found under “Information”.
Furthermore, the connection to the device can be changed.
With „Logging“ the page with the settings on logging can be viewed. If any problems
might occur with printing on one of the GLP printers, the logging can be intensified via
this page and the loggings viewed (double click on respective entry in list). In addition,
you can make the setting that in case of errors the printing queue is not to be stopped,
but that the print is automatically repeated ("continue in case of errors").

GLP printer driver Installation
6.562.98.5.01.01 -13-
4.5 Step 4: Test printout
There are two options to start a test printout:
−Option “Print test page” in the printer properties.
−Printout from an application.
The printout of a test page via printer properties only serves as a general functionality
test. The underlying test page is too big for the printing area of the GLP printers and is
therefore always cut. This method indicates quickly if the printing functions properly. For a
more meticulous test you should start a test print of an application.
Under Windows you could use Notepad or WordPad as applications. Set up the page
before the printout.
After a first installation of the GLP printer driver, the page margins have
moved out of position and need to be adjusted.
Start Notepad or WordPad.
Select in menu <File> / <Page Setup>.
Set label type.
Set all page margins to 0 mm.
In the preview, the changes are visible.
Fig. 4

Installation
GLP printer driver
-14-
6.562.98.5.01.01
4.6 Upgrade of a previous installation (only 32-Bit setup)
For an existing installation of the GLP printer driver you can carry out an upgrade to the
new version without uninstalling the old version.
Close all other applications before starting the upgrade. Close the control
panel and the status window of the printers. Print jobs must not be
processed at this time.
The upgrade process would otherwise not work correctly!
4.6.1 Step 1: Upgrade
The InstallShield Wizard recognizes automatically that a previous version has been
installed.
Start the file „SETUP.EXE“ on the installation medium of the new version of the GLP
printer driver.
A previous version is not recognized in detail. It may display “1.xx” as a
version Identification, even though the correct version is "1.41", as an
example. This has no effect on the upgrade procedure.
Fig. 5
Click “Next”.
The selection of the program parts (“Features”) to be installed comes up. As standard, all
options are selected. You can uncheck non-required options.

GLP printer driver
Installation
6.562.98.5.01.01
-15-
Fig. 6
Click “Next”.
The upgrade process is started. The following occurs:
−The actual program files and drivers are being installed
−The existing printer settings are taken over and adapted
Further process as with a standard installation. You might need to restart the PC after the
upgrade is completed. This will be necessary if parts of the printer driver were used.

Installation
GLP printer driver
-16-
6.562.98.5.01.01
4.6.2 Step 2: Rework
Since the drivers for the existing printers were replaced, the operating system may
change these printers to "off-line".
Open the printer overview in order to set these printers “on-line”.
Fig. 7
Check the GLP printer settings in the Control Panel:
Fig. 8
Now you can start test printouts and continue with the usual operation.

GLP printer driver
Installation
6.562.98.5.01.01
-17-
4.7 Help programs/tools
4.7.1 GLP 80/160 configuration program
The configuration program makes it possible to configure a GLP 80/160 connected to a
serial interface:
−Select the serial interface to which the GLP-80/160 is connected.
−Go to “Auto connect”.
−Then the parameters can be set and the changed configuration transmitted to the
device.
Fig. 9

Installation GLP printer driver
-18- 6.562.98.5.01.01
4.7.2 Modify log path
This help program is always installed. It makes it possible to adapt the log paths to the
installed Bizerba programs. When changing the log path for the GLP printer driver,
please, ensure that the printer queue should be stopped and restarted afterwards.
For example, in the command row using the following commands:
−net stop spooler
−net start spooler
4.7.3 Profibus (only Windows 2000, XP, 2003- 32 bit)
Profibus is available as offered for the operating systems Windows 2000 Professional,
Windows XP Professional and Windows 2003 Server. Operation under later Windows
versions or 64 bit are not supported. The Profibus service does not have to be
configured. The configuration has to be done on each device individually.
4.7.4 Rocket Port multi-serial interface cards (only 32 bit)
During the setup of the GLP printer driver it can be indicated in the customized
installation that the support of the RocketPort multiple serial interface cards will be
installed.
After the setup is complete, the drivers of the interface cards are located under
installation directory (C:\Programme\Bizerba\GLP) in RocketPort\ISA or RocketPort\PCI.
These drivers need to be installed manually with the respective installation programs.
4.8 Uninstalling
Before uninstalling the GLP printer drivers, all printers using one of the drivers have to be
deleted.
First make sure that all printers using a GLP printer driver were deleted. Under printer
properties you can see the driver currently used under the tab "Advanced".
End all applications and wait for all print jobs.
During uninstall, the print system has to be stopped for a short moment. Active print jobs
may prevent the uninstall process.
Open the Control Panel and select the setting "Software" (Windows 2000, XP or
2003) or “Programs and applications” (Vista and later version).
From the list of installed applications select "BIZERBA GLP printer driver".
Click on “Remove”.
If the software is still being used by a printer, a warning message is shown. Otherwise, a
security check will be displayed.

GLP printer driver Installation
6.562.98.5.01.01 -19-
In rare cases it can happen, that remainders of configuration data of a
deleted printer are left in the registry. Windows will remove these entries
only after a system reboot. If, after having removed all printers, you receive
a message saying that the printer drivers are still in use, check the entries
in the registry under
HKEY_LOCAL_MACHINE\SYSTEM\CurrentControlSet\Control\Print\Prin-
ters
If previously removed printers are still listed, delete these entries manually.
The printer drivers will be uninstalled.
Uninstall USB driver
Open PC administration (e.g. <Control panel> / <Administration> /
<PC administration> /< System> / <Device Manager> or execute „devmgmt.msc“ as
administrator).
If no GLP printer is connected via USB, activate option “View hidden devices” in
menu “View”.
Right mouse click on Bizerba USB driver and go to “Uninstall”.
Repeat this process if necessary if USB drivers are installed for both device families
(GLP 80/160, GLP 58).
This manual suits for next models
4
Table of contents
