manuals.online logo
Brands
  1. Home
  2. •
  3. Brands
  4. •
  5. Uninet
  6. •
  7. Printer
  8. •
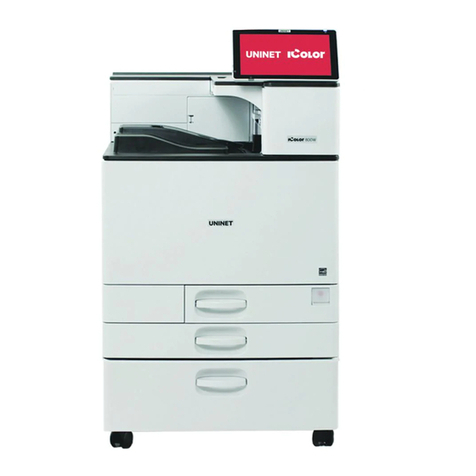
  9. Uninet iColor 500 User manual

Uninet iColor 500 User manual




iColor500series

UserManual






TableofContents

iColor500ModelSummary.............................................Page2
iColorPrinterSoftwareInstallationInstructions...............................Page3‐5
iColorPrinterSettings....................................................Page6‐8
iColor500seriesWhitePrintInstructions.....................................Page9
iColorTransferMediaInformation...........................................Page10
iColorTransferMediaInstructions...........................................Page11
iColorPrinterSpecSheet...................................................Page12
iColorPrinterFAQ........................................................Page13‐14


Email: [email protected]
Phone: 631-590-1040
Page 1


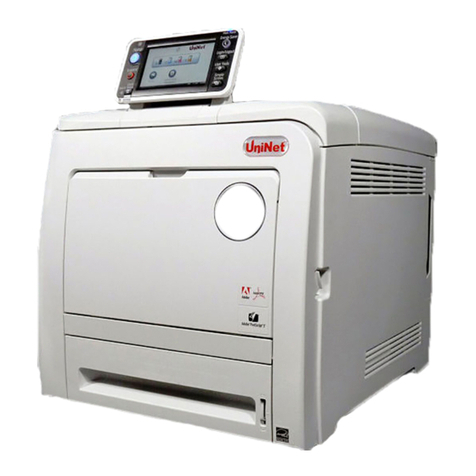
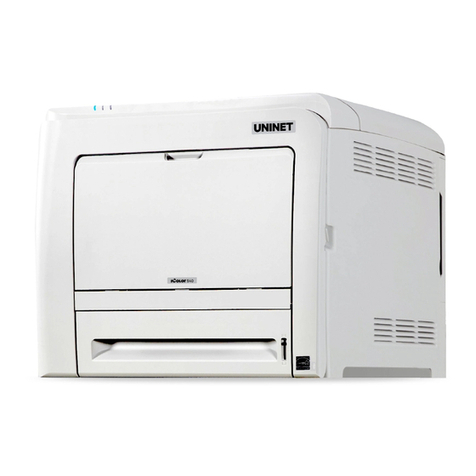
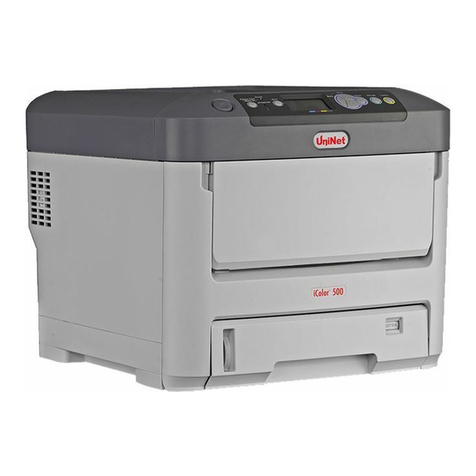
iColor500
iColor500ColorPrinter

TheiColor500printerhasbeendevelopedtoproducehigh‐qualityconventionalcolorprintswiththe
outoftheboxfunctionalityofprintinginwhite.
Pleasefollowtheenclosedquicksetupguidetogetstarted.Thestandardusermanual(providedonCD
enclosed)willprovidedetailedinstructionsforfullprinterfunctionality.TheiColor500comescomplete
with4tonercartridgesforfullcolorandblackprinting(CMYK),aswellasourexclusivefluorescentwhite
printingkit(toneranddrumcombination).Justquicklyswaptheblackforwhitewhenyouwanttoadd
whiteeffects.Blackcanthenbeproducedusingcompositeblack(madefromCMY),oriftrueblackand
whiteisneededatthesametime,justpasstheprintthoughtheprinterasecondtime.Ourregistration
systemwillensuretheprintsarelinedupperfectly.
Youwillalsohavetheoptiontoaddourfullfluorescentkitwhichcomescompletewith3[CMY]toner
cartridgesandmatchingdrumunits.Thissystemrequiresnoadditionalsoftwareorexpertisetoprint
conventionalCMYKimagesinvividfluorescentcolor.
Pleasenotethatvectorandlineartimages,includingtext,arelikelytoproducethebestresults.For
excitingdesignideasandsuggestionsforusingtheiColor500formaximumeffect,pleasevisitour
websiteatwww.icolorprint.com.
iColorpremiumtransfermediahasbeenoptimizedtoprovidequalityresultswhenusedwiththe500
printer,enablingtheusertoproduceeye‐catchingdesignswhichmaybeappliedtoavarietyoftextiles
andsurfaces.

Email: [email protected]
Phone: 631-590-1040
Page 2






InstallingiColor500printeronacomputer
TheseinstructionsareforWindows7viaUSBcable,othersaresimilar.YoumusthaveAdministrator
privilegesonthecomputer.

1. UnpacktheprinteraccordingtotheSet‐upGuide.Donotturnitonorconnectittothecomputeruntil
theinstallprogramasksyoutodoso.

2. PuttheprinterDVDintothedriveandsetupshouldautomaticallyrun.

3. Chooseyourlanguageandselectprintermodel(targetdevice)C711.

4. Afteracceptingthesoftwareagreementandgoingpasttheenvironmentaladvicepagesyoucanselect
softwaretoinstall.ClicktheNextbutton.

Also,nearthebottomofthisaretheonlinemanualsforlaterreference.


Email: [email protected]
Phone: 631-590-1040
Page 3




5. Thentheinstallationwillproceed,clickNextafterhavingtheprinterandcablesasdescribed.


6. ClickEasyInstallation(Local)thenNext.Thenyouwillseetheboxbelow

Email: [email protected]
Phone: 631-590-1040
Page 4




7. Usuallythenextscreenwillshowtheinstallationprogress,followedbytheFinishscreen.Ifnot,clicktheInstall
usinganotherportbuttonandaccepttheUSBdefaultshown.

RenamePrinter

1. Navigatefromthestartmenutothelistofinstalledprinters.TheWindow7pathis:


2. RightclickontheprinterOKIC711(PS)andselecttheprinterproperties.

3. OntheGeneraltabhighlighttheprintersnameandchangeit,thenclickOK


Email: [email protected]
Phone: 631-590-1040
Page 5





iColor500printersettingsforiColorpremiumtransfermedia
TheseinstructionsareshownusingthePostScriptorPSdriver.ThechoicesarethesameforthePCLdriver
butthedialogboxesaredifferent.

ThesecanbesetasPrinterPreferencesfromDevicesandPrintersorasDocumentPropertieswhen
printing.SettingthemasPrinterPreferencesmeanstheywillbethesamethenexttimeyouusethe
printer.
1. Thereare4tabsinthebox;LayoutisbasicallyPortraitorLandscape,whilePaper/Qualityisoutfirst
settingtochangetousetheMultipurposeTray.


Email: [email protected]
Phone: 631-590-1040
Page 6




2. TheAdvancedbuttononbothofthefirst2tabsisthesame.Settingsareshownwithredarrows.


3.
TheJobOptionstabisnormallyleftatdefaults.Wesuggesttheprintqualitybesetto“Fine”.And
undertheAdvancedbuttonthereisanoptionforMirrorPrinttofliptheimagesoitis“left‐to‐
right”correctaftertransfer.Thisisusefulforsomesoftwarethatdoesn’thavethisoption.ThePCL
Driverdoesnotincludethisoption.

Email: [email protected]
Phone: 631-590-1040
Page 7





4. ThelasttabhastheTonerSavingmodewhichshouldbesettoOff.HerewefindtheColorSwatchUtility,
whichisalsoavailablewiththePCLDriver.Thisallowsyoutoprintarangeofcolorstofindsettings
matchingtheoneyouwant.Thehelpbuttononitdescribeshowtodothis.






Email: [email protected]
Phone: 631-590-1040
Page 8



InstructionsforiColor500Printer
WiththeWhitekitinstalled,themachinewillprintwhitewheretheimage/textdisplays
black,bydefault.Pleasenotethatvectorandlineartimages,includingtext,arelikelyto
producethebestresults.Youmustcreateimagesusingtrueblack:

CMYK: C:0%M:0%Y:0%K:100%



Thisistrueblackcolor.Textandgraphicscreatedinthiscolorwillgivethebestwhite
resultswhenprinted.Theseprinterswillalsoprintcompositeblackwiththewhitekit
installed.Fortrueblackprinting,simplyreplacethewhitekit,withtheincludedblackkit.

Usingwhitewithcolorstoassuretransferofhalftones
Imagesthatcontainhalftonesorgradientscancauseproblemswithself‐weedingtransfer
media.Thisisbecausethebackgroundisassumedtobewhiteandnothingisprinted
there.
Itisusuallyeasiesttouseanimageeditingprogramtocreateacopyoftheimageusing
trueblackasillustratedabove.Selecttheentireimageandchangethecolor,savingasa
separatefile.
Printthestandardcolorsontoatransfersheetfirst,thenprintthetrueblackimageyou
savedpreviouslyovertheprintedcolorimagebypassingthetransfersheetthroughthe
printerasecondtimeusingthemultipurposetray.Fromtherefollowtheusualprocess
fortheiColorpremiumtransfermedia.
Email: [email protected]
Phone: 631-590-1040
Page 9




iColorPremiumTransferMedia

TheiColorpremiumtransfermediasetwillallowyoutotransferprintsfromyouriColor500
printer(includingwhiteandfluorescentprints)ontoavarietyofgarments–includingdark
fabrics.

iColormediaworksatalowerthanusualtemperatureof248‐260°Fwhichmeansyoucanprint
ontomanytypesofsyntheticmaterialsuchasnylon,polyesterandpoly‐cottonblendswithout
theriskofscorchingormeltingthefabric.*

iColorpremiumtransfermediaisaweed‐freesystem,ensuringlittletimeiswastedpickingand
weedingyourtransferprints.iColormediaenablesyoutoproducedetailed,qualityimages
whiledramaticallyreducingyourproductiontime.

Wash‐testedupto100washesat104°F,yourimageswillremaindurableandvibrant.**

DesignedtoworkwiththeiColor500specialtyprinter,theiColorpremiumtransfermedia
rangewillalsoworkwithmanypopularcolorlaserprinters–pleasecheckwithyourprinter
manufacturertobecertain.

*Thetemperatureanddurationvariesslightlybasedontheheatpressbeingused

**Therearemanytypesofcoatingsandfinishesappliedtotextilesandsyntheticfabrics,somakecertainadhesion
issatisfactoryandtestforwashabilityorscuff‐resistancewhenapplyingtransfermediatosuchmaterials.

Email: [email protected]
Phone: 631-590-1040
Page 10


iColorPremiumTransferMediaInstructions

iColorpremiumtransfermediaisusedasaset,comprisingofa‘TransferSheet’andan
‘AdhesiveSheet’.Pleasefollowthestepsbelowforbestresults:

1.PlacetransfersheetintothemanualsheetfeedoftheiColor500printer,smoothestsideup
(pleasenotethisisthecoatedsideofthesheet).
2.Settheprintertoprintfromthe‘MultipurposeTray’andsetpapertypeto‘MediumLight’
andsetsizetoA4.
*Remembertocreatetheimageinreversetoensureitlookscorrectwhentransferredtothe
garment.
3.Printtheimage.
4.Onceimageisprinted,placetheadhesivesheetontopoftheprint,white(adhesivecoated)
sidedown–theimageandtheadhesiveshouldbeface‐to‐face.
5.Foldasmallcorneroftheadhesivesheetover,priortopressing–thiswillmakeiteasierto
peelapartafterpressing.
•Youshouldrunthetwosheetstogetherthroughalaminatoronamediumheatsettingpriorto
pressing‐thiswillensureallairbubblesareremovedandalladhesiveistransferred
6.Pressthetwosheetstogetherusingaheatpressat248‐260°Ffor30‐40seconds*witha
medium‐highpressure.
7.Uponopeningthepress&whilehot‐immediatelypeeltheadhesivesheetawayfromthe
transfersheetquicklyandevenly,peelinginasmooth,continuousmotion.Leavethesheetson
thepresstominimizeheatloss.
8.Discardtheusedadhesivesheet.
9.Trimtheedgesawayfromthetransfersheet–thiswillensurenoexcessadhesivesticksto
thegarment.
10.Positionthetransfersheet(printsidedown)ontothegarmentandpressusingaheatpress
at248‐260°Ffor30‐40seconds*withamedium‐highpressure.
11.Removethegarmentfromtheheatpressandallowtocool.
12.Oncethegarmentiscooled(about1–2minutes),carefullypeelawaythetransfersheetand
theimagewillremainonthegarment.Donotwaittoolongforthisstep.
13.Re‐Pressingtheimageintotheshirtisimportantforwashdurability.Wehavefounditbest
tore‐presstheimageontheshirtforroughly15‐30seconds.UsetheKraftpaperontopofthe
imageforaMattefinishandtheTeflonpaperontopoftheimageforaglossfinish.Atthat
pointwhiletheshirtisstillonthepressandstillhot;lightlystretchthematerialtoallowthe
tonertomoveintothefabric.
*Thetemperatureanddurationvariesslightlybasedontheheatpressbeingused
iColor 500 Series Printer
Specifications
sku: iColor 500CMYKW Paper Size:
Main Tray, standard/optional
2nd Tray, and optional 3rd
Tray – 5.8” x 8.3” to
8.5” x 14”: Multi-Purpose
Tray – 3” x 5” to 8.5” x 52”
banner: Duplex – 5.8” x 8.3”
to 8.5” x 14”
Print Speed
Mono: 36 Size: 17.1" x 21.5" x 15.3"
Duplex: Optional Weight: 60.8 lb. (27.6 kg)
Duty Cycle: 100000 Power: 120v
Memory: 256
Print Speed
Color: 34
Resolution: 1200 x 600
Interfaces:
USB v2.0, Parallel/10
Base-T/100 Base-TX
Internal Ethernet Print
Server
Paper
Capacity:
630 sheets standard
(530-sheet
Legal/Letter/Universal Main
Tray + 100-sheet Multi-
Purpose Tray).
Email: [email protected]
Phone: 631-590-1040
Page 12
iColor300/500FAQ

1) Whentransferringimageswithhalftones,it’spossiblethatsomeoftheadhesivewillnot
transferovertothetonerduringthefirststep.Ifyouseethishappenwithyourimage,just
reprinttheimageandthenprintalayerofwhitebehind(Ontop)oftheimagetothickenup
thedensityandgivetheadhesivesomethingtostickto.Halftonecolorsusemuchlesstoner.
Printingthewhiteovertheimagewillfillinthegaps,will;notchangethecolor,butgivesthe
adhesivesomethingtostickto..Todothis,printyourimageincolorasnormal,Thenusinga
graphicsprogram,createanoutlineoftheimageslightlysmallerthantheactualsize,andfill
thatoutlineinwithRed204foruseintheiColor300series(Red204=brightwhite)ormake
yourimage100%Black(K)foruseintheiColor500series.

2) TheiColor500bydefaultwillprintallblackgraphicsandimagesusingcompositeblackand
textusingtrueblack.Thiscouldcauseyoursolidblackgraphicstoprintgrey/pinkinsteadof
solidwhite(whenusingthewhitekit).Inordertoaddressthis,pleasegointotheprinter
driverandadjustasfollows.Yourspecificdrivermightlooklikeeitherofthesetwochoices
below.Thischangewillforceallblackimagestoprintusingonlythewhitekitandtherefore
givingyousolidwhiteimagesasdesired.

 


3) Layyourshirtoutonatableandcarefullypositionthetransfersheetintheproperplace.
Takeyourtimeinthisstepbecauseonceit’spressedyoucannotmakechanges.Useapiece
ofscotchtapefoldedoverononesidetoholdyourtransferpaperinplaceonyourshirt
whenmovingyourgarmentovertothepresssoitstaysinplace.Thetapewillnotmeltand
canberemovedafterthepressiscompletewithoutdamagetothegarment.


Email: [email protected]
Phone: 631-590-1040
Page 13
4) TheuseofaHOTlaminatorishighlysuggestedbeforepressingthetransfersheetand
adhesivesheetstogetherinordertoavoidareaswheretheadhesivedoesnottransferto
thetonerinthefirststepwhenusing2steppaper.Thisstepisnecessarytopre‐activethe
adhesive.Ifyoudonothavealaminatoravailable,youcanalternativelychoosefromthese
twooptions:
1. Settheheatto275degreesfor45seconds
2. Settheheatto250degreesfor30seconds,press,thenrepeatthe
processagainwithasecondpressat250degreesfor30seconds

5) Foldacorneroftheadhesiveoveroroffsetthepaperssoyoucanpeeltheadhesiveoff
easily
6) Whenpressingtheadhesivetotheimage,placethesheetsonthepresswiththeadhesive
ontop.
7) Whenpeelingtheadhesiveofftheimage,holdtheimagepaperonthebottomandpullthe
adhesivepaperoffat180degrees.(Straightback)thesteepanglegivesacleanerpull.
8) Beforepressingtheimagetothematerial,prestretchtheclothwheretheimageistobe
applied
9) AfterRE‐pressingyourfinishedshirt,stretchthefabricoutabitwhileonthepress.
10) Intheeventthatsomeresidueisleftsurroundingtheimageafterpullingthetransfersheet
awayfromthematerial,simplyscrapeitoffwithyourfingernail.Thiscanbeeliminatedby
lettingitcoolfurther(3‐5minutesoffthepress).
11) Afterthetransferpaperandadhesivepaperhavebeenseparated,don’tforgettotrim
aroundyourimagetoremoveanyadhesivethatmighthavetransferredaroundtheedgesof
thepaper.











Uninet
3232 W. EL SEGUNDO BLVD * HAWTHORNE, CALIFORNIA 90250
TELEPHONE: 631-590-1040 * FAX: 631-218-3285
www.icolorprint.com
Email: [email protected]
Phone: 631-590-1040
Page 14

Other manuals for iColor 500

3

Other Uninet Printer manuals

Uninet DTF 100 User manual

Uninet

Uninet DTF 100 User manual

Uninet iColor 500 User manual

Uninet

Uninet iColor 500 User manual

Uninet IColor 800W User manual

Uninet

Uninet IColor 800W User manual

Uninet iColor 500 User manual

Uninet

Uninet iColor 500 User manual

Uninet OKIDATA C 3400 User manual

Uninet

Uninet OKIDATA C 3400 User manual

Uninet OKIDATA C5500 Installation and maintenance instructions
Uninet

Uninet OKIDATA C5500 Installation and maintenance instructions

Uninet DTF 1000 User manual

Uninet

Uninet DTF 1000 User manual

Uninet iColor 500 User manual

Uninet

Uninet iColor 500 User manual

Uninet IColor 250 User manual

Uninet

Uninet IColor 250 User manual

Uninet icolor 600 User manual

Uninet

Uninet icolor 600 User manual

Uninet iColor 300 series User manual

Uninet

Uninet iColor 300 series User manual
Uninet iColor 300 series User manual

Uninet

Uninet iColor 300 series User manual

Uninet icolor 550 User manual

Uninet

Uninet icolor 550 User manual

Uninet IColor 560 User manual

Uninet

Uninet IColor 560 User manual

Uninet icolor 550 User manual

Uninet

Uninet icolor 550 User manual

Uninet iColor LF-600 User manual

Uninet

Uninet iColor LF-600 User manual

Uninet DTF 1000 Manual

Uninet

Uninet DTF 1000 Manual

Uninet iColor 350 User manual

Uninet

Uninet iColor 350 User manual

Uninet iColor 540 User manual

Uninet

Uninet iColor 540 User manual

Uninet IColor 650 User manual

Uninet

Uninet IColor 650 User manual

Uninet icolor 550 User manual

Uninet

Uninet icolor 550 User manual

Uninet IColor 800W User manual

Uninet

Uninet IColor 800W User manual

Uninet OKIDATA C5100 Installation and maintenance instructions

Uninet

Uninet OKIDATA C5100 Installation and maintenance instructions

Uninet icolor 600 User manual

Uninet

Uninet icolor 600 User manual
Popular Printer manuals by other brands

Oce ColorWave 600 user manual

Oce

Oce ColorWave 600 user manual

CTI CP-80 Operation manual

CTI

CTI CP-80 Operation manual

Canon LBP-810 user guide

Canon

Canon LBP-810 user guide

Lexmark 522n - C Color Laser Printer Service manual

Lexmark

Lexmark 522n - C Color Laser Printer Service manual

TransAct POSJET 1500 Spare parts

TransAct

TransAct POSJET 1500 Spare parts

Epson Stylus Color 740i Start here

Epson

Epson Stylus Color 740i Start here

Canon advanced anywhere print user guide

Canon

Canon advanced anywhere print user guide

Squid Ink CoPilot 500 user guide

Squid Ink

Squid Ink CoPilot 500 user guide

Seiko I Infotech IP-5620 user guide

Seiko I Infotech

Seiko I Infotech IP-5620 user guide

Lexmark E350d Setup & installation

Lexmark

Lexmark E350d Setup & installation

Fujitsu FTP-621CDL003 Specification sheet

Fujitsu

Fujitsu FTP-621CDL003 Specification sheet

IBM RS/6000 44P Series 270 user guide

IBM

IBM RS/6000 44P Series 270 user guide

Ricoh Aficio SP 1210N Quick setup guide

Ricoh

Ricoh Aficio SP 1210N Quick setup guide

Cashino KMP-II user manual

Cashino

Cashino KMP-II user manual

Aisino RCK-600 user guide

Aisino

Aisino RCK-600 user guide

Canon BJC-4000 Service manual

Canon

Canon BJC-4000 Service manual

Canon lpb3360 user guide

Canon

Canon lpb3360 user guide

Konica Minolta bizhub 552 Setup instructions

Konica Minolta

Konica Minolta bizhub 552 Setup instructions

manuals.online logo
manuals.online logoBrands
  • About & Mission
  • Contact us
  • Privacy Policy
  • Terms and Conditions

Copyright 2025 Manuals.Online. All Rights Reserved.