manuals.online logo
Brands
  1. Home
  2. •
  3. Brands
  4. •
  5. Black & Decker
  6. •
  7. Trimmer
  8. •
  9. Black & Decker NST1118 User manual

Black & Decker NST1118 User manual

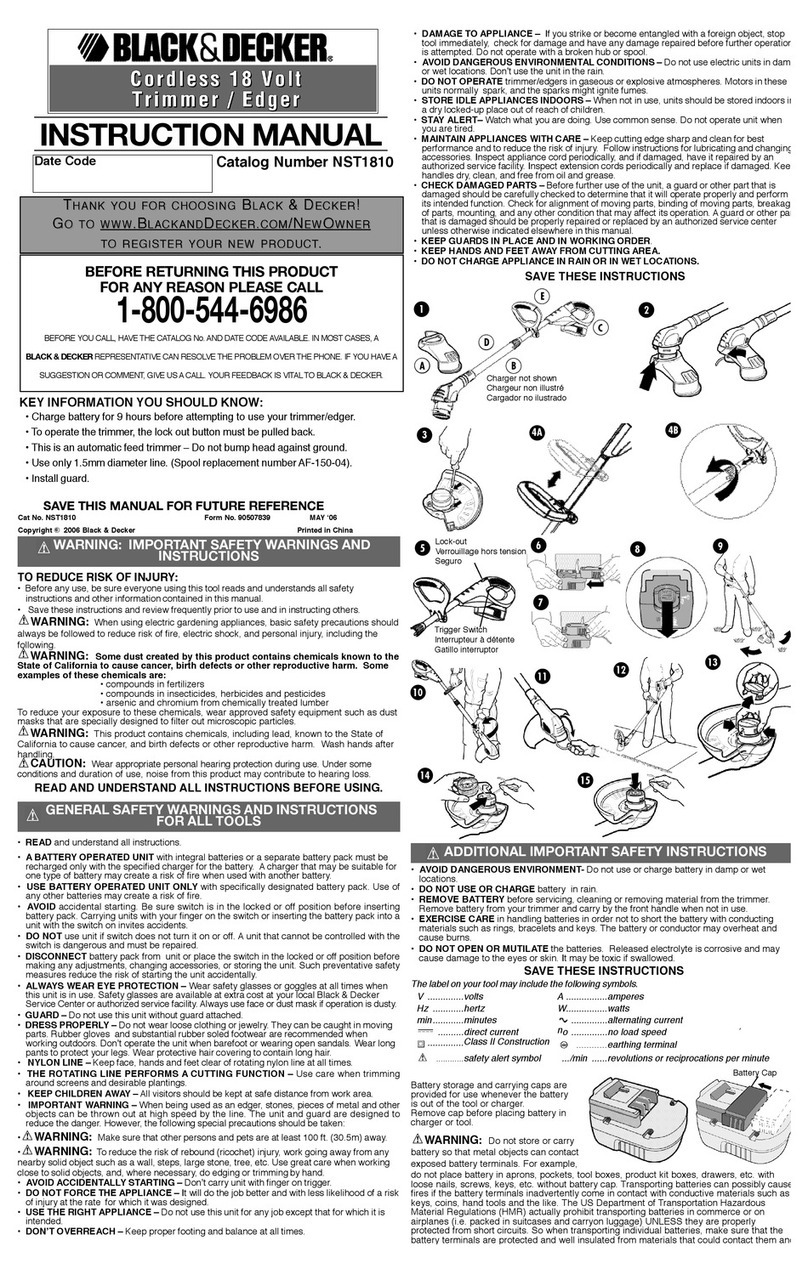
1) Unpack components and verify contents. ST118/ ST2118 contains (1) trimmer, (1) black handle, (1) guard, (1) battery ( ST1118),
(2) batteries ( ST2118) and (1) charger. OTE: ST1118 contains one battery.
2) Place battery on charge.
Important:Charge battery pack for at least 9 hours to ensure a full charge is delivered to the battery. During charging the
green LED will appear. When charging is complete the green LED will go off.
3) Install the handle.
Important:The black auxiliary handle must be installed with the
Black & Decker logo facing up.
• Press in on the buttons on both sides of the upper housing (B1).
• Partially push the handle on so that it will hold the buttons in when you
release them with your hand (B2).
• Push the handle completely onto the housing and position it slightly until it
“snaps” into place (B3).
Note: If the handle is installed upside down, the adjustment button will not
engage. To remove the handle, insert a nail or screwdriver into the small hole
on the side of the handle, push in the spring loaded button on the opposite
side of the handle, and remove the handle from the trimmer body.
4) Install the guard.
Turn the trimmer upside down so that you are looking down at the spool cap.
• Turn the guard upside down and slide it onto the orange tab below the
motor housing as shown (C1). Make sure the tabs on the guard engage the
ribs on the motor housing as shown in C2.
• Continue to slide the guard on until you hear it “snap” into place.
• Using a phillips screwdriver, insert the guard screw to complete the guard
assembly (C3).
5) Remove the tape from the line and cutting blade on the guard.
6) Adjust the mode and height.
Important:The trimmer ships in the box set in the edging mode.
• To switch the trimmer back into trimming mode, loosen the black collar lo-
cated at the top of the aluminum pole (D1).
• Rotate the pole 180°. There is a position stop at 180° to indicate you are in
trimming mode (D2).
• You may also adjust the height of the trimmer to a comfortable operating
height when the collar is loose (D3).
• Tighten the collar when the trimmer is at the desired height and mode.
7) Once the battery is charged, slide the battery into the trimmer area as shown.
8) Depress the lock off button (as shown here) in either direction and simultaneously pull the trigger.
You do not need to continue to depress the lock off button during operation.
If you have additional questions or need help, please call Black & Decker at 1-800-544-6986 from
8 a.m. to 5 p.m. EST Mon. - Fri.
Please check instruction manual for full instructions and warnings.
QUICK TART GUIDE - N T1118 / N T2118
RECHARGEABLE 18 VOLT NiCd TRING TRIMMER
1
2
A
C1 C2 C3
D1 D2 D3
E
F
B1 B2 B3
9 hours
9 heures
9 horas
Edge mode
Mode de coupe-
bordures
Modo de bordeado
Trim mode
Mode de taillage
Modo de poda
1) Déballer les pièces et vérifier si tout y est. Le modèle ST1118/ ST2118 contient (1) taille-bordures, (1) poignée noire, (1) pare-main,
(1) bloc-piles ( ST1118) ou (2) bloc-piles ( ST2118) et (1) chargeur. OTE: ST1118 contient une batterie.
2) Charger le bloc-piles.
Important : Charger le bloc-piles pendant au moins 9 heures pour assurer une charge pleine au bloc-piles. Durant la charge, la DEL verte
sʼallume. Lorsque la charge est terminée, la DEL verte sʼéteint.
3) Poser la poignée.
Important :La poignée auxiliaire noire doit être installée de manière à ce que le logo Black & Decker soit positionné vers le haut.
• Enfoncer les boutons logés de chaque côté du boîtier supérieur (B1).
• Pousser partiellement la poignée. Ainsi, les boutons seront maintenus enfoncés au moment de les relâcher (B2).
• Pousser la poignée complètement sur le boîtier et la positionner légèrement de manière à ce quʼelle « sʼenclenche » en place (B3).
Remarque : Si la poignée est posée à lʼenvers, le bouton de réglage ne sʼenclenchera pas. Pour enlever la poignée, insérer un clou ou un
tournevis dans le petit orifice pratiqué sur le côté de la poignée, enfoncer le bouton à ressort logé du côté opposé de la poignée, puis enlever la
poignée du corps du taille-bordures.
4) Poser le pare-main.
Mettre le taille-bordures à lʼenvers de manière à voir le couvercle de la bobine.
• Mettre le pare-main à lʼenvers et le glisser sur la languette orange située sous le boîtier du moteur comme le montre lʼillustration (C1). Sʼassurer
que les pattes du pare-main engagent les nervures du boîtier du moteur comme le montre lʼillustration C2.
• Continuer de glisser le pare-main jusquʼà ce quʼil « sʼenclenche » en position.
• À lʼaide dʼun tournevis cruciforme, insérer la vis du pare-main pour terminer lʼassemblage du pare-main (C3).
5) Retirer le ruban du fil et de la lame de coupe sur le pare-main.
6) Régler le mode et la hauteur.
Important : Le taille-bordures expédié dans la boîte est réglé au mode de coupe-bordures
• Pour remettre le taille-bordures en mode de taillage, desserrer le collet noir logé au sommet de la tige dʼaluminium (D1).
• Tourner la tige de 180 °. Une butée de position à 180 ° indique que le mode de taillage est réglé (D2).
• Il est également possible de régler la hauteur du taille-bordures à une hauteur dʼutilisation confortable lorsque le collet est desserré (D3).
• Serrer le collet lorsque le taille-bordures est à la hauteur et au mode souhaités.
7) Lorsque le bloc-piles est chargé, lʼinsérer dans le logement du taille-bordures comme le montre lʼillustration.
8) Enfoncer le bouton de verrouillage (comme il est indiqué ici) dans un sens ou lʼautre et actionner simultanément la détente.
Il nʼest pas nécessaire de tenir le bouton de verrouillage enfoncé en cours dʼutilisation.
Pour poser des questions supplémentaires ou obtenir de lʼaide, communiquer avec Black & Decker au 1 800 544-6986, de 8 h à 17 h H E, du
lundi au vendredi.
Consulter le mode dʼemploi pour connaître toutes les directives et tous les avertissements.
GUIDE DE DÉMARRAGE RAPIDE - N T1118 / N T2118
TAILLE-BORDURE À FIL ROTATIF DE 18 V AVEC BLOC-PILE AU NI-CD
RECHARGEABLE
1) Desembale los componentes y verifique el contenido. El modelo ST1118/ ST2118 contiene (1) podadora, (1) mango negro, (1) protector,
(1) batería ( ST1118) o (2) baterías ( ST2118) y (1) cargador. OTA: ST1118 contiene una batería.
2) Ponga a cargar la batería.
Importante: Cargue el paquete de baterías durante al menos 9 horas para garantizar que la batería reciba una carga completa. Durante la carga
el indicador LED aparecerá verde. Al completarse la carga, el LED verde se apagará.
3) Instale el mango.
Importante: El mango auxiliar negro debe instalarse con el logotipo de Black & Decker mirando hacia arriba.
• Oprima los botones a ambos lados de la cubierta superior (B1).
• Empuje el mango parcialmente de manera que oprima los botones cuando los suelte con su mano (B2).
• Empuje el mango completamente sobre la cubierta y muévalo levemente hasta que encaje en su lugar produciendo un chasquido (B3).
Nota: Si el mango se instala al revés, el botón de ajuste no se accionará. Para retirar el mango, inserte un clavo o un destornillador en el orificio
pequeño de un lado del mango, empuje hacia adentro el botón accionado por resorte del lado opuesto del mango y retire el mango del cuerpo de
la podadora.
4) Instale el protector.
Voltee la podadora de manera que pueda ver la tapa del carrete al mirar hacia abajo.
• Gire el protector al revés y deslícelo sobre la lengüeta naranja bajo la cubierta del motor como se muestra (C1). Asegúrese de que las lengüetas
del protector se empalmen con las varillas de la cubierta del motor como se muestra en C2.
• Continúe deslizando el protector hasta que encaje en su lugar produciendo un chasquido.
• Utilizando un destornillador Phillips, inserte el tornillo del protector para finalizar el ensamblaje del mismo (C3).
5) Retire la cinta de la cuerda y de la hoja de corte en el protector.
6) Ajuste el modo y la altura.
Importante: La podadora se despacha en la caja configurada en el modo de bordeado.
• Para cambiar la podadora de vuelta al modo de poda, afloje el collar negro que se encuentra en la parte superior del tubo de aluminio (D1).
• Gire el tubo 180 grados. Existe un tope de posición en 180 grados para indicarle que está en modo de poda (D2).
• También puede ajustar altura de la podadora en una altura cómoda de funcionamiento cuando el collar está suelto (D3).
• Ajuste el collar cuando la podadora esté en la altura y modo deseados.
7) Una vez cargada la batería, deslícela en el área de la podadora como se muestra.
8) Oprima el botón de bloqueo (como se muestra aquí) en cualquier dirección y simultáneamente jale el disparador.
o necesita seguir oprimiendo el botón de bloqueo durante el funcionamiento.
Si tiene alguna pregunta o si necesita ayuda, llame a Black & Decker al 1-800-544-6986, de 8 a.m. a 5 p.m. hora del Este, de lunes a viernes.
Revise el manual de instrucciones para conocer las instrucciones y advertencias completas.
Part umber 90577049 Printed in China JU E 2011
GUÍADE INICIO RÁPIDO: PODADORADE CUERDA CON BATERÍADE
NÍQUEL-CADMIO RECARGABLE DE 18 V N T1118 / N T2118

Other manuals for NST1118

4

This manual suits for next models

1

Other Black & Decker Trimmer manuals

Black & Decker GL225S User manual

Black & Decker

Black & Decker GL225S User manual

Black & Decker 244999-00 User manual

Black & Decker

Black & Decker 244999-00 User manual

Black & Decker GL300 User manual

Black & Decker

Black & Decker GL300 User manual

Black & Decker NHT524 User manual

Black & Decker

Black & Decker NHT524 User manual

Black & Decker STC1820 User manual

Black & Decker

Black & Decker STC1820 User manual

Black & Decker LST1018 User manual

Black & Decker

Black & Decker LST1018 User manual

Black & Decker GL550 User manual

Black & Decker

Black & Decker GL550 User manual

Black & Decker GLC1825L-XE User manual

Black & Decker

Black & Decker GLC1825L-XE User manual

Black & Decker GH610 User manual

Black & Decker

Black & Decker GH610 User manual

Black & Decker ST4500 User manual

Black & Decker

Black & Decker ST4500 User manual

Black & Decker NST2018 User manual

Black & Decker

Black & Decker NST2018 User manual

Black & Decker GPC1820L User manual

Black & Decker

Black & Decker GPC1820L User manual

Black & Decker GL800 User manual

Black & Decker

Black & Decker GL800 User manual

Black & Decker HT2200 User manual

Black & Decker

Black & Decker HT2200 User manual

Black & Decker LST400 User manual

Black & Decker

Black & Decker LST400 User manual

Black & Decker NST2118 User manual

Black & Decker

Black & Decker NST2118 User manual

Black & Decker ST182320 User manual

Black & Decker

Black & Decker ST182320 User manual

Black & Decker GL650 User manual

Black & Decker

Black & Decker GL650 User manual

Black & Decker LST400 User manual

Black & Decker

Black & Decker LST400 User manual

Black & Decker LST220 User manual

Black & Decker

Black & Decker LST220 User manual

Black & Decker BCSS20 User manual

Black & Decker

Black & Decker BCSS20 User manual

Black & Decker GL7033 User manual

Black & Decker

Black & Decker GL7033 User manual

Black & Decker HT18 User manual

Black & Decker

Black & Decker HT18 User manual

Black & Decker GLC1825N-XE User manual

Black & Decker

Black & Decker GLC1825N-XE User manual

Popular Trimmer manuals by other brands

Wahl 92373 operating instructions

Wahl

Wahl 92373 operating instructions

Kompernass KH 5517 operating instructions

Kompernass

Kompernass KH 5517 operating instructions

Echo SRM-210 - PARTS CATALOG SERIAL NUMBERS... parts catalog

Echo

Echo SRM-210 - PARTS CATALOG SERIAL NUMBERS... parts catalog

Craftsman WS230 Operator's manual

Craftsman

Craftsman WS230 Operator's manual

Lux Tools A-RT-20 Original instructions

Lux Tools

Lux Tools A-RT-20 Original instructions

Echo GT-231 Operator's manual

Echo

Echo GT-231 Operator's manual

BaBylissMEN SUPER-X METAL Series quick start guide

BaBylissMEN

BaBylissMEN SUPER-X METAL Series quick start guide

Masport HT 4055 owner's manual

Masport

Masport HT 4055 owner's manual

Nakayama EH5000 manual

Nakayama

Nakayama EH5000 manual

Troy-Bilt TB635 EC Addendum

Troy-Bilt

Troy-Bilt TB635 EC Addendum

Gardena ComfortCut Li-18/50 Operator's manual

Gardena

Gardena ComfortCut Li-18/50 Operator's manual

Snapper 2150 parts manual

Snapper

Snapper 2150 parts manual

Craftsman WEEDWACKER 358.791050 Operator's manual

Craftsman

Craftsman WEEDWACKER 358.791050 Operator's manual

Homelite UT32600 Engine Starting Procedure

Homelite

Homelite UT32600 Engine Starting Procedure

Stihl FSA 65 instruction manual

Stihl

Stihl FSA 65 instruction manual

Ryobi RLT8038 Original instructions

Ryobi

Ryobi RLT8038 Original instructions

Homelite UT41112B Operator's manual

Homelite

Homelite UT41112B Operator's manual

Hyundai HYHT60Li user manual

Hyundai

Hyundai HYHT60Li user manual

manuals.online logo
manuals.online logoBrands
  • About & Mission
  • Contact us
  • Privacy Policy
  • Terms and Conditions

Copyright 2025 Manuals.Online. All Rights Reserved.