8
ENGLISH
8
한국어
용도
BLACK+DECKER DVJ215B, DVJ315B 및 DVJ320B
Dustbuster® 휴대용 무전스틱 진공 청소기는 진공 청소
용으로 설계되었습니다. 본 제품은 가정용입니다.
제품을 사용하기 전에 본 사용 설명서 전체 내
용을 잘 읽고 숙지해주십시오.
안전 지침
경고! 안전 경고와 지시 사항을 모두 읽으십시
오. 아래 나열된 경고와 지시 사항을 준수하지
않으면 감전, 화재 및/또는 심각한 부상을 초
래할 수 있습니다.
본 사용 설명서에 제품의 용도가 설명되어 있습니
다. 본 사용 설명서에서 권장하는 방식 이외의 다른
방식으로 본 제품을 조작하거나 액세서리 또는 부
착물을 사용하는 경우 신체 부상의 위험이 있을 수
있습니다.
향후 참고할 수 있도록 본 사용 설명서를 잘 보관해
두십시오.
제품 사용
본 제품으로 화재를 일으킬 수 있는 액체나 물질을
빨아들이지 마십시오.
본 제품을 물 근처에서 사용하지 마십시오.
본 제품을 물에 담그지 마십시오.
충전기를 소켓에서 분리할 때 절대로 충전기 리드 선
을 잡아당기지 마십시오. 충전기 리드 선이 열, 오일
및 날카로운 가장자리에 닿지 않도록 하십시오.
안전 책임자의 감독 또는 제품 사용과 관련된 지시 사
항이 제공되고 관련된 위험 사항을 이해한 경우에만 8
세 이상의 어린이 및 신체, 지각 또는 정신 능력이 낮
거나 경험 및 지식이 부족한 사람이 본 제품을 사용할
수 있습니다. 어린이가 제품을 가지고 놀게 해서는 안
됩니다. 청소 및 사용자 유지 보수를 할 때 감독 없이
어린이 혼자 해서는 안됩니다.
검사 및 수리
사용 전, 제품에 손상되거나 결함 있는 부품이 있는지
점검하십시오. 부품 파손, 스위치 손상 등 정상적 사용에
영향을 미칠 수 있는 제품 이상이 있는지 점검하십시오.
손상되거나 결함 있는 부품이 있는 경우에는 제품을
사용하지 마십시오.
손상되거나 결함 있는 부품은 공인 수리 대리점에
의뢰하여 교체 또는 수리하십시오.
충전기 리드 선의 손상 여부를 주기적으로 점검하
ENGLISH (Original instructions)
Intended use
Your BLACK+DECKER DVJ215B, DVJ315B and DVJ320B
Dustbuster®hand-held vacuum cleaners have been designed
for vacuum cleaning purposes. These appliances are intended
for household use only.
Read all of this manual carefully
before operating the appliance.
Safety instructions
@Warning! Read all safety
warnings and all instructions.
Failure to follow the warnings
and instructions listed below may
result in electric shock, re and/or
serious injury.
uThe intended use is described in this
manual. The use of any accessory
or attachment or the performance
of any operation with this appliance
other than those recommended in this
instruction manual may present a risk
of personal injury.
uRetain this manual for future
reference.
Using your appliance
uDo not use the appliance to pick up
liquids or any materials that could
catch re.
uDo not use the appliance near water.
uDo not immerse the appliance in water.
uNever pull the charger lead to
disconnect the charger from the
socket. Keep the charger lead away
from heat, oil and sharp edges.
uThis appliance can be used by
children aged from 8 years and above
and persons with reduced physical,
sensory or mental capabilities or
lack of experience and knowledge
if they have been given supervision
or instruction concerning use of
the appliance in a safe way and
understand the hazards involved.
Children shall not play with the
appliance. Cleaning and user
maintenance shall not be made by
children without supervision.
Inspection and repairs
Before use, check the appliance for
damaged or defective parts. Check for
breakage of parts, damage to switches
and any other conditions that may affect
its operation.
uDo not use the appliance if any part is
damaged or defective.
uHave any damaged or defective parts
repaired or replaced by an authorized
repair agent.
uRegularly check the charger lead for
damage. Replace the charger if the
lead is damaged or defective.
uNever attempt to remove or replace
any parts other than those specied in
this manual.
Additional safety instructions
After use
uUnplug the charger before cleaning the
charger or charging base.
uWhen not in use, the appliance should
be stored in a dry place.
uChildren should not have access to
stored appliances.
Residual risks
Additional residual risks may arise when
using the tool which may not be included
in the enclosed safety warnings. These
risks can arise from misuse, prolonged
use etc.
ENGLISH (Original instructions)
Intended use
Your BLACK+DECKER DVJ215B, DVJ315B and DVJ320B
Dustbuster®hand-held vacuum cleaners have been designed
for vacuum cleaning purposes. These appliances are intended
for household use only.
Read all of this manual carefully
before operating the appliance.
Safety instructions
@
Warning! Read all safety
warnings and all instructions.
Failure to follow the warnings
and instructions listed below may
result in electric shock, re and/or
serious injury.
uThe intended use is described in this
manual. The use of any accessory
or attachment or the performance
of any operation with this appliance
other than those recommended in this
instruction manual may present a risk
of personal injury.
uRetain this manual for future
reference.
Using your appliance
uDo not use the appliance to pick up
liquids or any materials that could
catch re.
uDo not use the appliance near water.
uDo not immerse the appliance in water.
uNever pull the charger lead to
disconnect the charger from the
socket. Keep the charger lead away
from heat, oil and sharp edges.
uThis appliance can be used by
children aged from 8 years and above
and persons with reduced physical,
sensory or mental capabilities or
lack of experience and knowledge
if they have been given supervision
or instruction concerning use of
the appliance in a safe way and
understand the hazards involved.
Children shall not play with the
appliance. Cleaning and user
maintenance shall not be made by
children without supervision.
Inspection and repairs
Before use, check the appliance for
damaged or defective parts. Check for
breakage of parts, damage to switches
and any other conditions that may affect
its operation.
uDo not use the appliance if any part is
damaged or defective.
uHave any damaged or defective parts
repaired or replaced by an authorized
repair agent.
uRegularly check the charger lead for
damage. Replace the charger if the
lead is damaged or defective.
uNever attempt to remove or replace
any parts other than those specied in
this manual.
Additional safety instructions
After use
uUnplug the charger before cleaning the
charger or charging base.
uWhen not in use, the appliance should
be stored in a dry place.
uChildren should not have access to
stored appliances.
Residual risks
Additional residual risks may arise when
using the tool which may not be included
in the enclosed safety warnings. These
risks can arise from misuse, prolonged
use etc.
십시오. 리드 선이 손상되거나 결함이 발견되면 충
전기를 교체하십시오.
본 사용 설명서에 명시된 내용 이외에는 어떤 부품
도 제거하거나 교체하지 마십시오.
추가 안전 지침
사용 후
충전기 또는 충전 거치대를 청소하기 전에 충전기
의 플러그를 뽑으십시오.
사용하지 않을 때에는 본 제품을 습기가 없는 건조한
장소에 보관해야 합니다.
어린이가 보관된 제품을 만지지 못하도록 해야 합
니다.
충전기
본 충전기는 특정 전압에서 작동하도록 설계되었습니
다. 전원 전압이 명판에 기재된 전압과 일치하는지 항
상 확인하십시오.
경고! 충전기를 절대로 일반 전원 플러그로 교체하지
마십시오.
제품과 함께 제공된 배터리를 충전할 때는 Black &
Decker 충전기만 사용하십시오. 다른 배터리를 사용
하면 배터리가 폭발하여 신체 부상을 당하거나 손
해를 입을 수 있습니다.
절대로 비충전식 배터리를 충전하려고 하지 마십시오.
전원 코드가 손상된 경우 사고가 발생하지 않도록
제조업체 또는 공인 BLACK+DECKER 서비스 센터에
서 교체해야 합니다.
충전기에 물이 닿지 않도록 하십시오.
충전기를 해체하거나 열지 마십시오.
충전기를 시험하지 마십시오.
제품/배터리는 충전 시 환기가 잘되는 장소에 두어
야 합니다.
배터리
어떤 이유로든 배터리 팩을 절대 열려고 하지 마십
시오.
배터리에 물이 닿지 않도록 하십시오.
배터리가 열에 노출되지 않도록 하십시오.
온도가 40°C를 초과할 수 있는 곳에 보관하지 마십
시오.
주변 온도가 10°C - 40°C 사이에 있을 때에만 충전하십
시오.
충전할 때는 이 청소기와 함께 제공된 충전기만 사
용해야 합니다. 잘못된 충전기를 사용하면 감전을
초래하거나 배터리가 과열될 수 있습니다.
배터리를 폐기할 때는 "환경 보호" 섹션에 나와 있
는 지시 사항을 따르십시오.
9
한국어
부상을 당하거나 화재의 위험이 있을 수 있으므로
구멍이나 충격 등으로 배터리 팩을 손상/변형시키
지 마십시오.
손상된 배터리를 충전하지 마십시오.
극한 상황에서, 배터리 누출이 발생할 수 있습니다.
배터리에 액체가 보일 경우 헝겊을 사용하여 주의
깊게 닦아내십시오. 피부에 닿지 않도록 하십시오.
피부나 눈에 닿은 경우, 아래의 지침을 따르십시오.
경고! 배터리 신체 부상의 위험이 있거나 재산상의 손해가
발생할 수 있습니다. 피부에 닿으면, 즉시 물로 씻어내십시
오. 적열 상태, 통증 또는 염증이 발생할 경우, 치료를 받으
십시오. 눈에 들어간 경우, 즉시 깨끗한 물로 씻어내고 치
료를 받으십시오.
전기 안전
충전기에 붙은 기호
제품을 사용하기 전에 본 사용 설명서 전체
내용을 잘 읽고 숙지해주십시오.
이 제품 이중으로 절연되어 있으므로 접지
선이 필요 없습니다. 전원이 전동기 라벨에
기재된 전압과 일치하는지 항상 확인하십시
오.
충전 거치대는 실내용으로만 사용합니다.
제품에 부착된 레이블
다음 기호는 날짜 코드와 함께 본 제품에 나옵니다.
제품을 사용하기 전에 본 사용 설명서 전
체 내용을 숙독하십시오.
충전기 S010Q로만 사용할것
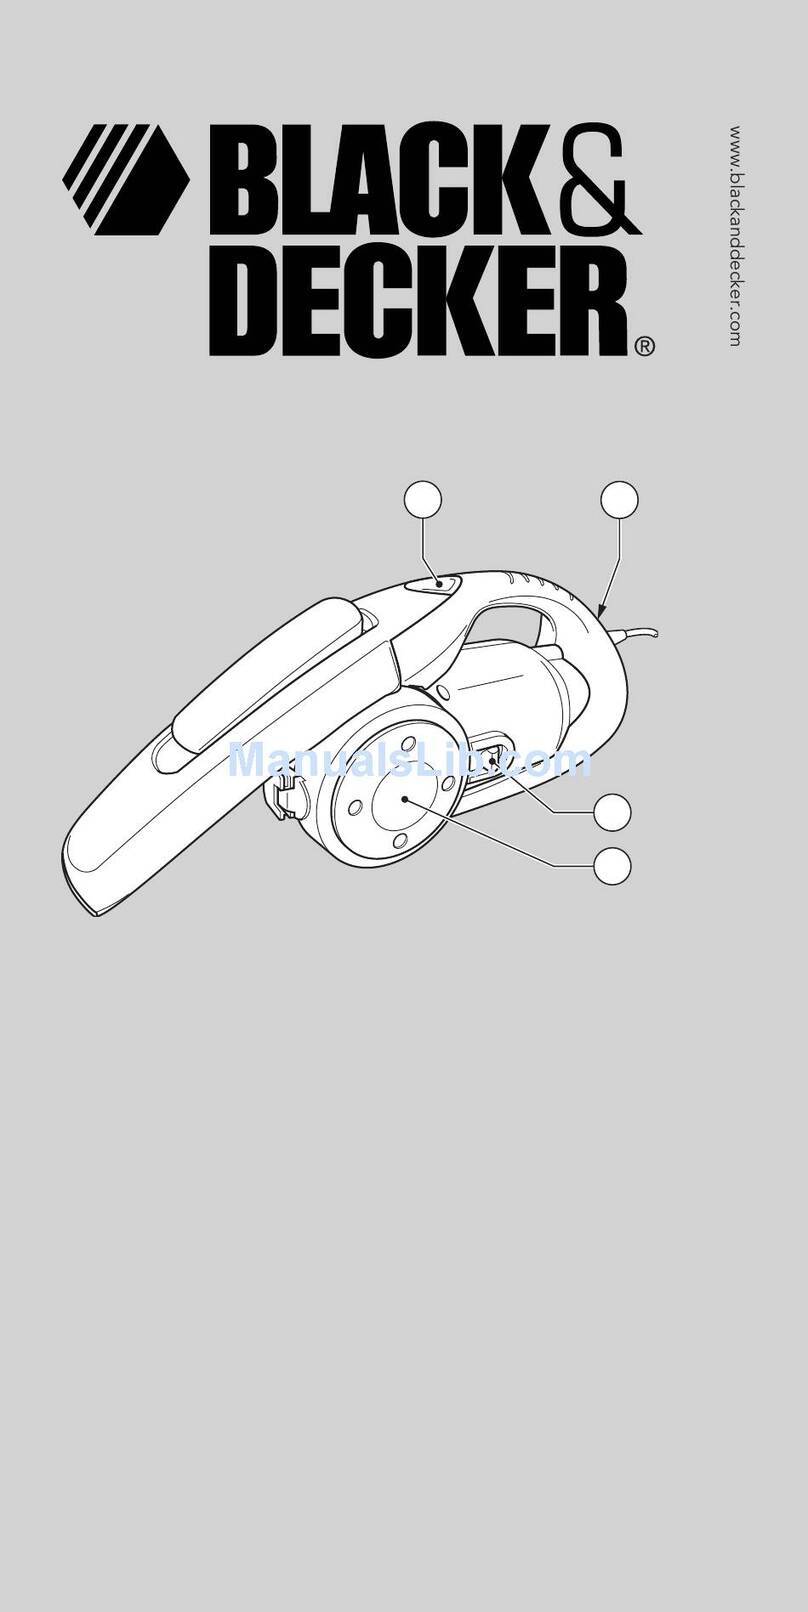
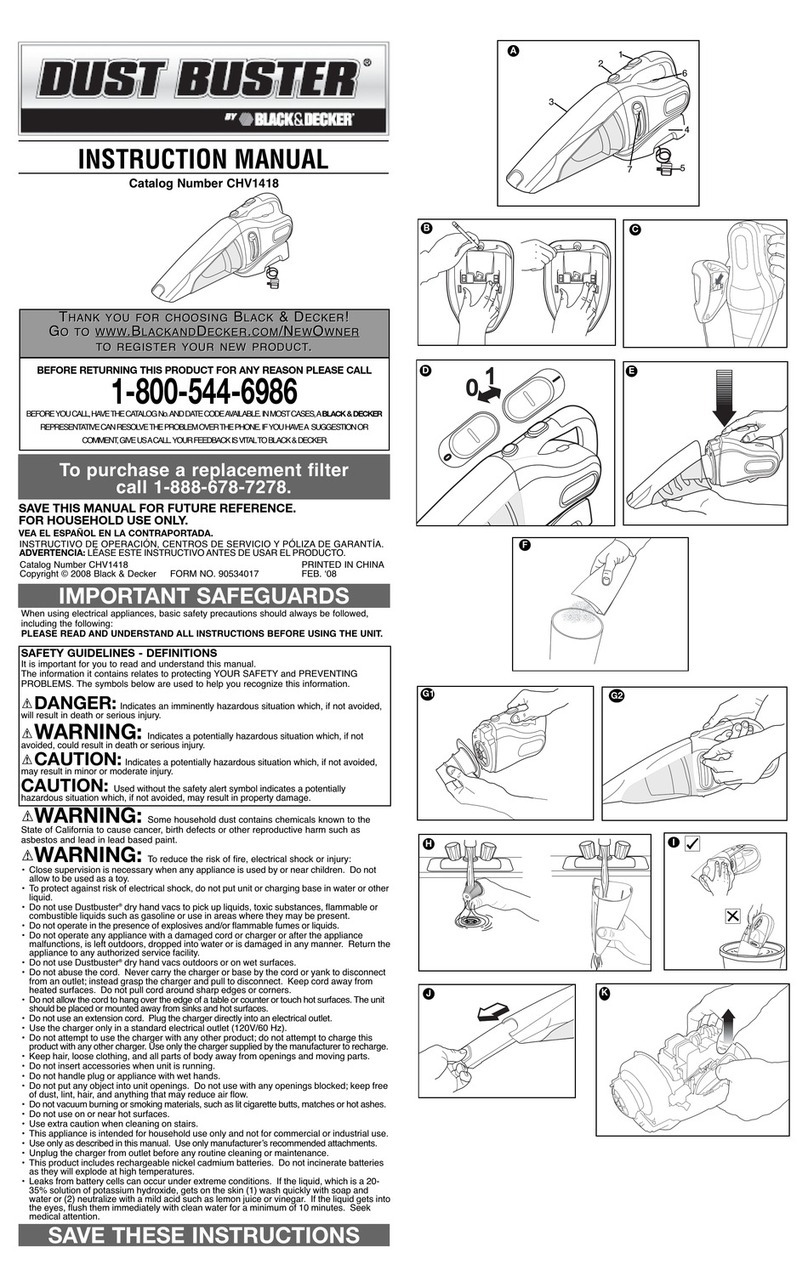
기능
본 청소기에는 다음 기능들 중 일부 또는 전부가 포함
되어 있습니다.
1. On/off 전원 스위치
2. 핸들
3. 노즐
4. 히든틈새노즐
5. LED 충전 표시등
6. 먼지통
7. 충전 거치대
8. 플립 다운 브러시
9. 충전기
6
ENGLISH (Original instructions)
Charging (Fig. D)
uPlace the appliance onto the charging base (7) and plug
into the electrical outlet.
uSwitch the electrical outlet on. The LED charging indicator
(5) will illuminate.
Dual LED Display
B. LED Charging display
Battery icon is illuminated when appliance is switched on
pattern chart in this manual).
C. BOOST mode
Illuminates when the appliance is in BOOST mode.
LED Patterns
Charging
Battery Fault
Charger Fault
Battery Hot
B
C
Electrical safety
Symbols on the charger
Read all of this manual carefully before using the
appliance.
#This tool is double insulated; therefore no earth wire
is required. Always check that the power supply
corresponds to the voltage on the rating plate.
$The charging base is intended for indoor use only.
Labels on appliance
The following symbols appear on this appliance along with the
date code
Read all of this manual carefully before
using the appliance
S010Q 14 Only use with charger S010Q 14
Features
This tool includes some or all of the following features.
1. On/off power switch
2. Handle
3. Nozzle
4. Pull out crevice tool
5. LED charging indicator
6. Dust bowl
7. Charging base
8. Flip down brush
9. Charger
Use
Switching on and off (Fig. A)
uPress the button to turn, on the unit operates in slow
speed, low power mode, conserving the battery life.
uPress the button again, and the unit goes to a BOOST
mode.
uPressing the button again will turn the product off.
Using the pull out crevice tool (Fig. B,C)
u
clicks in place.
uTo retract the crevice tool (4) press the crevice tool release
button (4a) allowing it to return to its normal position
(Fig. B).
Note: The flip down brush (8) can only be utilised when the
crevice tool is in the retracted position.
6
ENGLISH (Original instructions)
Charging (Fig. D)
uPlace the appliance onto the charging base (7) and plug
into the electrical outlet.
uSwitch the electrical outlet on. The LED charging indicator
(5) will illuminate.
Dual LED Display
B. LED Charging display
Battery icon is illuminated when appliance is switched on
pattern chart in this manual).
C. BOOST mode
Illuminates when the appliance is in BOOST mode.
LED Patterns
Charging
Battery Fault
Charger Fault
Battery Hot
B
C
Electrical safety
Symbols on the charger
Read all of this manual carefully before using the
appliance.
#This tool is double insulated; therefore no earth wire
is required. Always check that the power supply
corresponds to the voltage on the rating plate.
$The charging base is intended for indoor use only.
Labels on appliance
The following symbols appear on this appliance along with the
date code
Read all of this manual carefully before
using the appliance
Only use with charger S010Q 14
Features
This tool includes some or all of the following features.
1. On/off power switch
2. Handle
3. Nozzle
4. Pull out crevice tool
5. LED charging indicator
6. Dust bowl
7. Charging base
8. Flip down brush
9. Charger
Use
Switching on and off (Fig. A)
uPress the button to turn, on the unit operates in slow
speed, low power mode, conserving the battery life.
uPress the button again, and the unit goes to a BOOST
mode.
uPressing the button again will turn the product off.
Using the pull out crevice tool (Fig. B,C)
u
clicks in place.
uTo retract the crevice tool (4) press the crevice tool release
button (4a) allowing it to return to its normal position
(Fig. B).
Note: The flip down brush (8) can only be utilised when the
crevice tool is in the retracted position.
사용법
전원 켜기 및 끄기(그림 A)
버튼을 눌러서 장치를 켜고 느린 속도, 낮은 전원
모드에서 작동해서 배터리 수명을 아낍니다.
버튼을 다시 누르면, 장치가 BOOST 모드로 들어갑니다.
버튼을 또 다시 누르면, 제품이 꺼집니다.
히든틈새노즐 사용 (그림 B,C)
제자리에 들어가 딸깍 소리가 날 때까지 그림 C와
같이 틈새 노즐(4)를 연장합니다.
틈새 노즐(4)를 집어 넣으려면, 정상 위치로 돌아갈 수
있도록 틈새 노즐 해제 버튼(4a)을 누릅니다 (그림 B).
참고: 플립 다운 브러시(8)는 틈새 노즐이 들어가 있을
때 이용할 수 있습니다.
충전(그림 D)
제품을 충전 거치대(7)에 놓고 전기 콘센트의 플러
그를 꽂습니다.
전기 콘센트의 스위치를 켭니다. LED 충전 표시등
(5)이 점등됩니다.
6
ENGLISH (Original instructions)
Charging (Fig. D)
uPlace the appliance onto the charging base (7) and plug
into the electrical outlet.
uSwitch the electrical outlet on. The LED charging indicator
(5) will illuminate.
B. LED Charging display
Battery icon is illuminated when appliance is switched on
pattern chart in this manual).
C. BOOST mode
Illuminates when the appliance is in BOOST mode.
LED Patterns
Charging
Battery Fault
Charger Fault
Battery Hot
Electrical safety
Symbols on the charger
Read all of this manual carefully before using the
appliance.
#This tool is double insulated; therefore no earth wire
is required. Always check that the power supply
corresponds to the voltage on the rating plate.
$The charging base is intended for indoor use only.
Labels on appliance
The following symbols appear on this appliance along with the
date code
Read all of this manual carefully before
using the appliance
S010Q 14 Only use with charger S010Q 14
Features
This tool includes some or all of the following features.
1. On/off power switch
2. Handle
3. Nozzle
4. Pull out crevice tool
5. LED charging indicator
6. Dust bowl
7. Charging base
8. Flip down brush
9. Charger
Use
Switching on and off (Fig. A)
uPress the button to turn, on the unit operates in slow
speed, low power mode, conserving the battery life.
uPress the button again, and the unit goes to a BOOST
mode.
uPressing the button again will turn the product off.
Using the pull out crevice tool (Fig. B,C)
u
clicks in place.
uTo retract the crevice tool (4) press the crevice tool release
button (4a) allowing it to return to its normal position
(Fig. B).
Note: The flip down brush (8) can only be utilised when the
crevice tool is in the retracted position.
