manuals.online logo
Brands
  1. Home
  2. •
  3. Brands
  4. •
  5. Black Box
  6. •
  7. Modem
  8. •
  9. Black Box ME801A-E User manual

Black Box ME801A-E User manual

TX+
TX-
RX+
RX-
ME801A-E
J1
RS-232
CONNECTOR
SPECIFICATIONS:
Interface: RS-232-C (DCE) to attached local device;
Proprietary balanced 4-wire to line.
Protocol: Synchronous
Clock Source: Local internal (each SHM-B Sync unit
independently generates it's own clock.
Operation: 4-wire, Full Duplex, point-to-point.
Flow Control: Hardware (RTS and/or DTR), local only (control
signals are not passed across the 4-wire line;
transparent to software (X-ON/X-OFF).
Data Rate: 19,200, 9600, 4800, 2400, 1200, or 600 bps.
Loopback: Simultaneous local loopback to attached RS-232
device and remote loopback to remote SHM-B Sync
(user-controllable)
User Controls: (1) Front-mounted push-button to turn loopback
ON and OFF. (6) Internal pairs of jumper posts for
setting the data rate. (3) Internal pairs of jumper posts
for setting CTS delay.
Connectors: (1) DB25 Female connector; (1) 4-screw
terminal block.
Indicators: (2); (1) TD and (1) RD.
Leads/Signals Supported: RS-232: TD, RD, RTS, CTS, DSR,
SGND, DCD, TC, RC, DTR. Pins 1 thru 8, 15, 17,
and 20.
Surge Protection: Internal opto-isolators (effective up to
20 VDC) on transmit and receive lines.
Power: Power is supplied by a wall-mounted power transformer.
Primary 230VAC +/- 10%, 50 Hz, 5 watts.
Secondary: 17 VAC, 700 ma
External Power Supply Part # = PS008E
S2
Loopback
TD
RD
TERMINAL
BLOCK
GND
LONG
SHORT
NONE
CTS-DELAY
SELECTION
600
1200
2400
4800
9600
19200
DATA RATE
SELECTION
Data Rate
in bps Distance
in miles Distance
in km
19,200
9,600
4,800
2,400
1,200
600
.75
.9
1
2
3.5
5
1.2
1.4
8
5.6
1.6
3.2
INTRODUCTION:
The Short-Haul Modem-B Sync (SHM-B Sync for short) is a synchronous full-duplex 4-wire line
driver and receiver that makes it possible for two RS-232-C devices to communicate across
distances up to 5 miles (8 km), at data rates up to 19,200 bps. In addition to its transmitter and
receiver circuits, the SHM-B Sync also features status LED's a loopback switch, and support for
RS-232 clock and control signals.
The SHM-B Sync is designed to operate with 4-wire cable. It is also designed for maximum
operator safety. There are no voltages greater than 12 VDC or 17 VAC present on the unit's circuit
board. Opto-isolation circuits protect both the transmit and receive lines against voltage surges (up
to 20 VDC) such as those caused by lightning.
The SHM-B Sync is available in either a 120-VAC (ME801A) or 220-VAC (ME801A-E)
standalone version or a card version (ME801-C) that will fit in our ME810 or RM007 card chassis.
CONFIGURATION:
Before you install a pair a SHM-B Sync units, you should set their configuration jumpers as
necessary. Caution!
If you have the card version, make very sure that the SHM-B
Sync card is not installed in a powered chassis when you
configure it. If you have the standalone version, make sure
that it is unplugged and is disconnected from any other devices.
No voltages greater than 17 VAC are ever present on the board
even when it is powered, but the possibility of electric shock
should always be avoided.
When you handle the SHM-B Sync's circuit board, take every
reasonable precaution against damaging the board with static
electricity. At the very least, discharge yourself by touching a
fixed metal surface before handling the board; if possible, stand
on an anti-static mat and wear a grounding strap or anti-static
gloves.
There are two sets of jumper posts mounted on the SHM-B Sync's circuit board.
1. Six pairs of posts are used to set the SHM-B Sync's data rate. They're at the front of
the left-hand side of the board. The six possible data-rate settings are 600, 1200,
2400, 4800, 9600, and 19200 bps. The factory-default value is 9600 bps; if your
RS-232 equipment is using one of the other data rates, set the jumpers in both units
accordingly by moving the jumper to the appropriate pair of posts. (The SHM-B Sync
units must both be set to the same data rate, which they will generate internally; the
attached devices must be set to accept clock from them).
2. Three pairs of posts are used to set the SHM-B Sync's CTS delay. They are at the
rear of the right-hand side of the board. The CTS delay is the amount of time that the
SHM-B Sync waits after detecting that the attached device has raised RTS before it
responds by raising CTS. The possible settings are LONG (53 ms), SHORT (7 ms)
or NONE. Factory default is NONE, but if your RS-232 device needs to see a CTS
delay in order to function properly, move the jumper to the appropriate post in that
SHM-B Sync only. INSTALLATION:
1. Open the case of one of the SHM-B Sync units.
2. Thread the bare ends of the four wires into the four screw terminals on the SHM-B
Sync's board marked RX+, RX-, TX+, and TX-. Refer to drawing on the next page for
proper wiring of the terminal blocks.
3. Plug one end of an RS-232 cable into the DB25 female connector on the rear of the
unit. Avoid running this cable farther than 50 ft.
4. Plug the other end of the RS-232 cable into a powered-down device whose serial
communication you want to extend.
5. Repeat steps 1 thru 4 with the remote site's SHM-B Sync unit.
RX+
RX-
TX+
TX-
TX+
TX-
RX+
RX-
WIRING DIAGRAM
OPERATION:
While the SHM-B Sync and its attached devices are plugged in and turned on, the system should operate continuously
without requiring human intervention. You can, however, monitor the unit's status at any time by looking at the LED's marked
"TD" and "RD" on the unit's front panel. These will indicate the logic status of the transmitter and receiver circuitry,
respectively: They will light green for a "high" logic level or red for a "low" logic level, and will flicker as data is transmitter and
received. (These LED's respond to the actual transmitted and received signals, not the TD and RD lines of the RS-232
interface).The RS-232 Signals, Flow Control, and Synchronous Timing:
The SHM-B Sync should be connected to your RS-232 device with a standard RS-232 cable. The cable must have a DB25
male connector at the SHM-B Sync's end. The type of connector at the other end will depend on what type of RS-232 device
you're attaching, and the pinning of the cable will depend on whether the device is a DTE or DCE;
1. To connect a sync terminal, a PC running a sync protocol, or another DB25 male sync-DTE serial port, use a
straight-through-pinned DB25 male-to-female RS-232 cable such as our product code ECN25C-MF.
2. To connect a mux's composite port or another DB25 female sync-DTE serial port, use a straight-through-pinned
DB25 male-to-male RS-232 cable such as our product code ECN25C-MM.
3. To connect a sync modem, a mux's channel port, or another DB25 female sync-DCE serial port, use cross-
pinned DB25 male-to male tail-circuit cable such as product code EYN255C.
To implement flow control as soon as the system begins operating, each SHM-B Sync unit forces its own RTS, CTS, DSR,
and DTR signals "High" (above +3V), and as soon as each unit detects the presence of the one at the far end, it also raises
CD in order to signal the attached device to expect data. If the cables are correctly wired and attached, the system is ready
for continuous data transmission.
The control signals will stay in this state unless:
1. One of the SHM-B Sync units is powered down (all signal transmission at its end will cease and the other SHM-B
Sync will lower CD).
2. The 4-wire cable is broken or detached (both SHM-B Sync units will lower CD).
3. An attached device is powered down or lowers DTR or RTS (its attached SHM-B Sync unit will drop carrier and
the other will lower CD).
As far as the synchronous clock signals go, each SHM-B Sync will generate its own internal clock and continuously
transmit it to the attached device on both the Transmit Clock (TC) and Receive Clock (RC) leads while the system is operating.
The SHM-B Sync cannot accept clock from the attached device; it also cannot buffer signals, so it's very important
that the two SHM-B Sync units are set to the same data rate.
Note:
Always keep in mind that both clocking and flow control operate
locally only--the data signals are the only signals passed across
the 4-wire line.

Other Black Box Modem manuals

Black Box ME615A User manual

Black Box

Black Box ME615A User manual

Black Box MD403A User manual

Black Box

Black Box MD403A User manual

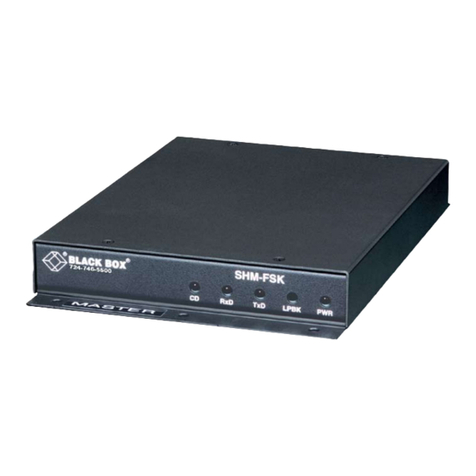
Black Box Short-Haul Modem-FSK User manual

Black Box

Black Box Short-Haul Modem-FSK User manual

Black Box ME605A-FST User manual

Black Box

Black Box ME605A-FST User manual

Black Box MPI Series User manual

Black Box

Black Box MPI Series User manual

Black Box LES1204A-3G User manual

Black Box

Black Box LES1204A-3G User manual

Black Box ME759C-RJ45 User manual

Black Box

Black Box ME759C-RJ45 User manual

Black Box ME800A-R2 User manual

Black Box

Black Box ME800A-R2 User manual

Black Box MD1621A User manual

Black Box

Black Box MD1621A User manual

Black Box ME605A-FST User manual

Black Box

Black Box ME605A-FST User manual

Black Box ME0010A-VDSL User manual

Black Box

Black Box ME0010A-VDSL User manual

Black Box ME800A-PLUS-R2 User manual

Black Box

Black Box ME800A-PLUS-R2 User manual

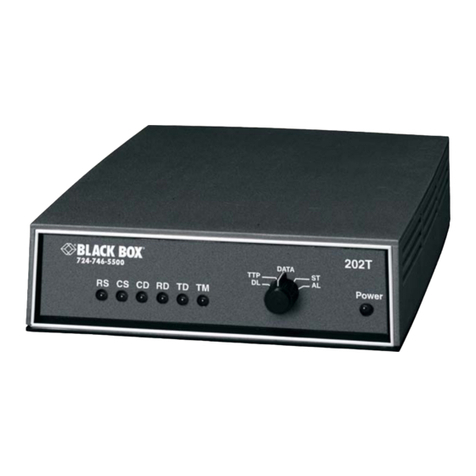
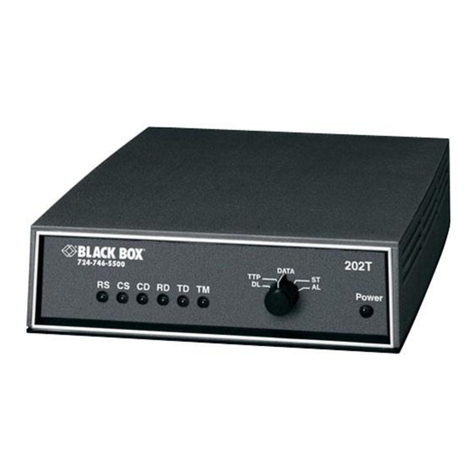
Black Box 202T User manual

Black Box

Black Box 202T User manual

Black Box ME795A User manual

Black Box

Black Box ME795A User manual

Black Box G.703 NTU w/V35 User manual

Black Box

Black Box G.703 NTU w/V35 User manual

Black Box CSU/DSU MS/DBU User manual

Black Box

Black Box CSU/DSU MS/DBU User manual

Black Box ME570A-MST-R2 User manual

Black Box

Black Box ME570A-MST-R2 User manual

Black Box High Speed SHM-B Async User manual

Black Box

Black Box High Speed SHM-B Async User manual

Black Box SHM-B Sync User manual

Black Box

Black Box SHM-B Sync User manual

Black Box USB Director RS-232 User manual

Black Box

Black Box USB Director RS-232 User manual

Black Box Tote-a-Fax 542 User manual

Black Box

Black Box Tote-a-Fax 542 User manual

Black Box MDS931AE-2 User manual

Black Box

Black Box MDS931AE-2 User manual

Black Box MD1650A-JP User manual

Black Box

Black Box MD1650A-JP User manual

Black Box MD3400A User manual

Black Box

Black Box MD3400A User manual

Popular Modem manuals by other brands

MyGica T232 user guide

MyGica

MyGica T232 user guide

Patton electronics 1058 user manual

Patton electronics

Patton electronics 1058 user manual

TP-Link TD-8616B user guide

TP-Link

TP-Link TD-8616B user guide

TP-Link TD-W8968 Quick installation guide

TP-Link

TP-Link TD-W8968 Quick installation guide

Comtech EF Data CDM-625A Installation and operation manual

Comtech EF Data

Comtech EF Data CDM-625A Installation and operation manual

Ebyte E870-E1 user manual

Ebyte

Ebyte E870-E1 user manual

Huawei E397U-53 quick start guide

Huawei

Huawei E397U-53 quick start guide

Sierra Wireless AirCard 503 user manual

Sierra Wireless

Sierra Wireless AirCard 503 user manual

Datalogic Star user guide

Datalogic

Datalogic Star user guide

Dantel 49013 Installation & operation manual

Dantel

Dantel 49013 Installation & operation manual

ADC 410F user manual

ADC

ADC 410F user manual

Navini Networks Ripwave CPE Quick installation guide

Navini Networks

Navini Networks Ripwave CPE Quick installation guide

Bentley iDirect installation guide

Bentley

Bentley iDirect installation guide

Maestro M100 2G Quick start guide & user manual

Maestro

Maestro M100 2G Quick start guide & user manual

NimbeLink Skywire LTE CAT1 quick start guide

NimbeLink

NimbeLink Skywire LTE CAT1 quick start guide

NETGEAR DGND3800B installation guide

NETGEAR

NETGEAR DGND3800B installation guide

Cradlepoint MC100W quick start guide

Cradlepoint

Cradlepoint MC100W quick start guide

Aztech DSL Turbo 900 Package user manual

Aztech

Aztech DSL Turbo 900 Package user manual

manuals.online logo
manuals.online logoBrands
  • About & Mission
  • Contact us
  • Privacy Policy
  • Terms and Conditions

Copyright 2025 Manuals.Online. All Rights Reserved.