manuals.online logo
Brands
  1. Home
  2. •
  3. Brands
  4. •
  5. Aztech
  6. •
  7. Modem
  8. •
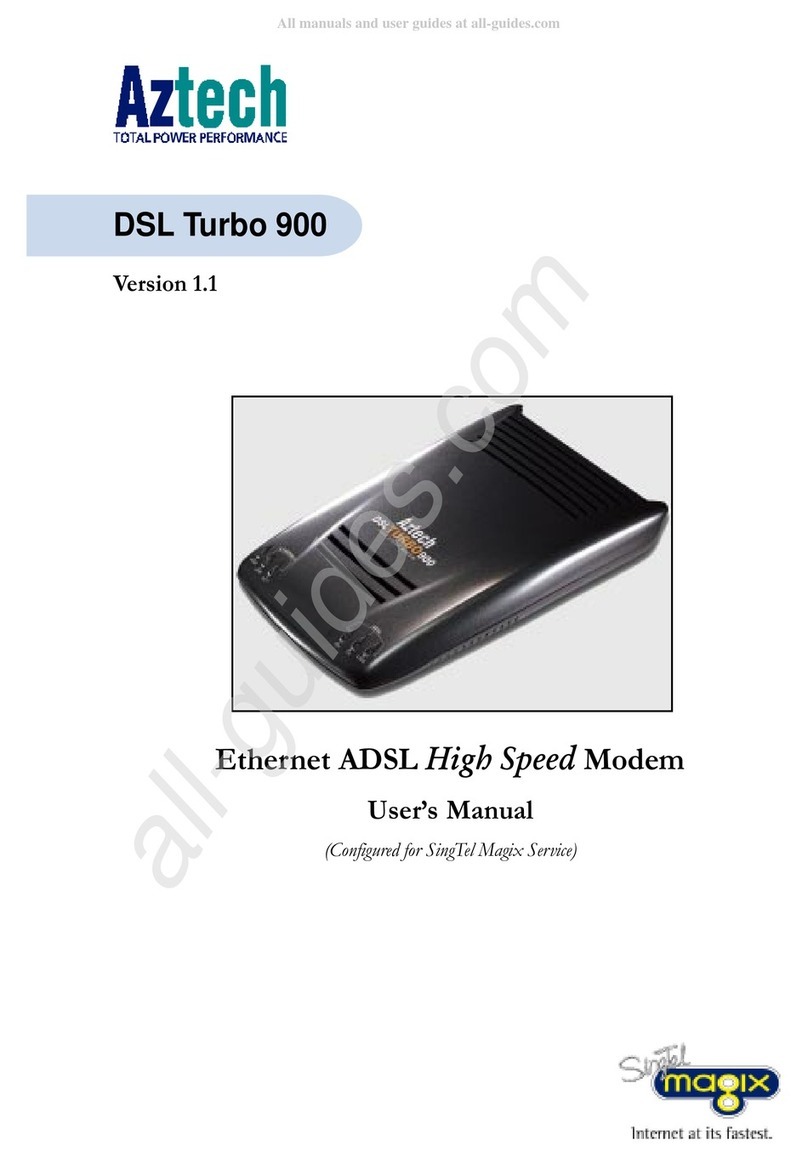
  9. Aztech DSL Turbo 900 Package User manual

Aztech DSL Turbo 900 Package User manual

DSL Turbo 900
Version 1.1
Ethernet ADSL High Speed Modem
Users Manual
(Configured for SingTel Magix Service)
Contents
○○○○○○○○○○○○○○○○○○○○
Product warranty does not apply to damage caused by lightning, power surges or wrong voltage usage.
Introducing DSL Turbo 900 .......................................... 5
1.1 Overview ...........................................................................5
1.2 DSL Turbo 900 Features ......................................................6
Before You Begin ......................................................... 9
2.1 Package ..............................................................................9
2.2 Minimum System Requirements ...........................................10
2.3 Operating Environment ......................................................10
2.4 Safety Precaution ...............................................................10
Setting Up DSL Turbo 900 ........................................... 11
3.1 Setup Overview .................................................................11
3.2 Connecting DSL Turbo 900 ................................................12
3.3 Verifying Your Connections ................................................15
Configuring Your Ethernet Card
(For Windows® 95 users only) ......................................................... 17
Installing the Client Software.......................................... 21
5.1 Installing the Software ........................................................21
5.2 Establishing the Magix Connection ........................................25
5.3 Checking the Connection Information ...................................26
5.4 Disconnecting from Magix ...................................................26
5.5 Changing of Entry Settings ..................................................27
5.6 Changing of Your Magix Password ........................................28
Web Browser Configurations for Magix............................ 31
6.1 Configuring Internet Explorer v3.02 to access Magix Service ....31
6.2 Configuring Internet Explorer v4.0 to access Magix Service ......32
6.3 Configuring Internet Explorer v5.0 to access Magix Service ......33
6.4 Configuring Netscape Navigator Gold v3.0 to access
Magix Service....................................................................34
6.5 Configuring Netscape Communicator (v4.02 and above) to
access Magix Service ..........................................................35
Email Configurations for Magix ...................................... 37
7.1 Setting Up Outlook Express for Magix Service ........................37
7.2 Setting Up Mail and Newsgroup Services for Netscape
Communicator 4.05 ..........................................................44
Uninstalling the Client Software...................................... 49
Technical Specifications ................................................ 51
Frequently Asked Questions .......................................... 55
Troubleshooting ........................................................... 57
Technical Support ........................................................ 61
5
○○○○○○○○○○○○○○○○○○○○○○○○○○○○○○○○○○○○○○○○○
1. Introducing DSL Turbo 900
Introducing
DSL Turbo 900
1.1 Overview
Congratulations on your purchase of DSL Turbo 900!
DSL Turbo 900 is an External Bridge Modem that uses the latest communication
technology, ADSL (Asymmetric Digital Subscriber Line) to offer faster and
uninterrupted Internet access. It allows use of real-time, interactive multimedia
and broadcast-quality for services such as video-on-demand, collaborative
computing and distance learning.
DSL Turbo 900 is capable of data rate in both Full-Rate and G.Lite, with Full Rate
transmission at up to 8 Mbps downstream, 640 Kbps upstream1and G.Lite
transmission at up to 1.5 Mbps downstream, 512 Kbps upstream1. Major features
include the following:
ADSL Protocols Support
To ensure the broadest customer reach, DSL Turbo 900 features multiple data
encapsulation formats for DSL transport over ATM PVCs, including the widely
supported ADSL protocol RFC 1483 (Ethernet Over ATM).
Compatibility (Interoperability)
Multimode ADSL support: ANSI T1.143 Issue 2, ITU-T G.992.1 (G.dmt) and
G.992.2 (G.Lite). DSL Turbo 900 uses discrete Multi-tone (DMT) line encoding
scheme which is also used by major ADSL equipment manufacturers, thus further
guarantees interoperability with network service providers worldwide.
○○○○○○○○○○○○○○○○○○○○
This section gives a brief introduction of DSL Turbo 900 features and
its specifications.
1The actual downstream and upstream rates will depend on the service package offered by your
ADSL Service Provider.
6
○○○○○○○○○○○○○○○○○○○○○○○○○○○○○○○○○○○○○○○○○
1. Introducing DSL Turbo 900
ADSL Receive LED
(RX)
Lights up when the
ADSL Line is receiving
data.
Ethernet Activity LED (ACT)
Lights up when the Ethernet is
transmitting/receiving data.
ADSLStatusLED(LINK)
Lights up when the ADSL
Line is established.
Power LED (PWR)
Lights up when Power
switch is pressed ON.
Ethernet Link LED (LINK)
Lights up when the Ethernet link is
established.
ADSL Transmits LED (TX)
Lights up when the ADSL Line is
transmitting data.
1.2 DSL Turbo 900 Features
1.2.1 Front View
7
○○○○○○○○○○○○○○○○○○○○○○○○○○○○○○○○○○○○○○○○○
1. Introducing DSL Turbo 900
Power Connector (DC IN)
To connect to your Mains supply
Power Switch (PWR)
To power on or off the modem.
I - indicates ON position
O -indicates OFF position
Ethernet Jack (ETHERNET)
10Base-T Ethernet jack (RJ-45) to connect
to your Ethernet card
Serial Port (SERIAL)
9-pin serial port for local network management
Line Jack (LINE)
Telephone jack (RJ-11) to connect to the
ADSL Line
Phone Jack2(TEL)
Telephone jack (RJ-11) to connect to the
Telephone Handset
2This optional connection provides easy access to your Telephone set while working near the
modem.
1.2.2 Rear View
8
○○○○○○○○○○○○○○○○○○○○○○○○○○○○○○○○○○○○○○○○○
1. Introducing DSL Turbo 900
1.3 Knowing Your Cables
To ensure that you are using the correct cables for the modem, go through the
following table on the cable types, required for the corresponding jacks.
Jacks Types of cables required
ETHERNET RJ-45 UTP Category 3, 4 or 5 Crossover cable
SERIAL DB-9 Straight cable
LINE RJ-11 cable
1.3.1 RJ-45 UTP Ethernet Cable
RJ-45 cable is used for connection to your Ethernet card. It acts as a tranmission
media between your Ethernet card and your modem. One end is connected to the
Ethernet jack (ETHERNET) on your modem and the other end to yourEthernet card.
1.3.2 RJ-11 Cable
RJ-11 cable is used for connection to the ADSL line. It provides a connection from
your modem to your ADSL Provider. One end is connected to the Line jack (LINE)
on your modem and the other end to your Telephone Wall Socket.
9
○○○○○○○○○○○○○○○○○○○○○○○○○○○○○○○○○○○○○○○○○
2. Before You Begin
2.1 Package
Ensure that you have the following items in your DSL Turbo 900 package. For any
missing items, please contact your dealer immediately.
Before You Begin
This chapter contains information that you need to know before
setting up your modem. It is important that you go through them.
○○○○○○○○○○○○○○○○○○○○
DSL Turbo 900 DSL Turbo 900
Installation CD
DSL Turbo 900
User’s Manual
Power adapter
UTP Crossover
Ethernet cable (RJ-45)
Telephone cable (RJ-11)
Power cable
10
○○○○○○○○○○○○○○○○○○○○○○○○○○○○○○○○○○○○○○○○○
2. Before You Begin
2.2 Minimum System Requirements
Make sure that your computer meets the following requirements before you start
your setup.
•Pentium MMX 233MHz with Ethernet card that is installed with TCP/IP Protocol
(For video streaming, Pentium II 300MHz or above is recommended)
•A Serial Port
•A Crossover Ethernet Cable
2.3 Operating Environment
For optimum performance, ensure that DSL Turbo 900 operates within the following
operating environment.
2.3.1 Temperature
Operating : 10oto 45 o Celsius
50o to 113 o Fahrenheit
Non-Operating : -25 o to 70 o Celsius
-13 o to 158 o Fahrenheit
2.3.2 Humidity
Operating : 30% to 80% Relative Humidity (Non-Condensing)
Non-Operating : 10% to 95% Relative Humidity (Non-Condensing)
2.4 Safety Precaution
•Switch off the modem and adapter when the modem is not in use.
•During times of lightning/thunderstorms, do not use the modem.
•Keep the modem away from water and direct sunlight.
•Do not introduce any foreign material to the modem through the ventilation
slits (e.g. by dropping foreign items or poking into the slits).
11
○○○○○○○○○○○○○○○○○○○○○○○○○○○○○○○○○○○○○○○○○
3. Setting Up DSL Turbo 900
3.1 Setup Overview
The following gives an overview of DSL Turbo 900 setup.
Setting Up
DSL Turbo 900
This chapter contains information on setting up DSL Turbo 900.
Verification steps are also included to ensure correct connections.
○○○○○○○○○○○○○○○○○○○
Telephone 2
Telephone 1
PC
DSL Turbo 900
Micro-Filter3
Power
adapter
LINE
The Mains
Supply
10Base-T
(UTP Crossover
Ethernet cable)
LINE
3The Micro-Filter can be
purchased separately from
SingTel Magix.
12
○○○○○○○○○○○○○○○○○○○○○○○○○○○○○○○○○○○○○○○○○
3. Setting Up DSL Turbo 900
3.2 Connecting DSL Turbo 900
Please carry out the following steps to connect your modem to your computer.
Power off your computer and any connected devices before installing
your modem!
3.2.1 Connecting the UTP Ethernet Cable
Connect one end of the Ethernet cable to the ETHERNET jack on DSL Turbo 900
and the other end to the Ethernet card on your PC.
Rear view of a PC
UTP Crossover
Ethernet cable
Ethernet card
ETHERNET
Rear view of DSL
Turbo 900
13
○○○○○○○○○○○○○○○○○○○○○○○○○○○○○○○○○○○○○○○○○
3. Setting Up DSL Turbo 900
3.2.2 Connecting the Telephone cable (RJ-11)
Connect one end of the telephone cable to the LINE jack on your modem and the
other end to your Telephone wall socket.
Telephone
wall socket
Telephone
cable
LINE
Rear view of DSL
Turbo 900
3.2.3 Connecting to a Telephone Set
This connection is optional. The TEL jack provides easy access to your Telephone
set while working near the modem.
Connect the Phone cable to the TEL jack on your modem.
Telephone set
Phone cable
TEL
Rear view of DSL
Turbo 900
14
○○○○○○○○○○○○○○○○○○○○○○○○○○○○○○○○○○○○○○○○○
3. Setting Up DSL Turbo 900
3.2.4 Connecting to the Power Mains
Connect the connector of the Power adapter to the DC IN on your modem.
Attach the jack of the Power cable to the Power adapter as shown, and the Power
plug to the Power Mains.
Power adapter
Power Mains
Power cable
DC IN
Rear view of DSL
Turbo 900
15
○○○○○○○○○○○○○○○○○○○○○○○○○○○○○○○○○○○○○○○○○
3. Setting Up DSL Turbo 900
3.3 Verifying Your Connections
To verify the connections that you have done,
Power on DSL Turbo 900
i) Power on the Switch at the Mains Supply.
ii) Power on the Switch on DSL Turbo 900.
Observe the following LEDs on your modem:
3.3.1 Power LED (PWR)
3.3.2 Ethernet Link LED (LINK)
You should see this
Power LED lights up.
You should see this
Ethernet Link LED
lights up.
If your Power LED does not
light up, check that:
i ) the Mains Supply is
powered on and the Power
switch on the modem is at
‘I’position.
ii) the connection is carried
out as described in section
3.2.4 - Connecting to the
Power Mains.
If your Ethernet Link LED
does not light up, check that:
i) the connection is carried
out as described in section
3.2.1 - Connecting the UTP
Ethernet Cable.
16
○○○○○○○○○○○○○○○○○○○○○○○○○○○○○○○○○○○○○○○○○
3. Setting Up DSL Turbo 900
3.3.3 ADSL Status LED (LINK)
This LED will start blinking,
trying to establish a
connection. Once the
connection is established, this
LED will remain lit.
If your ADSL Status LED does
not light up, check that:
i ) the Mains Supply is
powered on and the Power
switch on the modem is at
‘I’position.
ii) the connection is carried
out as described in section
3.2.2 - Connecting the
Telephone cable (RJ-11).
If the mentioned 3 LEDs all light up, it means that your modem are successfully
connected.
3.3.4 Phone connection
If you have connected a
Telephone set to your modem,
pick up the handset of the
Telephone. You should hear the
normal dial-tone.
If you do not hear the normal dial-tone of a
telephone, check that the connection is done
as described in section 3.2.3 - Connecting
to a Telephone Set. If your connections are
correct, it may be due to a faulty phone cable
that you are using.
This completes the connections for DSL Turbo 900. For Windows®98 and Windows®
2000 users, please proceed to the Chapter 5 on Installing the Client Software. For
Windows®95 users, please proceed to the following chapter to configure your
Ethernet card before proceeding to chapter 5.
17
○○○○○○○○○○○○○○○○○○○○○○○○○○○○○○○○○○○○○○○○○
4. Configuring Your Ethernet Card
Configuring Your
Ethernet Card
(For Windows® 95 users only)
This chapter guides you on how to configure your Ethernet card that
is installed on your computer to work with DSL Turbo 900 for
Internet.
○○○○○○○○○○○○○○○○○○○○
Power on your computer.
1
2
From your Windows desktop, right-click on the Network Neighborhood
icon. Select Properties.
From the Configuration tab,
check for the listing of TCP/
IP (as shown on your left).
If TCP/IP is listed, you may
proceed to the chapter 5 to
install the client software.
If TCP/IP is not listed,
continue with the following
configurations.
3
18
○○○○○○○○○○○○○○○○○○○○○○○○○○○○○○○○○○○○○○○○○
4. Configuring Your Ethernet Card
From the Configuration tab, select Realtek RTL8029(AS) PCI Ethernet
NIC and click Add.
At the Select Network Component Type prompt, select Protocoland click
Add... .
4
At the Manufacturers
field, select Microsoft.
At the Network
Protocols field, select
TCP/IP. Click OK.
5
19
○○○○○○○○○○○○○○○○○○○○○○○○○○○○○○○○○○○○○○○○○
4. Configuring Your Ethernet Card
You will be prompted for your Windows 95 CD-ROM/diskettes. Insert
your Windows 95 CD-ROM/diskettes in your CD-ROM Drive/Floppy Disk
Drive and click OK.
6
7
Follow any on-line instructions. If you are prompted with DHCP prompt,
asking if you want to see future DHCP messages, click No.
This completes the configuration for your Ethernet Card. You may now proceed to
chapter 5 to install the Client Software.
20
○○○○○○○○○○○○○○○○○○○○○○○○○○○○○○○○○○○○○○○○○
4. Configuring Your Ethernet Card
This page is intentionally left blank.

Other manuals for DSL Turbo 900 Package

5

Other Aztech Modem manuals

Aztech MR8800-U User manual

Aztech

Aztech MR8800-U User manual

Aztech 56K PCI Modem User manual

Aztech

Aztech 56K PCI Modem User manual

Aztech 56K External Modem Product information sheet

Aztech

Aztech 56K External Modem Product information sheet

Aztech DSL500U Instructions for use

Aztech

Aztech DSL500U Instructions for use

Aztech DSL700P User manual

Aztech

Aztech DSL700P User manual

Aztech HomePlug AV with Simple Connect Button User manual

Aztech

Aztech HomePlug AV with Simple Connect Button User manual

Aztech DSL 1015EN L Guide

Aztech

Aztech DSL 1015EN L Guide

Aztech DSL500U Product information sheet

Aztech

Aztech DSL500U Product information sheet

Aztech ADSL USB Modem Product information sheet

Aztech

Aztech ADSL USB Modem Product information sheet

Aztech DSL 300P Product information sheet
Aztech

Aztech DSL 300P Product information sheet

Aztech DSL605E Instructions for use

Aztech

Aztech DSL605E Instructions for use

Aztech DSL Turbo 900 Package User manual

Aztech

Aztech DSL Turbo 900 Package User manual

Aztech MSP2950-W User manual

Aztech

Aztech MSP2950-W User manual

Aztech MR2800-W User manual

Aztech

Aztech MR2800-W User manual

Aztech MDP7800 User manual

Aztech

Aztech MDP7800 User manual

Aztech DSL1015EN L User manual

Aztech

Aztech DSL1015EN L User manual

Aztech DSL Turbo 900 Package User manual

Aztech

Aztech DSL Turbo 900 Package User manual

Aztech 305E User manual

Aztech

Aztech 305E User manual

Aztech DSL305E Instructions for use

Aztech

Aztech DSL305E Instructions for use

Aztech UM3100 User manual

Aztech

Aztech UM3100 User manual

Aztech FG7003GRV(AC) User manual

Aztech

Aztech FG7003GRV(AC) User manual

Aztech 56K External Modem Instructions for use
Aztech

Aztech 56K External Modem Instructions for use

Aztech DSL5018EN User manual

Aztech

Aztech DSL5018EN User manual

Aztech MDP3880-U User manual

Aztech

Aztech MDP3880-U User manual

Popular Modem manuals by other brands

ZyXEL Communications PRESTIGE 861 Specifications

ZyXEL Communications

ZyXEL Communications PRESTIGE 861 Specifications

Teltonika T-ModemUSB TMU-100 quick start guide

Teltonika

Teltonika T-ModemUSB TMU-100 quick start guide

Nivis RF-P9-06-01-01 user manual

Nivis

Nivis RF-P9-06-01-01 user manual

Patton electronics 1060 user manual

Patton electronics

Patton electronics 1060 user manual

Zte MF823 quick guide

Zte

Zte MF823 quick guide

Huawei T-Mobile webConnect UMG181 quick start

Huawei

Huawei T-Mobile webConnect UMG181 quick start

3Com 005699-00 - installation guide

3Com

3Com 005699-00 - installation guide

Dataradio DL-3282 Setup instructions

Dataradio

Dataradio DL-3282 Setup instructions

Medion P89135 quick guide

Medion

Medion P89135 quick guide

SwannOne Smart Hub SWO-HUB01K quick start guide

SwannOne

SwannOne Smart Hub SWO-HUB01K quick start guide

Patton electronics 1009 user manual

Patton electronics

Patton electronics 1009 user manual

HomeSpot HS-WIFIUSB Quick install guide

HomeSpot

HomeSpot HS-WIFIUSB Quick install guide

Paradyne FrameSaver FLEX 9123 user guide

Paradyne

Paradyne FrameSaver FLEX 9123 user guide

TerraTec GRABSTER AV 300 MX Quick setup guide

TerraTec

TerraTec GRABSTER AV 300 MX Quick setup guide

Huawei EC168 Getting to know

Huawei

Huawei EC168 Getting to know

NETGEAR DG824M - 802.11b Wireless ADSL Modem Quick installation guide

NETGEAR

NETGEAR DG824M - 802.11b Wireless ADSL Modem Quick installation guide

EZCast HDCN0026M1 user manual

EZCast

EZCast HDCN0026M1 user manual

Tenda TED8620R user manual

Tenda

Tenda TED8620R user manual

manuals.online logo
manuals.online logoBrands
  • About & Mission
  • Contact us
  • Privacy Policy
  • Terms and Conditions

Copyright 2025 Manuals.Online. All Rights Reserved.