manuals.online logo
Brands
  1. Home
  2. •
  3. Brands
  4. •
  5. Black Box
  6. •
  7. Server
  8. •
  9. Black Box LES424A User manual

Black Box LES424A User manual

724-746-5500 | blackbox.com724-746-5500 | blackbox.com 724-746-5500 | blackbox.com
Page 5 Page 6
© Copyright 2013. Black Box Corporation. All rights reserved.
Black Box and the Double Diamond logo are registered trademarks of
BB Technologies, Inc. UL is a registered trademark of Underwriters
Laboratories. Any other trademarks mentioned in this manual are
acknowledged to be the property of the trademark owners.
BL A C K B O X®
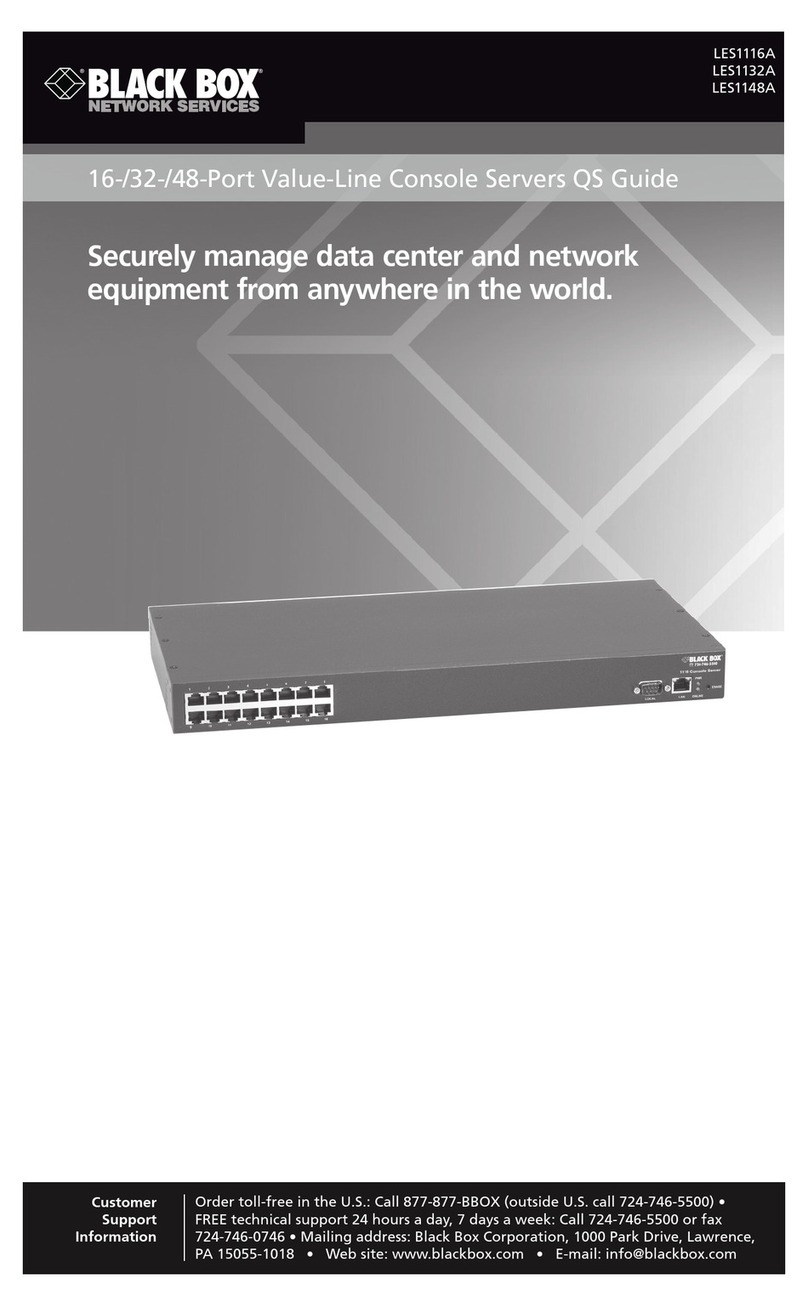
Quick Start Guide
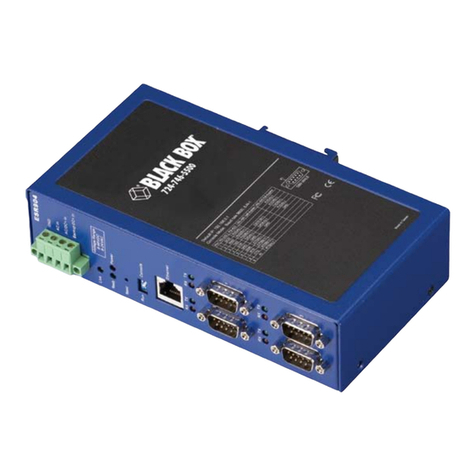
4-Port Hardened Serial Server
LES424A
Black Box Tech
Support: FREE! Live.
24 / 7. Tech support
the way it should be.
Great tech support is just 30 seconds
away at 724-746-5500 or blackbox.com.
Order toll-free in the U.S.:
Call 877-877-BBOX
(outside U.S. call 1-724-746-5500)
FREE technical support
24 hours a day, 7 days a week:
Call 724-746-5500 or
fax 724-746-0746
Mailing address:
Black Box Corporation
1000 Park Drive
Lawrence, PA 15055-1018
Web site: www.blackbox.com
E-mail: info@blackbox.com
Customer
Support
Information
BL A C K B O X®
LES424A Quick Start Guide
Step 1. Install/Connect the Hardware.
• Unpack your serial server from the shipping
container. Verify that all included items are
present.
- 4-Port Hardened Serial Server
- CD with Hardened Serial Server Software
- (2) panel mount adapters and (4) mounting
screws
- DIN rail mount adapter and (3) mounting
screws
- This Quick Start Guide
• Mount the serial server using panel or DIN rail
mount adapters.
• Connect a 10- to 58-VDC power supply
(6.0 W required).
• Connect to the network (using a standard
Ethernet cable).
• Connect the serial devices (using an RS-232
with DB9 cable, straight-through for DCE
device, null-modem for DTE device).
LES424A Quick Start Guide, rev. 1
Reset switch operation.
Hold in Reset (mode) switch for… Result
0 to 2 seconds Initiates a hardware reset.
2 to 10 seconds Enters Console mode.
More than 10 seconds Resets to factory defaults.
Serial Port Pinout — DB9
Table B-1. DB9 M connector pinout.
DB9
M
Pin RS-232 Direction
(RS-232) RS-422/485
4-Wire RS-485
2-Wire
1DCD Input RDA (-) —
2RD Input RDB (+) —
3TD Output TDB (+) Data B (+)
4DTR Output TDA (-) Data A (-)
5GND —GND GND
6DSR Input — —
7RTS Output — —
8CTS Input — —
9 — — — —
Specifications
Certifications — FCC Part 15 Class A, CE, NEMA TS2
Enclosure — Rating: IP30;
Mounting: DIN rail mount (35 mm);
Size: 1.8"H x 4.4"W x 6.75"D (4.57 x 12.2 x
17.1 cm)
Specifications (Continued from page 5)
Environment — Operating Temperature: -40 to
+176° F (-40 to +80° C);
Storage Temperature: -40 to +185° F (-40 to
+85° C);
Operating Humidity: 10 to 95%, noncondensing
Power Supply — Voltage requirements: 10- to
58-VDC;
Consumption: 6.0 watts maximum
724-746-5500 | blackbox.com724-746-5500 | blackbox.com 724-746-5500 | blackbox.com
LES424A Quick Start Guide LES424A Quick Start GuideLES424A Quick Start Guide
Page 3Page 2 Page 4
Step 2. Install/Run Serial Server Software.
• Install Hardened Serial Server Software.
- Insert the Black Box Hardened Serial Server Software
CD into the computer. The install program should
automatically run.
- Follow the prompts to install the software.
• Run Serial Software.
- Click “Start—>Programs—>Black Box—>Serial
Server Software—>Serial Server.”
- The Discovery page opens.
- Select “Network.”
- If you know the IP address, select “The device is at
this address,” and type in the address.
- If not, select “I don’t know the IP address of the
dev ice.”
- Click on the “Connect” button. The Hardened Serial
Server Software will search for any serial servers on
the network.
• Login to the Hardened Serial Server.
- Select the Hardened Serial Server from the list.
- Login to the device. (The factory password is blank.
Just click “Login.”)
Step 3. Configure the Serial Server.
• General Setup.
- Enter a name for the serial server. This name will
show up in the serial server list in the Hardened
Serial Server Software.
- Change the login password if desired.
• Enter the Network Settings.
- The serial server is configured at the factory to get an
IP address automatically (DHCP). If a DHCP server is
not available on your network, it will default to
169.254.102.39.
- If a static IP is desired, uncheck the box “I want
DHCP to setup the network.” Enter the static IP,
Subnet Mask, and default Gateway information.
• Setup of the Serial Port Communications.
- For each serial port on the device: Select the
communications mode: RS-232, RS-422, RS-485
(2-wire), or RS-485 (4-wire).
- Select the communications parameters (Baud Rate,
Data Bits, Stop Bits, Parity, and Flow Control) for
your serial device.
• Setup of the Serial Port Network Protocol.
- Select the type of network protocol you want to use
for each port: TCP, UDP, VCOM, or Paired Mode.
- TCP: Select whether the serial server will operate as a
Client or Server, then configure the required IP
address, port numbers, and other related
parameters.
- UDP: Configure the IP addresses, ports, and other
related parameters for the devices you want to
receive data from and send data to.
- VCOM: Configure the serial port to act as a virtual
COM port on the PC. You must also add the VCOM
driver to the PC using the “Add” button in the
Hardened Serial Server Software.
- Paired Mode: Configure the serial server to be paired
with another serial server, configure it as either the
client or the server in the pair, and set up the IP
address, port numbers, etc.
- Set up Advanced parameters as necessary for your
application. Click on the the “Advanced” button to
set up serial and network timers and packet
delimiters.
• Save your configuration to the serial server.
- The device will reboot after saving the settings.
Step 4. Test and Verify Operation.
• Set up the serial server as a TCP Server on serial
port 1.
• Set serial port to RS-232 on serial port 1.
• Set to 9600 8-N-1 on serial port 1.
• Loopback serial port 1 by connecting TD to RD.
• Open a command window and type “telnet
x.x.x.x yyyy” where x.x.x.x is the IP address of the
serial server and yyyy is the port number of the serial
port.
• Type characters on the keyboard. The characters
should appear in the window. If not, double-check
your settings.
LED status indicators.
LED Color Status
Power Green ON = power connected
Ready Green
ON = initialization
Flashing slowly = Normal operation
Flashing quickly = Device is rebooting
Speed Yellow ON = 100 Mbps
OFF = 10 Mbps
Link Green ON = Ethernet connected
Flashing = Data TX/RX
Serial Ports 1, 2, 3, 4 Green ON = Serial port is open
Flashing = Data TX/RX
Other Black Box Server manuals

Black Box Multiserver 5000 MX219A User manual

Black Box

Black Box Multiserver 5000 MX219A User manual

Black Box LRA 2900 User manual

Black Box

Black Box LRA 2900 User manual

Black Box LRA502A-ET-R5 User manual

Black Box

Black Box LRA502A-ET-R5 User manual

Black Box LES1208A-R2 User manual

Black Box

Black Box LES1208A-R2 User manual

Black Box leS1116a User manual

Black Box

Black Box leS1116a User manual

Black Box les1208A User manual

Black Box

Black Box les1208A User manual

Black Box ServTray KVT201A-JP-R3 User manual

Black Box

Black Box ServTray KVT201A-JP-R3 User manual

Black Box LWS401A User manual

Black Box

Black Box LWS401A User manual

Black Box LES1101A-R2 User manual

Black Box

Black Box LES1101A-R2 User manual

Black Box 40870-R2 User manual

Black Box

Black Box 40870-R2 User manual

Black Box LES401A User manual

Black Box

Black Box LES401A User manual

Black Box LS1016A User manual

Black Box

Black Box LS1016A User manual

Black Box Terminal Server User manual

Black Box

Black Box Terminal Server User manual

Black Box iCOMPEL ICC LG WEBOS 3 User manual

Black Box

Black Box iCOMPEL ICC LG WEBOS 3 User manual

Black Box 37687 User manual

Black Box

Black Box 37687 User manual

Black Box LES1108A User manual

Black Box

Black Box LES1108A User manual

Black Box LES301A-KIT User manual

Black Box

Black Box LES301A-KIT User manual

Black Box LES2702A-WL User manual

Black Box

Black Box LES2702A-WL User manual

Black Box LEU9070 User manual

Black Box

Black Box LEU9070 User manual

Black Box LRA2900A User manual

Black Box

Black Box LRA2900A User manual

Black Box CDUNM10 User manual

Black Box

Black Box CDUNM10 User manual

Black Box LES1508A User manual

Black Box

Black Box LES1508A User manual

Black Box LE2101A-BT-R2 User manual

Black Box

Black Box LE2101A-BT-R2 User manual

Black Box LWS405A User manual

Black Box

Black Box LWS405A User manual

Popular Server manuals by other brands

Vxl Itona C35 Specifications

Vxl

Vxl Itona C35 Specifications

Compaq ML570 - ProLiant - G2 Maintenance and service guide

Compaq

Compaq ML570 - ProLiant - G2 Maintenance and service guide

Ci Design SR 208 installation guide

Ci Design

Ci Design SR 208 installation guide

Bticino 391818 quick start guide

Bticino

Bticino 391818 quick start guide

NEC Express5800/R320f Configuration guide

NEC

NEC Express5800/R320f Configuration guide

Dell EMC PowerEdge T340 Installation and service manual

Dell EMC

Dell EMC PowerEdge T340 Installation and service manual

Mediastar Evolution 775 quick start guide

Mediastar Evolution

Mediastar Evolution 775 quick start guide

HP ProLiant WS460c Gen8 datasheet

HP

HP ProLiant WS460c Gen8 datasheet

Advantech EKI-1521 user manual

Advantech

Advantech EKI-1521 user manual

Dell PowerEdge C1100 Information update

Dell

Dell PowerEdge C1100 Information update

HPE SimpliVity 2600 Gen10 Installation and maintenance guide

HPE

HPE SimpliVity 2600 Gen10 Installation and maintenance guide

Dell PowerEdge R520 Getting started guide

Dell

Dell PowerEdge R520 Getting started guide

Cambridge Audio azur 640H Specifications

Cambridge Audio

Cambridge Audio azur 640H Specifications

Avaya INTUITY AUDIX Migration guide

Avaya

Avaya INTUITY AUDIX Migration guide

Elastix NLX-miniUCS Appliance quick start guide

Elastix

Elastix NLX-miniUCS Appliance quick start guide

Huawei FusionModule500 manual

Huawei

Huawei FusionModule500 manual

HP ProLiant ML110 Generation 6 (G6) Quickspecs

HP

HP ProLiant ML110 Generation 6 (G6) Quickspecs

Dell EMC Storage NX3340 Installation and service manual

Dell EMC

Dell EMC Storage NX3340 Installation and service manual

manuals.online logo
manuals.online logoBrands
  • About & Mission
  • Contact us
  • Privacy Policy
  • Terms and Conditions

Copyright 2025 Manuals.Online. All Rights Reserved.