Black Series Alpha Parts list manual
1
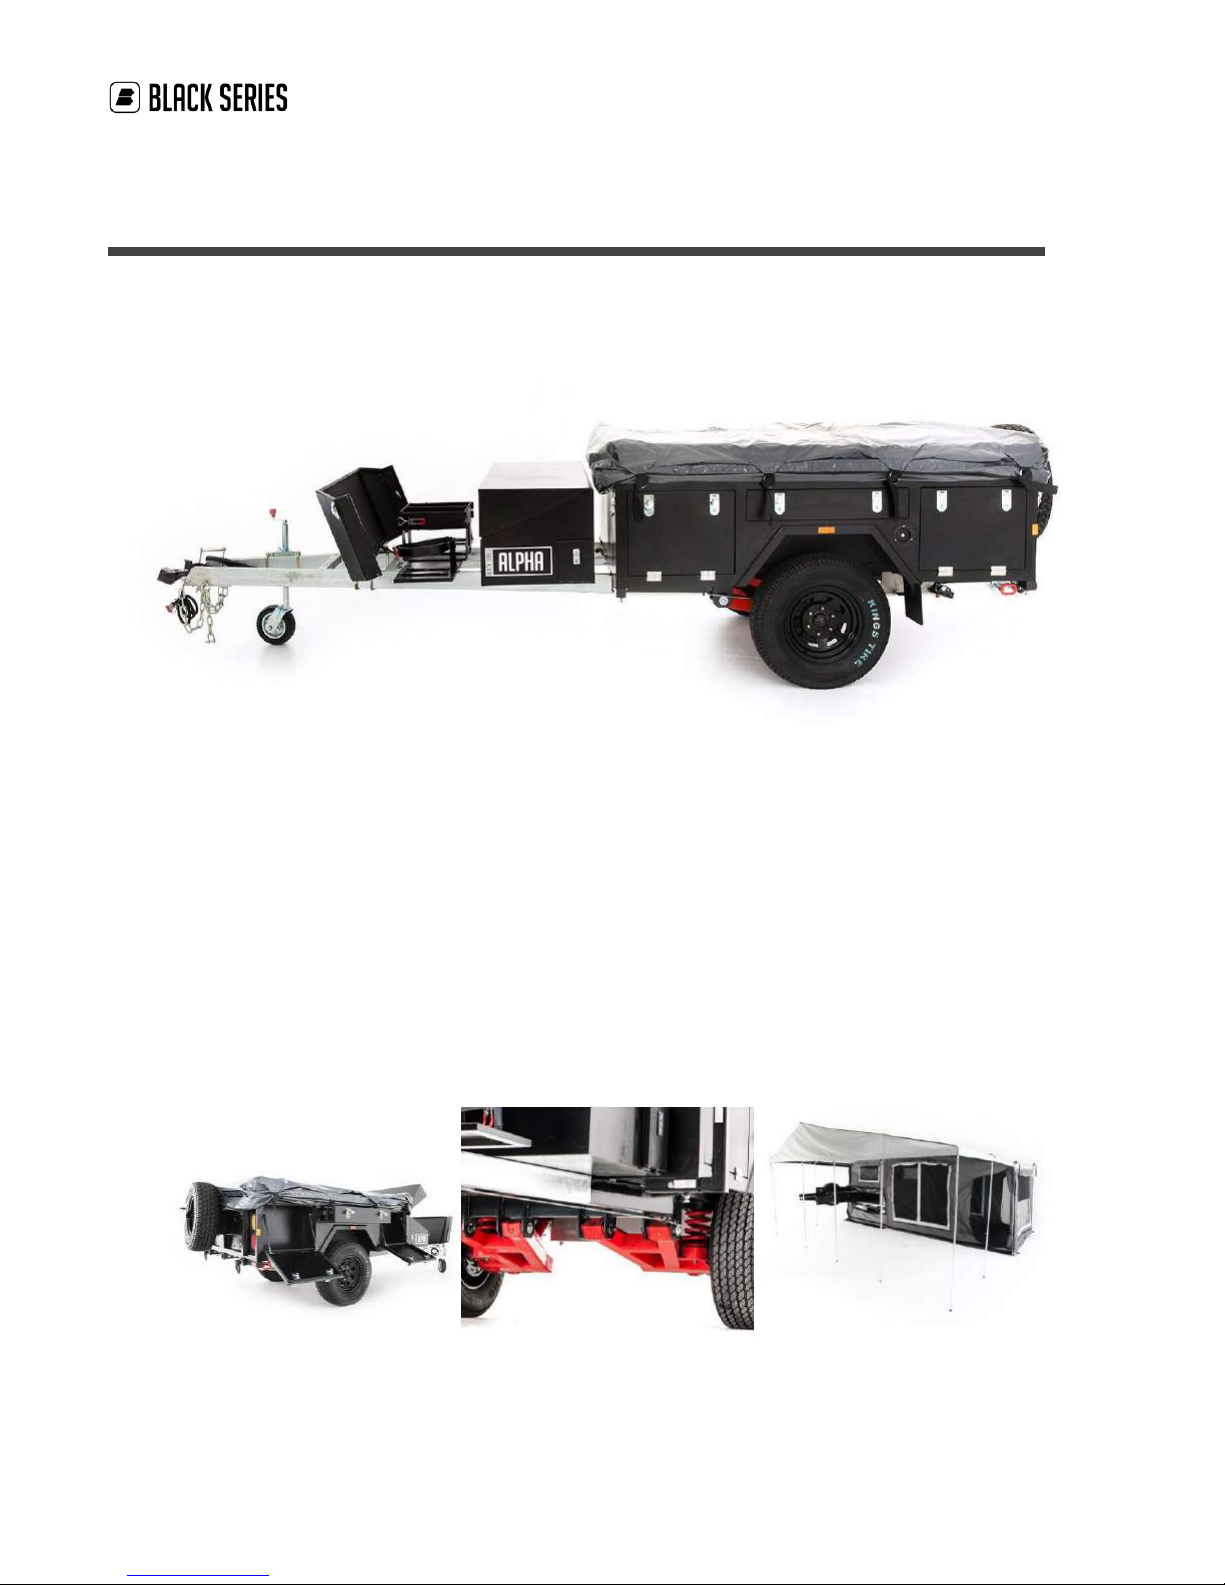
Alpha - Getting Started Manual
With its impressive carrying capacity, the Alpha is the perfect big
family or long distance tourer. This trailer is tough, practical, and ready for
your trip of a lifetime.

2
©2018 Black Series Camper, Inc. All rights reserved.
Disclaimer And Copyright
All information, illustrations and specifications contained in this manual are based
on the latest product information available at the time of publication. If and when
new materials and production techniques are developed that can improve the quality
of its product, or material substitutions are necessary due to availability, Black
Series reserves the right to make such changes.
Black Series Camper Owner’s Getting Started Manual
©2018 Black Series Camper, Inc. All rights reserved

3
TABLE OF CONTENTS
TABLE OF CONTENTS 3
INTRODUCTION 4
BEFORE YOU SET OFF 5
SETTING UP 6
PACKING UP 7
FINAL CHECK 9
TOWING 11
BLACK SERIES TRAILER CARE GUIDE 12
BATTERY GUIDE 16

4
INTRODUCTION
Thanks for purchasing the Black Series Alpha. It is supplied with everything you
need to take it away and enjoy your trip.
The Black Series Alpha - Getting Started was created as a short and concise
instructional manual regarding the basics of how to set up, use, and care for your
Black Series travel trailer. Every trailer owner will have their own set of skills
and varying capabilities so have you need any further assistance, please contact
your Black Series Dealer for information, repairs, and resources.
These instructions assume that you have never used a hard floor style camper before;
if you have there may still be some steps that are unique to this camper. Please
follow the instructions carefully to minimize the setup time and to ensure that the
camper remains in excellent condition. Please also read the 'Additional
Manufacturers Information' which covers some important care items that you are
responsible while using the camper.
The instructions may appear difficult, but in practice they are easy to follow and
you will have the camper set up in no time!
Always obey warnings and safety messages.

5
BEFORE YOU SET OFF
CHECK LIST:
1. Make sure that all 4 corner jacks are raised.
2. Make sure that the hitch is connected properly.
3. Check chains and make sure that the shackles are done up. It is usually best
to cross the chains underneath the draw-bar.
4. Connect the 7 pin socket to car, using the portable brake controller if
required.
5. Connect Anderson plug to vehicle if available.
The camper can not be towed unless the electric brakes are connected
to your vehicle.
6. Make sure the trailer handbrake is off.
7. Check all lights for proper operation.
If you intend to free camp, please note that the camper is supplied
with the water tank empty to keep the towing weight down. Remember to
fill the tanks with potable water when you are close to your
destination.

6
SETTING UP
ARRIVAL ON SITE
1. Park the camper on a level area.
2. If required use a leveling ramp to level the camper left to right.
Once level left to right, engage the handbrake, undo the chains and electrical
connections.
3. Place a chock against each wheel.
4. Put the jockey wheel into its bracket and tighten.
5. Disengage the hitch (remove pin)
6. Raise the camper with the jockey wheel.
7. Move the vehicle away from the hitch.
8. Level the camper front to back using the jockey wheel to adjust the height.
9. Drop each corner jack by pulling the blue handle.
10. Wind them down using the winder handle in the front boot.
The corner jacks should not take the weight of the camper and so just
need to be down enough to be stable.
KITCHEN SETUP
1. Pull out the kitchen and support the end using the support leg provided.
2. Extend the sink drain and direct it away from the camper. If you are
installing the walls and floor, place a bucket under the drain.
3. Connect the blue water hose to the water connection
4. Plug in the kitchen light (small electrical connector next to water plug).
5. Connect the orange gas hose to the gas connection at the rear of the camper.
6. Turn gas on at gas tank.
MISCELLANEOUS SETUP
1. Pass the shower head through the small zip at the top of the ensuite tent.
2. Place chemical toilet in ensuite room and add chemicals as per instructions on
bottles.
SIT DOWN & ENJOY!
That’s it! All that’s left to do is set up the table and chairs, and relax.

7
PACKING UP
Packing up is almost a reverse of the setting up process but there are a few
differences - the sequence is often important.
Lay everything neatly on the ground as you take things down and then return them to
their appropriate storage in one go.
It is critical that everything is dry before it is put away,
including the floor, walls and ensuite. Pay special attention to the
plastic windows in the awning walls as condensation can form on an
otherwise dry wall.
If the items have to be put away wet they must be opened and
reassembled within 24 hours or mold may start to form.
INITIAL STEPS
1. Turn off all switches in control panel.
2. Zip all windows closed.
3. Disassemble all optional setup items including:
a. Toilet
b. Water Heater
c. Ensuite
d. Floor
e. Walls
f. Awning
g. Skirt
h. Solar Panels
i. Turn Off Gas Tanks
4. Remove all internal bracing poles (#7 and #13)
5. Lower internal support hoops to their lowest level.
6. Fold table and set interior up as a bed (ie with cushions placed on table)
7. Disconnect gas, water and electrical connections from kitchen.
8. Push kitchen closed.
9. Return support leg to inside of camper.
10. Undo all press studs (being careful not to damage them; they can be quite
fragile!)
11. Return solar panels to inside of camper.

8
12. Close and lock camper door (must be done now as it cannot be done once camper
roof has been closed).
13. Fold rear hoop down as far as it will go into body of camper.
14. Connect rear winch to hook on right forward side of camper roof (winch handle
is stored in right rear small locker).
15. Winch closed, stopping to make sure that all canvas is carefully folded
inside the camper body.
16. When fully closed, disconnect winch and wind in.
17. Return winch handle to storage.
18. Secure roof with all latches.
19. Close roof rack and secure latches.
20. Lock all latches & door.
HOOKING UP
1. Raise front & rear legs with winder and fold away.
2. Hook vehicle up to tow hitch.
3. Insert hitch pin and secure with ‘R’ clip.
4. Raise jockey wheel, and swing to closed position.
5. Connect chains and electrical connection to vehicle.
6. Release camper handbrake.
7. Remove chocks.
8. Move camper to release levelling ramp if used.
9. Return all chocks, ramp, winders & handles to front/side boot.
That’s it! You are packed away!

9
FINAL CHECK
1. Camper, fridge, stove, optional items, solar, cutlery, plates etc cleaned &
put away.
2. All winders and handles returned to storage.
3. All cables and hoses have been neatly put in storage bags and returned to
storage.
4. All poles, pegs and ropes have been put in their bags and returned to pole
storage.
5. Chocks & Ramp removed and put away.
6. Roof secured with no canvas trapped.
7. Roof rack secured with clips.
8. Gas off.
9. All chairs, table, annex mat etc cleaned & put away.
10. All doors and hatches closed and locked.
11. It should look something like this:

10

11
TOWING
Tips & Tricks: Jockey Wheel - First thing you put down, last thing you put up.
Hitching Your Travel Trailer
1. With your towing vehicle parked ahead of the front of the trailer, slide the
vehicle adapter on to the polyblock hitch so the holes are aligned.
2. Insert the spring into the large steel pin along with the washer and place the
pin through the aligned holes. The washer and spring should sit on top of the
adapter hole with the washer nudged between the spring and the adapter.
3. The end of the pin will have an additional hole for the cotter pin. Secure the
cotter pin into the hole. The cotter pin secures the large steel pin to the
polyblock hitch and the vehicle adapter, making sure the trailer is secured to
your vehicle.
4. There are two safety chains connected to the tongue of the vehicle. The safety
chains act as a form of back-up to reduce the risk of the trailer from
disconnecting from the vehicle it is attached to in case of a catastrophic
failure of the polyblock hitch. To connect the safety chain to your vehicle,
make sure to cross the chains before attaching to the vehicle hitch. If the
chains are too long, twist the chains before attaching. This is to ensure the
chains do not drag on the road, causing potential sparks and fires.
5. The last step before embarking is to remember to put your stands and your
jockey wheel up.
Unhitching Your Travel Trailer
When set and ready to unhitch your trailer, Park trailer in set location, lower the
stabilizer leg, lower jockey jockey wheel and stabilize before unhitching the
trailer and removing the safety chains.

12
BLACK SERIES TRAILER CARE GUIDE
This information is taken from the manufacturers’ instructions and may be of use.
ANDERSON PLUG
This camper is fitted with a 50amp Anderson plug. This is to allow for your
batteries to be charge from your solar panels, 240v charger or your 50amp Anderson
on your vehicle if fitted. In the event your batteries are not charging, this may be
because your 50 amp circuit breaker has tripped, your batteries/wiring may have been
overloaded; try to reset the breaker by removing all electronics plugged into the
camper, and flicking the 50 amp switch.
WINCHES
This camper is fitted with winches and gas struts to assist in setting up. To help
assist with setting up and packing down, please ensure to use both winches for setup
and pack up. Please note we
JOCKEY WHEEL
Always ensure your jockey wheel is secured with the handle & wheel at least level
with or higher than your draw bar. This will reduce the possibility of damage being
sustained. However, you must remember to loosen the handle & allow the wheel to
swivel, before moving your Camper Trailer.
Failing, to do so, will result in damage
to the axle of the jockey wheel.
STABILIZER LEGS
A spindle has been supplied to allow you to lower & raise them. Please ensure they
are raised & secured on each occasion before your departure. This should prevent
them lowering during travel & sustaining any damage,
Please note; stabilizer legs
should never be fully extended to support the camper, in the event of needing
further adjustment, we recommend using chocks underneath the legs.
CANVAS & TENT SECTION

13
DO NOT LEAVE YOUR CAMPER TENT PACKED AWAY IN A DAMP OR WET STATE AS MOISTURE WILL
DESTROY ANY CANVAS, THE TENT MUST BE DRY, CLEAN AND FREE FROM DIRT.
During any instance that you are required to pack away your Camper Tent in the above
state, place a plastic sheet over your bedding (Queen size mattress up to 15 cm in
depth, along with your blankets, pillows, sheets & possibly, a couple of kids
mattresses).
OPEN YOUR CAMPER TENT & ALLOW IT TO DRY AS SOON AS POSSIBLE. On any of your future
departure dates, there is rain, forecast, we suggest you place a tarp over your
Camper Tent. During a break in the rain, pack your Camper Tent away so as to help
you minimize the drying time required. Using a tarp, will also help keep bird
droppings off your Camper Tent & help keep it clean.
STITCH HOLES
Every care is taken to ensure that your canvas is made using the finest water
repellent fabric. However, canvas products are not permanent structures and in
extreme conditions, some water may penetrate. Leaks may occur in the seams through
the needle holes created in the sewing process. This is normal and can be corrected
with the application of seam sealing compound. It is suggested you purchase a wax
stick or water proofing compound to keep with your camping equipment.
RAIN AND HEAVY WIND CONDITIONS
When raining Please ensure to lower the awning to allow for better water flow, this
will help stop pooling occurring on your awning.
SPREADER BARS
Spreader bars are to help minimize the chance of pooling, these are recommended to
be used for every camping trip.
CARING FOR TENT POLES

14
The steel poles have been hot dipped galvanized to provide long life with minimum
corrosion. Salt, sand, dirt and water are the enemy of any steel products and zip.
Make sure the poles and zips are always clean and dry before storage. When the poles
and zips have been used in damp, dusty. Sandy or salty conditions, they must be
cleaned and coated with a thin film of oil or silicone based liquid spray before
storage. Many of the frame poles are connected with pole joiners, which are designed
to keep them organized and allow quick assembly of the pole frame. Over stretching
or dropping the poles will easily damage the pole joiners and this may not be
covered under warranty. Please ensure to handle the poles carefully; especially when
unpacking and packing away.
PEGGING
Please ensure your tent pegs are secured into the ground before fully extending your
ceiling poles. Please remember, any excessive pulling force may result in stitching,
fabric, zip or mesh damage
CONDENSATION
Condensation is a natural occurrence in cold weather. In confined areas like
curtains and tents the body releases more moisture than the canvas can dispose of.
To minimize the chance of condensation, we recommend slightly opening the window of
the tent to enable airflow on cold nights.
MOLD
Most molds need 24-48 hours of moisture to begin to grow. Therefore if a suitable
material in your camper/tent is wet for more than 24 hours then you run the risk of
mold starting to grow. Many species of mold can begin to grow from humidity alone if
the humidity stays high for long enough. In fact the humidity only needs to be
higher than 55% before some molds can begin to grow. Please see below for the most
popular causes of mold:
●A relative Humidity of roughly 50% or higher
●Moisture
●Damp or Dusty Conditions
●Lack of Ventilation

15
WATER TANKS
The general water tank is your water reservoir when you’re using the HQ19. General
water applies to all the fresh water usage for showers and sinks. The HQ19 comes
with a 50 gal. tank.
Note:
Always wear gloves when handling the grey and black water tanks as you will be
dealing with biohazardous waste.
Grey
The grey water tank collects all the used water in your travel trailer except the
water for the toilet. The HQ19 features a 26 gal. grey water tank. Your grey water
tank is located on the bottom left side of your trailer. Once located, remove the
cap and connect your sewer hose. Put the end of your sewer hose in the dump hole at
least several inches inside to avoid splashing or spilling.
Black
The black water tank collects all waste, solids, and toilet paper from the toilet.
In order to dump and clean the black water tank, you must have a water hose specific
for flushing out the black water tank, a sewer hose, and the available dump hole.
The HQ19 features a 26 gal. black water tank located in the lower left back under
section of the travel trailer.
Sanitation Toilets
Black Series Travel Trailers all come with a Dometic brand gravity flush sanitation
toilet.
Please refer to the Dometic Sanitation Toilet Instruction Manual for
directions, specifications, and additional information.
Note:
Always make sure to use RV Toilet Paper. Regular toilet paper is too thick to
be dissolved and can lead to clogs in your black water tank.

16
BATTERY GUIDE
Charge State
>13.0V
100%
NOTE THAT THESE VOLTAGES ARE APPROXIMATE AND ARE
INFLUENCED BY TEMPERATURE ETC. BATTERIES JUST TAKEN
OFF CHARGE WILL HAVE A HIGHER VOLTAGE UNTIL THE
SURFACE CHARGE DECAYS OVER 30 MINS OR SO.
12.75V
90%
12.5V
80%
12.4V
70%
12.3V
60%
12.2V
50%
12.1V
40%
REPEATED DISCHARGE TO THESE LEVELS WILL SHORTEN
BATTERY LIFE
11.9V
30%
11.6V
20%
11.3V
10%
PERMANENT DAMAGE WILL OCCUR
10.5V
0%
We recommend to fully charge your camper trailer batteries with a suitable 240v
battery charger before and after every use and If you’re
not using your batteries for long periods of time we recommend to trickle charge
your batteries.
PLEASE NOTE: THIS IS A GUIDE ONLY
Table of contents
Popular Utility Vehicle manuals by other brands


SSV Works
SSV Works Can-Am X3 2014 manual

Massimo
Massimo MSU 1100 owner's manual

HAUL MASTER
HAUL MASTER 92174 Assembly and operation instructions

Zhejiang Xinyang
Zhejiang Xinyang XY300 Operating instruction

Wenger
Wenger Showmobile owner's manual

Sodikart
Sodikart Sodi Racing Furia 950 User maintenance guide


