ENGLISH
| Owner’s Manual
ENGLISH
!DANGER
Never place any items within
3-inches of the cooking
surface while in use. This
area can become very hot
and potentially damage
any accessory objects
placed too close.
!WARNING
Keep children and pets away
from appliance at all times.
This appliance is not
intended for use by children.
Close supervision is neces-
sary when any appliance is
used by or near children.
!WARNING
This appliance is not
intended for and should
never be used as a heater.
Do not use for purposes
other than intended.
!WARNING
The use of alcohol, prescrip-
tion or non-prescription
drugs may impair the
consumer’s ability to prop-
erly assemble or safely
operate the appliance.
!CAUTION
For residential and house-
hold use only. DO NOT use
for commercial cooking.
Section 02
GAS APPLIANCE SAFETY
SAFETY TIPS
• Do not move the appliance
when in use.
• Use long-handled cooking utensils
and oven mitts to protect against
burns and splatters.
• Do not place any empty cooking
vessels on the cooking surface
while in operation.
• Use caution when placing
anything in cooking vessel while
the appliance is in operation.
Allow cooking vessel to cool
to 115° F (45° C) before moving
or storing.
If grease or other hot material
drips from appliance onto valve,
hose or regulator:
STEP Turn o gas
supply immediately.
STEP Determine the cause
and correct it.
STEP Clean and inspect
valve, hose and regulator
before continuing.
STEP Perform a leak test.
(Please reference the Leak Test
Instructions in the Fuel chapter.)
For problems with this appli-
ance, please reference the
Troubleshooting chapter.
INSTALLATION SAFETY
This appliance is safety certified
for use in the United States and/
or Canada only. Do not modify
for use in any other location.
Modification will result in a safety
hazard and void warranty.
Use this appliance, as purchased,
only with gas and regulator/valve
assembly supplied.
Appliance installation must
conform with local codes, or in
the absence of local codes, with
either the National Fuel Gas Code,
ANSI Z223.1/ NFPA 54, Natural
Gas and Propane Installation Code,
CSA B149.1, or Propane Storage
and Handling Code, B149.2, or the
Standard for Recreational Vehicles,
NFPA 1192, and CSA Z240 RV
Series, Recreational Vehicle Code, as
applicable.
TURNING YOUR
APPLIANCE OFF
• When not in use, turn OFF appli-
ance by rotating the appliance
control knobs to the OFF position
and closing the fuel valve.
If the information in the above
statements is not followed exactly,
serious injuries, re, or death
may occur.
For Your Safety
ENGLISH
FOR YOUR SAFETY
Before proceeding, make certain that you understand the FOR YOUR
SAFETY section of this manual. Hazardous fire or explosion may result if
instructions are ignored.
Section 01
FOOD SAFETY
Food safety is an important part
of enjoying the outdoor cooking
experience. To keep food safe from
harmful bacteria, follow these four
basic steps:
CLEAN: Wash hands, utensils,
and surfaces with hot soapy water
before and aer handling raw meat
and poultry.
SEPARATE: Separate raw meats
and poultry from ready-to eat
foods to avoid cross contamina-
tion. Use clean platter and utensils
when removing cooked foods
from appliance.
COOK: Cook meat and poultry
thoroughly to kill bacteria. Use ther-
mometer to ensure proper internal
food temperatures.
CHILL: Refrigerate prepared foods
and leovers promptly.
For more information visit
foodsafety.gov or Canadian
Partnership for Consumer Food
Safety Education online at
befoodsafe.ca
Poultry
165° F or 74° C
Juices should run clear and esh
should not be pink.
Beef or Poultry Hamburger
160° F or 71° C
Juices should not be pink and esh
should be brown in the middle.
Beef, Veal, & Lamb
Steaks/Chops
145° F or 63° C
Beef, Veal, & Lamb Roasts
145° F or 63° C
ALL cuts of Pork
160° F or 71° C
Juices should not be pink.
MEAT COOKING
TEMPERATURES
!WARNING
NEVER partially cook meat
or poultry to finish cooking
later. Cook food completely
to destroy harmful bacteria.
HOW TO TELL IF
MEAT IS COOKED
THOROUGHLY
Meat and poultry cooked with this
appliance oen browns very fast on
the outside.
Use a meat thermometer to be sure
food has reached a safe internal
temperature and cut into food to
check for visual signs of doneness.
When reheating takeout foods or
fully cooked meats like hot dogs,
cook to 165° F (74° C), or until
steaming hot.
For Your Safety
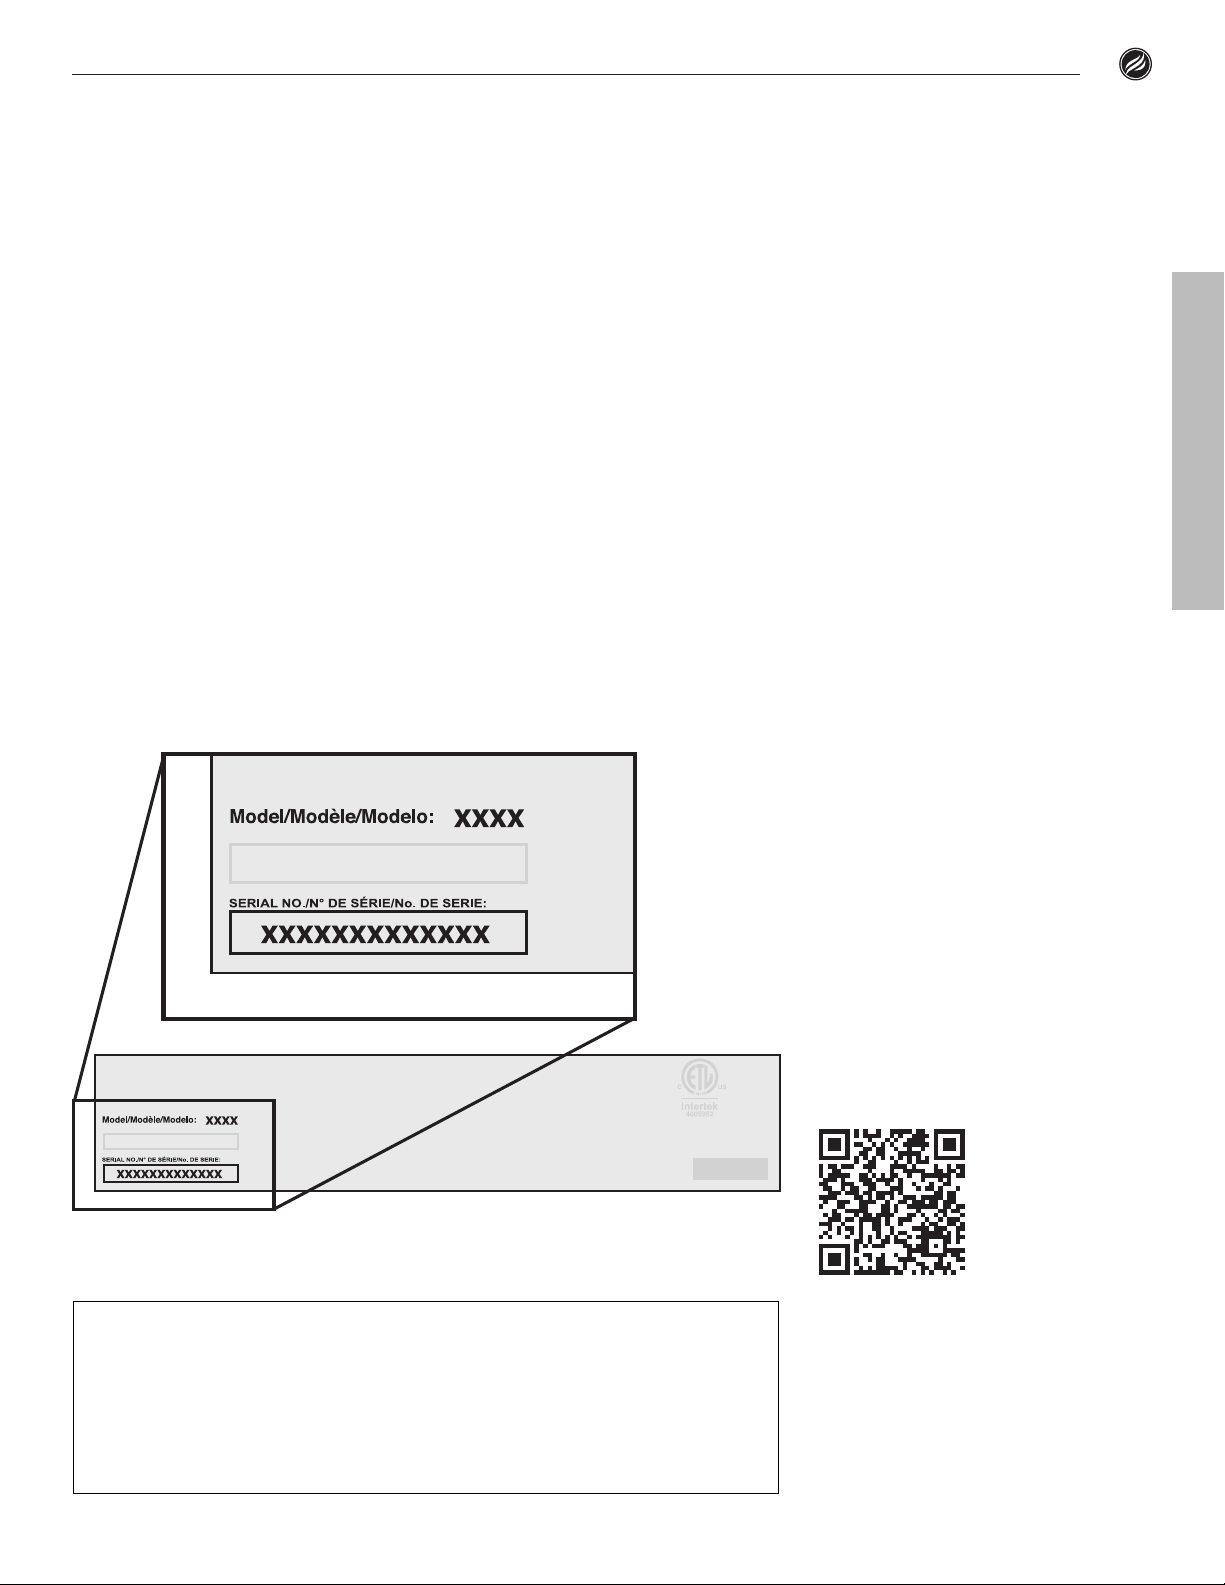
Model 1825
03