BlackboxMyCar SmartDrive User manual

BlackboxMyCar SmartDrive 10”
Wireless Auto Display
Product Manual

TABLE OF CONTENTS
1. Introduction
2. What’s Included
3. Product Specications
4. Micro SD Cards
5. Wiring
6. Rear Camera Installation
7. User Interface Overview
8. Connectivity
9. Settings
10.Troubleshooting Guide
11.Support

1. Introduction
2. What’s Included
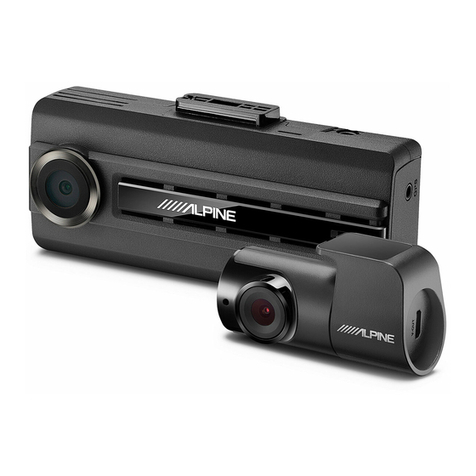
Designed by BlackboxMyCar, the BlackboxMyCar SmartDrive 10-inch Wireless Auto Display
is equipped with connectivity and entertainment features like Apple CarPlay & Android Auto
compatibility, plus a built-in front-and-rear dash cam to keep your drive protected.
Connect your devices wirelessly over Wi-Fi and Bluetooth to enjoy hands-free calling, web
access, and streaming entertainment apps. Whether you’re listening to music or making
essential phone calls, the BlackboxMyCar SmartDrive 10” Wireless Auto Display keeps you in
contact while keeping your hands on the wheel.
• BlackboxMyCar SmartDrive 10” Wireless Auto Display with Front Camera
• Type-C Cigarette Lighter Power Cable
• Rear Camera, Cable and Mount
• 64GB MicroSD Card
• Monitor Base
• AUX Cable

3. Product Specications
Display 10” 1600*600 Touch IPS Screen
Front Camera Full HD (1920* 1080P) @ 25 FPS
Rear Camera Full HD (1920* 1080P) @ 25 FPS with AI
Motion Sensor
G-Sensor 3-Axis
CPU Allwinner V535 Cortex-A7 @ 1GHz
Software Linux
Connectivity Apple CarPlay, Android Auto
Wi-Fi 2.4GHz and 5GHz
Video Codec H.264/MP4
Audio Local Speaker, Apple CarPlay, Android Auto,
FM and AUX
Micro SD Card 32GB to 256GB, Class 10 U1
Bluetooth Equipped
Microphone Equipped
Voice Control Equipped
Screen Mirroring Equipped, Mirror Link
Operating Temperature -20°C - 70°C

4. Micro SD Cards
5. Wiring Instructions
The BlackboxMyCar SmartDrive 10” Wireless Auto Display requires an external micro SD card
to record with it’s Dash Cam and can be used to watch downloaded applications, movies, and
music. A Micro SD card is not required for operation, but core functions such as the Dash Cam,
will not work. We recommend choosing a reputable SD card brand such as SanDisk, Kingston,
Toshiba, or Samsung with a minimum Class 10 speed certication, from 32GB up to 256GB.
To power up the BlackboxMyCar SmartDrive 10” Wireless Auto Display using a 12V charger,
please do the following procedures:
1. Mount the BlackboxMyCar SmartDrive 10” Wireless Auto Display in your vehicle. It will
normally it on your dashboard, with the included adhesives.
2. Turn o the vehicle.
3. Find the 12V power port (cigarette lighter socket) in your car.
4. Insert the 12V car charger into the power port.
5. Connect the 12V car charger to the Carplay Display.
6. Start the vehicle’s ignition; the display should power up.
7. Follow on-screen instructions for setup.
8. Use CarPlay or Android Auto with your connected smartphone.
9. Safely disconnect your smartphone when nished.
10. Turn o the vehicle and remove the charger.
11. Secure excess cables to prevent distractions while driving.

6. Rear Camera Installation
7. User Interface Overview
To install the BlackboxMyCar SmartDrive 10” Wireless Auto Display’s rear camera, please
follow these procedures:
1. Choose a suitable location for the rear camera on the rear bumper or license plate
area. Mounting to the top of the interior of the rear windshield is possible with
adhesive, but the viewing angle will make using it for reversing challenging.
2. Securely mount the camera in the chosen location. Adhesive can be used if in a dry
location, otherwise bolting is recommended.
3. Route the camera’s wiring through the vehicle’s interior to the front display.
4. Mount the BlackboxMyCar SmartDrive 10” Wireless Auto Display inside the vehicle,
typically on the dashboard using the adhesives.
5. Connect the rear camera’s power wire (Short red wire, found near the rear camera)
to the reverse light wire for automatic activation in reverse.
6. Connect the camera’s video cable to the display monitor.
7. Ground the black wire to the vehicle’s frame.
8. Test the system to ensure it functions correctly. The Rear camera view should
appear on the front Display moments after the vehicle enters reverse.
9. The Reverse lines shown on the Display when reversing can be set to reect your
environment better and help guide you. Simply hold and drag on the far ends of the
lines to adjust them as needed.
The BlackboxMyCar SmartDrive 10” Wireless Auto Display’s user interface consists of various
functions accessible through its touchscreen:
Settings
This feature allows you to congure various system settings. These settings might
include display preferences, language settings, connectivity options, and more,
depending on the specic device.
Brightness Button
The brightness button allows you to adjust the screen brightness of the display unit.
You can increase or decrease the brightness based on your preferences and the
lighting conditions in your vehicle.
Volume Button
The volume button is used to adjust the audio volume of the unit. You can increase
or decrease the volume to control the audio output from the unit. Once pressed, you
can manually slide the volume bar located at the top of the touchscreen.
This option will only work with the unit’s built-in speaker. If the Audio output is set
to an existing Carplay/Android Auto connection, or via AUX, the volume must be
controlled through the vehicle’s interface. If the Audio output is set to FM, the volume
will help change the FM frequency.

Audio Output Options
This setting allows you to choose dierent audio output modes. Depending on your
preferences and the capabilities of your vehicle’s audio system, you can select modes
like Speaker, Carplay/Auto (which routes audio through the CarPlay or Android Auto
interface), FM (radio), or AUX (auxiliary input).
Apple CarPlay
This feature allows you to access the iPhone-specic interface (Apple CarPlay) on the
display unit. When connected to your iPhone, you can use CarPlay to access apps,
navigation, make calls, and more, all through the unit’s touchscreen interface.
Android Auto
Android Auto is the counterpart to Apple CarPlay but is designed for Android
smartphones. It provides access to Android phone features and apps, including
navigation, music, and messaging, through the display unit.
Bluetooth Music
This option allows you to pair your smartphone with the display unit via Bluetooth for
music playback. You can stream audio from your phone to the unit’s speakers.
Important notes:
• Android Auto supports both wired and wireless connections, while Apple CarPlay
exclusively supports wireless connectivity.
• Enabling the FM transmitter function and inserting the AUX cable will result in no
sound output from the device. Sound will resume when the FM function is deactivated,
or the AUX cable is removed.
• Bluetooth serves the purpose of connecting with a mobile phone and does not support
audio transmission to car speakers via Bluetooth.

8. Apple CarPlay & Android Auto Connectivity
How to Setup Apple CarPlay Connection
1. Start by clicking “Carplay” in Settings to switch to Carplay mode.
2. For initial connection, ensure that Bluetooth and Wi-Fi are enabled on your iPhone.
3. Connect to the unit’s Bluetooth and wait for 5-10 seconds. Your mobile phone will
display a prompt to use CarPlay in your vehicle.
4. Upon successful Bluetooth authentication, the unit’s CarPlay interface will be
automatically displayed.
5. For subsequent connections, the device will reconnect automatically if Bluetooth and
Wi-Fi are enabled (no additional steps required).
Note: Due to iOS system version compatibility issues, please refrain from connecting the device’s Wi-Fi
via your mobile phone. If the connection fails, manually ignore the connected device’s “tfxxx-wi” and
then click on Bluetooth connection again.
How to Setup Android Auto Connection
1. Ensure that your phone is running Android 10 or a higher version. Android phones
require pre-installation of the Android Auto App, which can be downloaded from
Google Play Store.
2. Click “Android Auto” in Settings to switch to Android Auto mode.
3. Verify that both Bluetooth and Wi-Fi on the unit are activated.
4. Enable Bluetooth and Wi-Fi on your mobile phone.
5. Connect to the paired unit and its Bluetooth from your mobile phone.
6. After successful Bluetooth connection, wait for 10-15 seconds for automatic access to
the Android Auto page.

9. Settings
You can also access the settings menu of the BlackboxMyCar SmartDrive 10” Wireless Auto
Display to customize various functions:
Playback Settings
This allows you to congure video playback-related settings. You can set video resolution (such
as 2.5K, 1080p, 720p) and loop recording settings (e.g., duration of video loops, overwriting old
footage). By default, the resolution will be set to 1080p.
Language Settings
Language settings allow you to choose the preferred language for the user interface. Available
languages include Simplied Chinese, Traditional Chinese, English, Russian, Spanish, French,
German, Japanese, Korean, Italian, and Portuguese.
Time-Lapse Video Settings
Time-lapse video settings switch normal recording to Time-lapse mode, recording at a lower
frame rate. These allow you to congure how time-lapse videos are recorded and played back.
You can set the interval between frames and other time-lapse-related options.
Date & Time Settings
In this section, you can set the date and time format as per your preference. This ensures that
timestamps on recorded videos and other data are accurate.
Collision Sensitivity Settings
Adjust collision sensitivity settings here. Depending on your preferences, you can ne-tune
how the unit detects and records events like accidents or collisions, including the sensitivity
threshold and video locking settings.
Reverse Settings
Customize settings related to reverse operation. These settings may include adjusting the
behavior of the camera feed when the vehicle is in reverse gear and related safety features.
Screen Saver Settings
You can congure the screen saver duration in this section. Screen savers help prevent screen
burn-in and reduce power consumption when the unit is not in active use.
Voice Control Settings
You can enable and congure Voice Controls in this section. Voice controls include: Show Front
camera, Turn on Display, Turn O Display, Show all Cameras.

Driving Position Settings
Choose your preferred driving position orientation, which may be left or right rudder
depending on the region. This setting ensures the interface aligns with your driving
perspective.
Screen Rotation Settings
If needed, you can rotate the screen content by 180 degrees. This can be useful if the unit is
installed in a way that requires an inverted display.
Storage Info
This option allows you to view information about the memory card, such as available storage
space and capacity. The Value on the right is the total storage, with the value on the left being
how much space is being used.
Format
Use this option to format the memory card, which will erase everything on the memory card.
Formatting is typically recommended for rst-time use or when troubleshooting issues with
the memory card.
Factory Reset
A factory reset restores all settings to their original state. Useful if you want to start fresh or
resolve issues with the unit’s conguration.
Firmware Version
This option lets you check the current rmware version of the unit. It’s helpful for keeping
track of updates and ensuring you have the latest software installed.

10. Troubleshooting Guide
Q: The unit does not power on or display anything.
A: Please ensure that the unit is securely connected to the vehicle’s power source. You may
also check the 12V charger and cable for any damage or loose connections. Make sure that the
vehicle’s ignition is turned on.
Q: There is no sound coming from the unit.
A: Please check the volume settings on both the unit and your smartphone. Ensure the audio
source is selected correctly (e.g., Carplay/Auto, Speaker, FM, AUX) and conrm that the audio
cable and connections are secure.
Q: The unit does not recognize or connect to the smartphone (CarPlay or
Android Auto).
A: Please ensure your smartphone’s CarPlay or Android Auto settings are enabled.
We recommend you to use a certied USB cable for a reliable connection. You may also
try connecting a dierent smartphone to identify if it’s a device-specic issue, or check for
software updates on both your smartphone and the unit.
Q: The display unit freezes or experiences lag during operation.
A: Please restart the unit by turning o the vehicle’s ignition and then back on. You can also
close any unused apps or processes on your smartphone to free up system resources.
Q: Recorded videos are not playing correctly or are of poor quality.
A: Please check the memory card for errors and free space and format it if necessary. Verify
that you are using a high-quality and compatible memory card, or adjust the video resolution
settings for optimal playback quality.

Q: Voice control commands are not working as expected.
A: Please ensure that voice control is enabled in the settings. Speak clearly and use the correct
voice commands as dened in the settings. You may also check for any background noise that
might interfere with voice recognition.
Q: AI motion detection is not functioning correctly.
A: Please verify that motion detection is enabled in the settings. You can adjust sensitivity
settings to match your preferences. Ensure that the camera lens is clean and unobstructed.
If you encounter persistent issues or want to start fresh, consider performing a factory reset.
Simply access the factory reset option in the settings menu and reset all settings to their
original state.
11. Support
If you’ve tried the above solutions and continue to experience issues, please contact
BlackboxMyCar’s customer support team for further assistance. We’re happy to help!
Email: [email protected]
Live chat: blackboxmycar.com
Toll Free: 1 (888) 978 6560
SMS: (604) 618 7788
Table of contents
