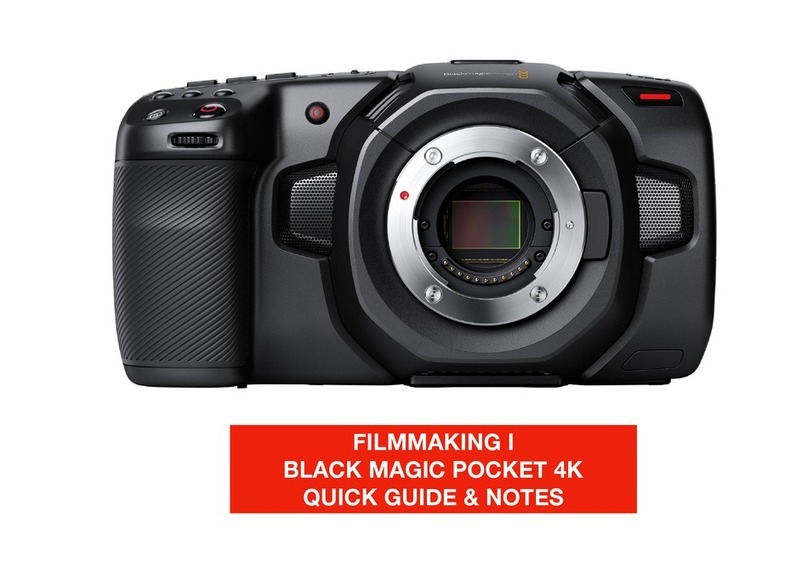
Blackmagicdesign Pocket Cinema Camera Series User manual

English
Welcome
Thank you for purchasing your new Blackmagic Pocket Cinema Camera!
In 2013, we released the original Blackmagic Pocket Cinema Camera. We were excited by creating
a small camera with high dynamic range and groundbreaking image quality that you could take
anywhere. After all your amazing feedback and being asked to make a 4K version, we decided to do
that with Pocket Cinema Camera 4K and then we released Blackmagic Pocket Cinema Camera 6K
with a Super 35mm sensor and an EF lens mount.
Blackmagic Pocket Cinema Camera 4K has the same Micro Four Thirds lens mount as the original
Pocket Cinema Camera so you can use all your existing MFT lenses. You can record records 4K
video up to 60 frames per second and HD video at 120 frames per second on CFast or UHS-II SD
cards. Blackmagic Pocket Cinema Camera 6K expands on these capabilities so you can also record
2.8K video at 120 frames per second and 6K video up to 60 frames per second! The USB-C port lets
you record on external drives so you can unplug the drive from your camera and plug straight into
your computer for an instant file workflow.
With 13 stops of dynamic range and dual native ISO, you can record beautiful, clean cinematic images
in varying light conditions. The built in 5 inch LCD touchscreen lets you easily check focus and see
fine details, even in bright daylight, and four built in microphones give you high quality audio straight
into the camera!
You even get powerful CCU features when connecting Blackmagic Pocket Cinema Cameras to
ATEM Mini switchers. This lets you set up your cameras’ focus, shutter, iris, color and much more
directly from the camera page in ATEM Software Control!
Your Blackmagic Pocket Cinema Camera is incredibly robust, very light, and easy to carry with you
everywhere you go. We’re also proud to include our Blackmagic RAW codec, offering the flexibility of
RAW processing all in a single file, providing massive performance increases with reduced file sizes.
We are extremely excited to see the creative work you produce using your new
Pocket Cinema Camera, and look forward to your feedback on new featuresyou would like to see
added to your camera!
Grant Petty
CEO Blackmagic Design

Which camera are you using? 5
Getting Started 6
Attaching a Lens 6
Turning Your Camera On 7
Using a Blackmagic Pocket
Camera Battery Grip 7
Powering Your Camera with the
Included Power Cable 9
Storage Media 10
CFast Cards 10
SD Cards 11
USB-C flash disks 13
Preparing Media for Recording 15
Preparing Media on
Blackmagic Pocket Cinema Camera 15
Preparing Media on a Mac 17
Preparing Media on Windows 18
Recording 19
Recording Clips 19
Blackmagic RAW 20
Recording to Blackmagic RAW 21
Maximum Sensor Frame Rates 23
Record Duration 25
Playback 30
Camera Features 31
Camera Front 31
Right Side 32
Left Side 32
Top Panel 34
Camera Underside 35
Camera Rear 36
Touchscreen Controls 37
Settings 58
Dashboard 58
Record Settings 58
File Naming Convention 64
Monitor Settings 64
Audio Settings 71
Setup Settings 73
Presets 82
3D LUTs 84
Entering Metadata 87
Slate 87
Camera Video Output 92
Using DaVinci Resolve 93
Project Manager 93
Editing with the Cut Page 94
Adding Clips to the Timeline 97
Editing Clips on the Timeline 98
Adding Titles 98
Working with Blackmagic RAW Files 99
Color Correcting your Clips
with the Color Page 102
Adding a Power Window 105
Using Plugins 107
Mixing Your Audio 108
Adding VFX and Compositing
on the Fusion Page 112
Mastering Your Edit 121
Quick Export 121
The Deliver Page 122
Camera Control with ATEM Mini 123
DaVinci Resolve Primary Color
Corrector 127
Working with Third Party Software 130
Working with Files from
CFast 2.0 and SD cards 130
Working with Files from
USB-C flash disks 130
Using Final Cut Pro X 131
Using Avid Media Composer 2018 131
Using Adobe Premiere Pro CC 132
Blackmagic Camera Setup Utility 133
Recommended Recording Media 134
Developer Information 147
Blackmagic Bluetooth Camera Control 147
Blackmagic SDI and Bluetooth
Camera Control Protocol 149
Example Protocol Packets 156
Help 157
Regulatory Notices 158
Safety Information 159
Warranty 160
Contents

Which camera are you using?
Blackmagic Pocket Cinema Camera 6K and Blackmagic Pocket Cinema Camera 4K models
have similar appearances. Both cameras produce incredible, wide dynamic range images and
share the same chassis. The control buttons and software menus are laid out the same way,
and operating the cameras is essentially the same.
Blackmagic Pocket Cinema Camera 6K features a Super 35mm sized sensor and an EF lens
mount, and has a 6K icon above the lens mount. Blackmagic Pocket Cinema Camera 4K
features a Micro Four Thirds sized sensor and a Micro Four Thirds lens mount.
Blackmagic Pocket Cinema Camera 6K
Blackmagic Pocket Cinema Camera 4K
5Which camera are you using?

Getting Started
Blackmagic Pocket Cinema Camera is a small portable digital cinema camera that records high
quality images on CFast 2.0 and UHS-I and UHS-II SD cards or an SSD via the USB-C port.
Your Pocket Cinema Camera is capable of recording clips using professional codecs designed
for post production including Blackmagic RAW and ProRes.
Getting started with your Blackmagic Pocket Cinema Camera is as simple as mounting a lens
and powering your camera.
Attaching a Lens
Blackmagic Pocket Cinema Camera 6K uses EF lenses and Blackmagic Pocket Cinema Camera
4K uses Micro Four Thirds lenses. Both of these types of lenses are very popular and
affordable, plus there is an enormous range to choose from. Attaching a lens to your camera is
the same process for Blackmagic Pocket Cinema Camera 6K and Pocket Cinema Camera 4K.
In both cases, the first step is to remove the protective dust cap. To remove the protective dust
cap, hold down the locking button and rotate the cap counterclockwise until it is released.
To attach an EF mount or Micro Four Thirds lens:
1 Align the dot on your lens with the dot on the camera mount. Many lenses have a visual
indicator, for example a blue, red or white dot.
2 Press the lens mount against the camera mount, and twist the lens clockwise until it
clicks into place.
3 To remove the lens, hold down the locking button, rotate the lens counterclockwise
until its dot indicator reaches the 10 o’clock position on an MFT lens, or 12 o’clock for an
EF lens. Gently remove the lens from its mount.
Attaching an MFT lens on Blackmagic Pocket Cinema Camera 4K
NOTE When no lens is attached to the camera, the glass filter covering the sensor is
exposed to dust and other debris so you’ll want to keep the dust cap on whenever
possible.
6Getting Started

Turning Your Camera On
Now that you’ve attached a lens, you will need to supply power to your camera. Blackmagic
Pocket Cinema Camera can be powered by inserting an LP-E6 battery into the camera, or from
two NP-F570 batteries in Blackmagic Pocket Camera Battery Grip, or by plugging the supplied
power adapter into the power input.
Inserting a Battery and Powering your Camera
Your camera uses standard removable LP-E6 type batteries. One is included with the camera,
but if you need additional batteries, they can be purchased from your Blackmagic Design
reseller or from most video or photography equipment stores.
1 On the underside of the camera, press the door release to open the battery door.
2 With the contacts facing the terminal, insert the LP-E6 type battery until you feel it click
into place under the locking tab.
TIP To release the battery, push the locking tab towards the front of the
camera and the battery will eject.
3 Close the door to the battery terminal and gently push until it clicks into place.
4 Move the power switch on the top of your camera to the ‘on’ position. To turn off the
camera, move the power switch to the ‘off’ position.
Using a Blackmagic Pocket Camera Battery Grip
If you have a Blackmagic Pocket Camera Battery Grip then it’s a good idea to install it now
before you continue. The Blackmagic Pocket Camera Battery Grip is designed to fit the
Pocket Cinema Camera 6K and Pocket Cinema Camera 4K models.
The battery grip adds a horizontal handle to your camera and holds two NP-F570 L-Series
batteries so you can shoot continuously for over two hours. The 12 V DC input can recharge the
batteries in the grip or provide uninterrupted power to the camera while changing the batteries.
You can use the USB-C port to recharge batteries in the grip while the camera is switched off.
To attach Blackmagic Pocket Camera Battery Grip:
Before you start attaching Blackmagic Pocket Camera Battery Grip, switch off your Pocket
Cinema Camera and unplug any external power source.
1 2
Open the camera battery compartment and remove
the LP-E6 battery.
Slide the tab near the hinge of the battery
compartment cover and remove the cover
from the camera.
7Getting Started

3 4
For safe storage of the battery compartment cover,
clip it into the recess on the underside of the battery
grip tray.
Close the battery compartment cover so it sits level
with the underside of the battery grip tray.
5 6
Insert the battery shaped part of the camera grip
into the battery compartment of your camera. The
1/4 inch screw on top of the battery grip should line
up with the 1/4-20 mounting point on the base of the
camera. A small pin next to the 1/4 inch screw helps
maintain correct alignment.
Turn the knob on the front of the battery grip to
the right to tighten the screw firmly and secure the
battery grip to the camera.
To insert batteries in Blackmagic Pocket Camera Battery Grip:
1 2
Twist the locking tab on the end of the battery
grip anticlockwise to unlock the battery tray. Slide
out the battery tray. You can do this before or
after attaching Blackmagic Pocket Battery Grip to
your camera.
Place two NP-F570 batteries into the battery
tray, being careful of their orientation, and slide
them away from each other. A tab between the
batteries moves up to lock the batteries into place.
When you want to remove the batteries, press
down on this locking tab and slide the batteries
toward each other.
8Getting Started

3 4
Slide the battery tray into the battery grip and turn
the locking tab clockwise. It’s important to note that
you can continue filming while changing batteries
in the battery grip if your camera is powered by an
external source plugged into the DC power input.
Twist the locking tab on the end of the battery grip
clockwise to lock the battery tray.
TIP When you have Blackmagic Pocket Camera Battery Grip attached and two
batteries inserted, the battery level indicator in the top right corner of the
LCD touchscreen shows two battery icons so you can monitor their charge level
independently. For more information, see the ‘power’ section.
Powering Your Camera with the Included Power Cable
The included 100-240 volt AC plug pack can be used to simultaneously power the camera and
charge the LP-E6 battery or two NP-F570 batteries if you have Blackmagic Pocket Camera
Battery Grip attached to your camera. The DC power connector locks to the camera so it
cannot be accidentally disconnected.
To plug in external power:
1 Connect the AC to 12V DC adapter plug to your mains power socket.
2 Open the rubber protector on the left side of your camera and rotate the locking
DC power connector so that it lines up with the recess on the top of the 12VDC
power input. Gently push the connector into the input until it clicks.
3 To unplug the connector, pull the sheath away from the connector and remove the
connector from the input.
If you have both external and battery power connected, only external power is used. If you
remove external power while a charged battery is connected, your camera switches to battery
power without interruption.
Your camera’s LP-E6 battery can be charged via USB when the camera is switched off. This is
convenient as you can use a portable power bank to charge the camera when not in use.
Blackmagic Pocket Cinema Camera supports charging via standard 10W USB wall chargers and
can also be used with chargers that support USB-Power Delivery, or USB PD. USB PD chargers
typically have a USB-C connection and up to 20V output, so can provide a faster charge.
Charging the LP-E6 battery via the 12V DC power input is supported when the camera is
switched on or off.
TIP If charging a hot battery immediately after use, charging speed is reduced until
the battery cools below 45 ˚C or 113 ˚F. We recommend letting the battery cool down
for 15 minutes before charging.
9Getting Started

You are now ready to insert the storage media and start recording!
Storage Media
Your Blackmagic Pocket Cinema Camera uses standard SD cards, faster UHS-II SD cards or
CFast 2.0 cards to record video.
Using the USB-C expansion port, you can also connect high capacity USB-C flash disks
forincreased recording times.
CFast Cards
CFast 2.0 cards are capable of supporting very high data rates, so are perfect for recording
6K, 4K and HD video at high frame rates. Refer to the record duration tables in the ‘recording’
section for details on the maximum frame rates that can be recorded in each format.
NOTE CFast 2.0 cards are generally high speed cards, though some cards have
slower write speeds compared to read speeds, and maximum data rates can differ
between models. For reliable recording with your chosen frame rates, use only the
cards recommended by Blackmagic Design.
To insert a CFast card:
12
To access the media slots, slide the door on the
right side toward the back of the camera.
The spring loaded door opens so you can access
the CFast and SD memory card slots.
3 4
Insert the CFast card into the CFast card slot
until you feel it lock into place. The card should
insert easily without the need for excessive force.
To remove a CFast card, gently push the CFast card
in and then release to eject it.
The storage information at the bottom of the LCD
touchscreen will show the name and record time
remaining of the detected CFast card.
10Storage Media

Inserting an SD card is like inserting a CFast card. For more information, see
‘To insert an SD Card’.
Choosing a CFast 2.0 Card
When working with high data rate video it’s important to carefully check the CFast card that
you would like to use. This is because CFast 2.0 cards have different read and write speeds.
For a list of CFast 2.0 cards tested and recommended by Blackmagic Design for shooting on
Pocket Cinema Camera, see the ‘Recommended Recording Media’ section.
For the most up to date information on supported CFast cards on Blackmagic
Pocket Cinema Camera, please refer to the Blackmagic Design support center at
www.blackmagicdesign.com/support.
SD Cards
In addition to CFast 2.0 cards, your camera can record on high speed UHS-I and UHS-II type
SD cards. UHS-I SD cards allow you to use more affordable storage media when shooting
compressed video formats in HD, and even faster UHS-II cards allow you to record
Blackmagic RAW as well as Ultra HD content in ProRes.
With SD cards, you can use more affordable storage media when shooting compressed video
formats in HD.
SDXC and SDHC are a very common media storage format for consumer still and video
cameras. If you’ve ever shot video using a DSLR, or use a Blackmagic Micro Cinema Camera,
Pocket Cinema Camera or Blackmagic Video Assist, you may already have compatible
SDcards to use.
For projects that don’t require the highest resolution files, or for when long recording durations
are needed, using SD cards can be very economical. Lower capacity and lower speed SD cards
can also be used for storing and loading LUTs and Presets.
11Storage Media

To insert an SD card
1 2
To access the media slots, slide the door on the
right side toward the back of the camera.
The spring loaded door opens so you can access
the media slots.
3 4
With the label on the SD card facing the
touchscreen, insert the SD card into the SDcard
slot until you feel it lock into place. The card should
insert easily without the need for excessive force.
To remove a the SD card, gently push the SD card in
and then release to eject it.
The storage information at the bottom of the LCD
touchscreen will show the name and record time
remaining of the detected SD card.
Choosing an SD Card
If you are recording 6K, 4K DCI or Ultra HD, then we recommend using the fastest high speed
UHS-II type SD cards available. It’s important to use high speed UHS-II SD cards for 6K, 4K DCI,
Ultra HD and HD recording, or UHS-I cards for HD recording. These cards are rated for fast data
speeds and support larger storage sizes. Generally the faster the cards, the better.
Before using your cards, you need to format them to either HFS+ or exFAT formats. It’s easy to
format your media via your camera’s ‘storage’ settings. Refer to the ‘settings’ section for more
information on storage settings.
If you want to, you can format your cards using a Mac or Windows computer. When using your
media on Mac, you can use HFS+ which is the Mac disk format, also known as OS X Extended.
If you are using Windows then you should use exFAT format, which is the Windows disk format
that Mac computers can also read.
For a list of SD cards tested and recommended by Blackmagic Design for shooting on Pocket
Cinema Camera, see the ‘Recommended Recording Media’ section.
For the most up to date information on supported SD cards on Blackmagic Pocket Cinema Camera,
please refer to the Blackmagic Design support center at www.blackmagicdesign.com/support.
12Storage Media

NOTE For high resolution, high frame rate recording, we recommend usingCFast 2.0
media or an external USB-C flash disk, as they are typically faster and available
inhighercapacities.
Locking and Unlocking SD Cards
SD cards can be write protected, or ‘locked’, to prevent data from being overwritten. When
inserting an SD card, make sure the card is not write protected. To disable write protection,
slide the plastic switch on the left side of the card to the position closest to the connectors.
Youcan always set the card to the locked again after recording.
Move the lock tab up or down
to lock or unlock an SD card
Your Blackmagic Pocket Cinema Camera lets you know if you’ve inserted a locked SD card by
displaying the word ‘locked’ instead of the card’s duration on the LCD touchscreen, and will
display a padlock icon in the storage menu next to the card name. If the card is locked, you
won’t be able to record video, capture stills, or export LUTs and presets until it is unlocked.
USB-C flash disks
Your Blackmagic Pocket Cinema Camera features a high speed USB-C expansion port, which
allows you to record video directly to USB-C flash disks. These fast, high capacity drives
allow you to record video for long periods, which can be important when filming events with
long durations.
Once you have finished recording you can connect the same drive directly to your computer for
editing and post production, without having to copy media across.
13Storage Media

To connect to a USB-C flash disk:
1 2
Open the rubber protector on the left side of the
camera and connect the other end of the cable to
the USB-C port.
Connect one end of a USB type-C cable to your
USB-C flash disk.
NOTE When a USB-C flash disk is connected to your camera, it occupies the
sameplace as the SD card in your camera’s operating system. This means that
whenyou have a compatible USB-C flash disk connected, your camera’s SD card slot
is unavailable.
To use the SD card slot instead of the USB-C flash disk, disconnect the USB-C
flashdisk from your camera.
Choosing a fast USB-C flash disk
USB-C flash disks are designed to offer fast, affordable storage for a wide range of devices and
are readily available from a variety of consumer electronics outlets. It’s important to note that
film making is only one part of the USB-C flash disk market, so choosing the best drive is vital to
making sure you have enough speed to record 6K and 4K footage.
Many USB-C flash disks are designed for home computing and aren’t fast enough to record
6K and 4K video.
For a list of USB-C flash disks tested and recommended by Blackmagic Design for shooting on
Pocket Cinema Camera, see the ‘Recommended Recording Media’ section.
For the most up to date list of recommended USB-C flash disks please go to
www.blackmagicdesign.com/support.
Important Notes About USB-C flash disk Speed
Some models of USB-C flash disk can’t save video data at the speed the manufacturer
claims. Thisis due to the disk using hidden data compression to attain higher write
speeds. This data compression can only save data at the manufacturer’s claimed
speed when storing data such as blank data or simple files. Video data includes video
noise and pixels which are more random so compression will not help, therefore
revealing the true speed of the disk.
14Storage Media

Some USB-C flash disks can have as much as 50% less write speed than the
manufacturer’s claimed speed. So even though the disk specifications claim a USB-C
flash diskhas speeds fast enough to handle video, in reality the disk isn’t fast enough
for real time video capture.
Use Blackmagic Disk Speed Test to accurately measure whether your USB-C flash disk
will be able to handle high data rate video capture and playback. Blackmagic Disk
Speed Test uses data to simulate the storage of video so you get results similar to
what you’ll see when capturing video to a disk. During Blackmagic testing, we have
found newer, larger models of USB-C flash disk and larger capacity USB-C flash disks
are generally faster.
Blackmagic Disk Speed Test is available from the Mac app store. Windows and
Macversions are also included in Blackmagic Desktop Video, which you can download
from the ‘capture and playback’ section of the Blackmagic Design support center at
www.blackmagicdesign.com/support.
Preparing Media for Recording
You can format your CFast cards, SD cards or USB-C flash disks using the ‘format card’ feature
on your camera’s storage and formatting menu, or via a Mac or Windows computer. For best
performance, we recommend formatting storage media using your camera.
HFS+ is also known as OS X Extended and is the recommended format as it supports
‘journaling’. Data on journaled media is more likely to be recovered in the rare event that your
storage media becomes corrupted. HFS+ is natively supported by Mac. exFAT is supported
natively by Mac and Windows without needing any additional software, but does not
supportjournaling.
Preparing Media on Blackmagic Pocket Cinema Camera
1 Tap either storage indicator at the bottom of the LCD touchscreen to enter the
storage manager.
2 Tap ‘Format CFast card’ or ‘Format SD card’. If you have a USB-C flash disk connected
to your camera, ‘Format drive’ will be displayed instead of ‘Format SD card’.
‘Format SD card’ is replaced with ‘Format external drive’ in your storage and formatting
screen when you have a USB-C flash disk connected to your camera
3 Tap ‘edit reel number’ if you would like to manually change the reel number. Use the
keypad to enter a new reel number and press ‘update’ to confirm your selection.
15Storage Media

4 Choose OS X Extended or exFAT format and tap the format button.
Tap ‘edit reel number’ to manually edit the reel number
5 A confirmation screen will allow you to confirm the card to be formatted, the selected
format and the reel number. Confirm your selection by tapping the format button.
Tap‘cancel’ to cancel the format.
Check that you have selected the correct card before formatting
6 Hold down the format button for three seconds to format your media.
7 The camera notifies you when the format is complete and your drive is ready for use,
orif formatting has failed.
16Storage Media

8 Tap ‘ok’ to return to the storage manager.
9 Tap ‘exit’ to leave the storage manager.
When formatting CFast cards, SD cards or USB-C flash disks using your camera, the camera ID
that is generated from the slate and reel number are used to name the media. Your camera
automatically adjusts the reel numbers incrementally each time you format. Ifyou need to
manually enter a specific reel number, tap the ‘edit reel number’ and enter the number you want
to format the card as.
Tap on ‘reset project data’ in the ‘project’ tab of the slate if you’re starting a new project and
want the numbering to reset back to 1.
The storage manager on your camera indicates whether you are
currently managing CFast, SD or USB-C flash disk media
TIP If the SD card is write protected, your camera will display the word ‘locked’ instead
of the card’s duration on the LCD touchscreen, and will display a padlock icon in the
storage menu. Unlock the card to format and record. For more information, refer to the
‘SD cards’ section of this manual.
NOTE If you have a USB-C flash disk connected, ‘external drive’ appears over
storageslot2.
Preparing Media on a Mac
Use the Disk Utility application included with Mac to format your CFast card, SD card, or USB-C
flash disk in the HFS+ or exFAT formats. Remember to backup anything important from your
media first as all data will be lost when it is formatted.
1 Connect the storage media to your computer and dismiss any message offering to use
your media for Time Machine backups.
2 Go to applications/utilities and launch Disk Utility.
3 Click on the disk icon for your camera’s storage media and then click the ‘erase’ tab.
4 Set the ‘format’ to ‘Mac OS extended (journaled)’ or ‘exFAT’.
5 Type a ‘name’ for the new volume and then click ‘erase’. Your camera’s storage media
will quickly be formatted and made ready for use.
17Storage Media

Use Disk Utility on Mac to erase your camera’s storage media in
the Mac OS extended ( journaled) or exFAT format
Preparing Media on Windows
The ‘format’ dialog box can format your camera’s storage media in the exFAT format on a
Windows PC. Remember to backup anything important from your media first as all data will be
lost when it is formatted.
1 Connect your camera’s storage media to your computer using an external reader,
USB-C cable or adapter.
2 Open the ‘start’ menu or ‘start’ screen and choose ‘computer’. Right click on your
camera’s storage media.
3 From the contextual menu, choose ‘format’.
4 Set the file system to ‘exFAT’ and the allocation unit size to 128 kilobytes.
5 Type a volume label, select ‘quick format’ and click ‘start’.
6 Your storage media will quickly be formatted and made ready for use.
Use the ‘format’ dialog box feature
in Windows to format yourcamera’s
storage media in the exFAT format
18Storage Media

NOTE If your recordings are dropping frames, check that your card or drive is on our
list of recommended media for the codec and frame size you are using. For lower data
rates try lowering your frame rate, resolution, or try a compressed codec such as
ProRes. Check the Blackmagic Design website for the latest information at
www.blackmagicdesign.com
NOTE Partitioned media can be used with your Blackmagic Pocket Cinema Camera,
though your camera will only recognize the first partition of your media for recording
and playback.
It’s worth noting that if you use the storage and formatting menu to format your media,
the entire drive including all partitions will be erased, not just the first partition that has
been used for recording and playback. For this reason we strongly recommend using
media with one partition only.
Recording
Recording Clips
Blackmagic Pocket Cinema Camera features two record buttons. The primary record button is
located on the top of the handgrip for triggering with your index finger when holding the
handgrip of the camera with your right hand.
The second record button is located on the front of your camera to allow you to begin recording
while holding the camera with one hand in situations where you want to record yourself. The
button is located in an easy to reach position, ideal if you are recording yourself for video blogs.
Press one of the ‘record’ buttons on your camera to begin recording immediately. Press ‘record’
again to stop recording.
The ‘record’ button located on the The ‘record’ button located on
top panel of your camera the front of your camera
19Recording

Before you start recording, tap and hold the name of the media at the bottom of the
touchscreen to select the memory card or USB-C flash disk you want to use.
The bar over the media type you have selected turns blue to indicate the camera is set
to record to this media. To record to a different card or drive, tap and hold the name of
the media. While recording, the bar is red.
Choosing the Recording Format
Blackmagic Pocket Cinema Camera records using Apple ProRes codecs including ProRes
422 HQ, ProRes 422, ProRes422 LT and ProRes 422 Proxy. ProRes codecs let you fit more
video on your SD card, CFast card or USB-C flash disk. ProRes 422 HQ provides the highest
quality video with the lowest compression. Alternatively, ProRes 422 Proxy gives you far more
recording time with greater compression. Your camera can also record with the Blackmagic
RAW format. You may decide to experiment to see which format best suits your workflow.
It’s important to note that Blackmagic Pocket Cinema Camera can use Blackmagic RAW for full
sensor and windowed sensor formats, and must use ProRes for scaled formats.
For more information on windowed and scaled formats, see the ’maximum sensor frame
rates’ section.
Blackmagic RAW
Blackmagic Pocket Cinema Camera supports the Blackmagic RAW file format. This format offers
superior image quality, wide dynamic range and a broad selection of compression ratios.
Blackmagic RAW features all the user benefits of RAW recording, but the files are very fast
because most of the processing is performed in the camera where it can be hardware
accelerated by the camera itself.
Blackmagic RAW also includes powerful metadata support so the software reading the files
knows your camera settings. If you like shooting in video gamma because you need to turn
around edits quickly and you don’t have time for color correction, then this metadata feature
means you can select video gamma, shoot in video gamma, and the file will display with video
gamma applied when you open it in software. However underneath, the file is actually film
gamma and the metadata in the file is what’s telling the software to apply the video gamma.
So what all this means is if you want to color grade your images at some point, then you have
allthat film dynamic range preserved in the file. You don’t have your images hard clipped in the
whites or the blacks, so you retain detail and you can color grade to make all your images look
cinematic. However, if you don’t have time for color grading, that’s fine because your images
will have the video gamma applied and look like normal video camera images. You are not
locked in on the shoot and you can change your mind later during post production.
Blackmagic RAW files are extremely fast and the codec is optimized for your computer’s
CPU and GPU. This means it has fast smooth playback and eliminates the need for hardware
decoder boards, which is important for laptop use. Software that reads Blackmagic RAW also
gets the advantage of processing via Apple Metal, Nvidia CUDA and OpenCL.
This means that Blackmagic RAW plays back at normal speed like a video file on most
computers, without needing to cache it first or lower the resolution.
It’s also worth mentioning that lens information is recorded in the metadata on a frame by frame
basis. For example, when using compatible lenses, any zoom or focus changes performed over
the length of a clip will be saved, frame by frame, to the metadata in the Blackmagic RAW file.
20Recording
This manual suits for next models
2
Table of contents
Other Blackmagicdesign Digital Camera manuals
Blackmagicdesign
Blackmagicdesign Cinema Camera User manual

Blackmagicdesign
Blackmagicdesign Pocket Cinema Camera 6K User manual

Blackmagicdesign
Blackmagicdesign Pocket Cinema Camera User manual
Blackmagicdesign
Blackmagicdesign Cinema User manual

Blackmagicdesign
Blackmagicdesign Pocket Cinema Camera 6K User manual

Blackmagicdesign
Blackmagicdesign Pocket Cinema User manual
Blackmagicdesign
Blackmagicdesign Blackmagic Cinema Camera User manual
Blackmagicdesign
Blackmagicdesign Studio User manual

Blackmagicdesign
Blackmagicdesign Pocket Cinema User manual

Blackmagicdesign
Blackmagicdesign Blackmagic Pocket Cinema Camera 6K Pro User manual


