BoX Medical Solutions Meibox User manual

Meibox Meibographer
Portable USB Meibography Camera
User’s Manual

1
Table of Contents
ABOUT THIS GUIDE.................................................................................................................. 2
1.
INTRODUCTION..................................................................................................................... 3
1.1 FEATURES AND BENEFITS .................................................................................................................................3
1.2 UNPACKING THE PACKAGE...............................................................................................................................3
1.3 SYSTEM REQUIREMENTS...................................................................................................................................4
1.4 PHYSICAL DESCRIPTION ....................................................................................................................................4
2.
HARDWARE INSTALLATION............................................................................................. 5
2.1 ATTACHING THE CAMERA TO THE SLIT LAMP...............................................................................................5
2.2 USB EXTENDER.....................................................................................................................................................5
2.3 SETTING UP THE CAMERA SOFTWARE ...........................................................................................................6
3.
IMAGE CAPTURE ................................................................................................................ 13
4.
IMAGE ENHANCEMENT.................................................................................................... 16
5.
FREQUENTLY ASKED QUESTIONS................................................................................ 20
TECHNICAL SUPPORT........................................................................................................... 22

2
About This Guide
This manual provides instructions and illustrations on how to use your Meibox
Meibographer, includes:
Chapter 1, Introduction, provides the general information on the camera.
Chapter 2, Installation, describes the hardware and software installation procedure forthe
Meibox.
Chapter 3, Security, explains the security feature of the camera.
Chapter 4, Application of the Camera, provides the illustrations of the camera’s
applications.
Chapter 5, Using the Camera, guides you through the configuration using the web
browser.
Chapter 6, IPView Pro, helps you to install and use thesoftware.
Chapter 7, Appendix.
Please note that the illustrations or setting values in this manual are FOR YOUR REFERENCE
ONLY. The actual settings and values depend on your system and network. If you are not sure
about the respective information, please ask your network administrator or MIS staff for help.

3
1. Introduction
Thank you for purchasing the Meibox Meibographer, a camera device that can be connected
directly to a window based PC. Compared to theconventional meibographer, the Meiboxfeatures
a portable cloud based meibography imaging solution that can provide a cost-effective solution
to imaging meibomian glands to aid in the diagnosis of dry eyes. It can be managed on any PC
terminal that has the client software installed.
The simple installation procedures and cloud-based interface allow you to integrate it into your
network easily. The camera features a simple portable imaging solution, allowing you to install
and use it in any clinical setting. The camera’s versatility allows you to adapt it to your clinic flow
instead of adapting your clinic to the technology. In addition, with comprehensive applications
supported, the Meibox is your best solution for high resolution images of your patient’s Meibomian
Glands.
1.1
Features and Benefits
Simple To Use
The Meibox was designed with quality, clinical efficiency and durability in mind. Composed of a
durable brushed aluminum chasis, the Meibox is unobtrusive and fits perfectly in the flow of any
clinic. Mounted on a slit lamp it can be placed in a centralized location as a screening tool or
placed in any examination room for easy integration. This design element has helped doctors
adapt the technology to their clinic flow instead of the other way around.
Cloud Based Database:
The Meibox utilizes Microsoft Azure a HIPPA Compliant storage database providing doctors
convenience, security and peace of mind. The advantages of a cloud based software systems
include:
- Protection of data ensured by Microsoft Azure
- No licensing fees for multiple viewing stations and installation
- No concerns of lost data due to server malfunctions
- Automatic updates ensuring the latest software updates are implemented
- Easy download of data to PC for attachment into electronic medical records
- Multi-location offices can access data for patients anywhere
Image Enhancing Software
Vision processing technology is available for enhancing your images of the meibomian glands.
With the click of a button, images of the glands are enhanced with increased border definition.
Inversion lighting allows you to see a negative of the image increasing the ability to interpret the
image. The intelligent lighting features allow you to click on any area of the picture that you
would like to see and enhances the surrounding light.
1.2
Unpacking the Package
Unpack the package and check all the items carefully. In addition to this User’s Guide,
be certain that you have:
One Meibox Meibographer Unit. (Imaging box and slit lamp attachment)
One Quick Installation Guide

4
One 10 foot USB A to USB Cable
One USB 2.0 Extender (used if the camera is beyond the 10 foot range)
One 20 foot Ethernet cable for USB 2.0 Extender
One cordless mouse
If any item contained is damaged or missing, please contact your local dealer immediately. Also,
keep the box and packing materials in case you need to ship the unit in the future.
1.3
System Requirements
Networking
Minimum internet speed recommended: 6Mbps Download and 1Mbps Upload
Accessing the Camera
Operating System: Microsoft® Windows® 7/8/10
CPU: Intel iCore 5 or above
Memory Size: 4GB RAM
Resolution: 1920x1080 or above
Windows 64 bit processing
(Recommended minimum outcomes are for optimal performance. Lower specifications have
been compatible for the Meibox software, but cannot be guaranteed)
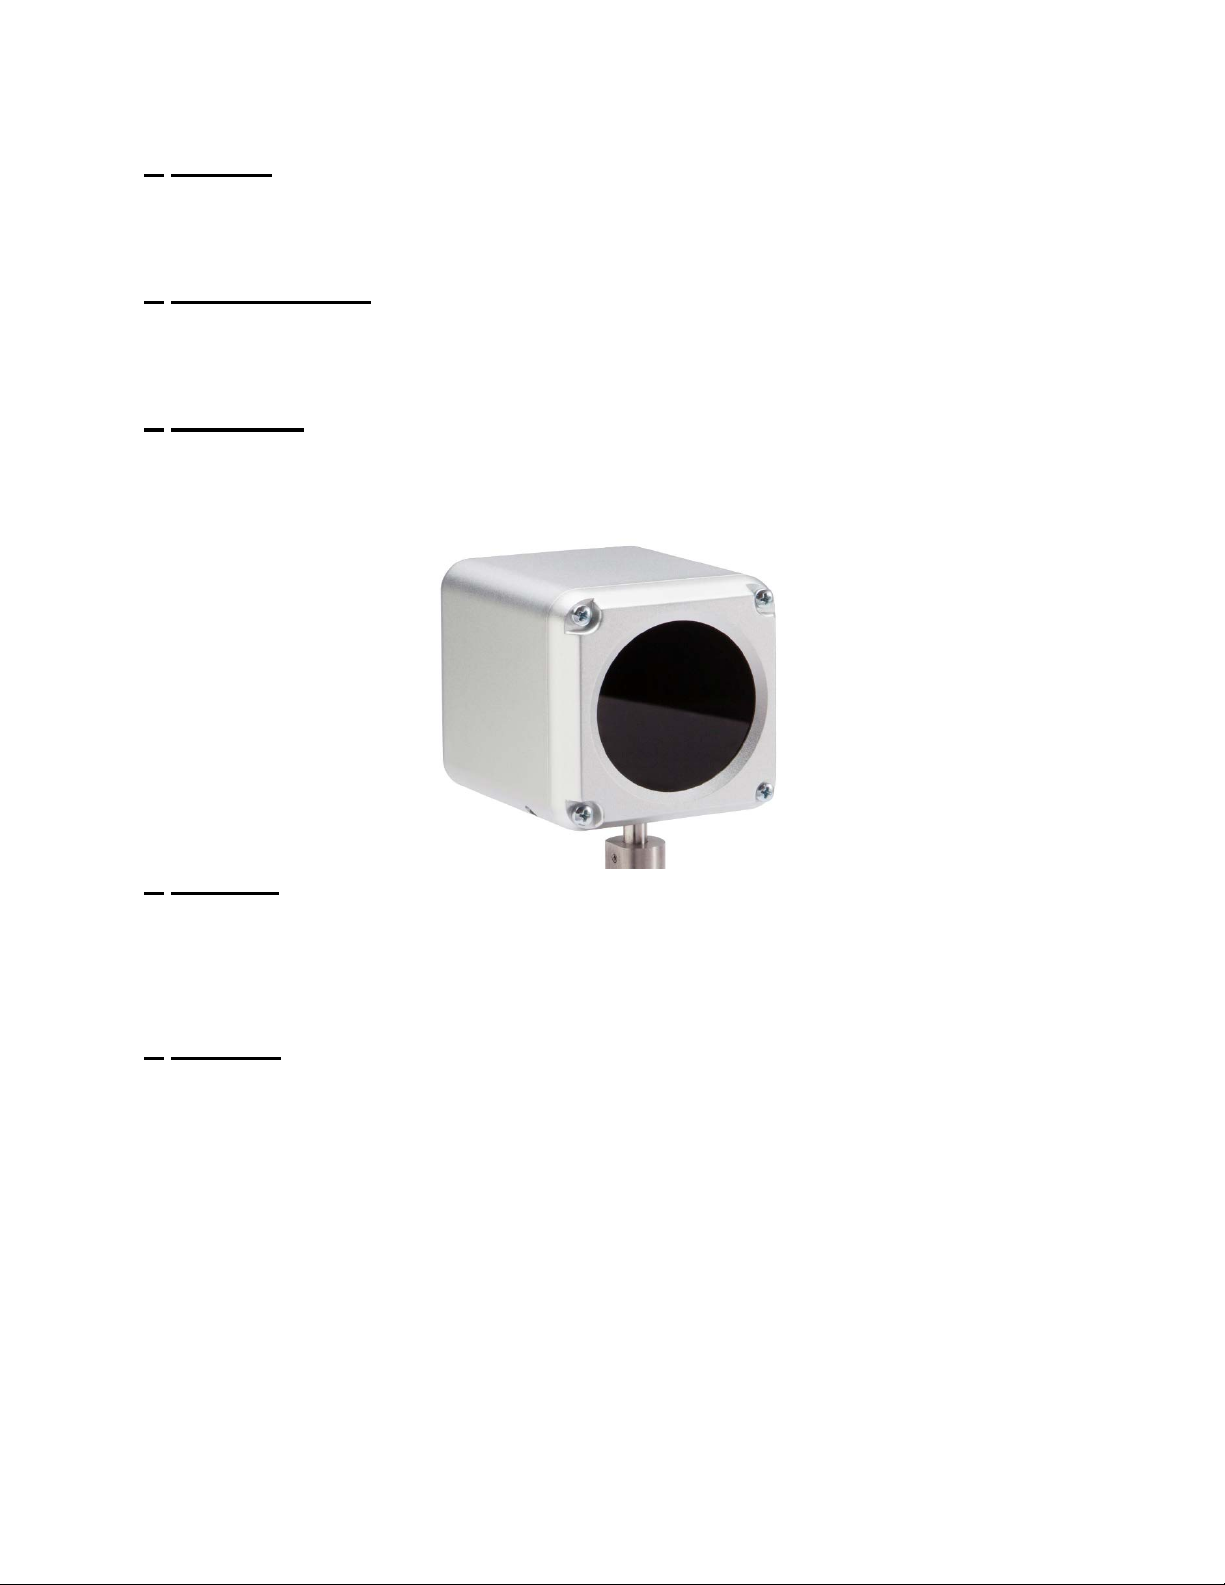
1.4
Physical Description
This section describes the externally visible features of the Meibox
5
1.
Base Pin
The pin at the base of the Meibox sits in the Ruby lens slot of the slit lamp and drops into the slit
lamp creating a platform for you to utilize the Meibox Device.
2.
Adjustment Knob
The black adjustment knob on the slit lamp is used to calibrate the height of the Meibox in the
event that your slit lamp ranges are restricted.
3.
Image Plate
The Meibox uses a special glass filter to allow only the optimum wavelengths of light in that allow
for the highest resolution image of the Meibomian Glands.
4.
Red LED:
When the camera system is active you will see a ring of red LED lights that will appear. The LED
lights will not appear unless the camera is plugged in and the software is engaged in the capture
process.
5.
USB Slot:
The USB A slot is located at the base of the Meibox Head.
(Image of Base of Meibox)

6
2. Hardware Installation
2.1
Attaching the Camera to the Slit Lamp
1. On your slit lamp find the accessory mounting hole. Sometimes there is a removal cover
on the hole.
2. Insert the Slit Lamp Adapter Pin to the Slit Lamp Accessory Mounting Hole.
3. Connect one end of the black 10 foot USB Cable to the bottom of the camera.
4. If your computer is within reaching distance of the USB Cable, you may attach it directly
into your computer.
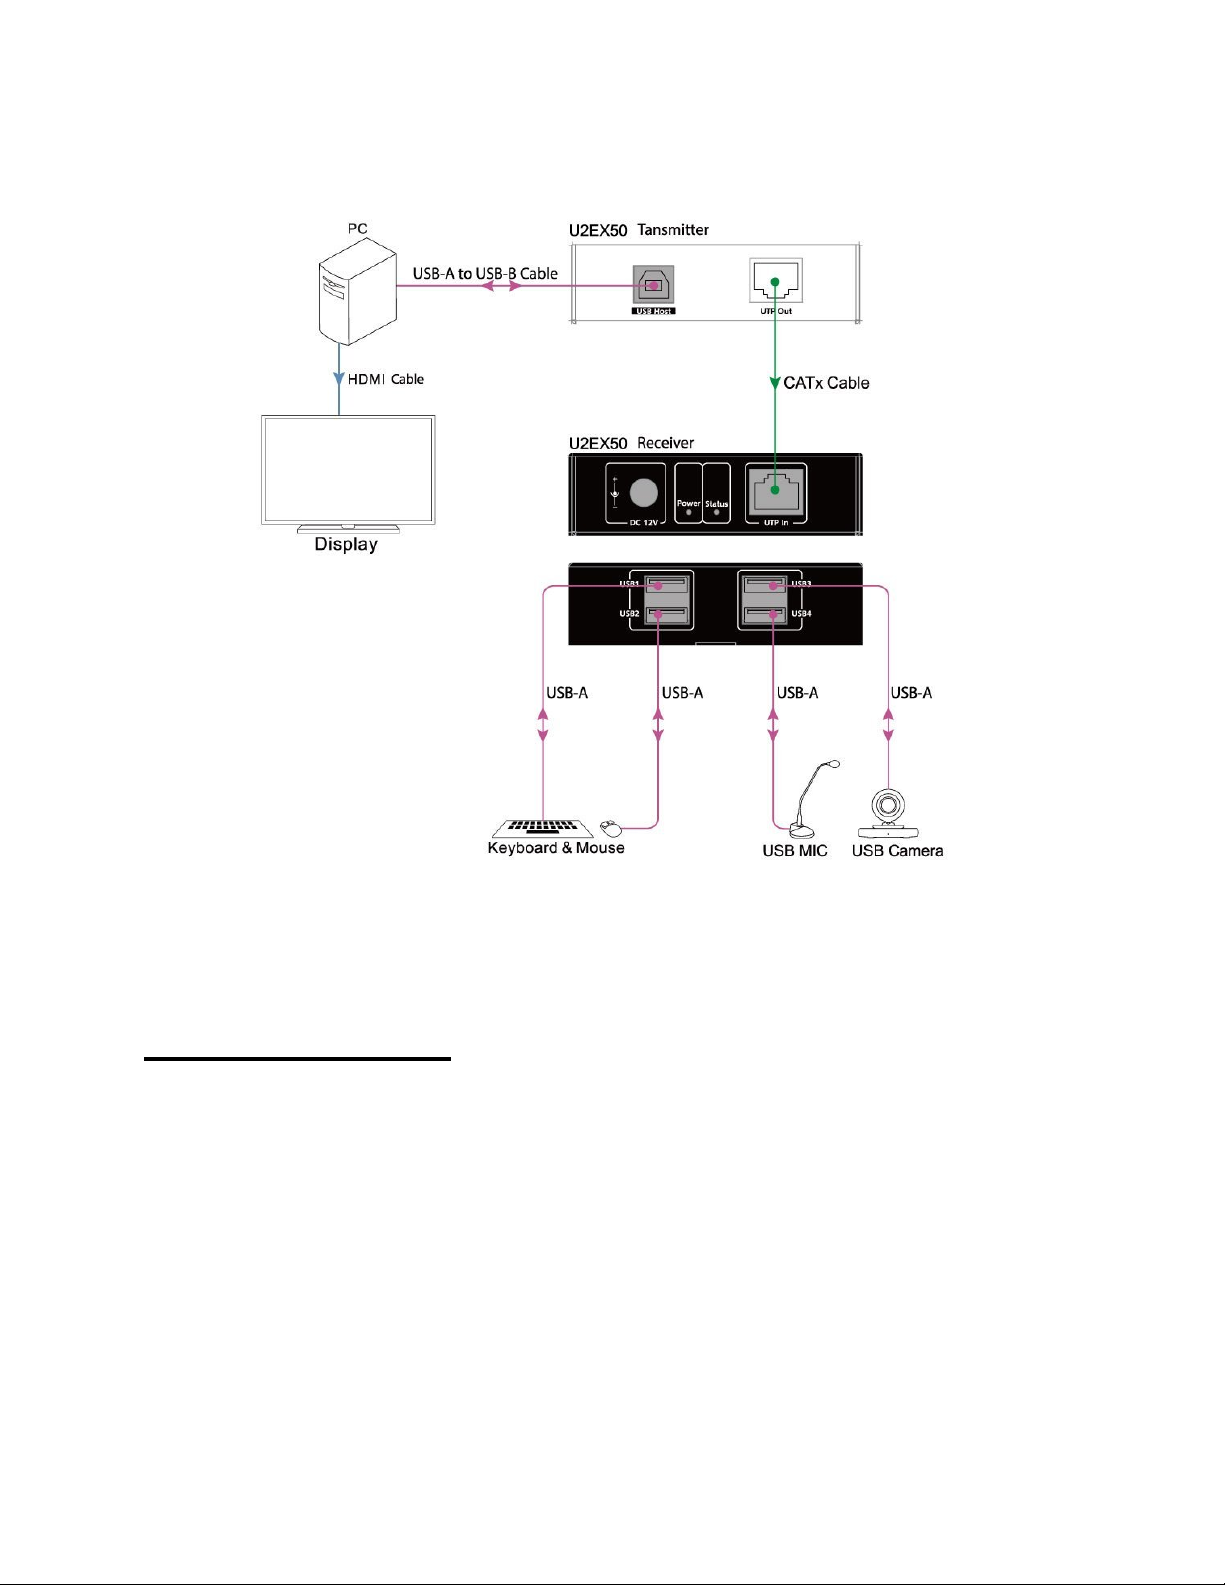
2.2
USB Extender:
If utilizing a USB extender attach the USB B end to the extender
and follow additional steps.
7
2.3
Setting up the Camera Software
Installing the Setup Wizard
Step 1 Visit website www.boxmedicalsolutions.com/store
Step 2 Click on Meibox Cloud Imaging Software and proceed to checkout.
Enter discount code: CloudMeibox1

8
Step 3 Register your device by completing the address and forms. Include the email address that you
would like to register to the cloud software as this will be used to determine if the account is legitimate
periodically. Submit order and you will receive a link to download the software:

9
Step 4 Open Meibox Set Up Software and select Yes when prompted to allow this app to make
changes on your device by Box Medical Solutions.
Step 5 Click Next to accept the default Destination Folder.
Step 6 Review and accept the Software Licensing Agreement

10
Step 7 Click Next to install all drivers. It is important to have the camera plugged into the computer at
this time.
Step 8 Select destination for program installation. Recommend using defaulted destination. Click
Install.
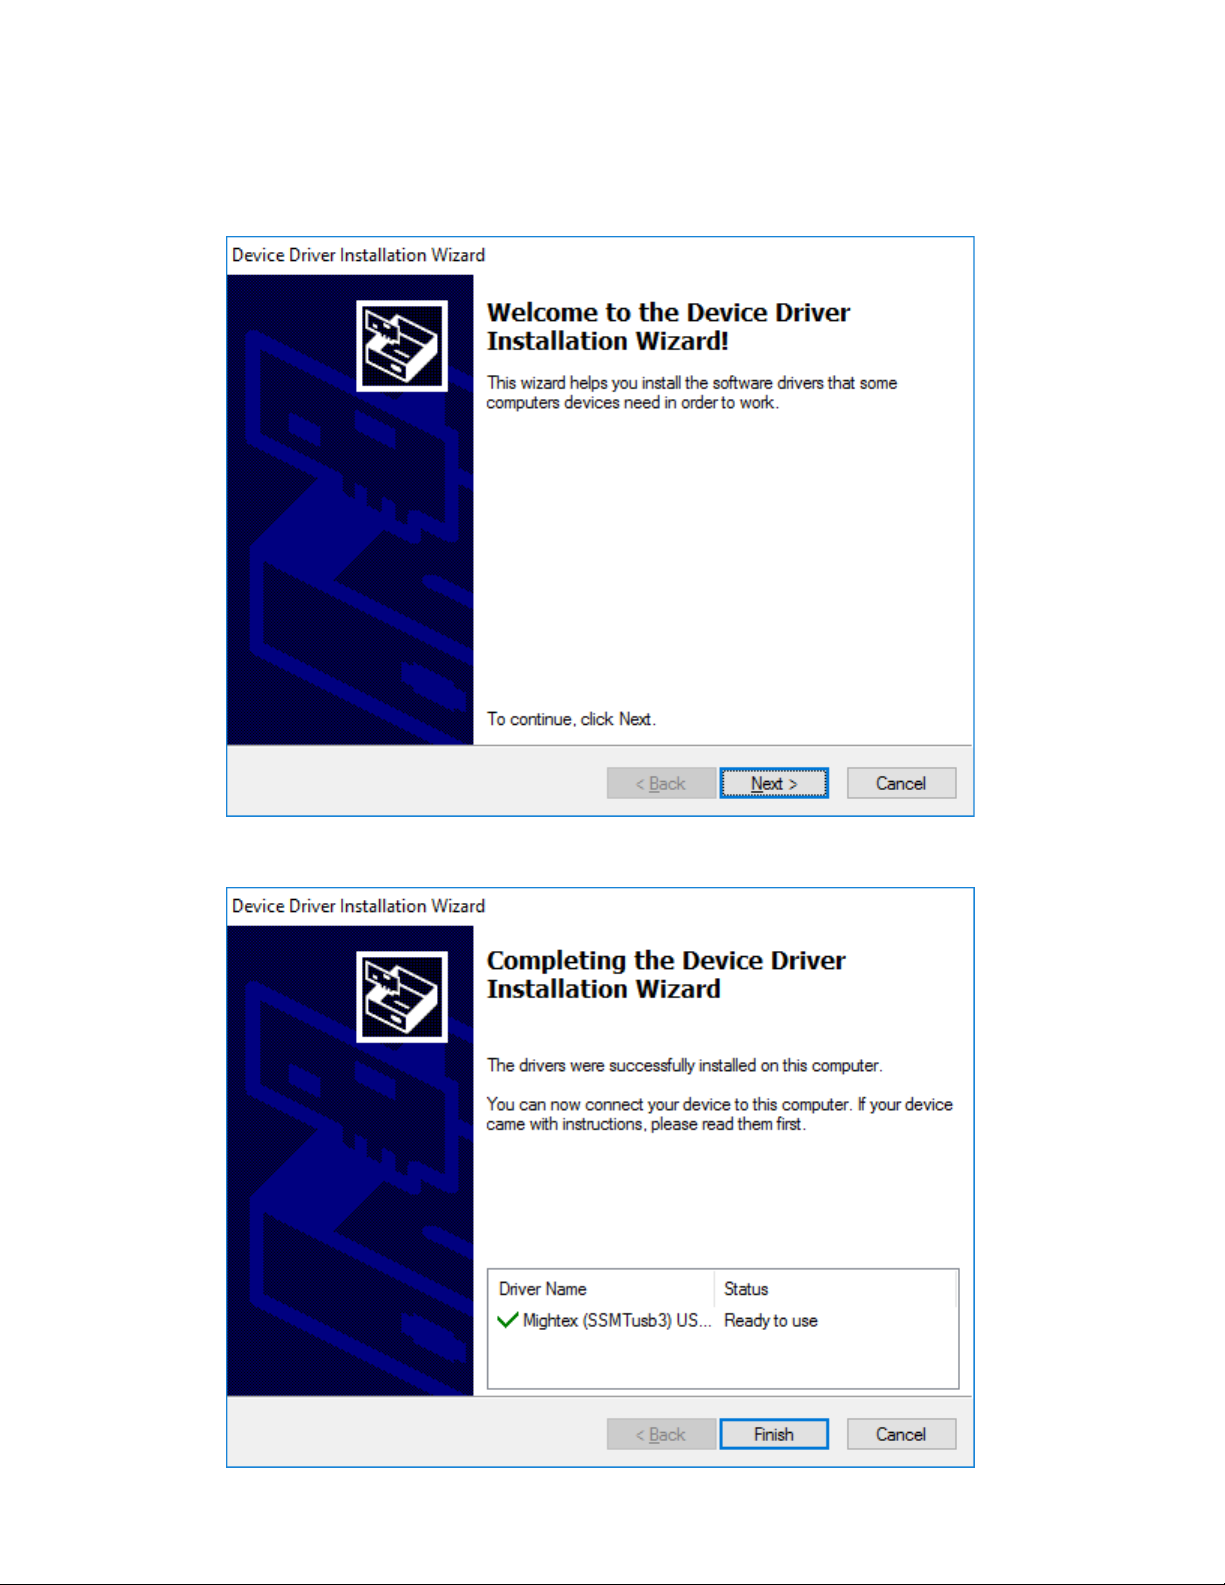
11
Step 9 Click Next
Step 10 Successful installation, click finish.
12
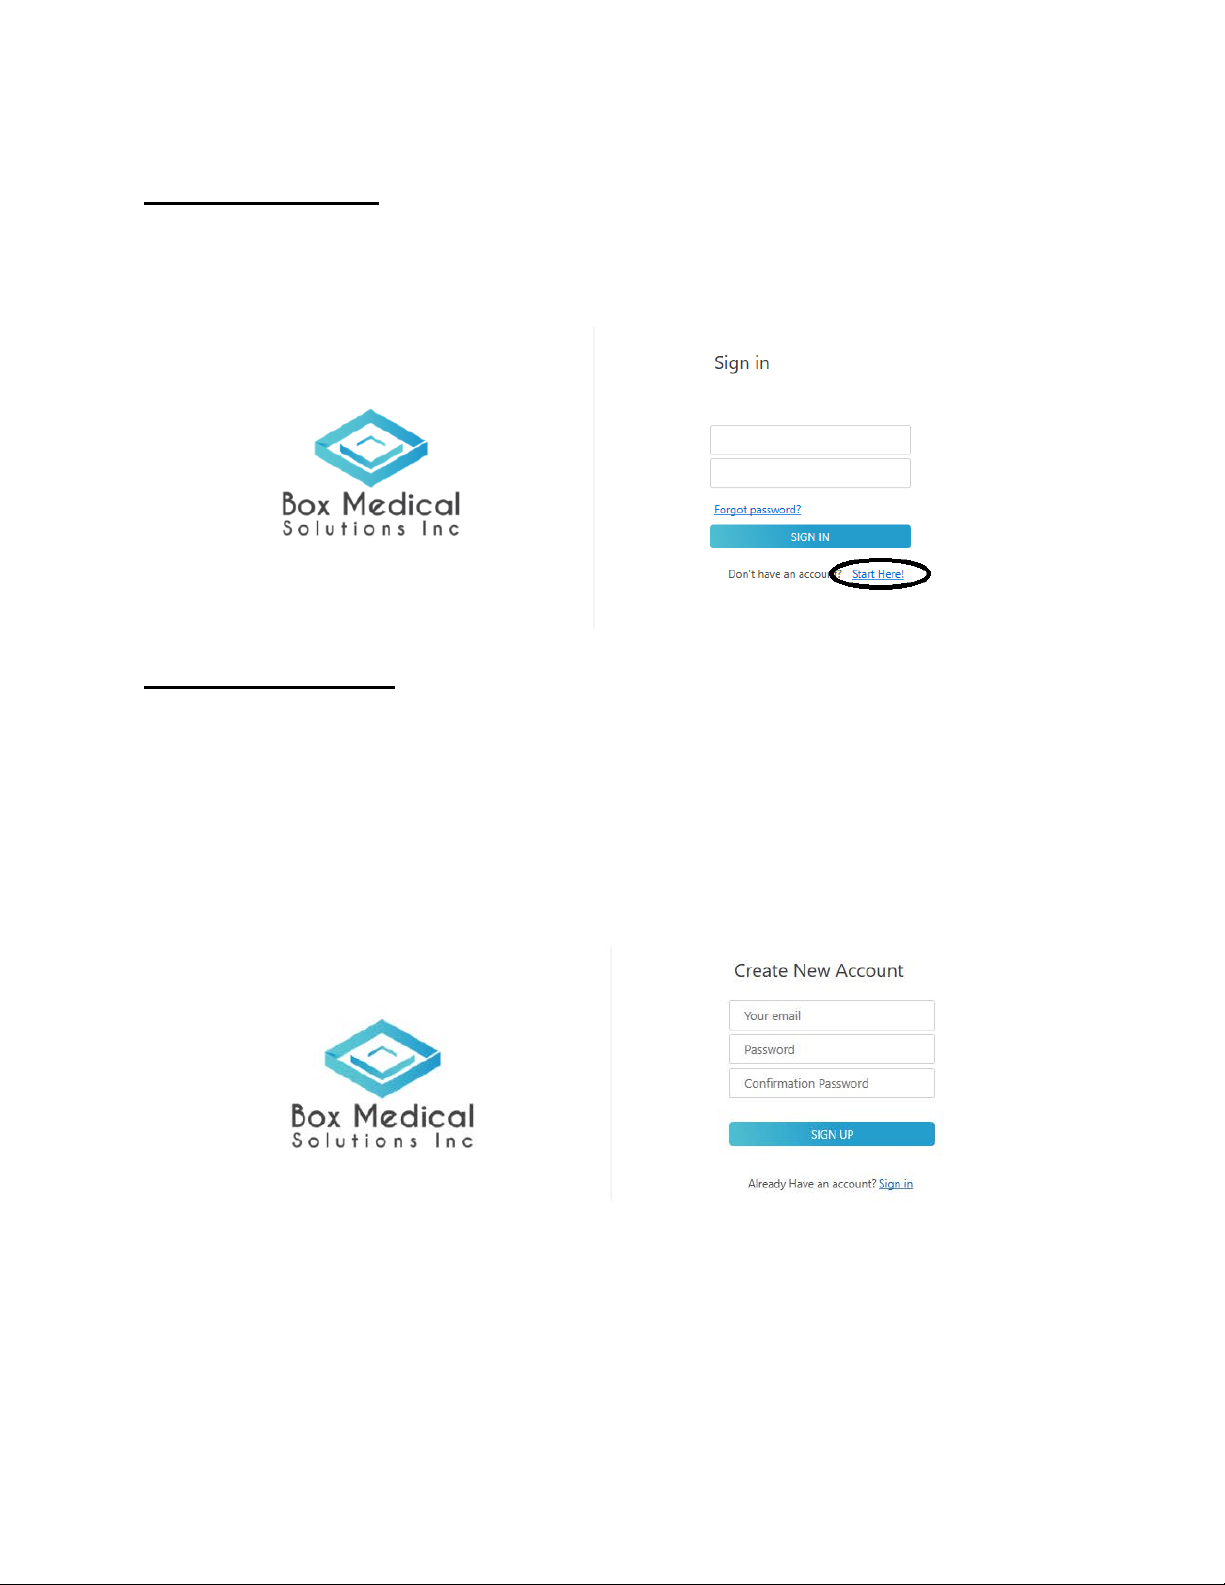
Creating an Account
Step 1 Create an account and then login to start using the software. Use the email that was registered on
the store as this will ensure that the account will not be suspended.
Starting new account:
Step 1 Create an account and then login to start using the software. Use the email that was registered on
the store as this will ensure that the account will not be suspended.

13
3. Image Capture
Image capture process:
Step 1 Add new patient by selecting upper right section:
Step 2 Enter patient demographics information:
Step 3 Start new session (upper right hand corner)

14
Step 4 Move camera system to 90 degree plane and move
beam splitter/tower to 45/135 degree position depending on
hand dominance. Do not move beam splitter beyond the
45/135 degree position or the slit lamp can potentially topple.
Place cordless mouse on slit lamp table
Step 5 Initiate camera capture process by selecting which eyelid you would like to take a picture of by
clicking on the camera or capture icon.
15
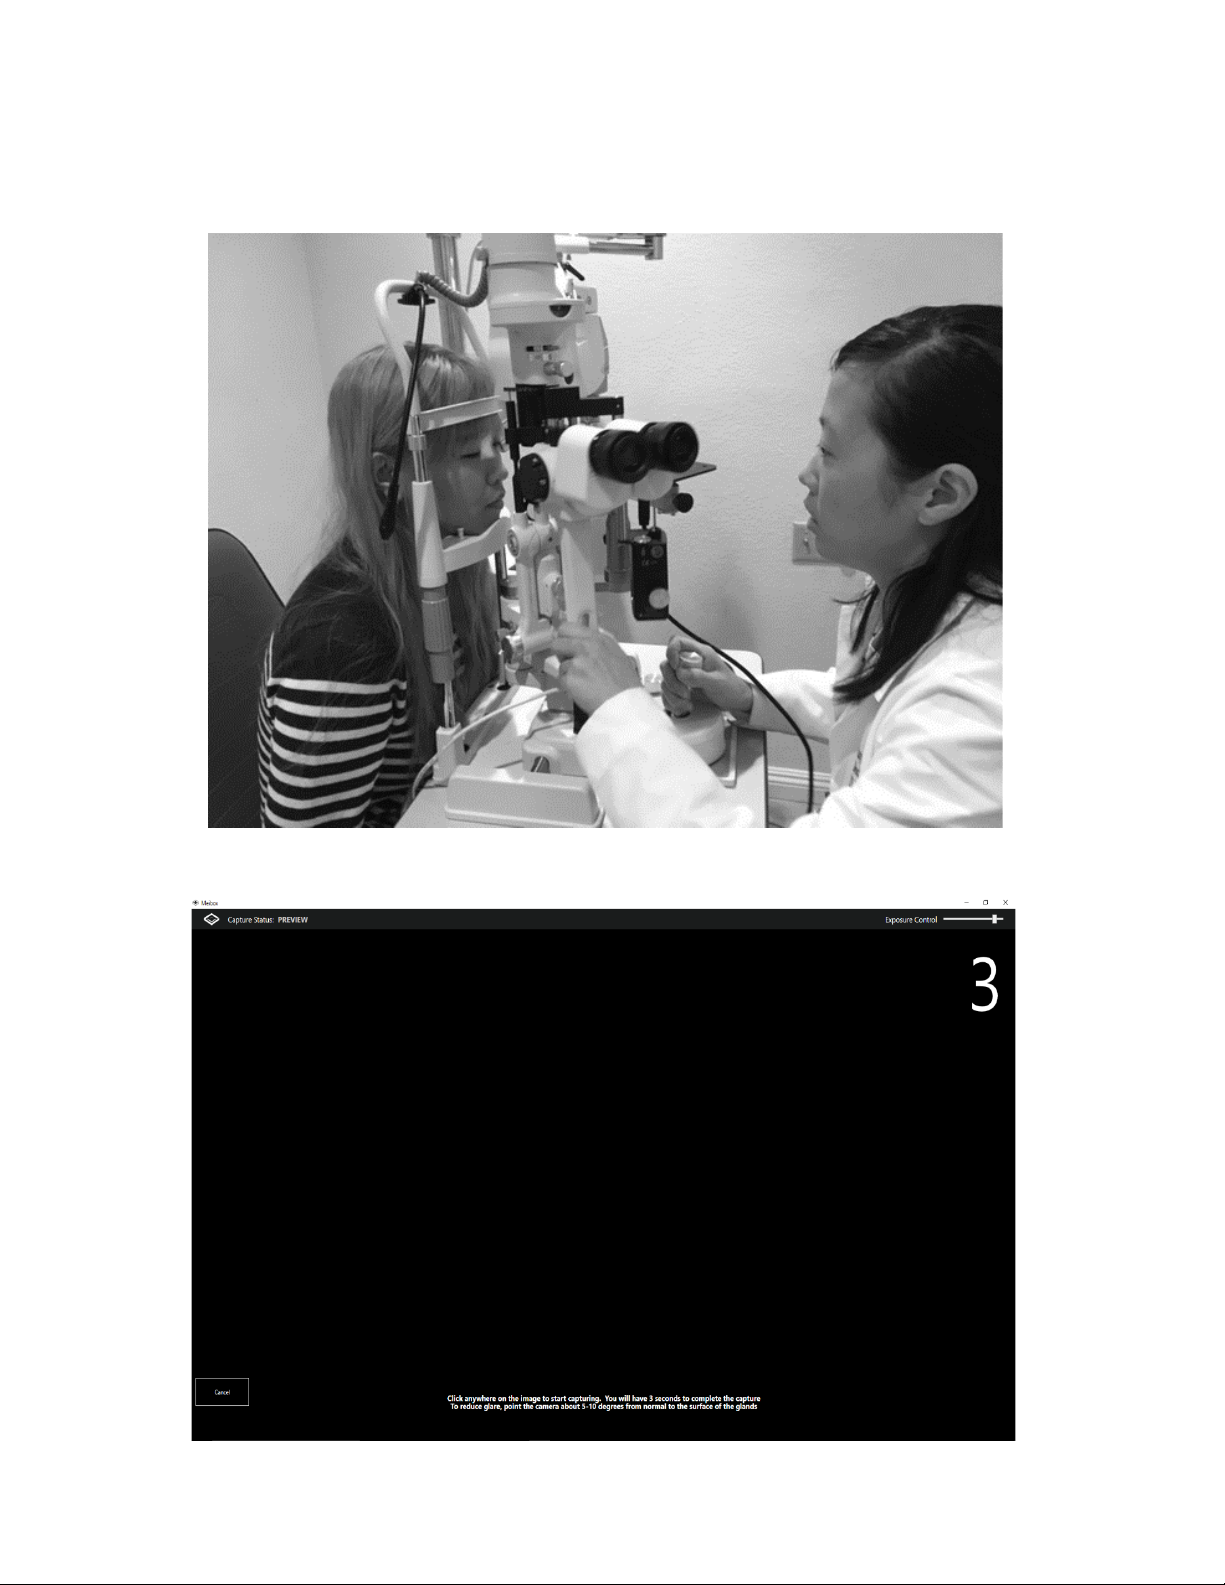
Step 6 Move slit lamp back all the way towards you and position the patient behind slit lamp
Move slit lamp towards patient until eyelids are in good focus. Slit lamp does not have to be on, the focus
is seen on the computer monitor. The optimum distance is 150mm from eye to Meibox for best clarity
Step 7 Evert eyelids.Click mouse button on live image of eye to start image capture process. There will
be a 3 second count down as 4 images are captured.

16
4. Image Enhancement
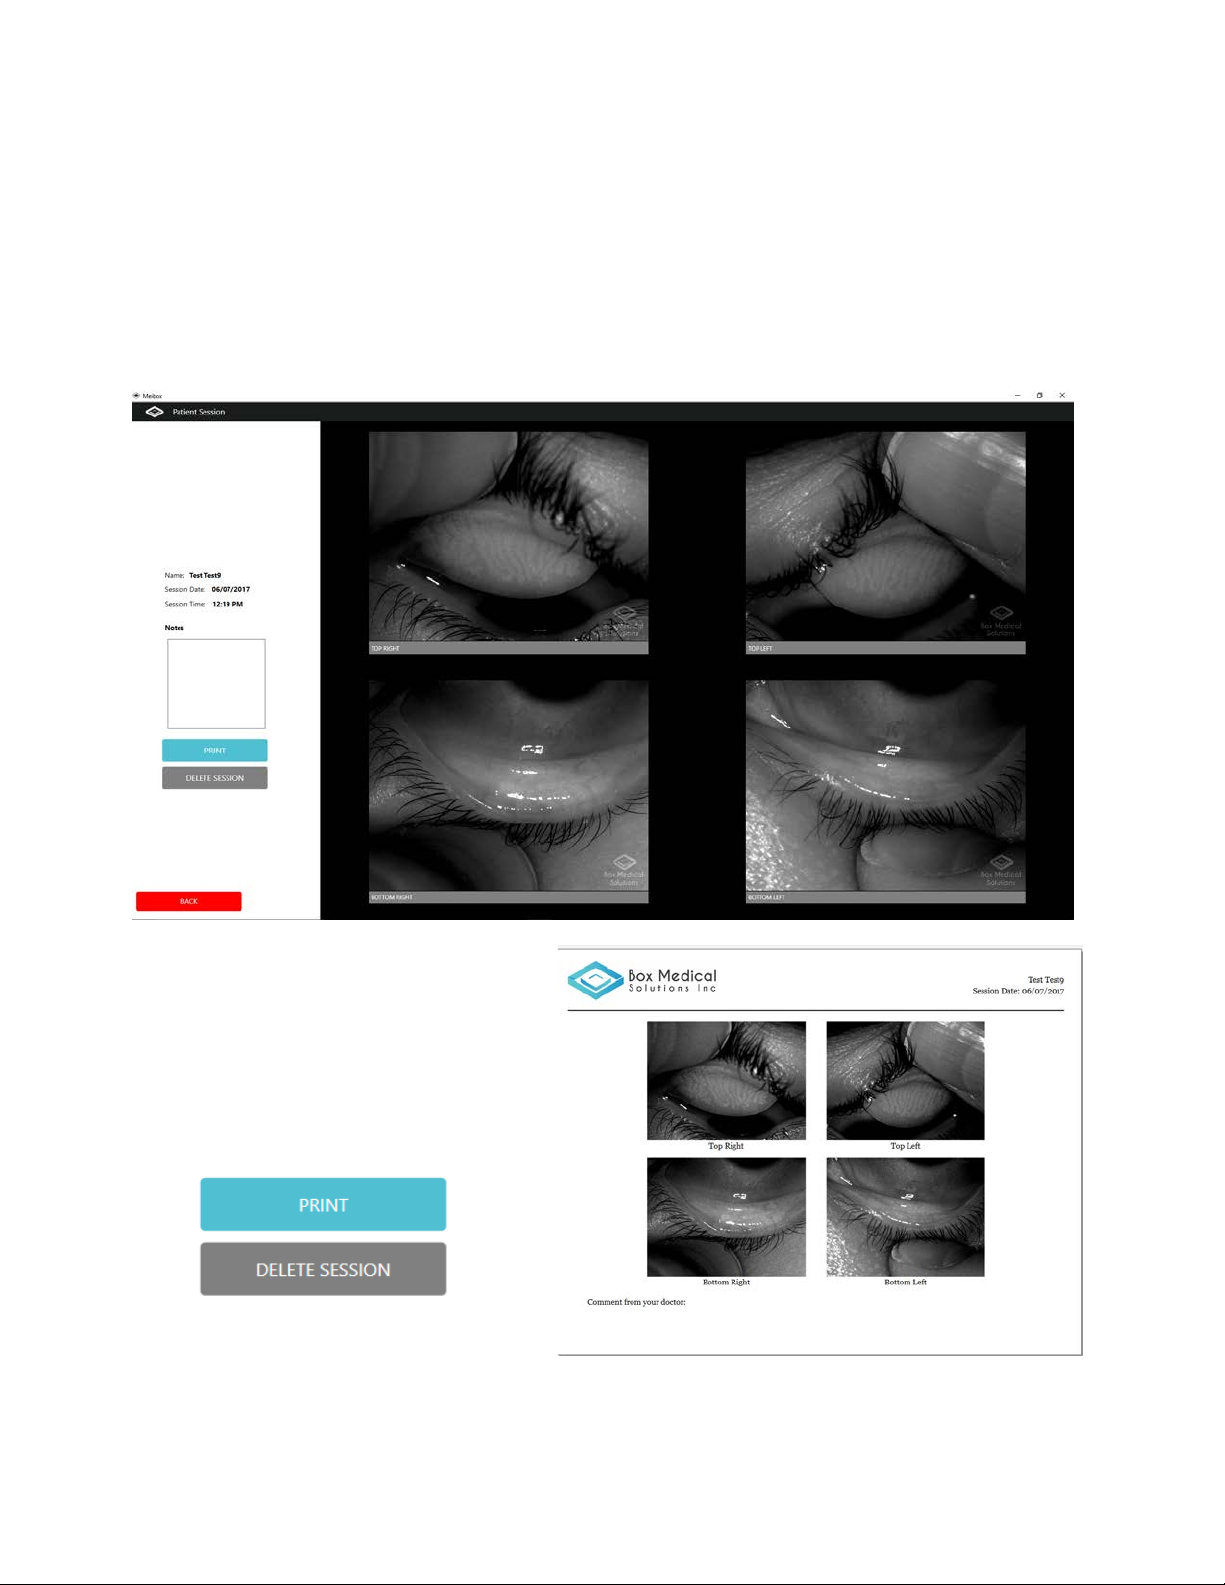
Step 1 Click on image you would like to enhance from the summary screen
Step 2 Once the image is selected you will have several enhancement options. Scroll bar has multiple
images that you can select from the previous patient sessions to allow for quick and easy access for
comparison
17
Contrast: Use contrast bar to adjust for better image capture
Enhance: Instant border enhancement of glands
Invert: Creates a negative image, glands will now appear black, may help with difficult to see
glands
Light: Intelligent lighting, select option and click on any area of picture that you would like to see
in better detail.
Download: Download a high-resolution jpeg of your image to attach to a file or email.
Step 3 Print option is available for report printing for patient. This function can be used to print a
summary for a patient or a PDF for attachment to an EMR system.
Step 3 Compare Screen Options. Check sessions you would like to compare and click the compare
button below.

18
Step 4 Modify and alternate between comparison screen by just selecting which images you would like to
compare.

19
5. Appendix
5.1 Frequently Asked Questions
Frequently Asked Questions:
Attachment Questions:
Q: How does the Meibox attach to the slit lamp?
A: The Meibox has a pin and attaches to the base of the slit lamp where the old Ruby Lens slot
would attach.
Q: Is the Meibox compatible with any slit lamp?
A: The Meibox has been tested with over 35 different slit lamp models and designs including Haag
Streit style slit lamps and Zeiss style slit lamps and have always been able to mount.
Q: Is the Meibox difficult to install and remove from the slit lamp?
A: The Meibox can be installed with one hand since it is dropped directly into the slot. It can just
as easily be removed and is attached to your computer via a USB cord.
Q: Does the Meibox need to be removed during the slit lamp examination?
A: For the most part, the Meibox is fairly unobtrusive and can be pushed aside during a slit lamp
examination. The exception remains for Haag Streit style slit lamps with goldman tonometry. For
these situations, the Meibox can simply be lifted off and placed on a stand on your desk.
Q: My computer is not detecting the Meibox camera system
A: Re-install Meibox driver and ensure that the camera is plugged in during installation. If the
Meibox is still not being detected by the computer following re-installation unplug the USB cord
from the computer and attempt another slot. If it is still not functioning, ensure that the USB cord
to the camera is secure.
Q: The Meibox works when directly plugged into the computer system, but does not work when
plugged into the adapter. What do I do?
A: Check to make sure that the power to the USB adapter is on. Ensure that the cables are all
connected firmly. If after completing the wire check and the camera is still not detected, unplug
from the USB adapter and plug the USB cable directly into the computer to check to see if the
camera is detected. If functioning, there may be an issue with the USB adapter. Contact us at
Q: The images appear grainy
A: Ensure that your computer meets the minimum specifications in the beginning of the manual.
Update your computer and display drivers and ensure that your computer resolution is at a
minimum of 1920 x 1080.
Q: Is a computer provided with the Meibox unit?
A: A computer does not come standard with a Meibox unit. The Meibox unit is designed to be
compatible with most computer technology. See specifications page for details for optimum PC
requirements.
Q: Does the Meibox work with a Mac?
A: No unfortunately at this time, the device is not compatible with a Mac.
Table of contents


